
With FluentSMTP, you can integrate toSend into WordPress to improve email deliverability and keep your transactional and marketing emails out of the spam folder. toSend is a modern email delivery service built on top of reliable infrastructure, and it takes only a few minutes to set up.
This article will guide you through connecting toSend to your WordPress site using the FluentSMTP plugin.
Configuring ToSend #
To learn how to configure toSend with FluentSMTP, follow the steps with screenshots below.
First, go to FluentSMTP under Settings in your WordPress Dashboard from the left sidebar, and select toSend from the given Connection Providers. Click the toSend tab to connect to this provider.
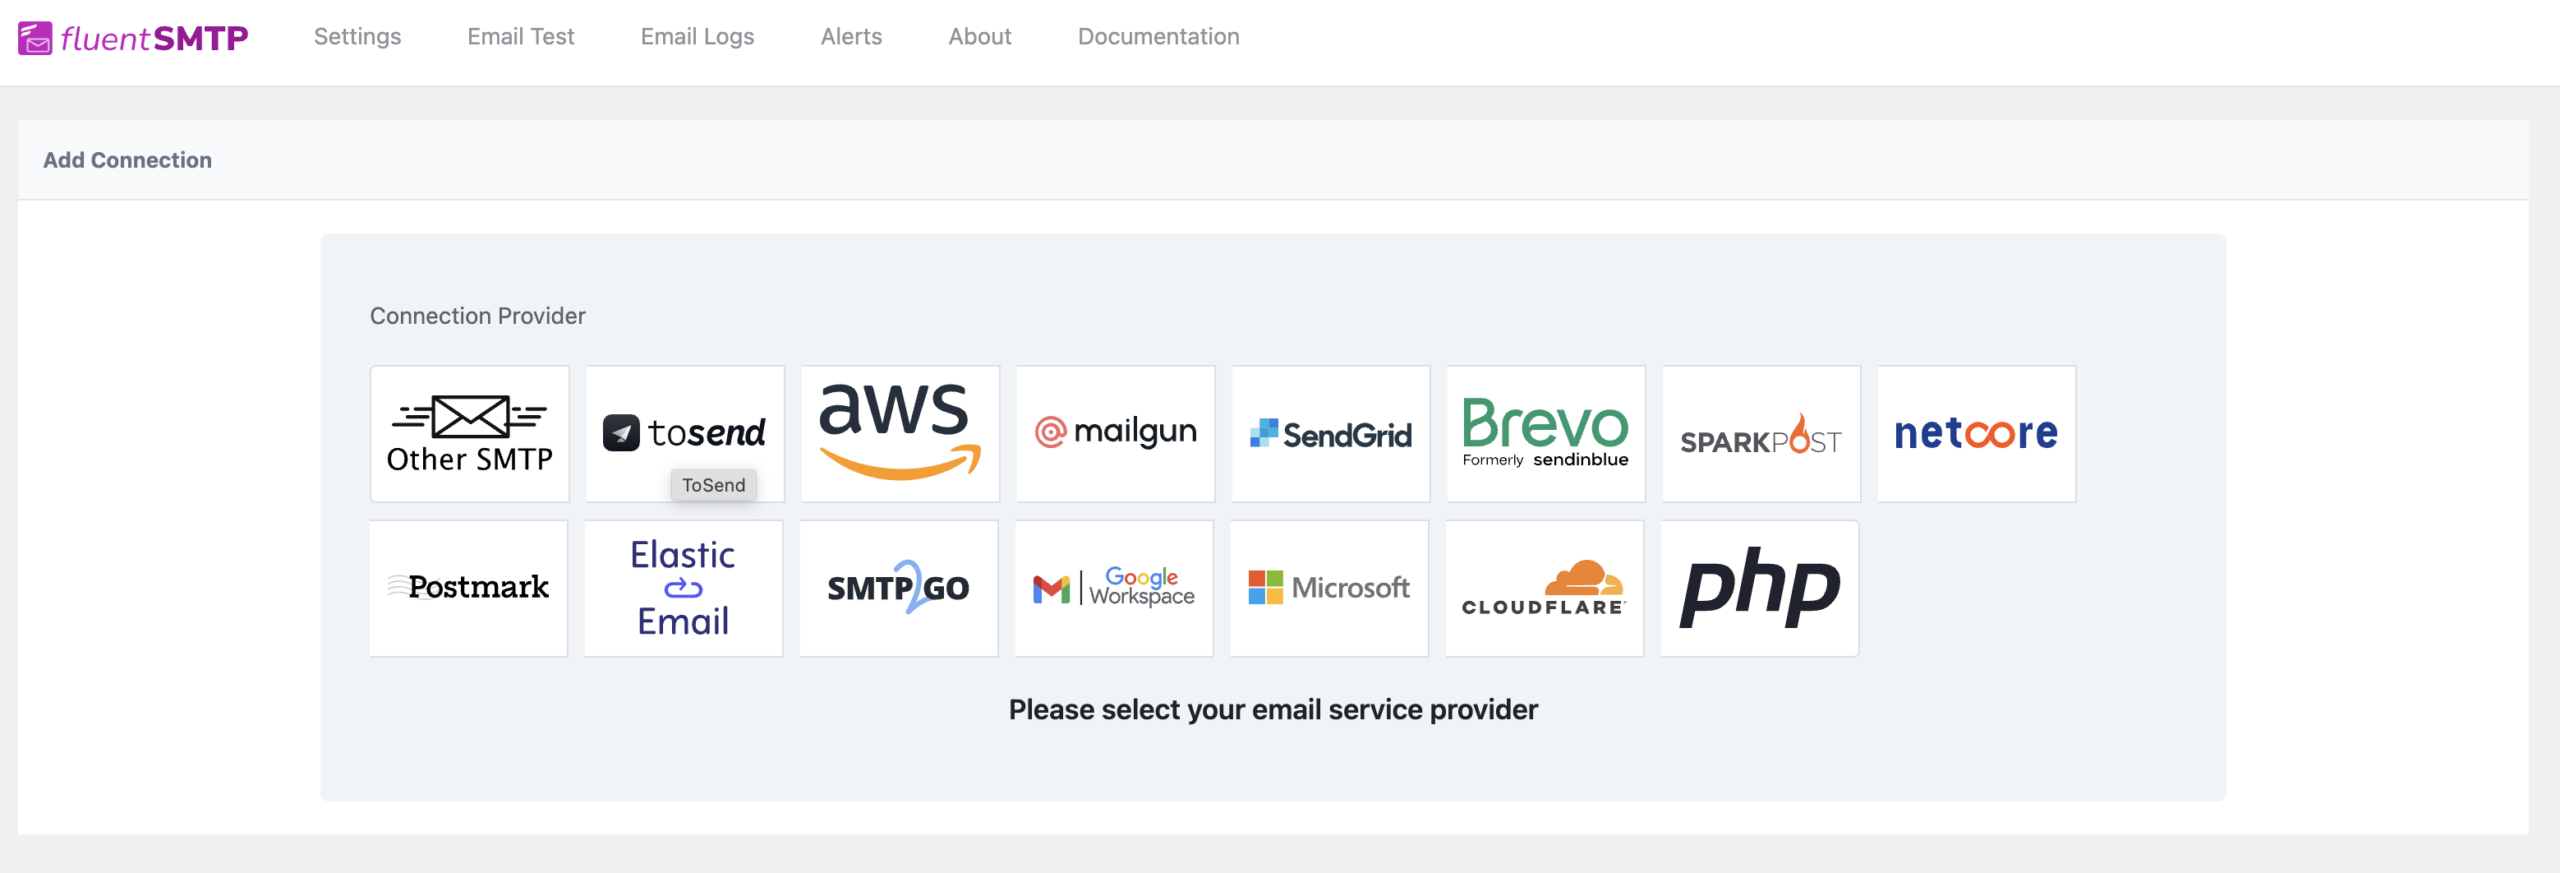
After you choose the provider, it will take you to the Add Connection page where you will get all the options to connect your toSend account.
Additionally, if you want to change the connection provider, simply click the Change button right next to the toSend tab at the top of the page.
Here, you need to provide:
- From Email: The “From Email” should use a domain that you have verified in your ToSend dashboard. Emails sent from an unverified domain will be rejected.
- From Name: The name that appears as the sender in your recipient’s inbox. You can use your personal name, brand name, or a combination of both.
- Force From Email: Check this box to force the “From Email” address across all emails sent from your site, even if a plugin tries to override it. This is usually recommended to keep a consistent sender address.
- Force Sender Name: Check this box to force the “From Name” across all outgoing emails, even when another plugin attempts to override it.
- API Key: The API Key has to be obtained from your toSend dashboard. To get it, click the Get an API Key link under the API Key box.
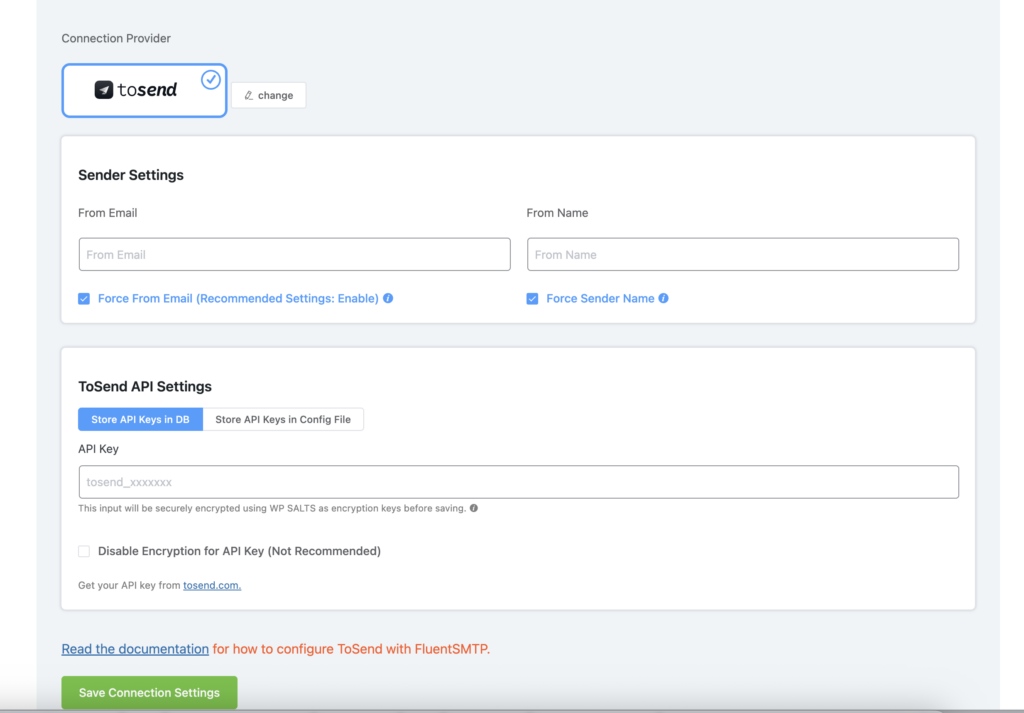
Once you provide all the necessary information, click the Save Connection Settings button. Your ToSend account will now be connected to your FluentSMTP plugin.
Get an API Key from toSend #
Learn how to get an API Key from ToSend by following the steps with the screenshots below.
First, log into your toSend Dashboard and open the API Keys tab from the left sidebar.
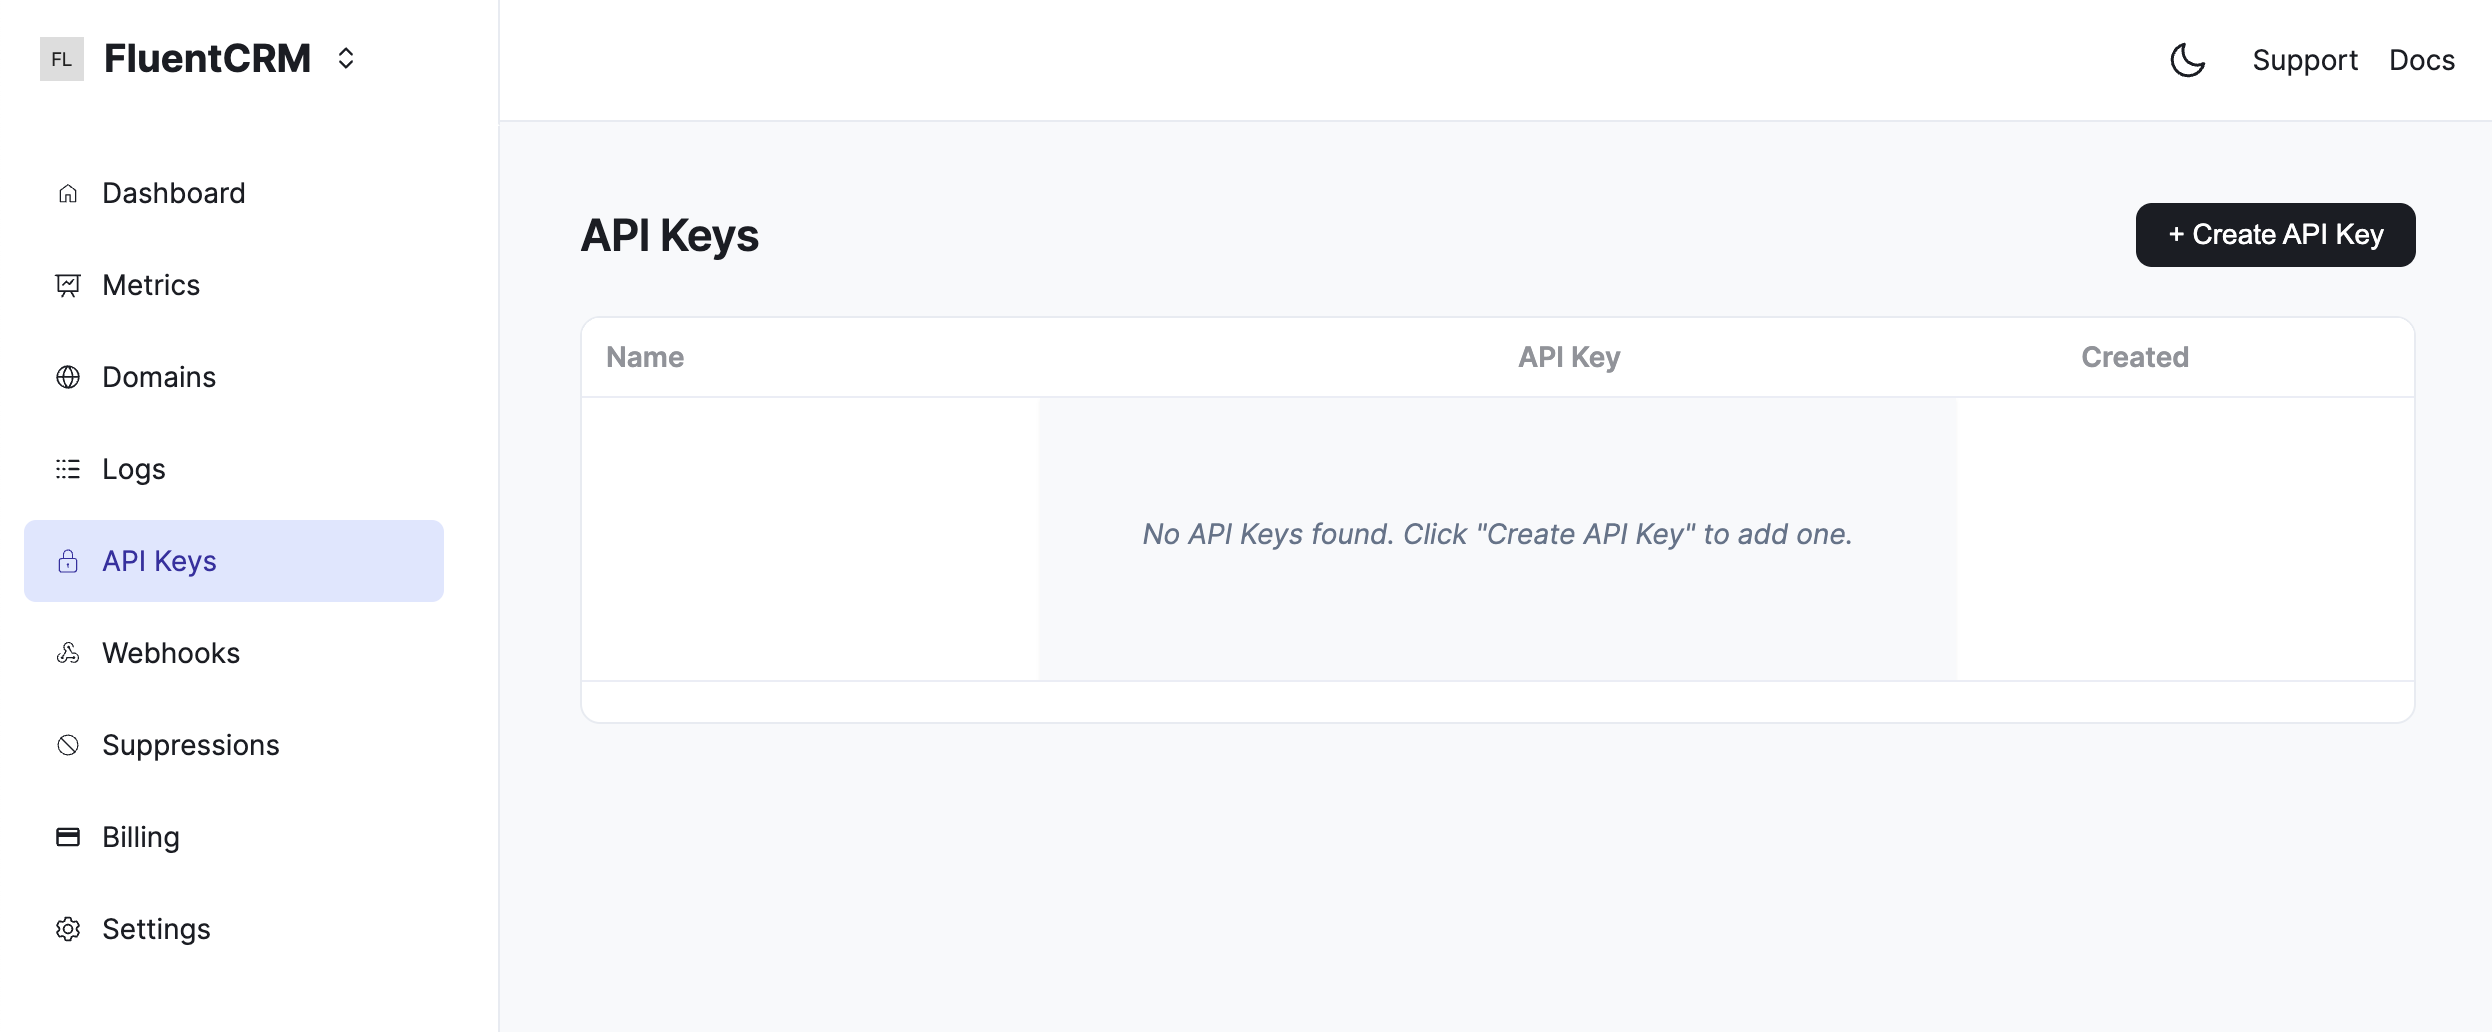
To generate a new API Key, click the Create API Key button.
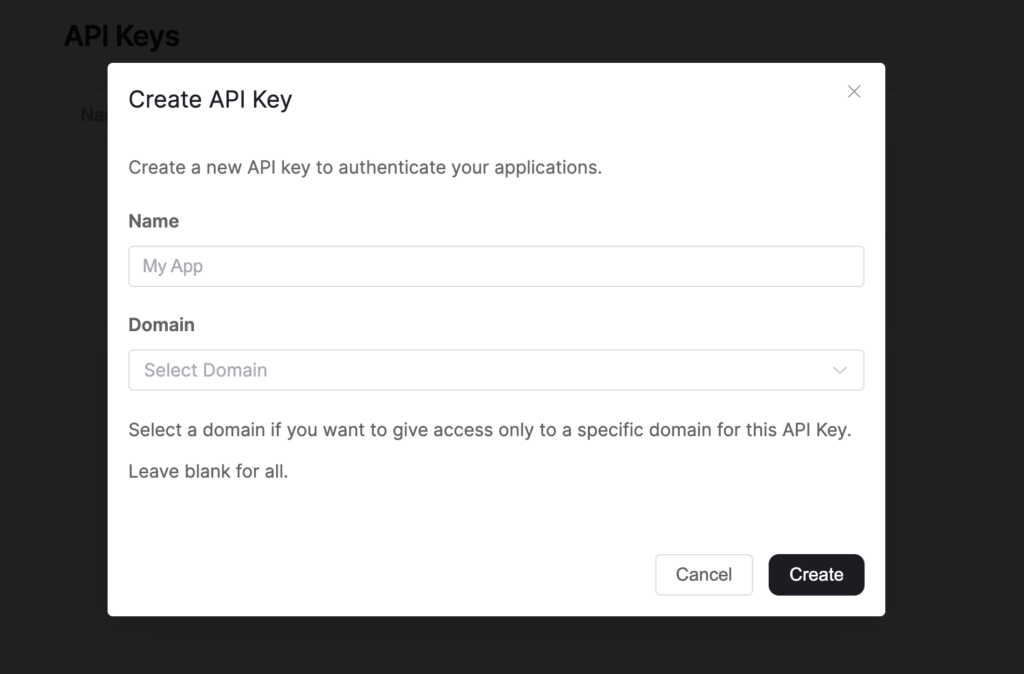
Enter a descriptive name for your key (for example, “My WordPress Site” or “Production Server”) so you can identify it later. Optionally, you can restrict the key to a specific verified domain by selecting it from the dropdown. If you leave it unrestricted, the key can send emails from any verified domain in your account.
Click the Create button to generate your API key.
Here is your ToSend API Key. Every ToSend API key starts with tsend_ followed by a unique identifier. Copy it by clicking the Copy icon.
Important: Make sure you copy the key and store it somewhere safe and accessible. The full API key is only shown once. If you lose the key, you will need to delete it and create a new one.
That’s all about configuring FluentSMTP with toSend to send emails from your WordPress website.


