
Amazon SES is the cheapest email API service for WordPress. With FluentSMTP SES Connection, you get the powerful, low-cost, high-deliverability managed infrastructure from Amazon. With the support of FluentSMTP, it’s super easy to set up and configure Amazon SES API and send all your WordPress emails. The integration is with Amazon’s latest SES API so your emails will be delivered faster and the right way.
In this article, we will show you how to use Amazon SES Email Delivery Connection with FluentSMTP.
Configuring FluentSMTP with Amazon SES #
Please follow the below sections to configure Amazon or AWS SES Emails with FluentSMTP.
Add New Amazon SES Connection #
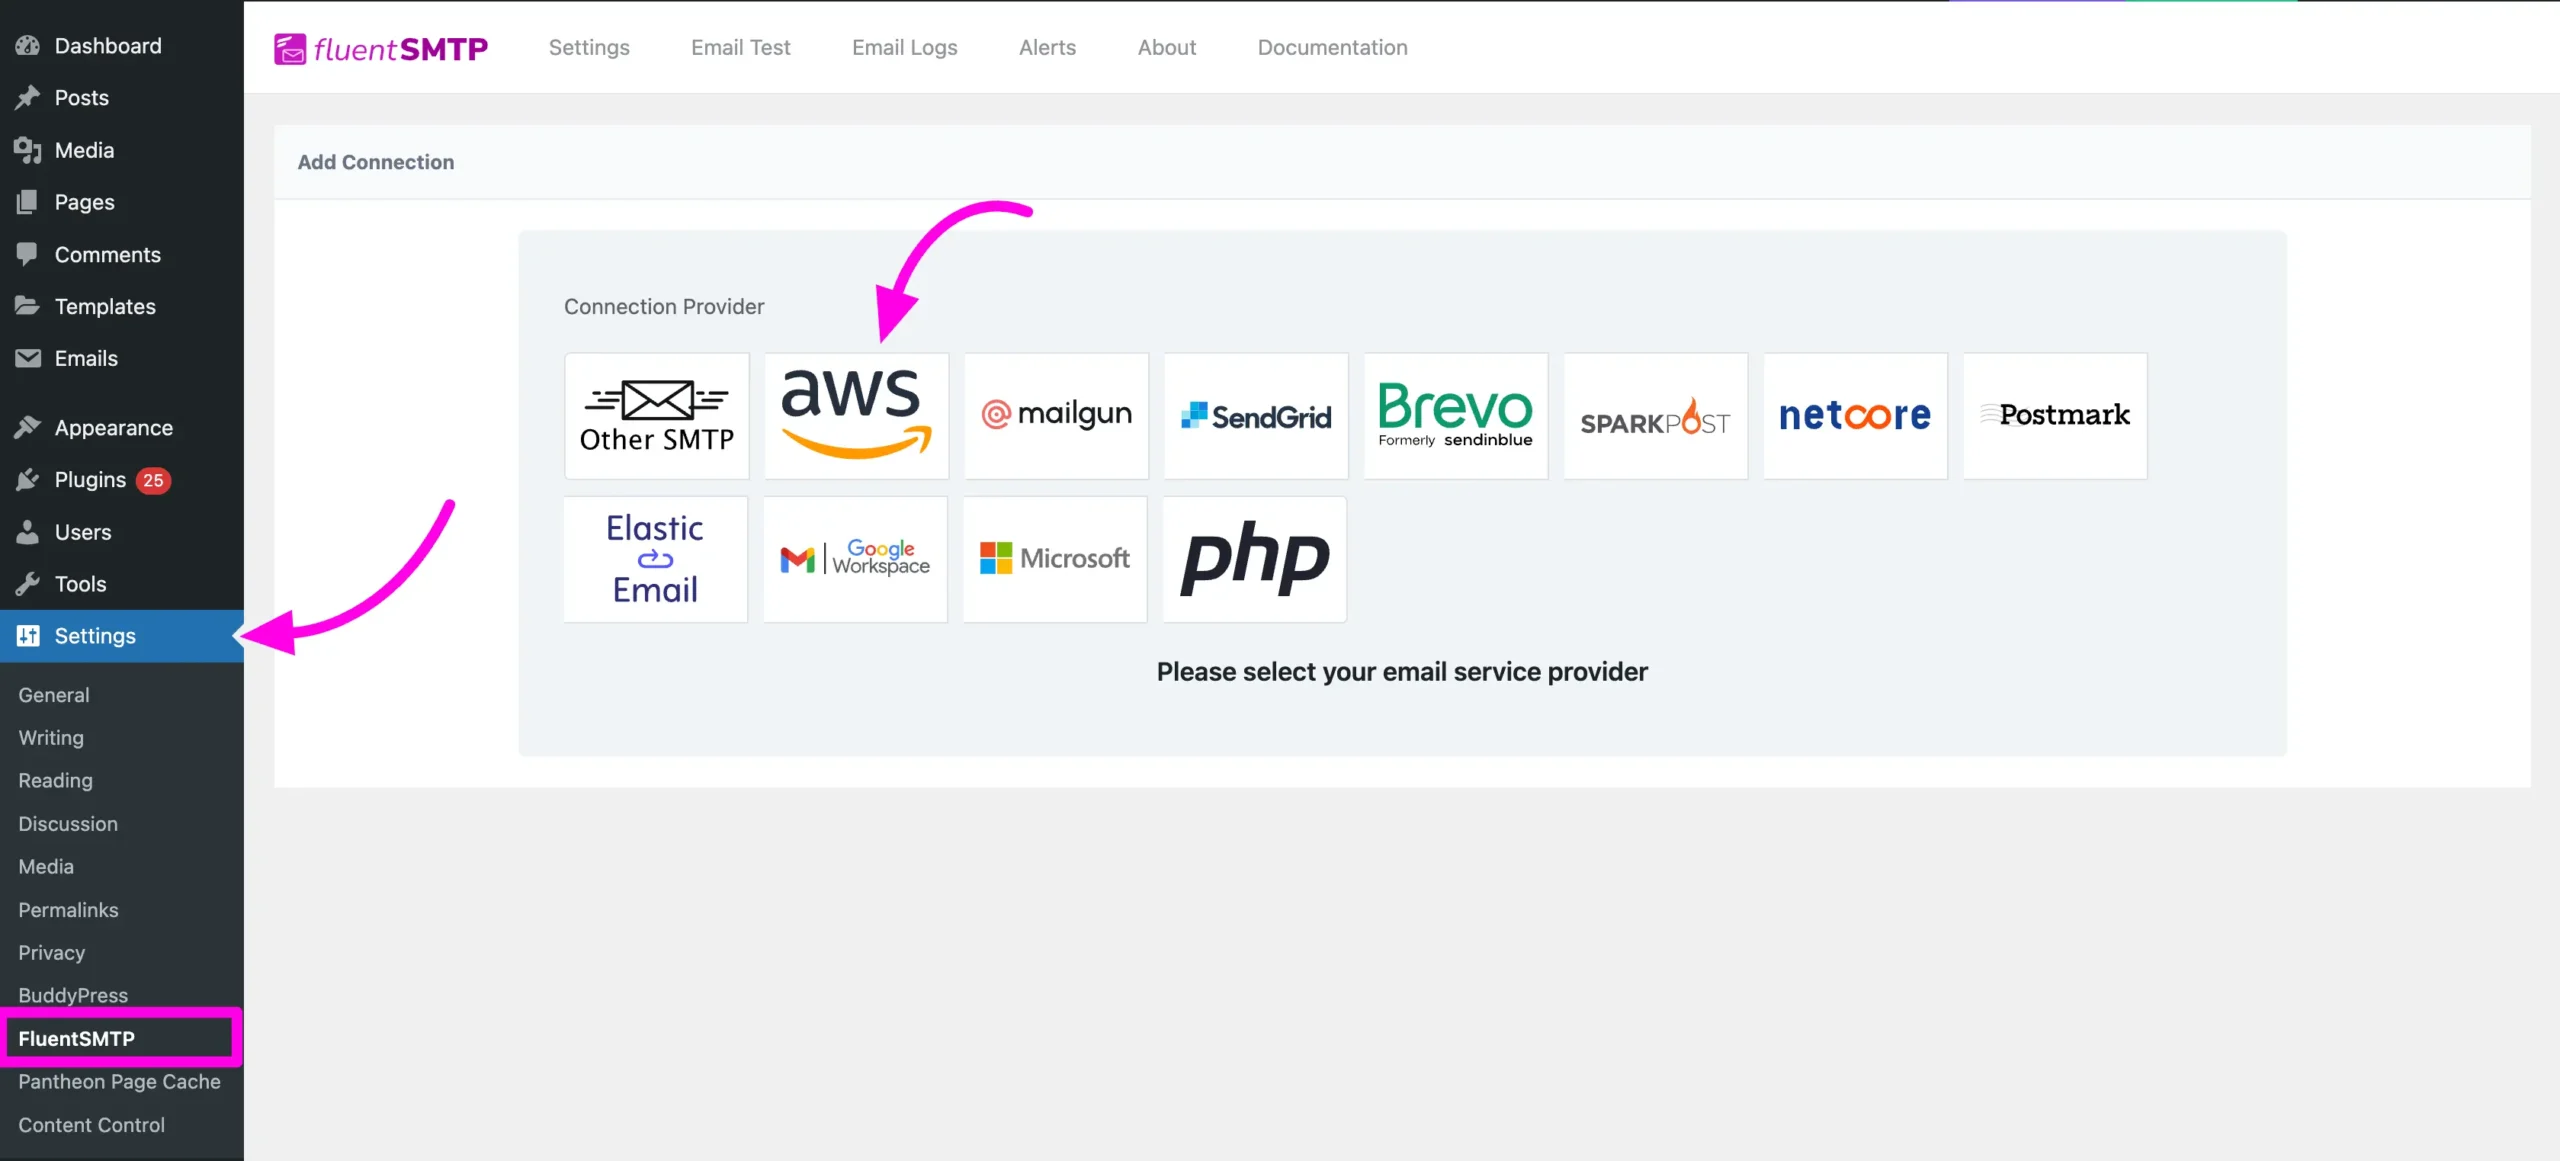
Please go to WordPress Settings ⮕ FluentSMTP and then select Amazon AWS.
If you already have any other configured connection, then you will be in the FluentSMTP Dashboard Settings ⮕ Add Another Connection
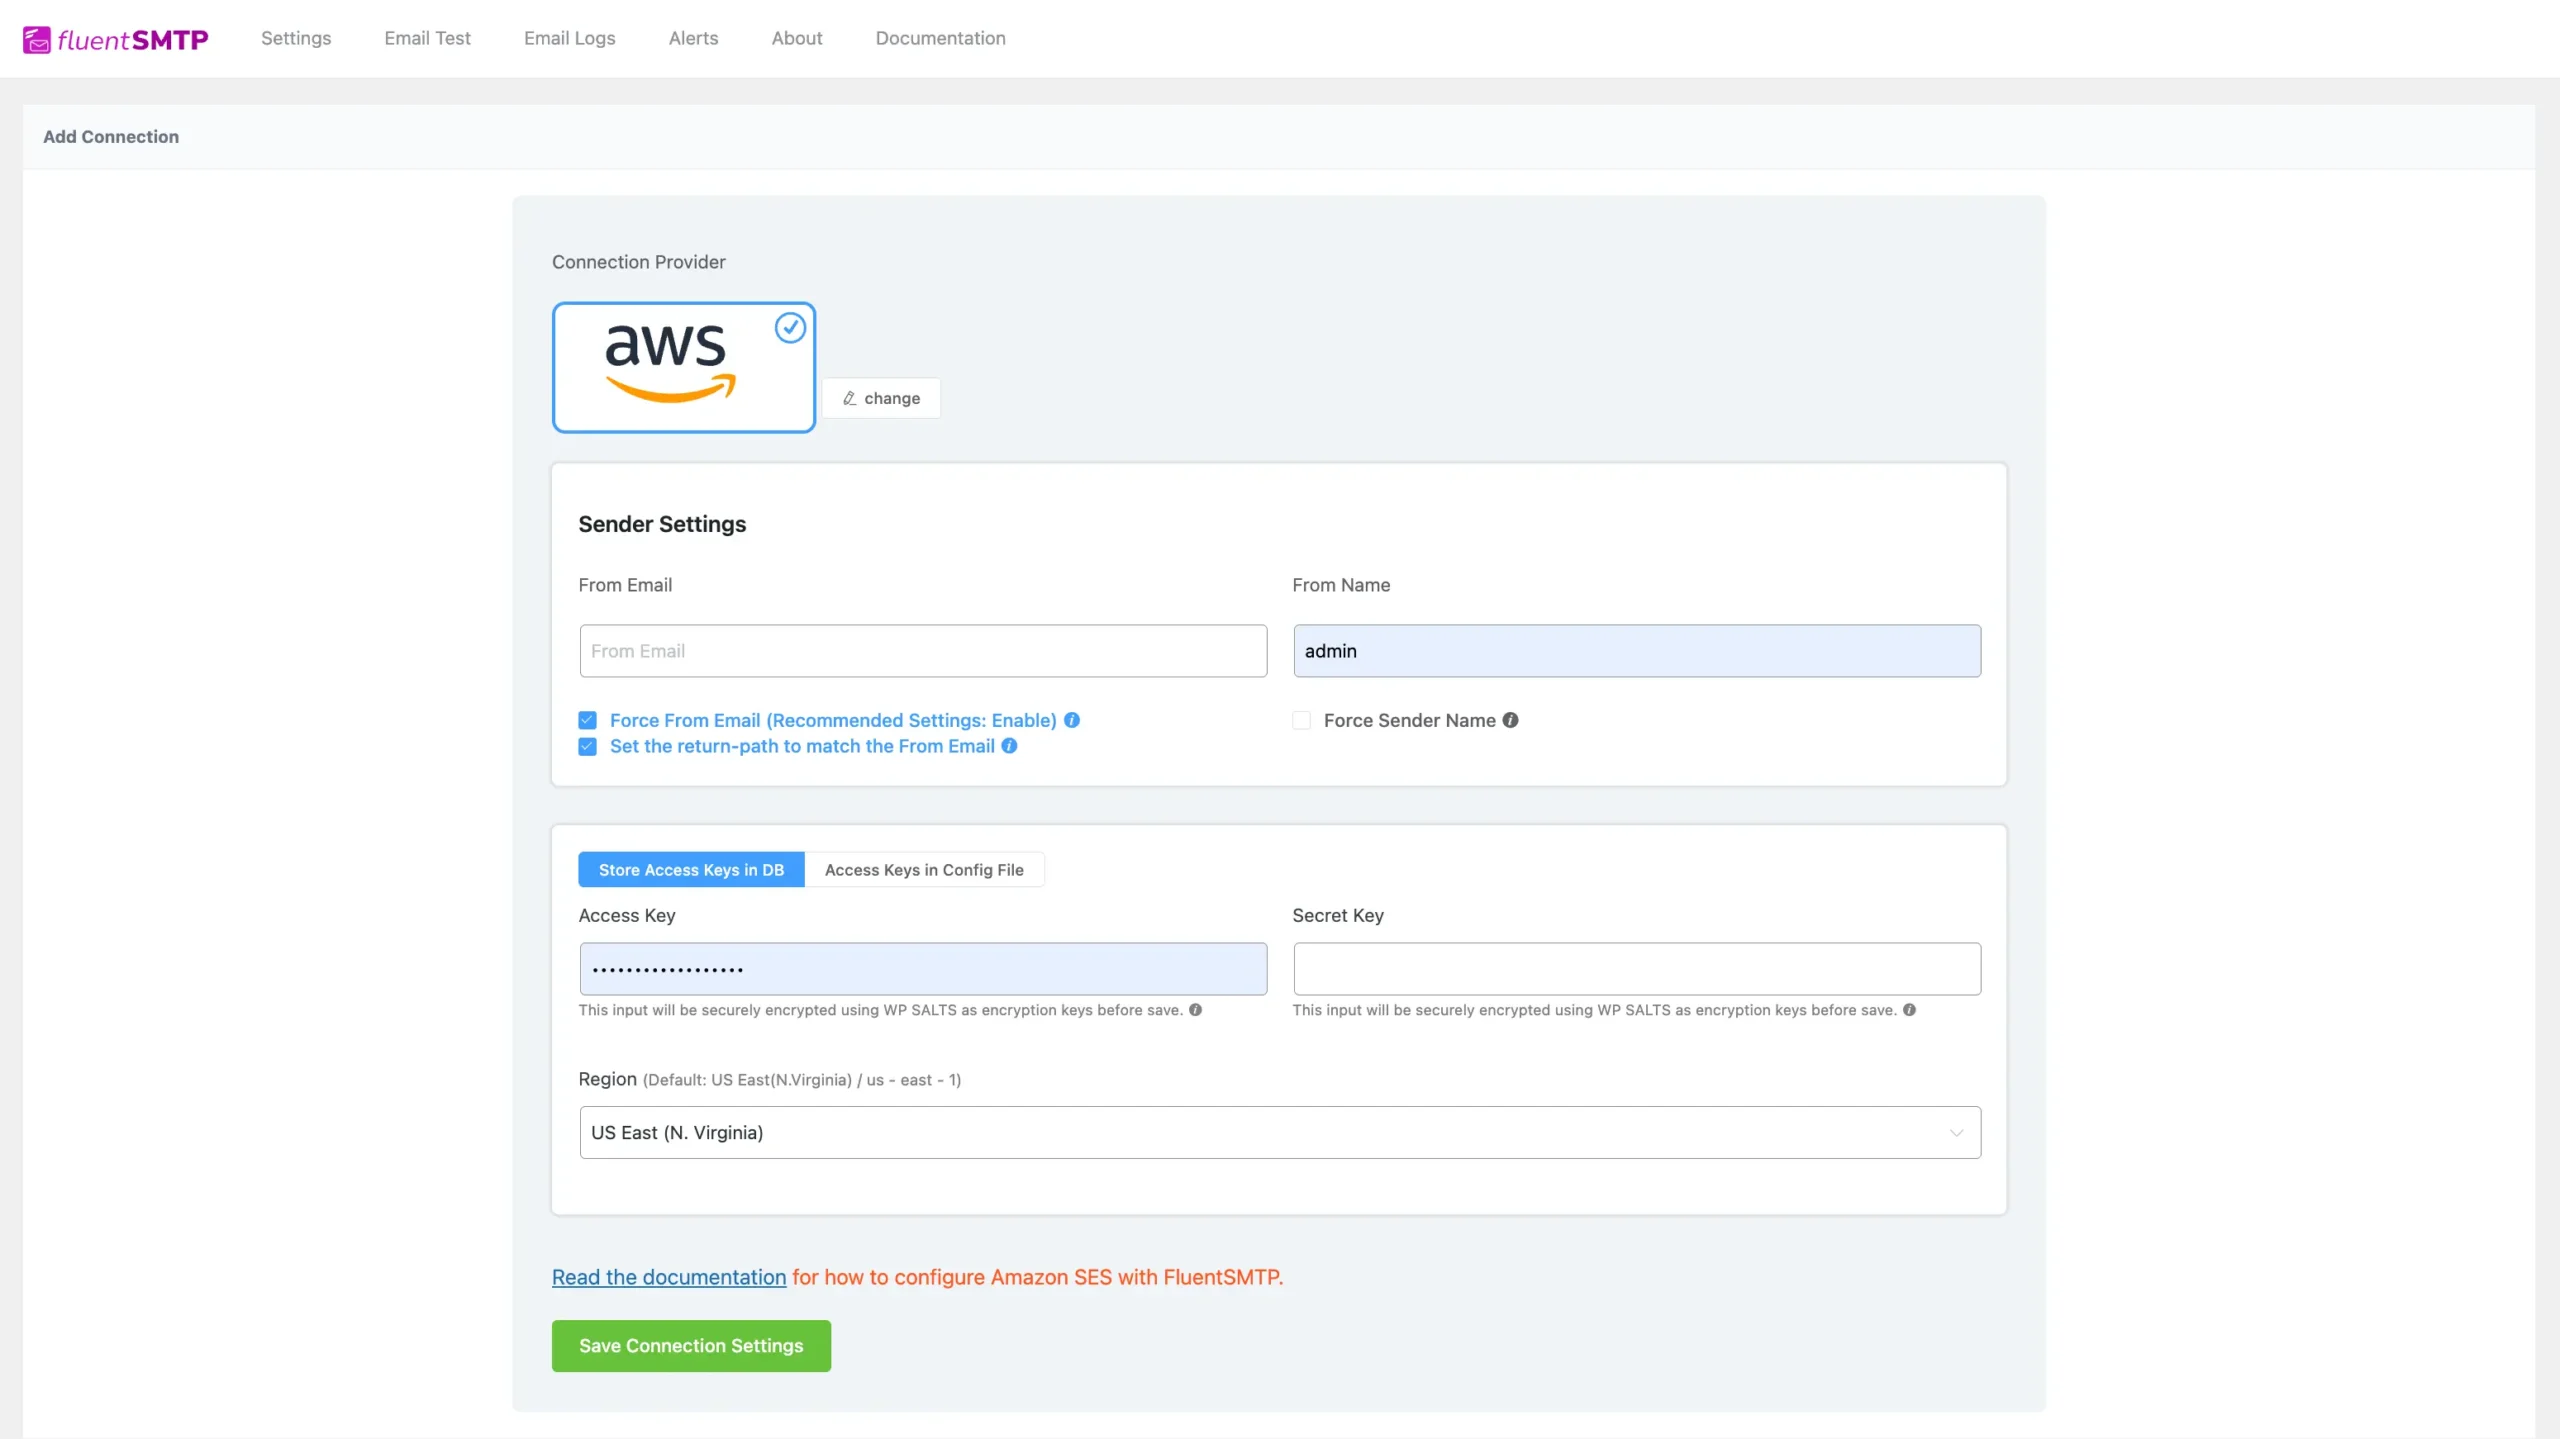
Amazon SES Connection Properties #
After selecting AWS as the mailer, a very simple settings window will open as shown in the screenshot below.
Here you can see that we need to provide From Email, From Name, Access Key, Secret Key, and Region where the Access Key, Secret Key, and Region has to be obtained from AWS Console for the From Email we are going to use for this AWS SES Connection. We will obtain those credentials from the following steps.
Get Credentials from AWS Console #
The Access Key, Secret Key, and Region are parts of the Amazon Web Services Console. We need to:
- Create or Register an IAM User in AWS Console.
- Select Access Key Best Practises and Create Keys.
- Retrieve Access Keys.
- Identify the Region.
Navigate to the AWS Console Dashboard #
Please go to Amazon Web Services Console Dashboard from Here: Home – AWS CONSOLE and login to your account. You may be asked to log in to your account using your Root Account Email.
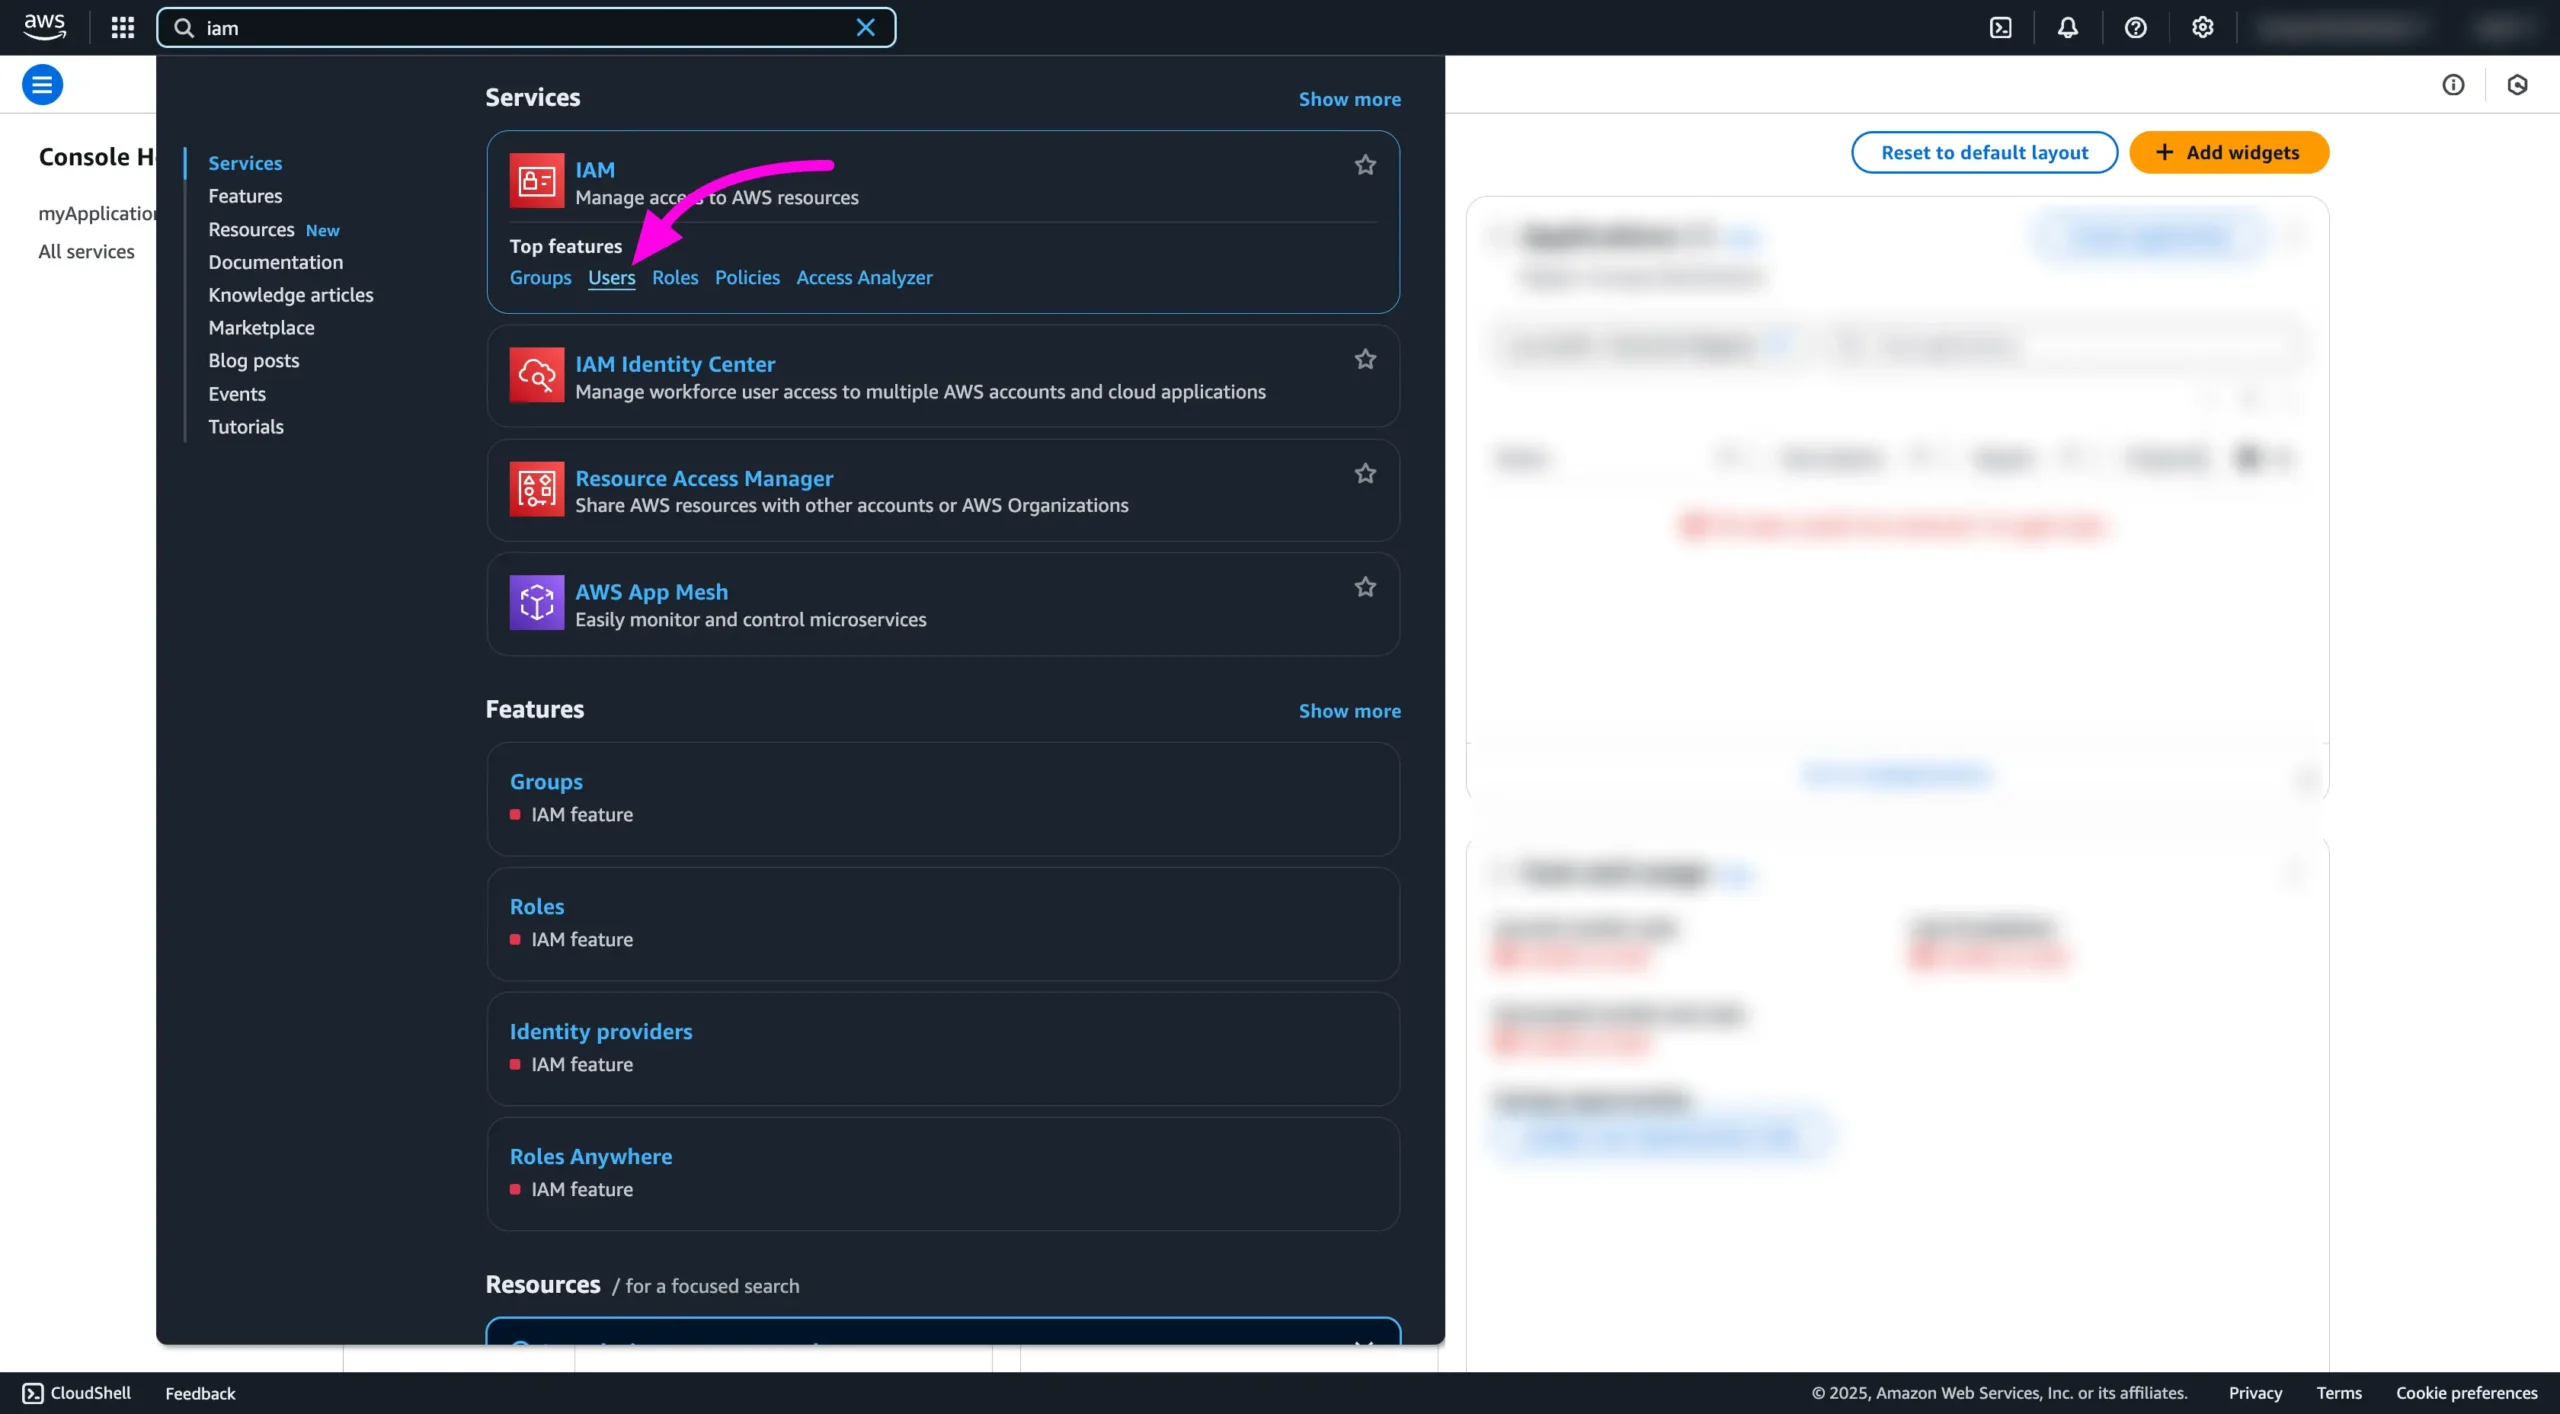
Once you are logged in you will be redirected to the AWS Console Home. Then we need to search for “IAM” in the top search bar and you will see that now click on the User from here.
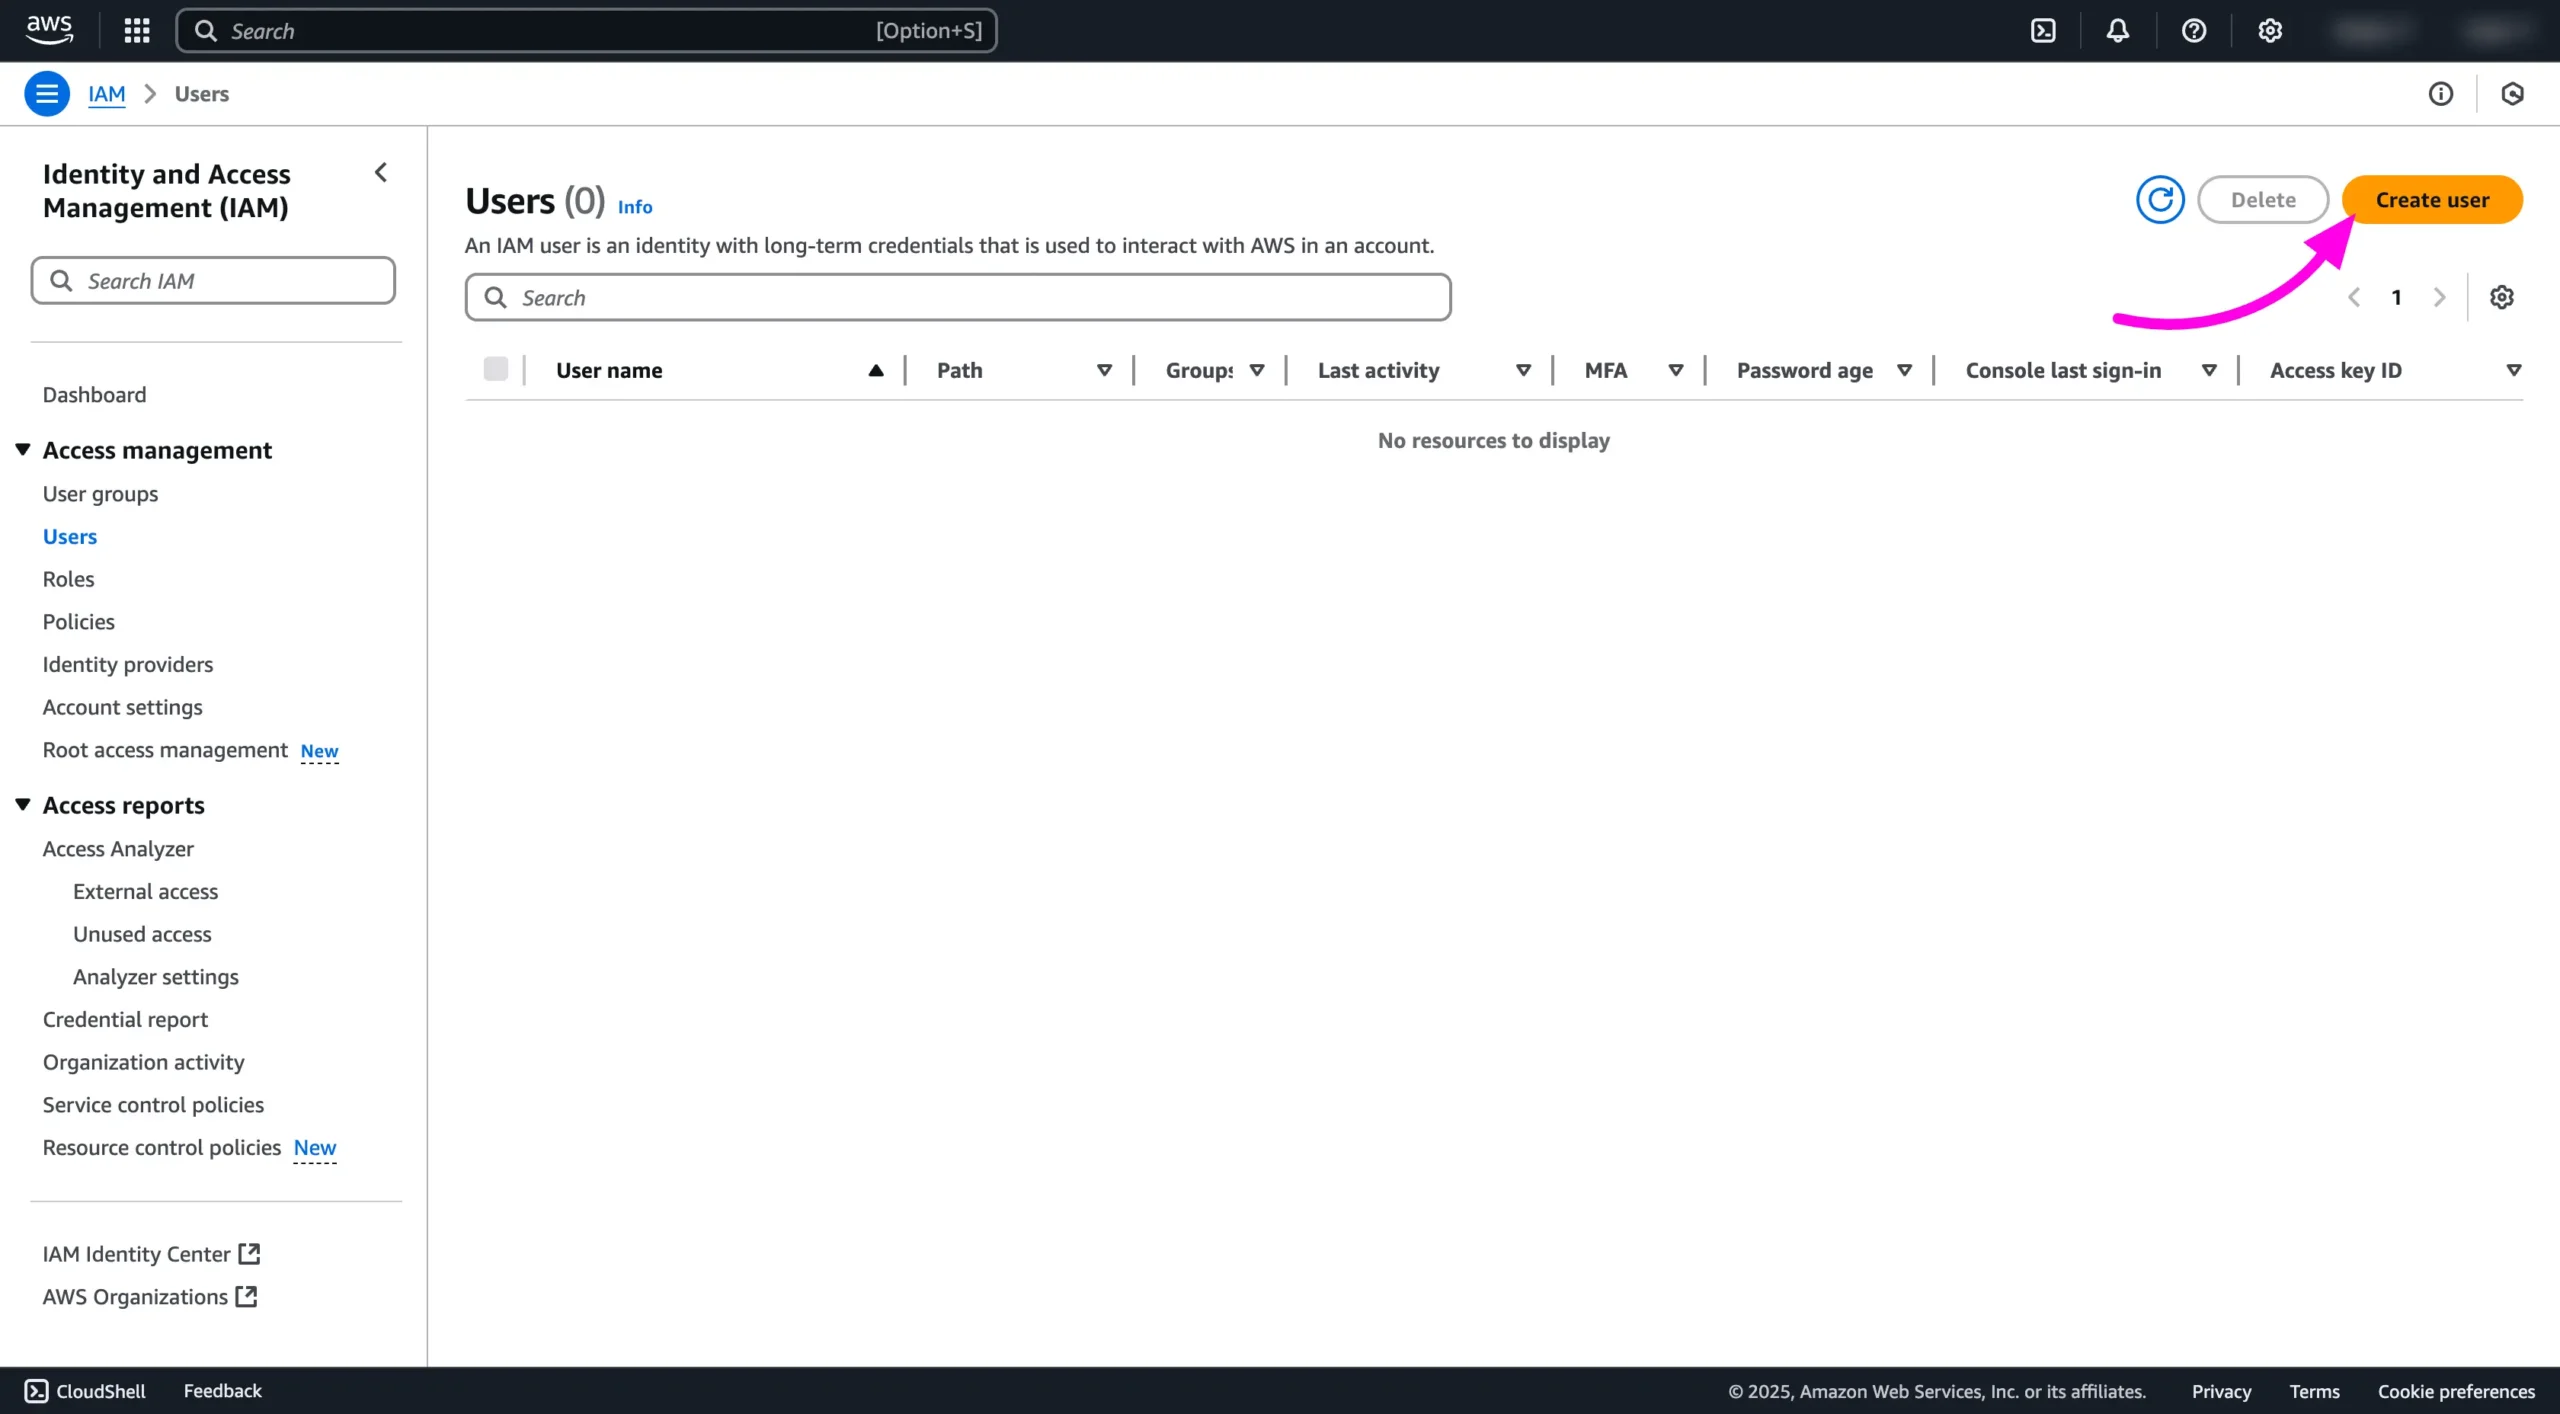
Add a New IAM User #
To create a new user for FluentSMTP click on the Create User button.
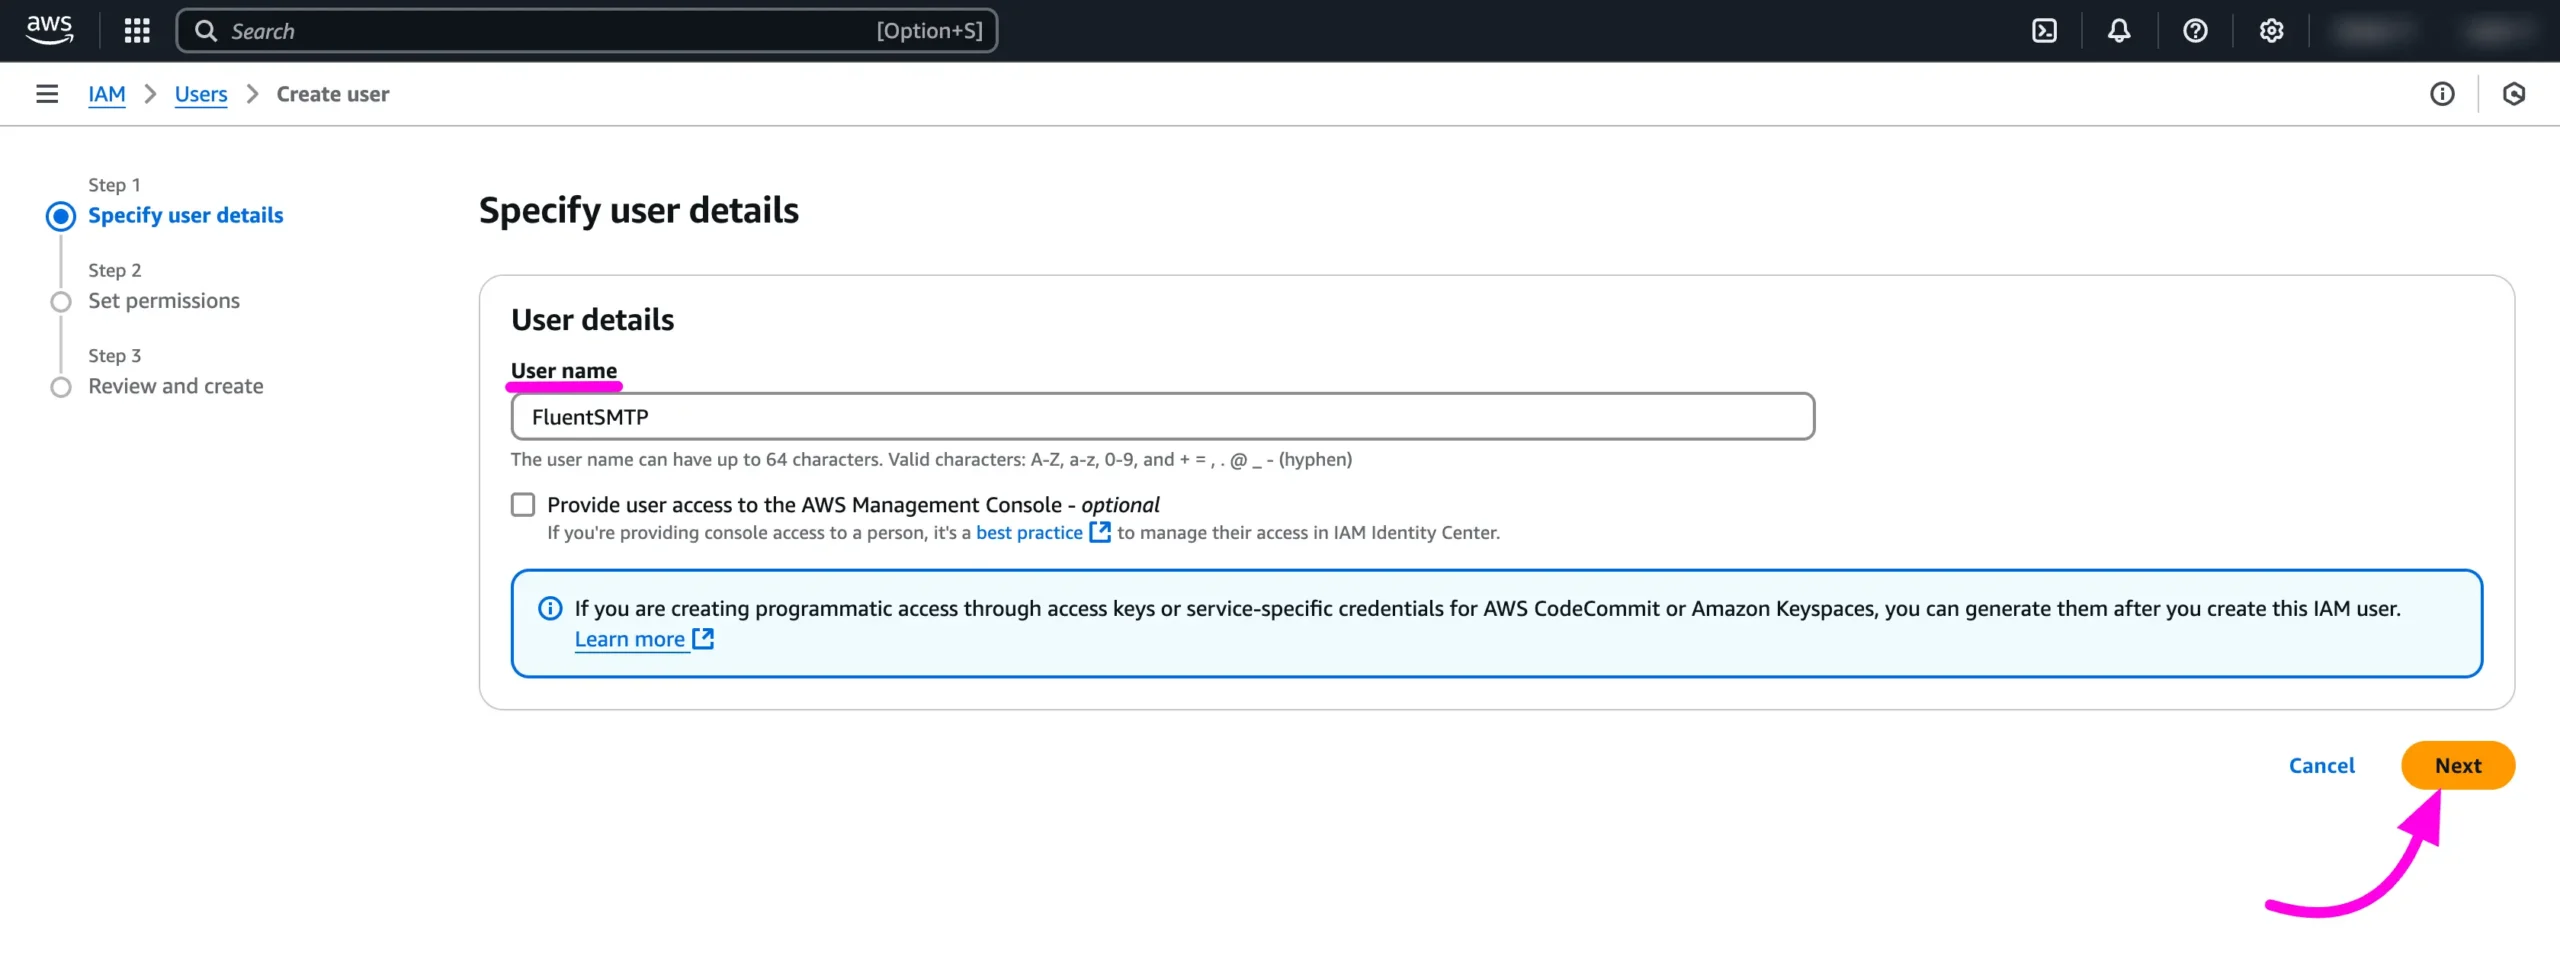
Then you will be redirected to the New IAM User Creation overview page. Firstly, you will need to provide a User Name and the supported format is also instructed under the field. We provided the User Name: FluentSMTP.
Once you are done with the User Name click on the Next Button to proceed to the next step.
Set Permissions #
In this step, we need to define the Policies and Permissions required for FluentSMTP to send emails through the new user account we are going to create.
First of all, Select Attach Policies Directly from the Permission Options.
Now we need to search for Permission Policies from the next section. In the Filter box, search for “sesfull” and then “snsfull”.
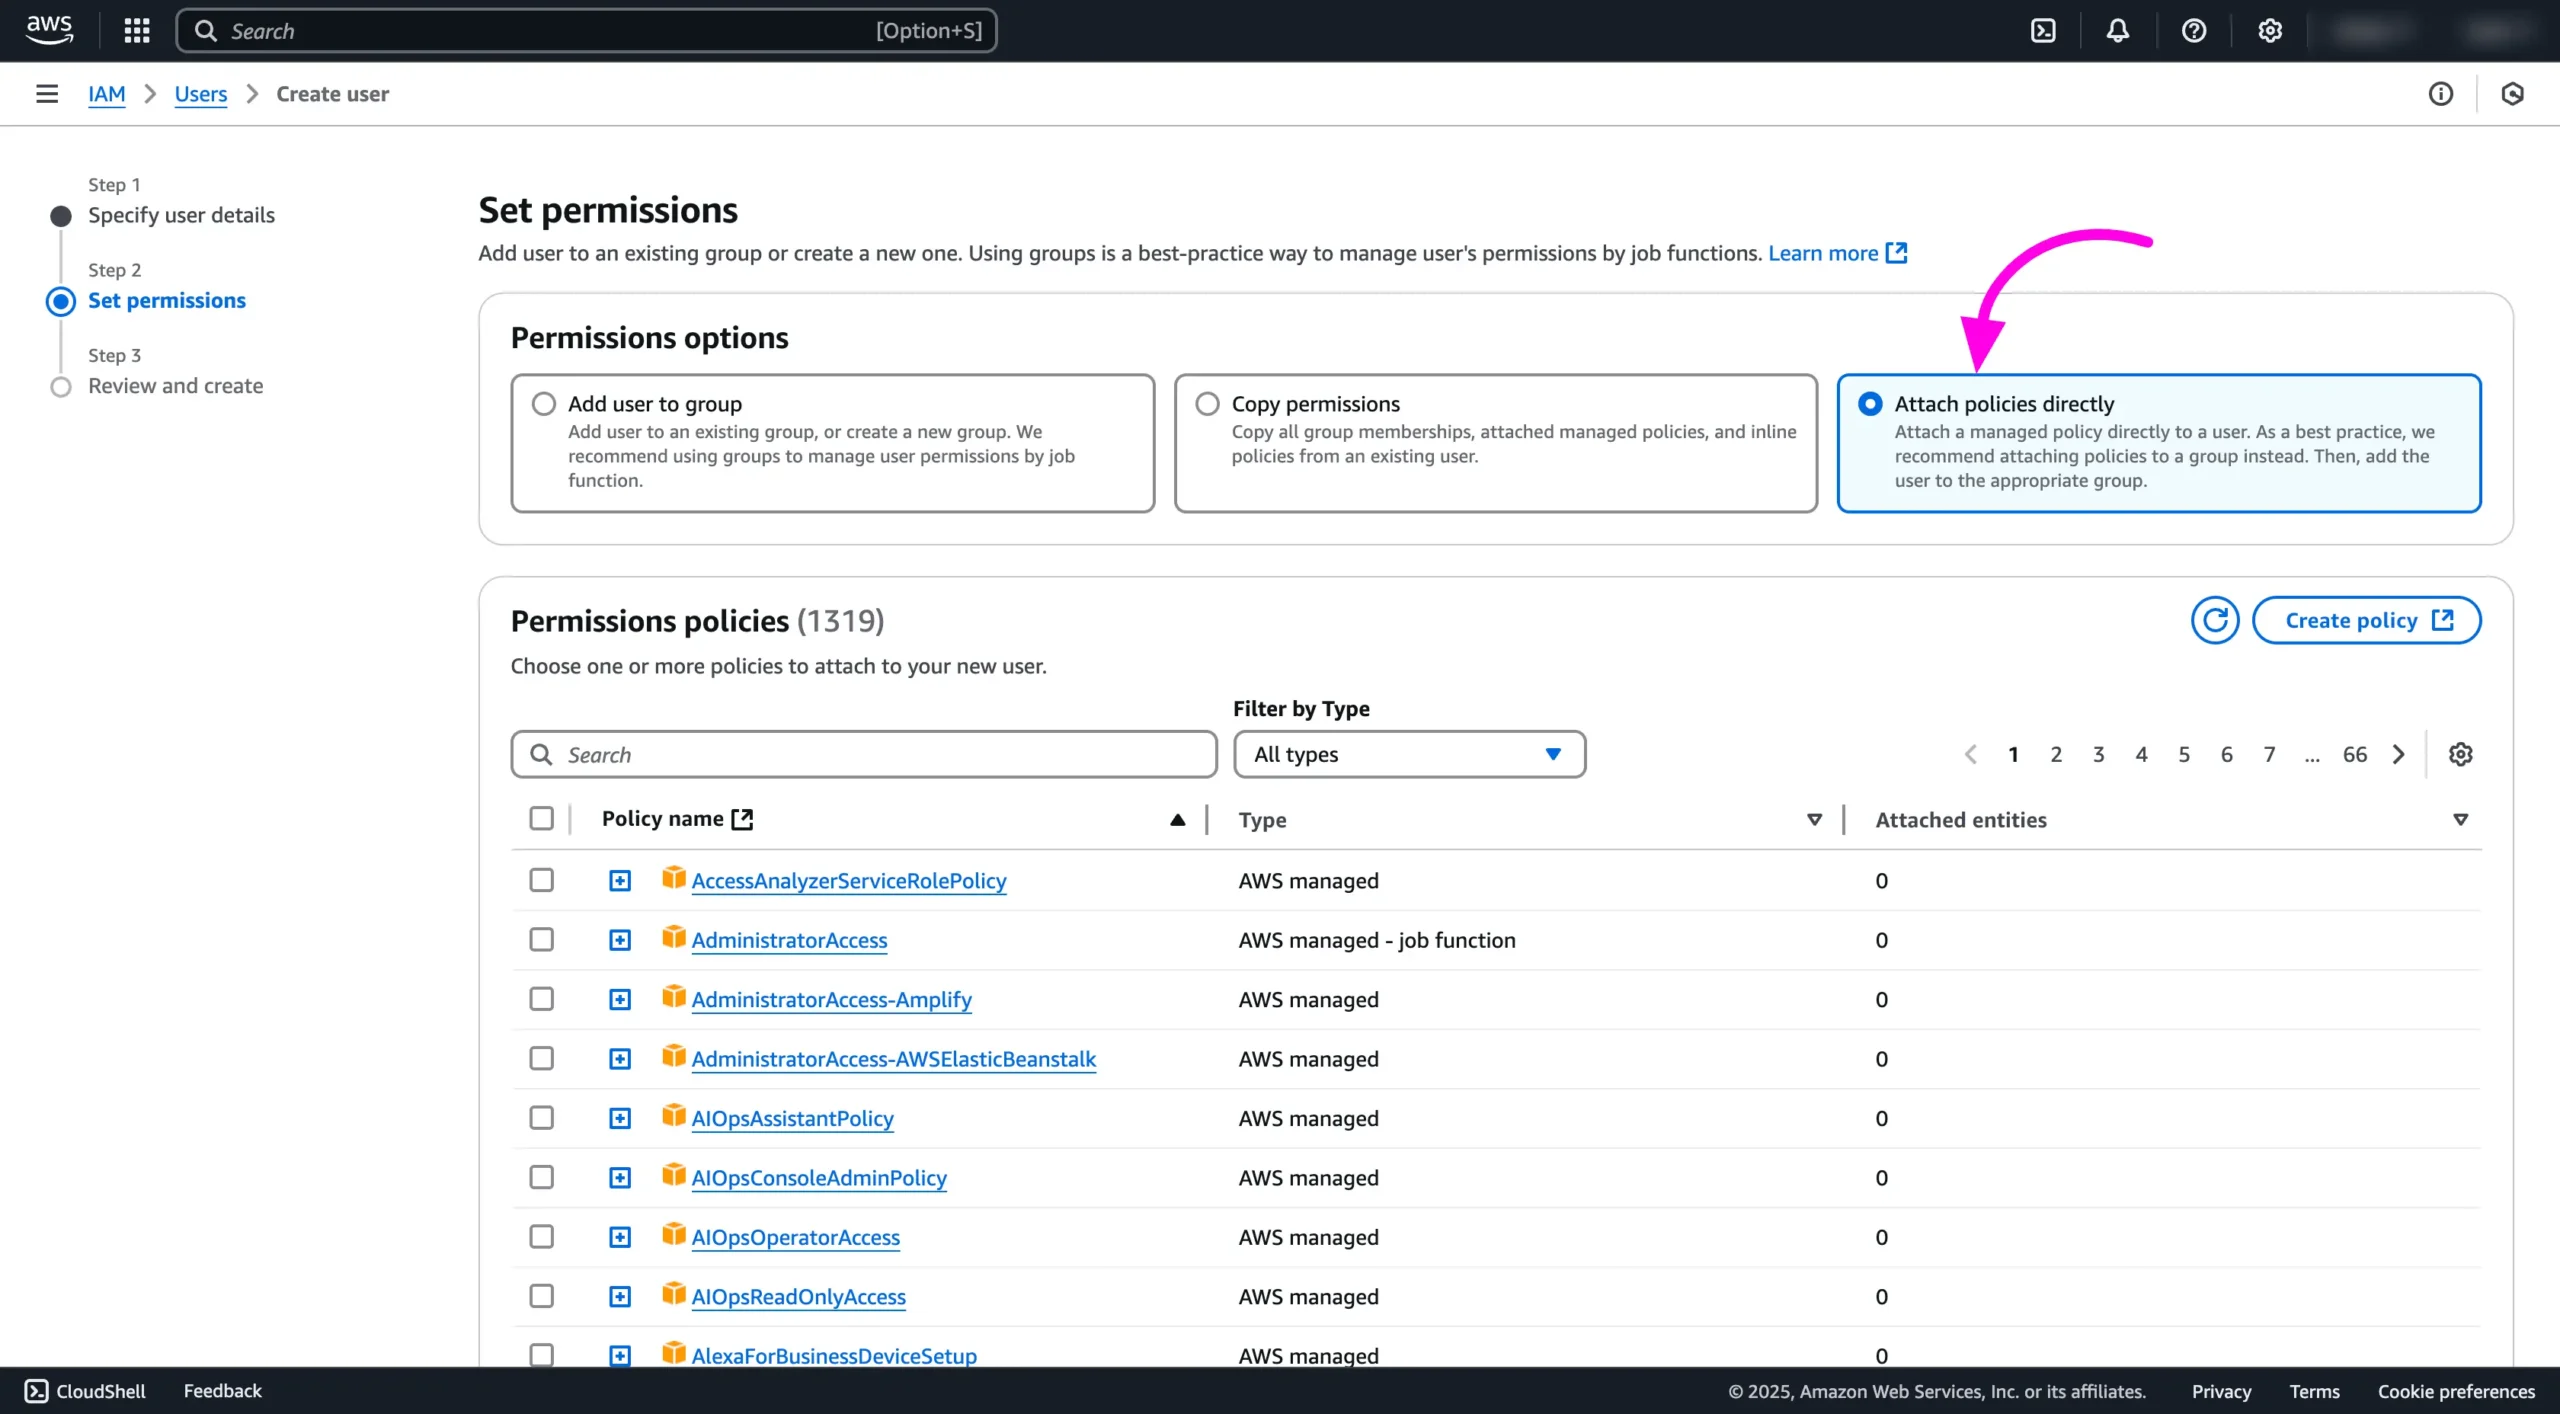
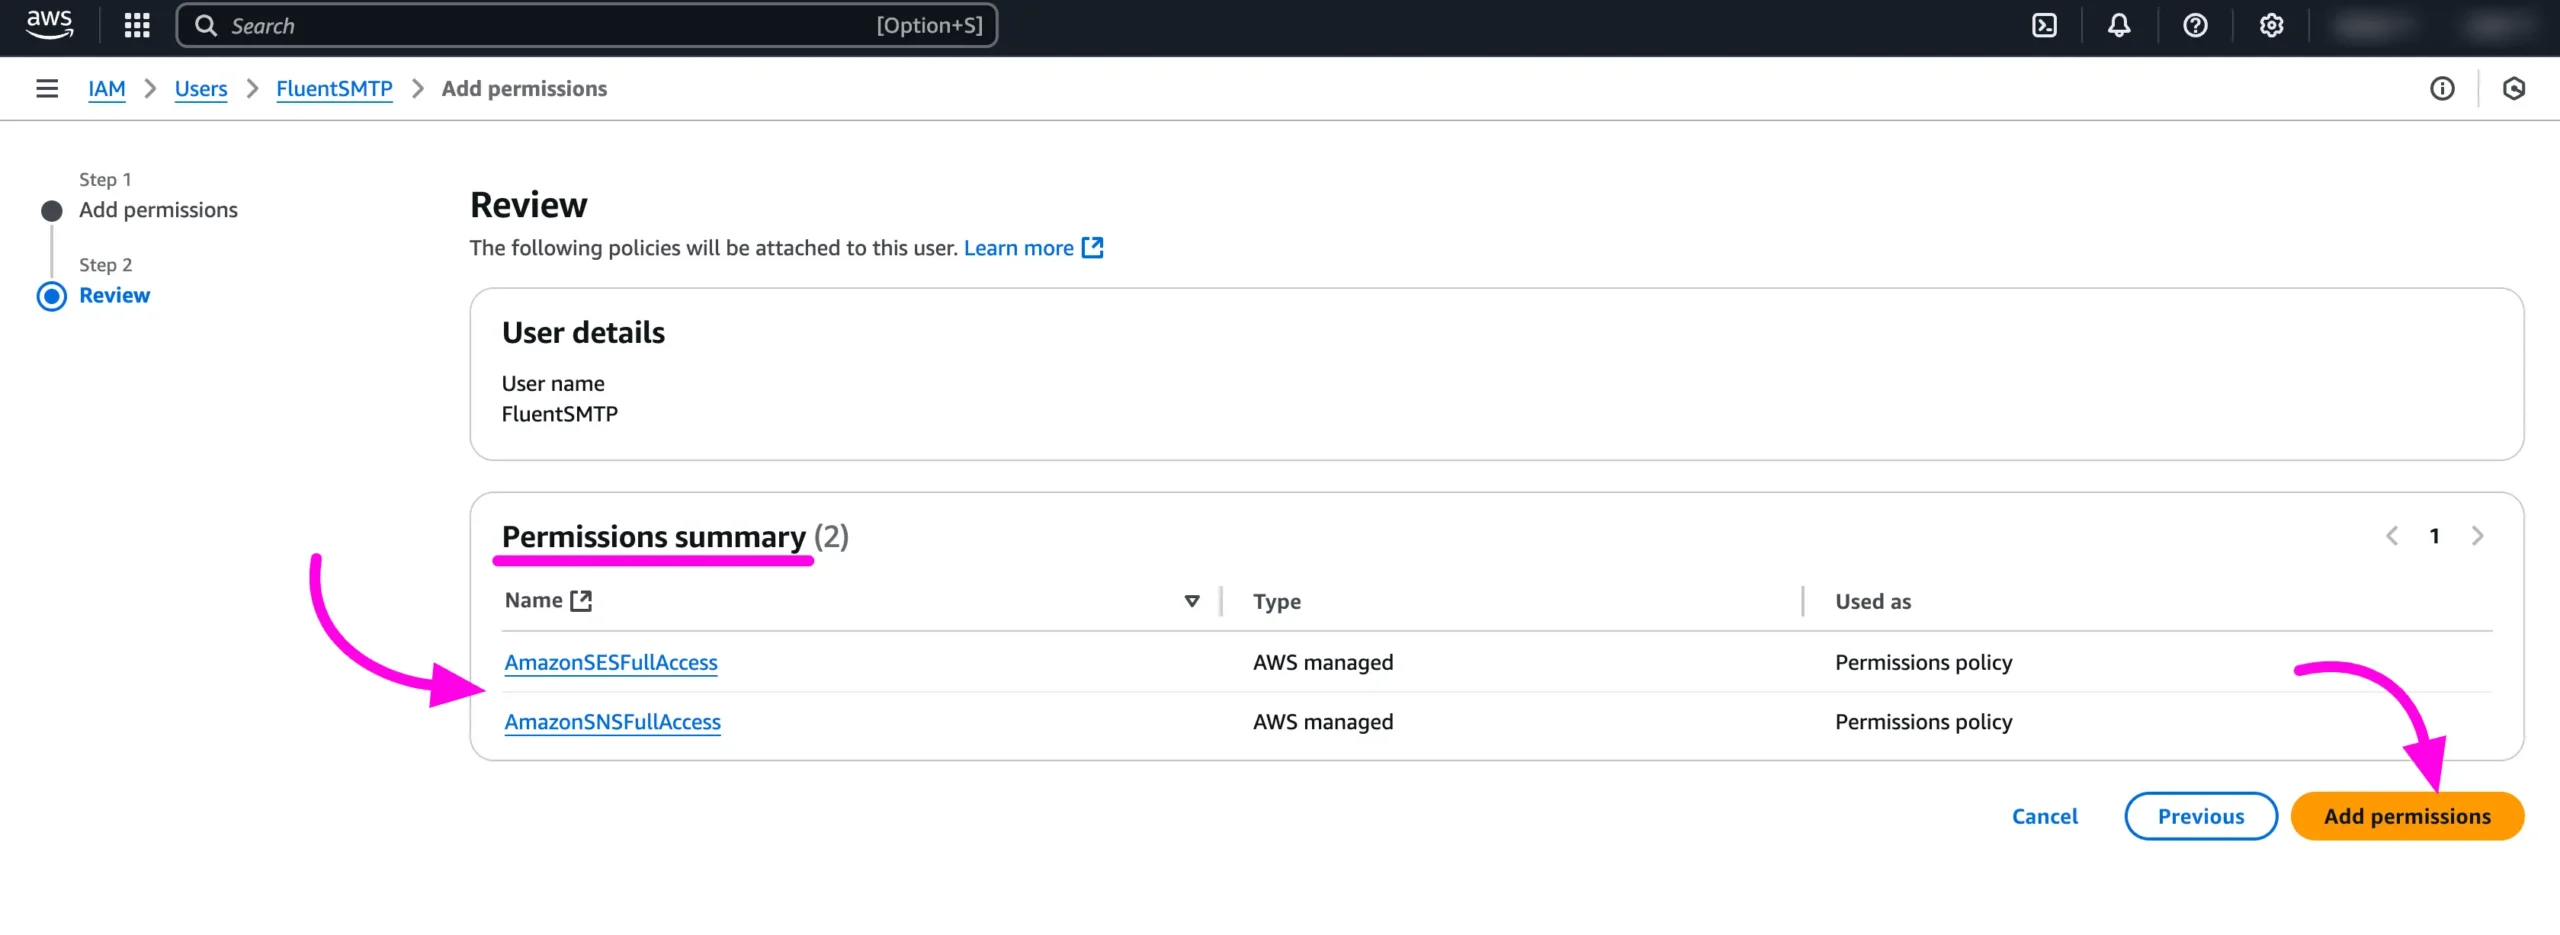
Now select AmazonSESFullAccess and AmazonSNSFullAccess Policies. Now check both of them as the below screenshot. Then click on the Add Permission button.
Once the user is created, you can click on either the View User from the top success message or from the Users lists by clicking on the newly created User Name. Then you will be redirected to the User Overview page.
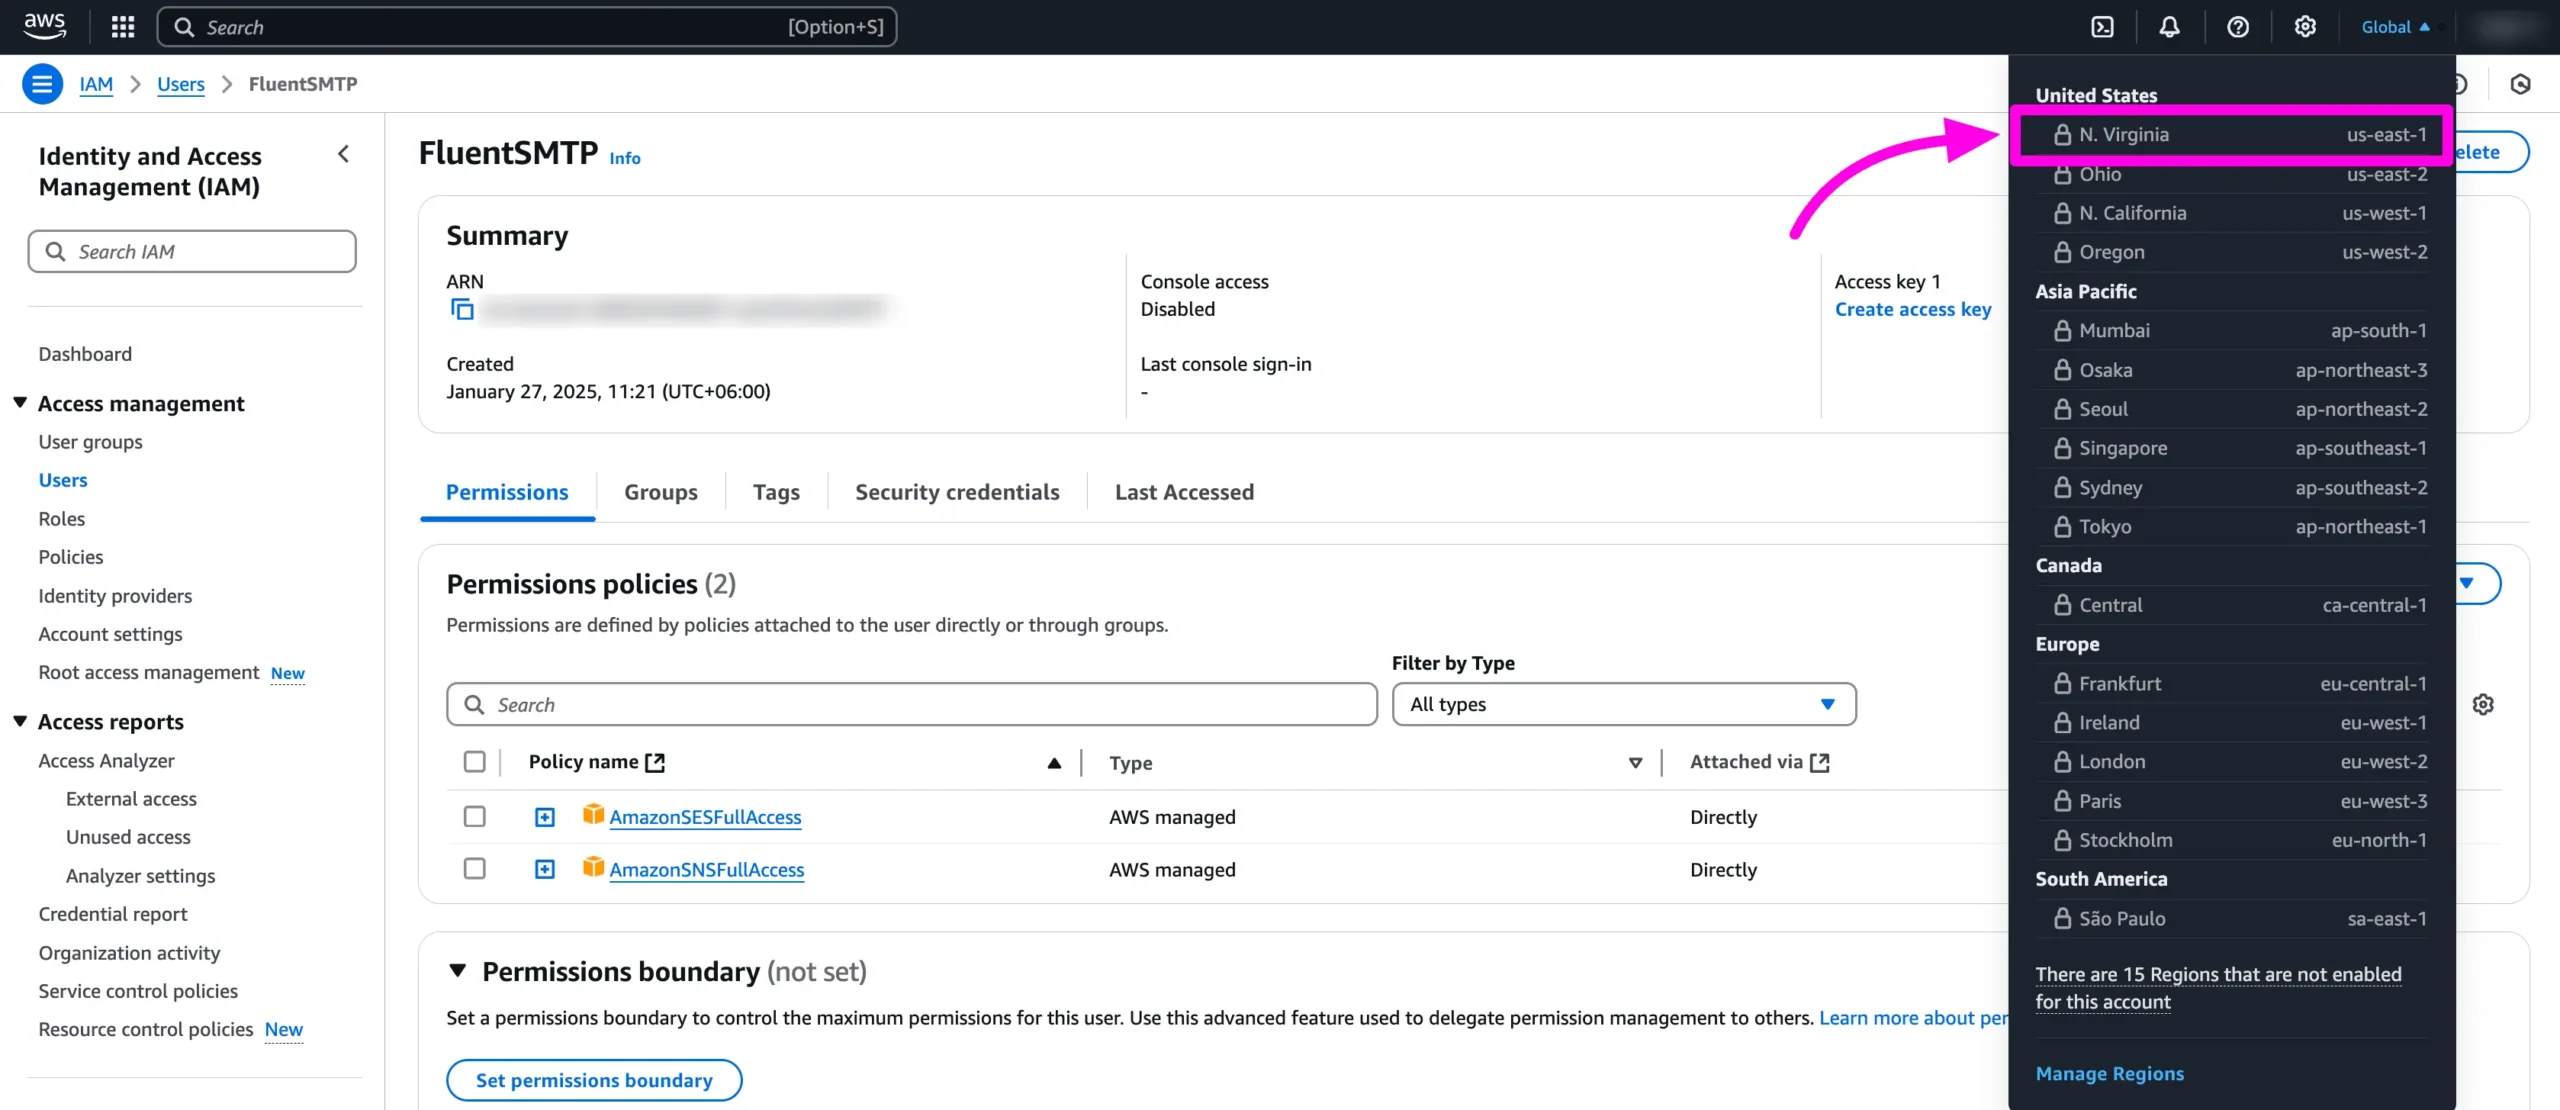
Identify AWS Console Region #
From the Console Dashboard, on the top right corner between the UserName and the Help menu, you will find the Region you are using to create the IAM User to be used for FluentSMTP.
Our Region is US East (North Virginia) [us-east-1]. We will be using this region in the FluentSMTP settings in the next step.
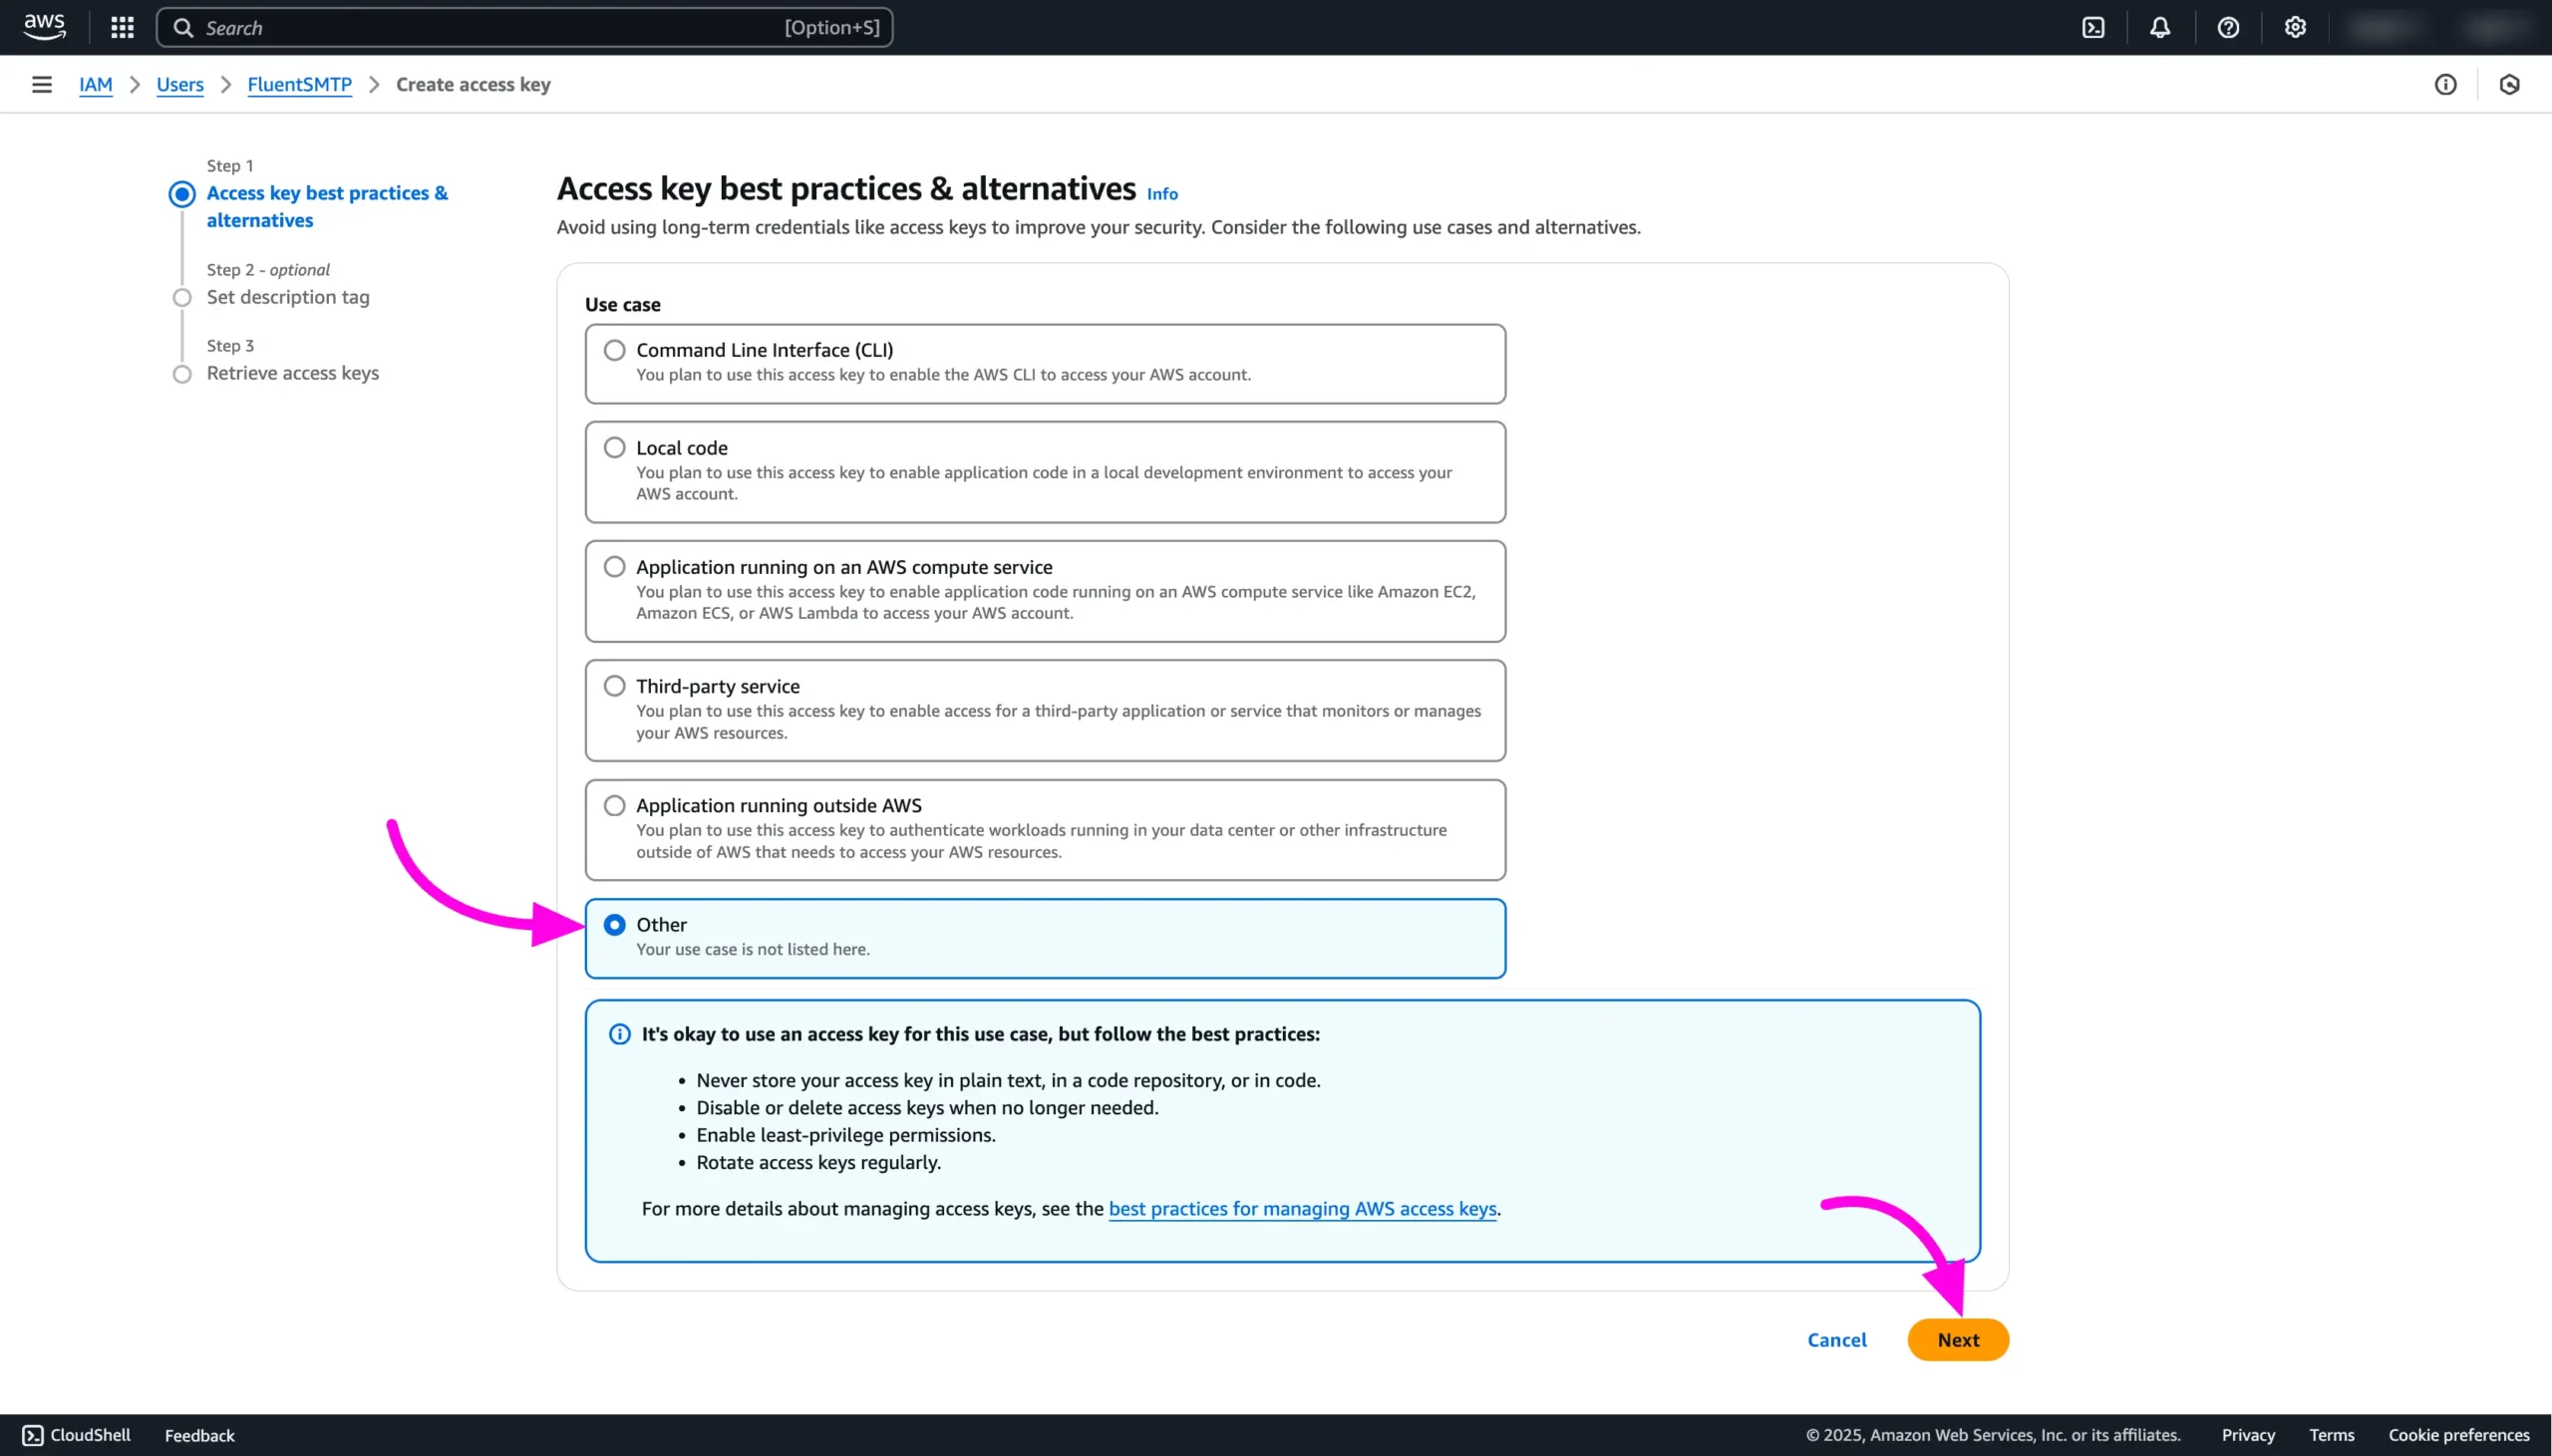
Create Access Key and Secret Key #
You can create the Access Key and Secret Key now, click on the Create Access Key button from the User Overview page.

Then you will be redirected to the Access Key best practice & alternative page. From here select the Other option and click on the Next button.
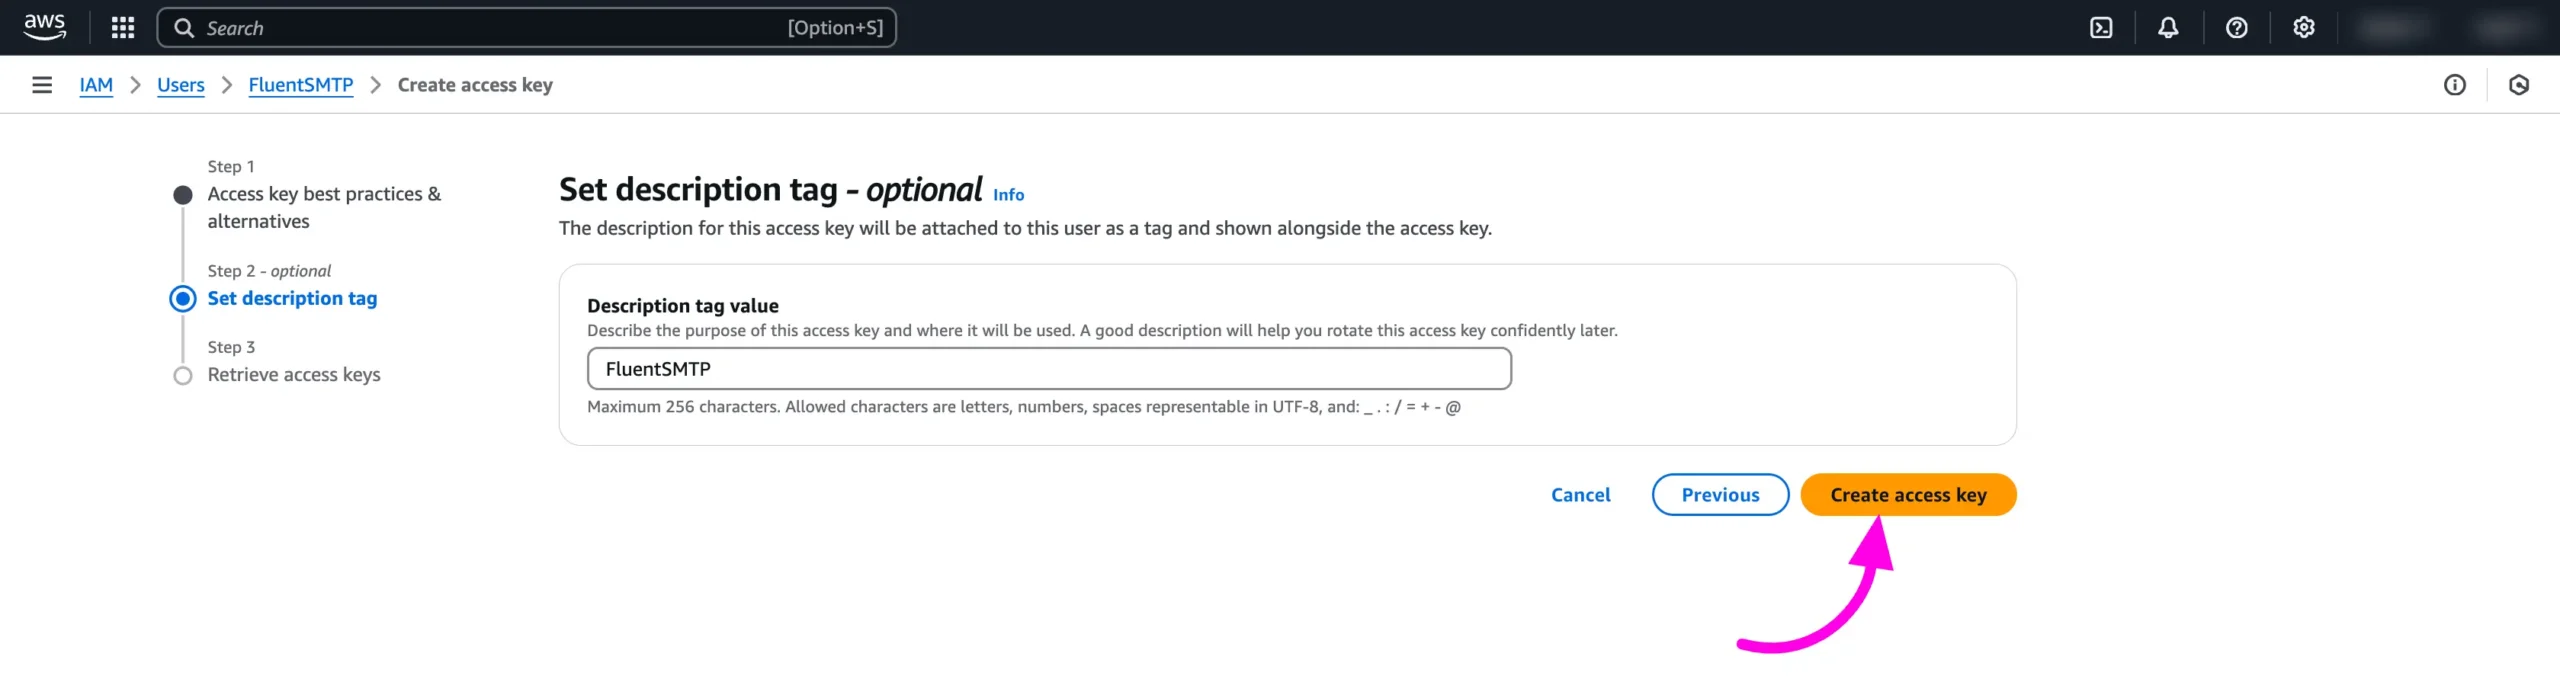
If you want to set any Description Tag then you can add it from here now otherwise you can skip it and click on the Create Access Key button.
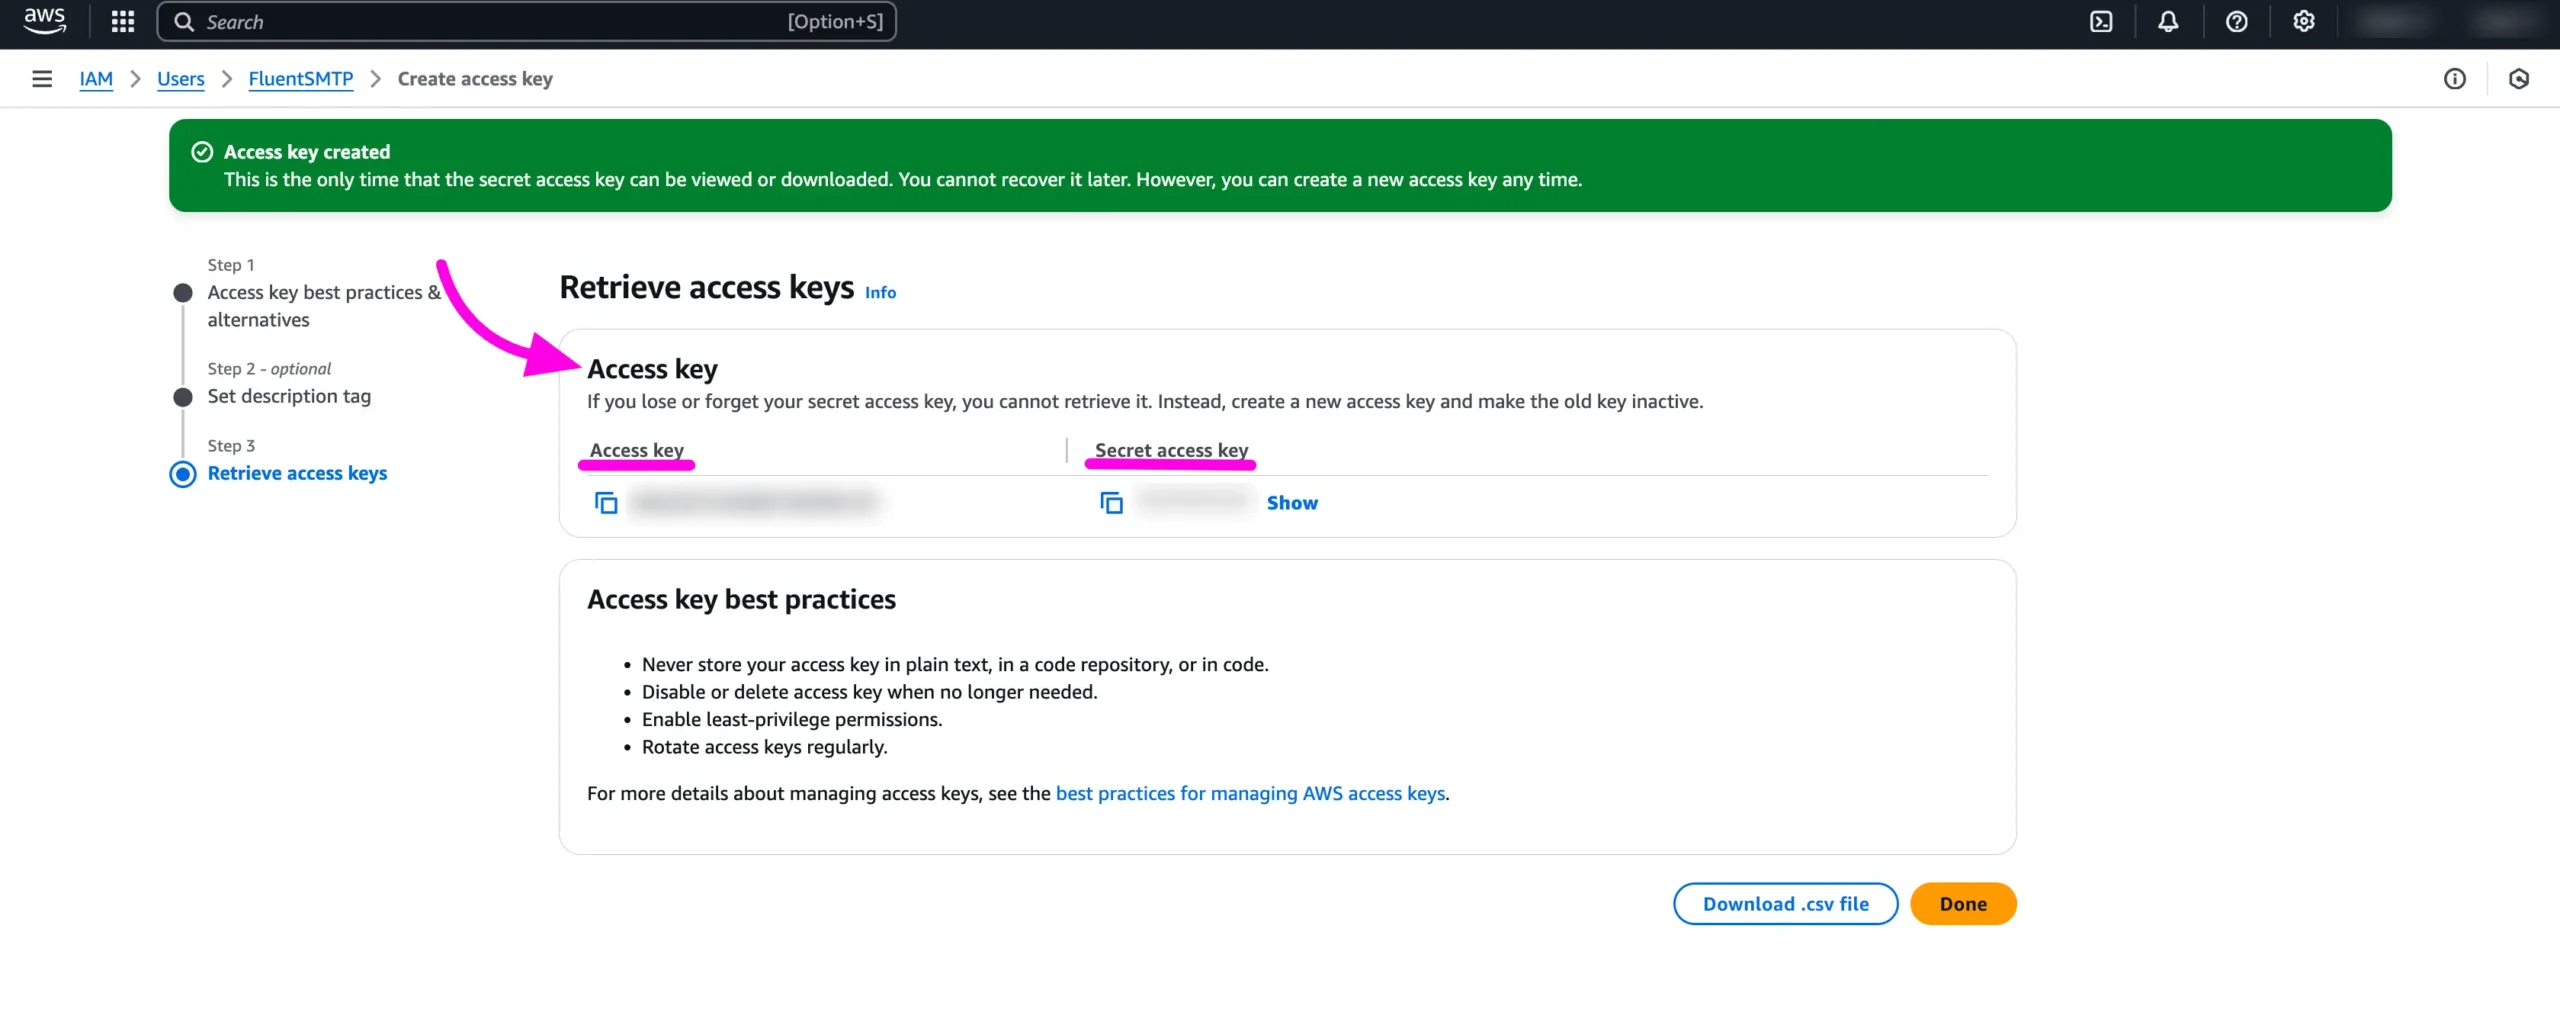
You will now receive a confirmation of the successful creation of the Access Key and Secret Key. Make sure to copy them for future use.
FluentSMTP AWS SES Settings #
Sender Settings #
From Email: The From Email feature refers to the email address shown as the sender when an email is sent. It identifies the email source, ensuring recipients know who sent the email.
From Name: It’s a feature that specifies the name displayed alongside the sender’s email address, helping recipients easily recognize who sent the email.
Force Form Email: If enabled, the “From Email” setting above will be used for all emails, verifying that the email address is listed among the available connections.
Set the return path to match the from email: The Return Path determines where non-delivery receipts (bounce messages) are sent. If disabled, bounce messages may not be received. When enabled, any bounced emails will be sent to the “From Email” address, notifying you of issues with the recipient’s email.
Now paste the Access Key, Secret Key, and Region we have copied earlier from the Amazon AWS Console. After providing them in the FluentSMTP Settings, please click on the Save Connection Settings button.
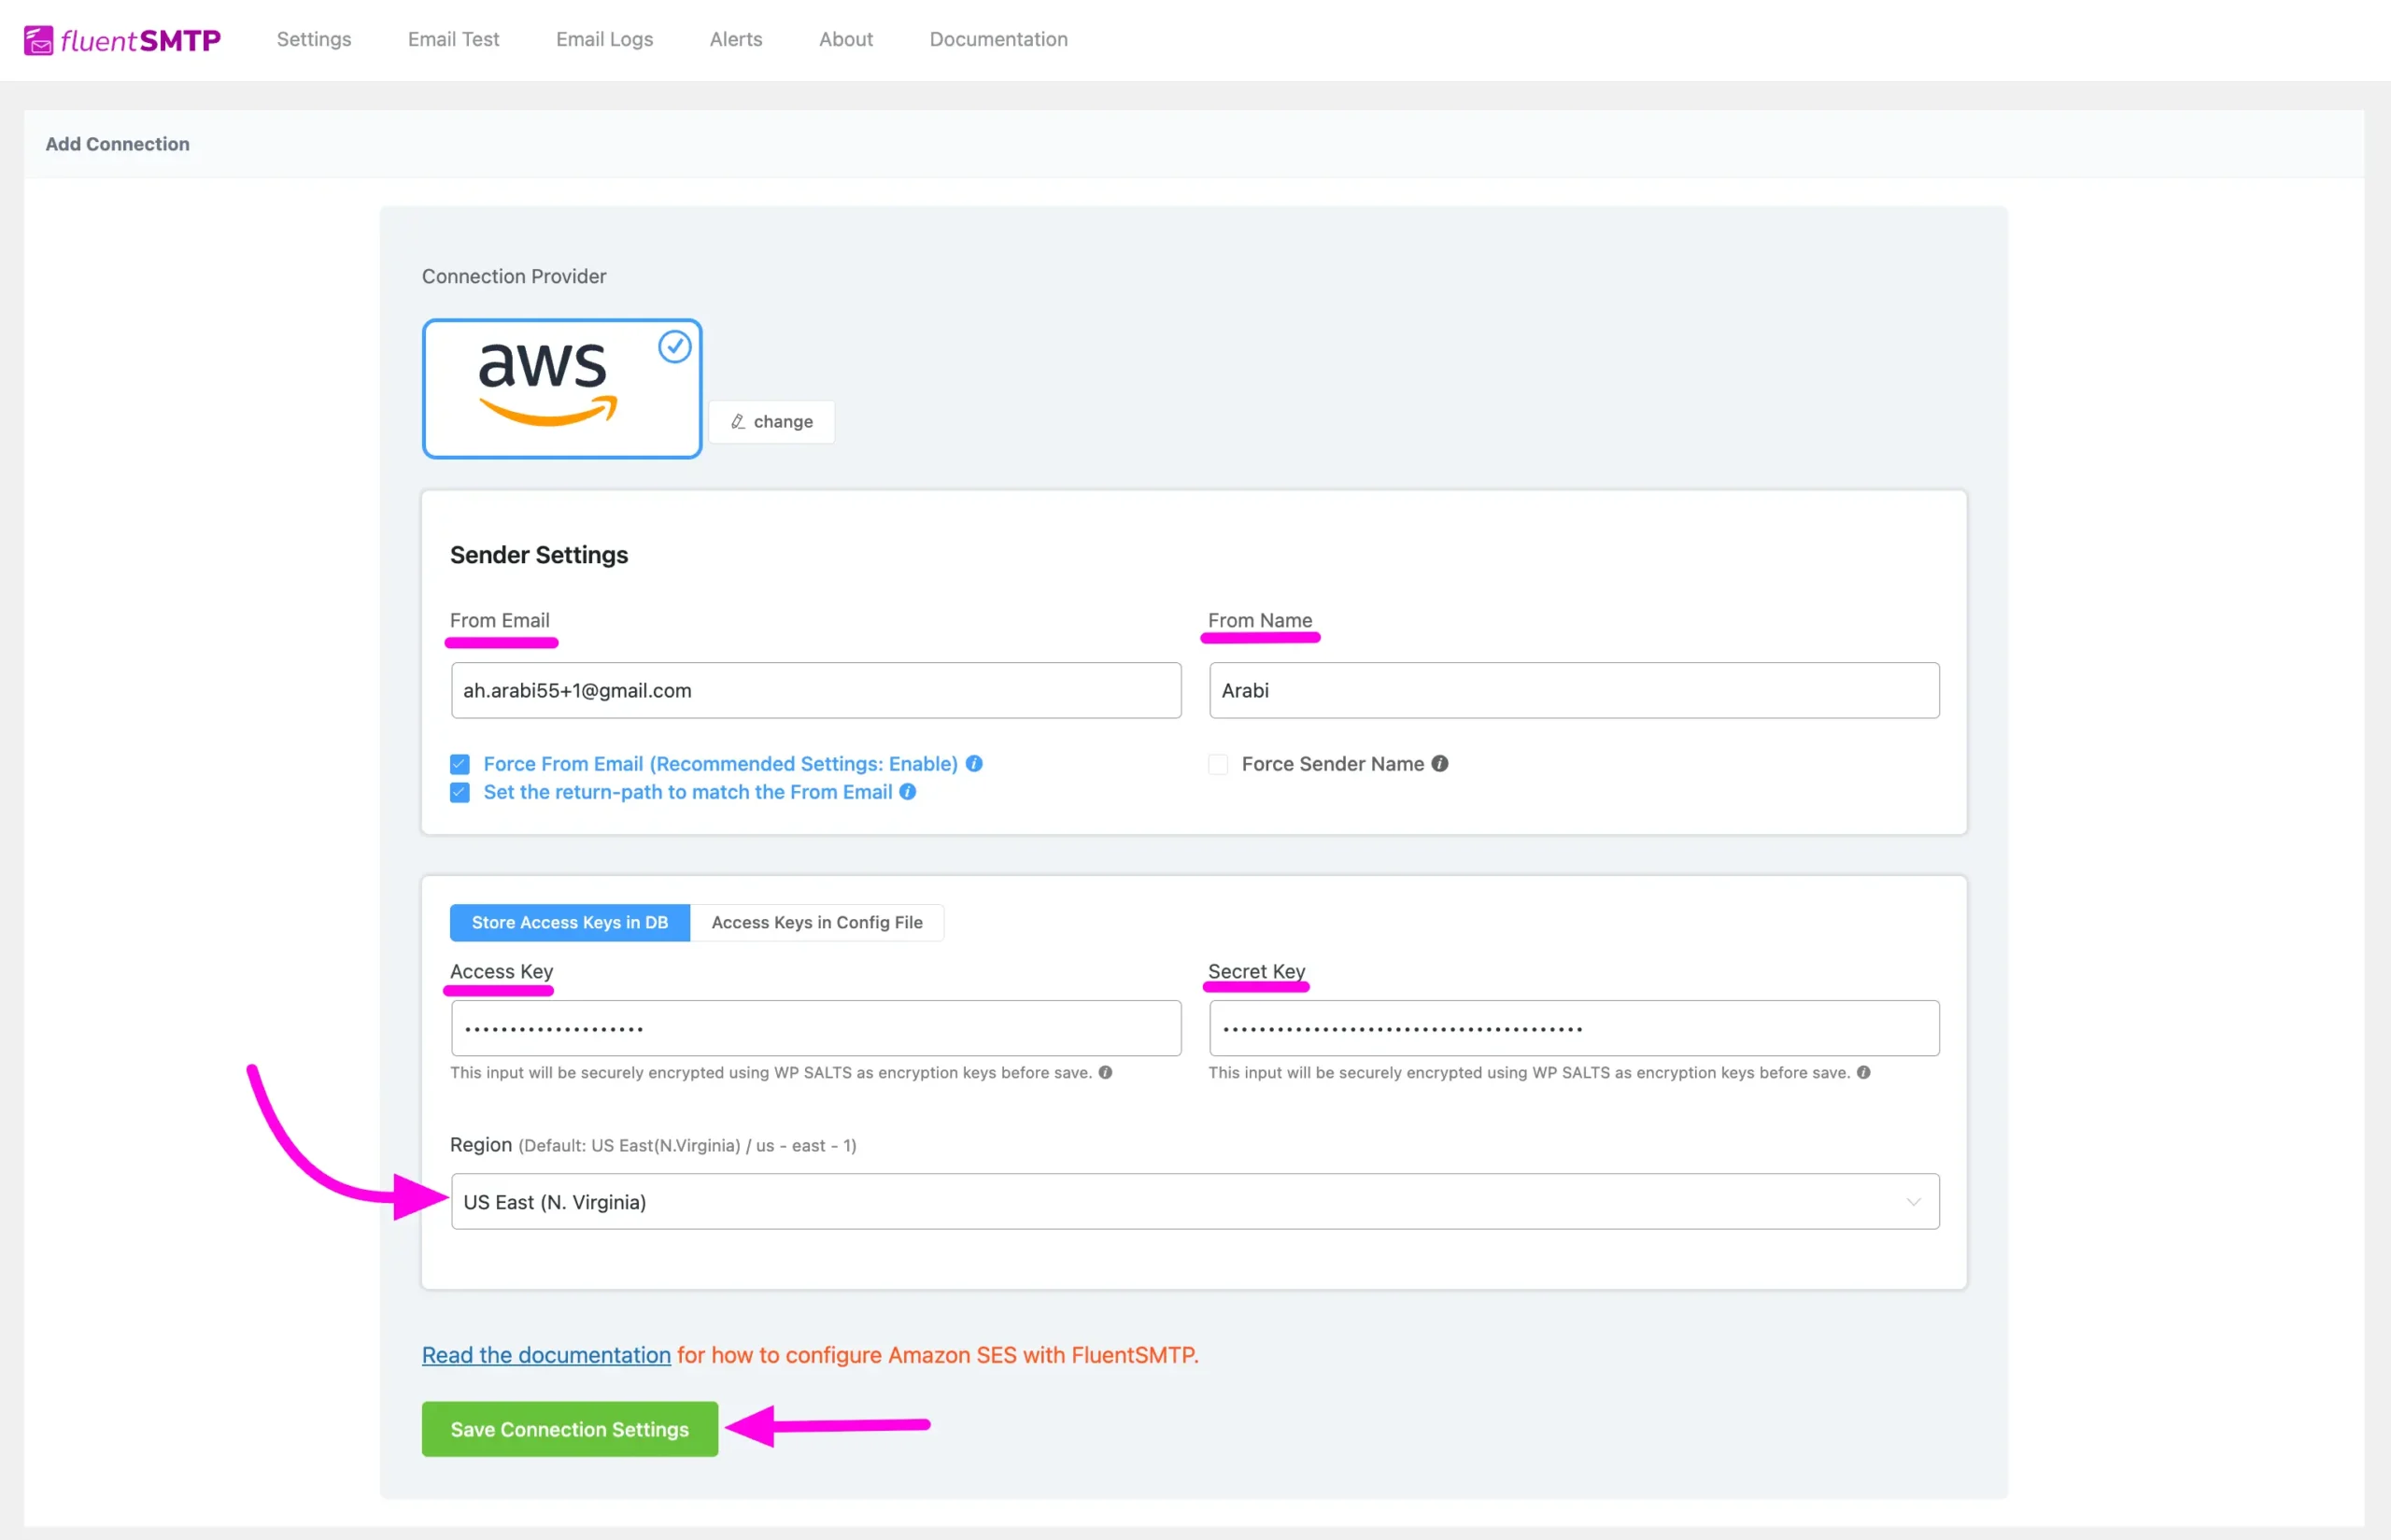
Access Keys Storage #
- Store Access Keys in DB: By default, this is enabled and strongly recommended. This will keep the information in the Databases in Encrypted format.
- Access Keys in Config File: This allows you to store the access keys in the following section inside the wp-config.php file by the following directives.
Simply copy the following snippet and replace the stars with the corresponding credential. Then simply paste it to the wp-config.php file of your WordPress installation.
We recommend using FluentSnippet on your WordPress site for a seamless experience. However, you can use any other snippet plugin of your choice.
define( 'FLUENTMAIL_AWS_ACCESS_KEY_ID', '********************' );

define( 'FLUENTMAIL_AWS_SECRET_ACCESS_KEY', '********************' );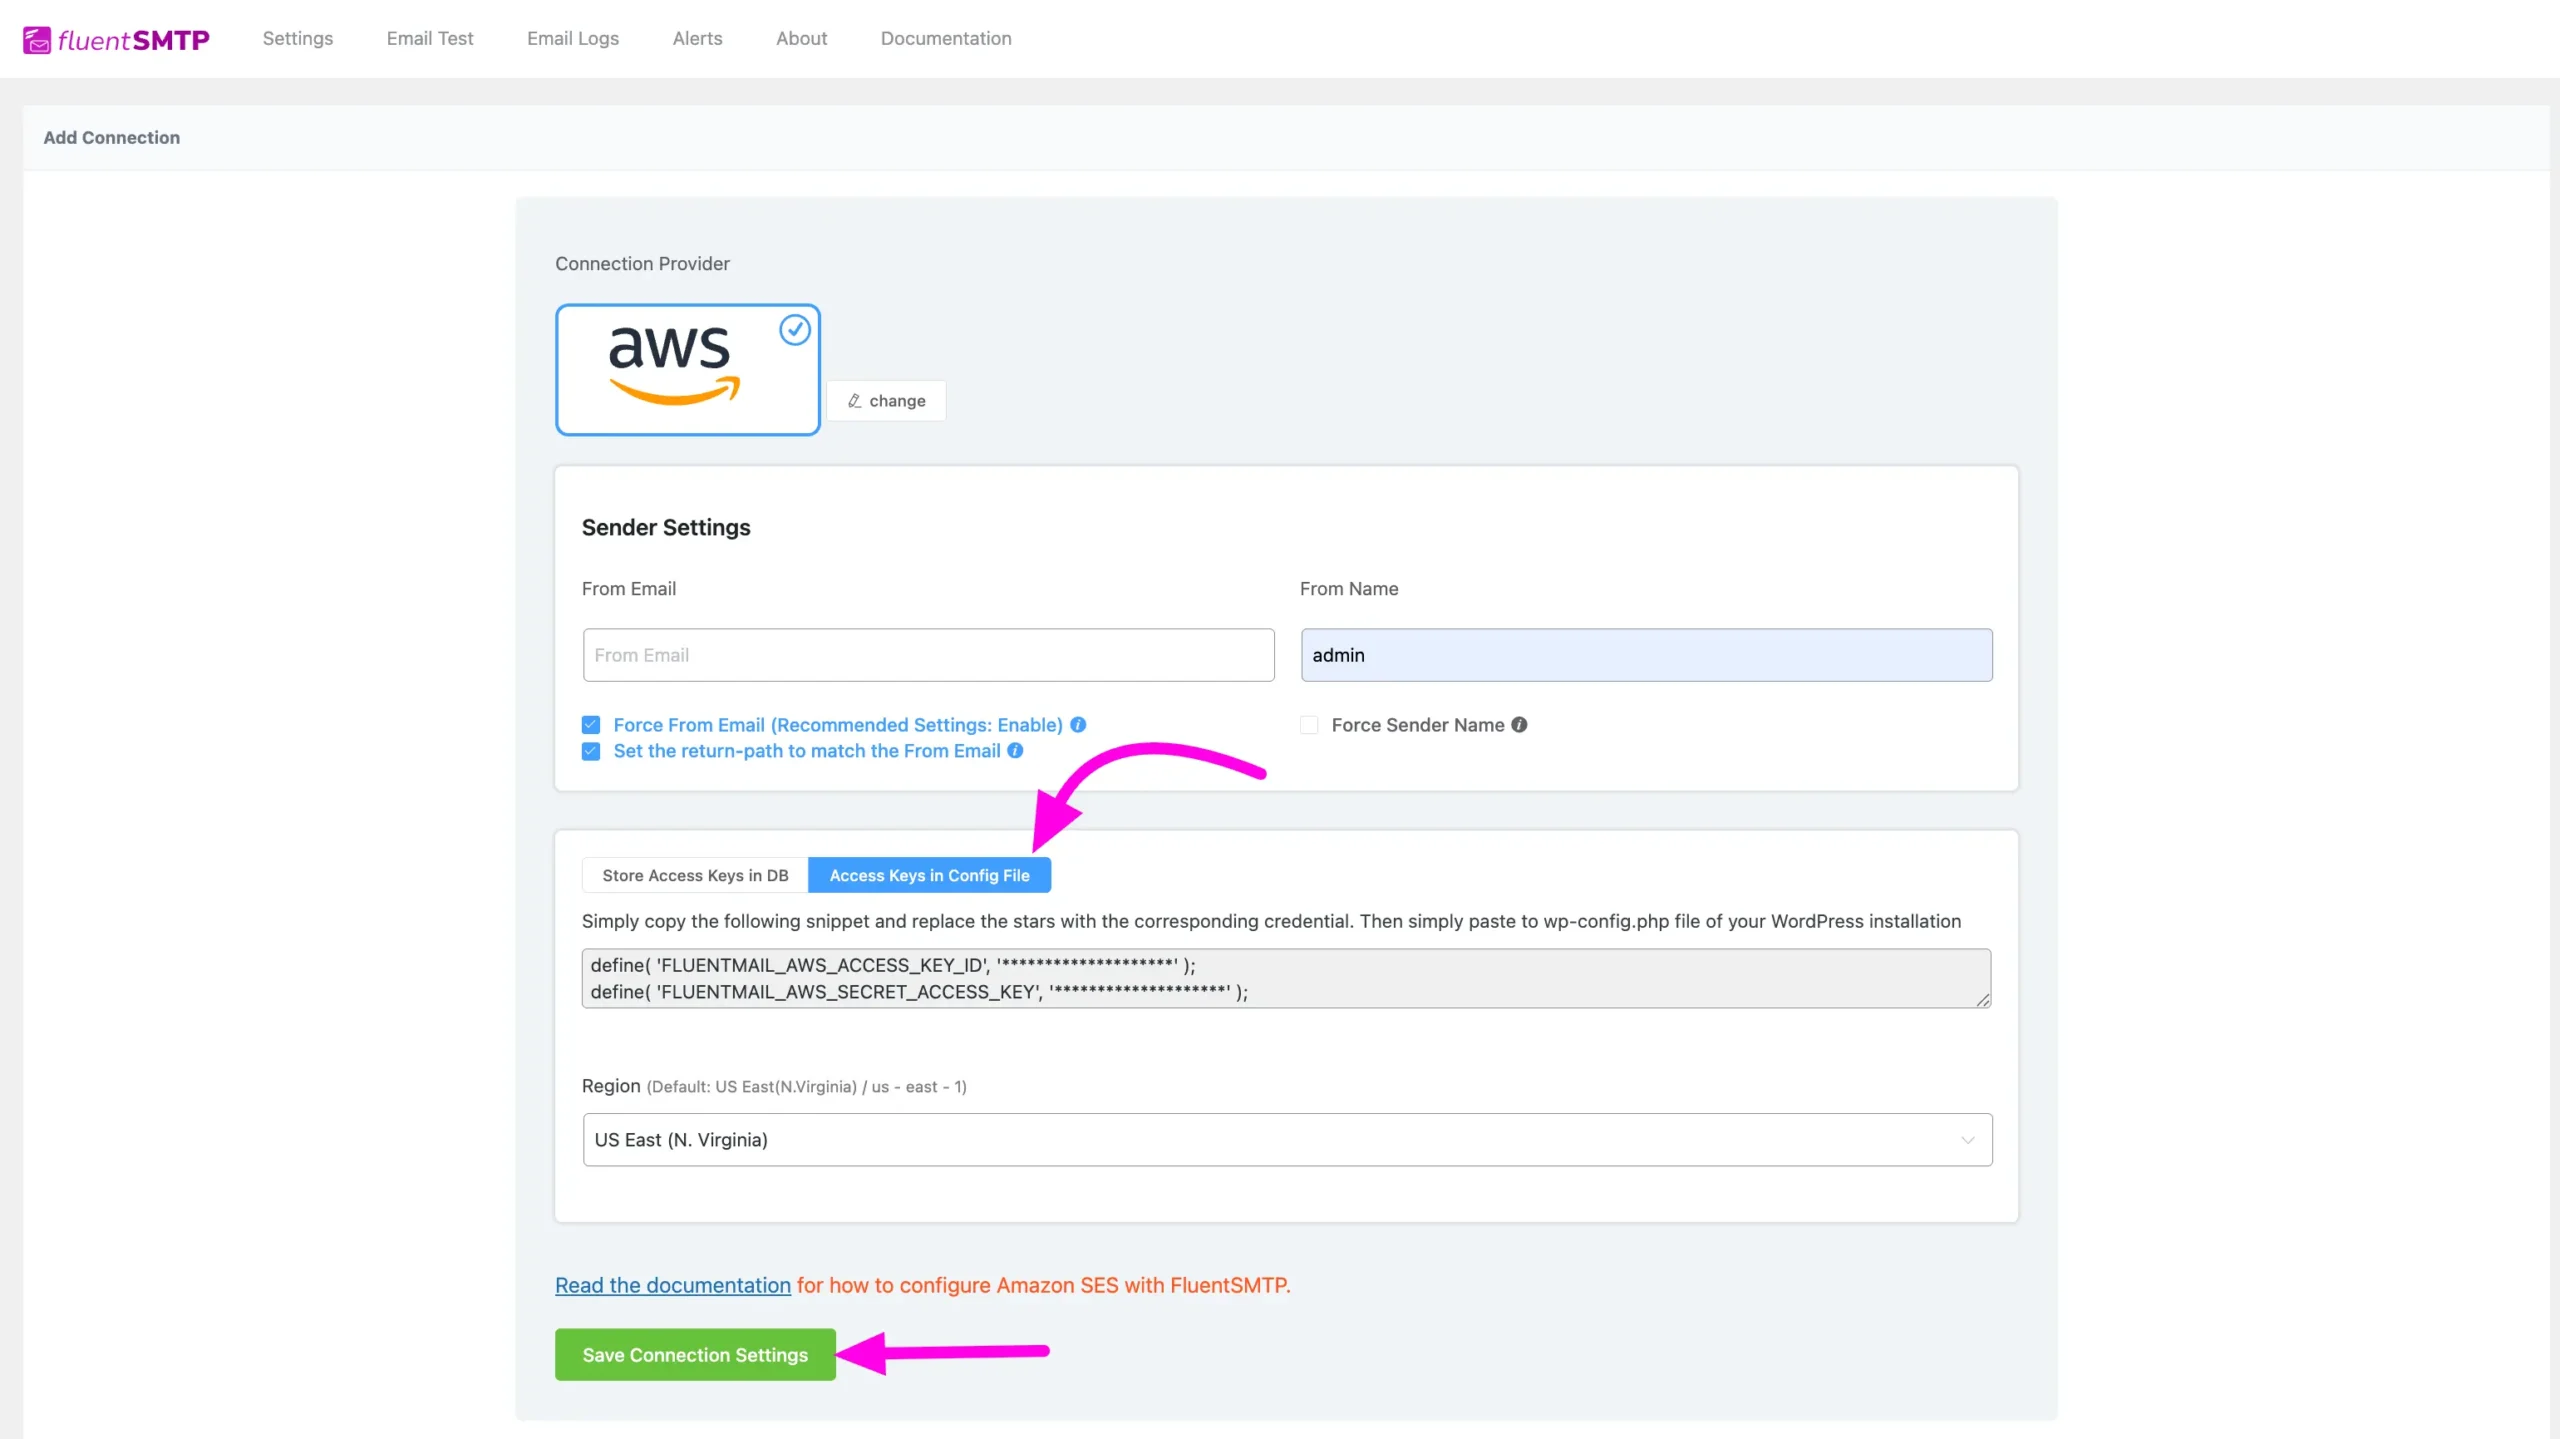
That’s all about Configuring FluentSMTP with Amazon Web Services or AWS SES(Simple Email Service) to send emails from the WordPress website. Additionally, it is recommended to Send a test email, Test Email Confirmation and then Confirm Test Email Deliverability.
Additional Resources #
Moving out of the Amazon SES Sandbox
A new AWS Console account will be in the Sandbox Mode by default. In this mode, you will only be able to simulate or practice sending emails to your own email addresses upon verifying them under Verified Identities.
To send emails to the users or realtime email sending, you need to go live from sandbox mode, Submit a request to AWS Support for Production Access to make your SES account go live from Sandbox. Please checkout this official resource: Moving out of the Amazon SES Sandbox
If you have any further questions or need assistance with this process, feel free to contact us. We’re here to help!


