
Connect Gmail or Google Workspace With FluentSMTP
Use this when the From address is a Gmail or Google Workspace mailbox. FluentSMTP talks to Google over OAuth. It does not store your Google password.
Gmail and Workspace are not a marketing ESP. Free Gmail is a few hundred messages a day. Workspace is higher, still not "blast a list." For volume, use SES, Mailgun, Postmark, or toSend.
Open the Gmail connection
- Go to Settings → FluentSMTP.
- If this is the first connection, pick Gmail or Google Workspace.
- If you already have a connection, open Settings, click Add Connection, then pick Gmail or Google Workspace.
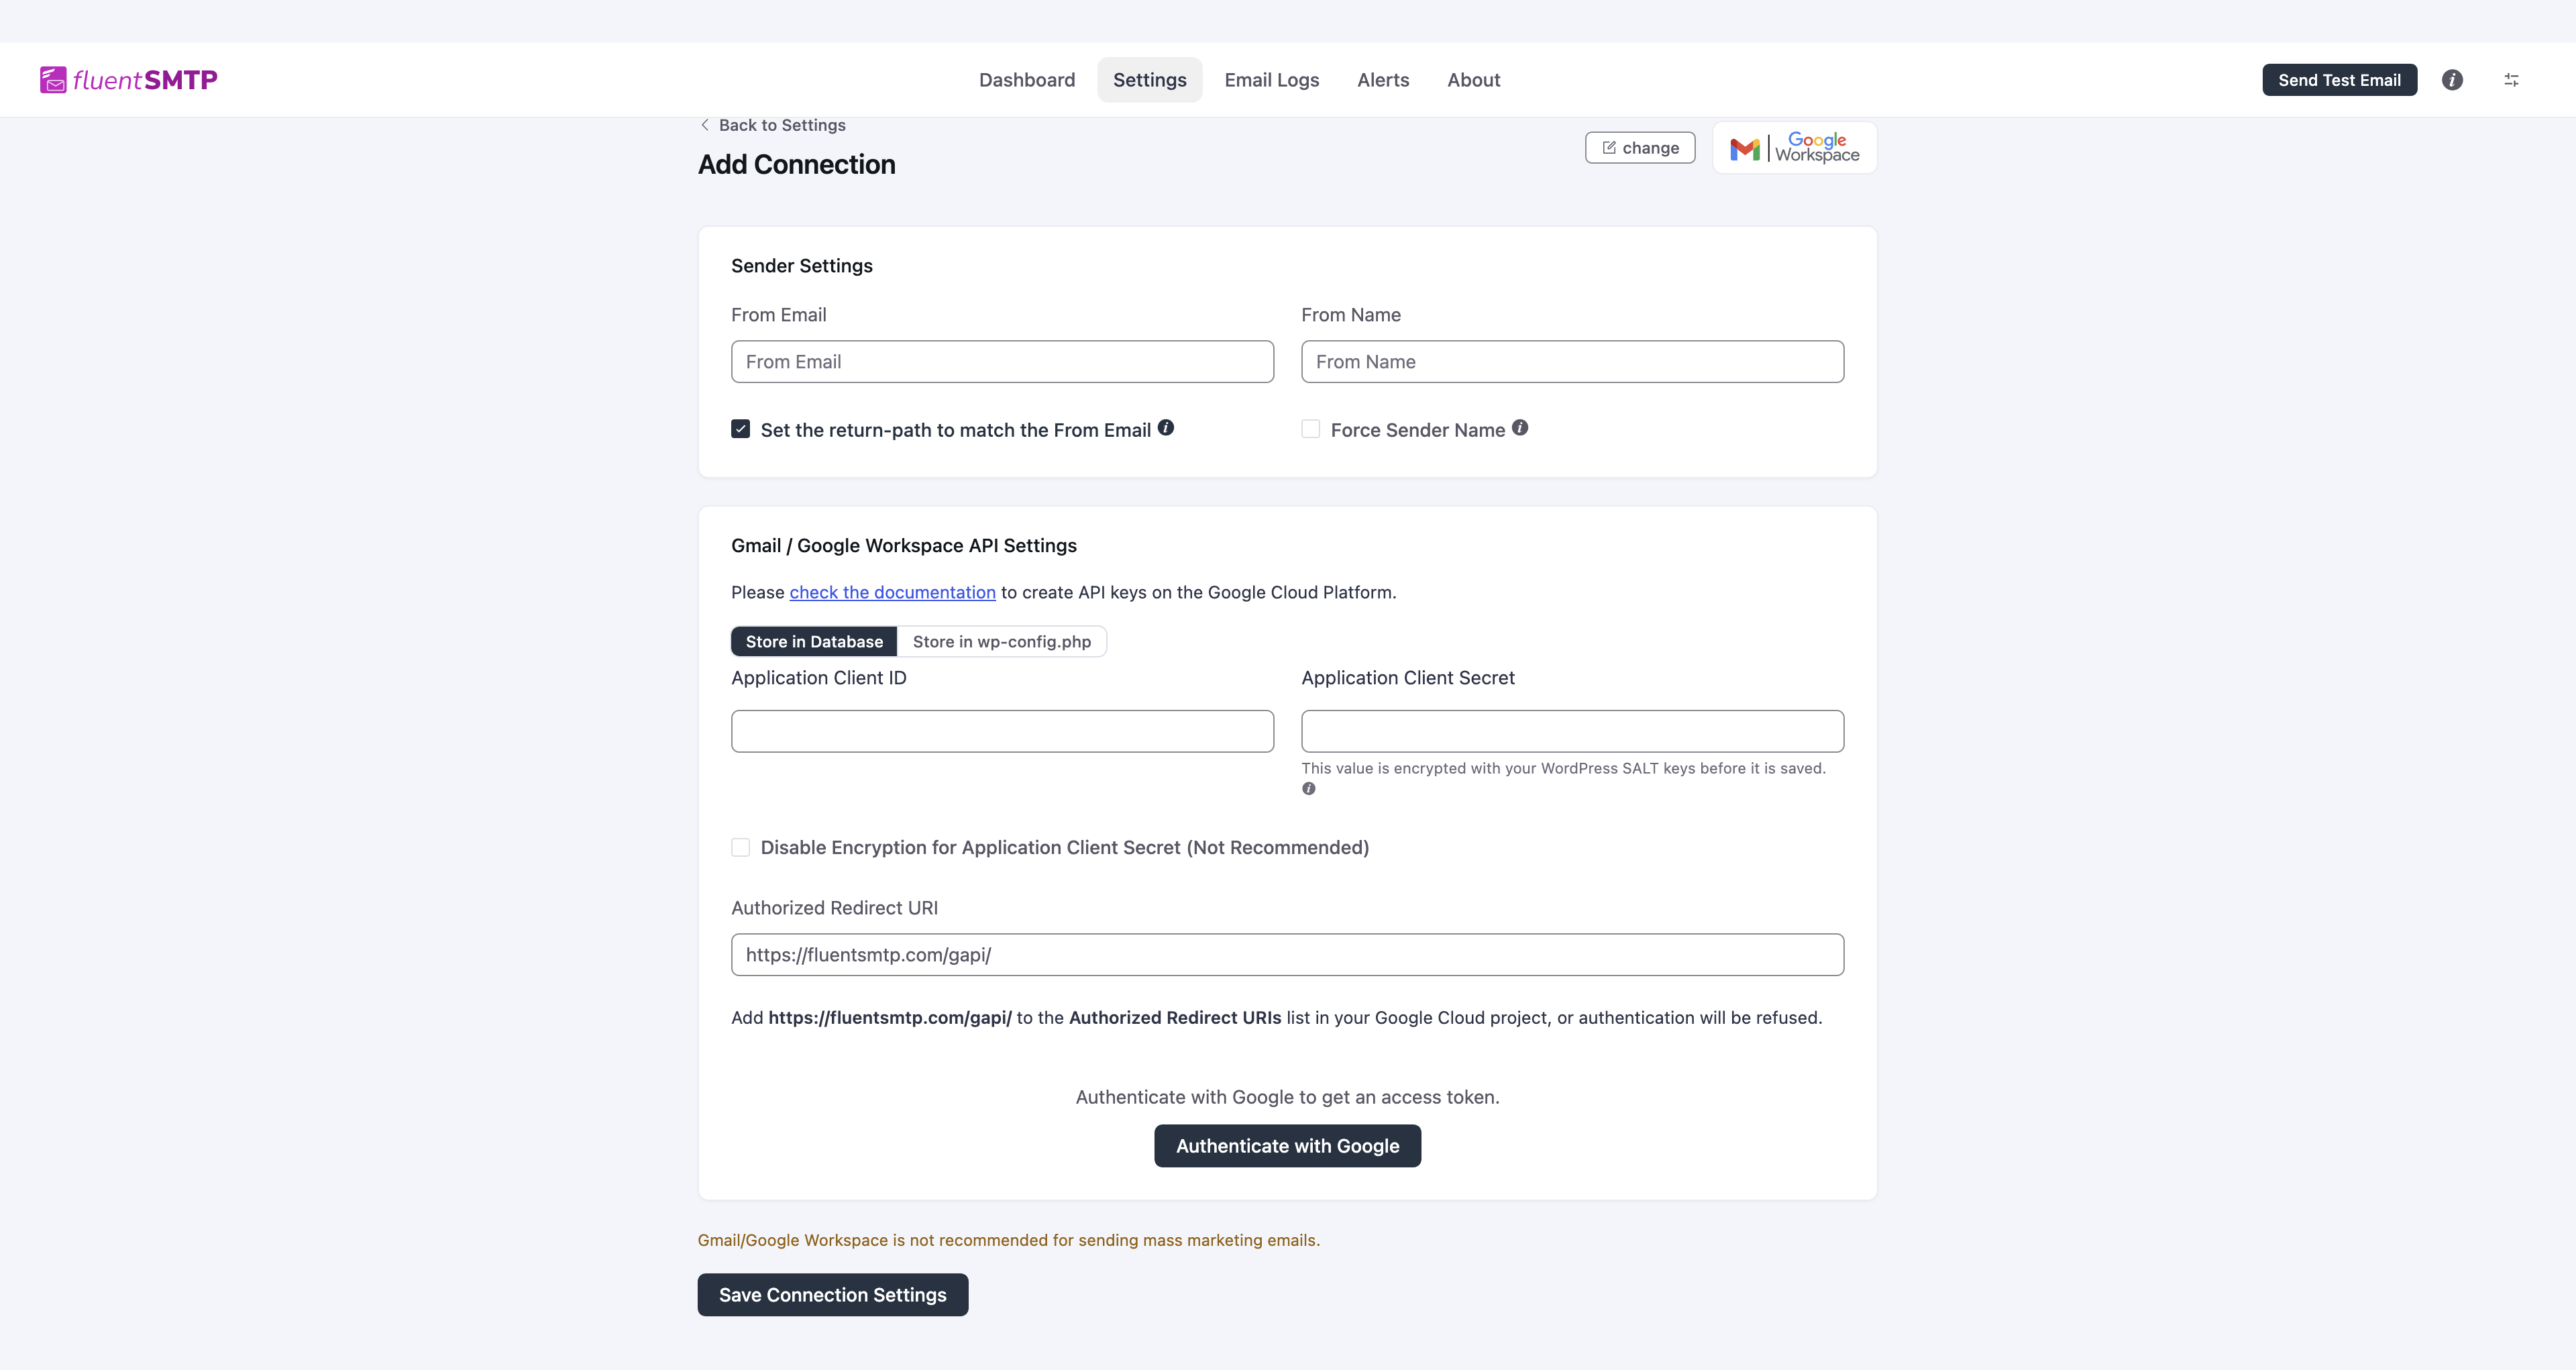
You will fill Sender Settings first:
- From Email: the Google address that will send. It must be the same account you approve on Google's consent screen.
- From Name: what recipients see.
- Set the return-path to match the From Email.
- Force Sender Name if you want this name on every message this connection sends.
Gmail does not have Force From Email. The mailbox you authenticate as is the From.
Then the Gmail / Google Workspace API Settings block.
Create a Google Cloud project
- Open Google Cloud Console and sign in as the user who owns the mailbox, or as a Workspace admin who can grant Gmail access.
- Click the project picker → New Project. Name it something like
FluentSMTPand create it. Select it when it exists.
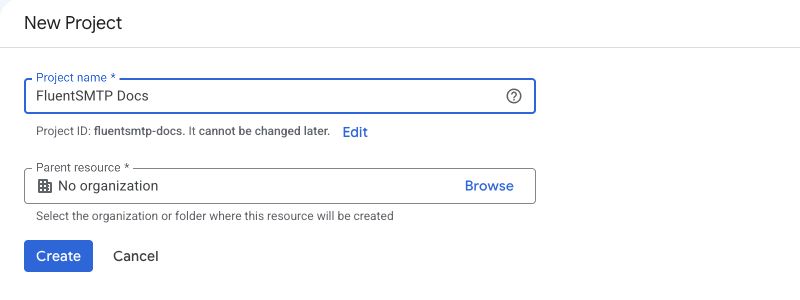
The screenshots use a demo project named FluentSMTP Docs. Use your own project and mailbox when following these steps.
Enable the Gmail API
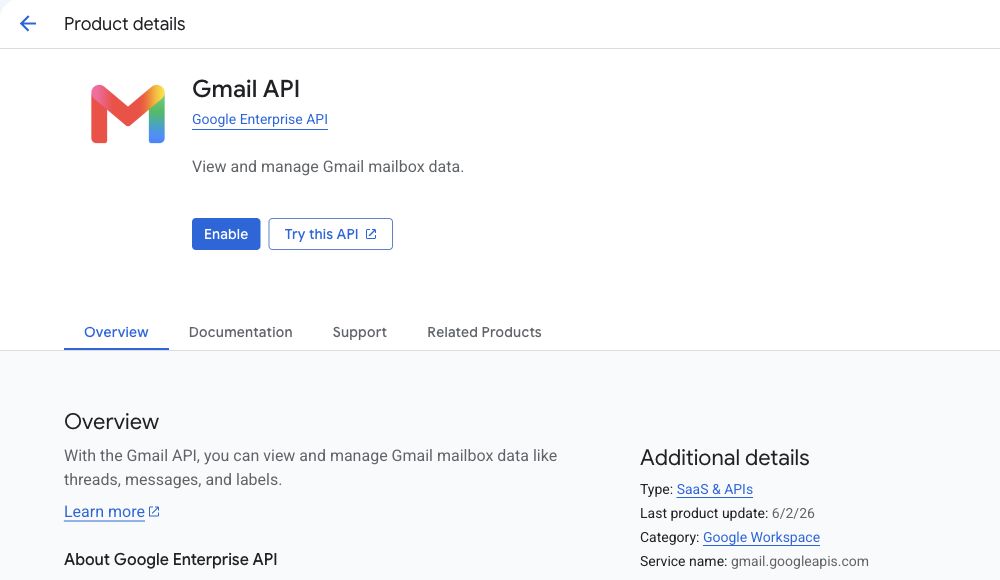
- Go to APIs & Services → Library (or Enable APIs and services).
- Search for Gmail API.
- Open it and click Enable.
OAuth consent screen
- Go to APIs & Services → OAuth consent screen. This opens Google Auth Platform.
- Click Get started if the project is not configured yet.
- Under App Information, enter an app name such as
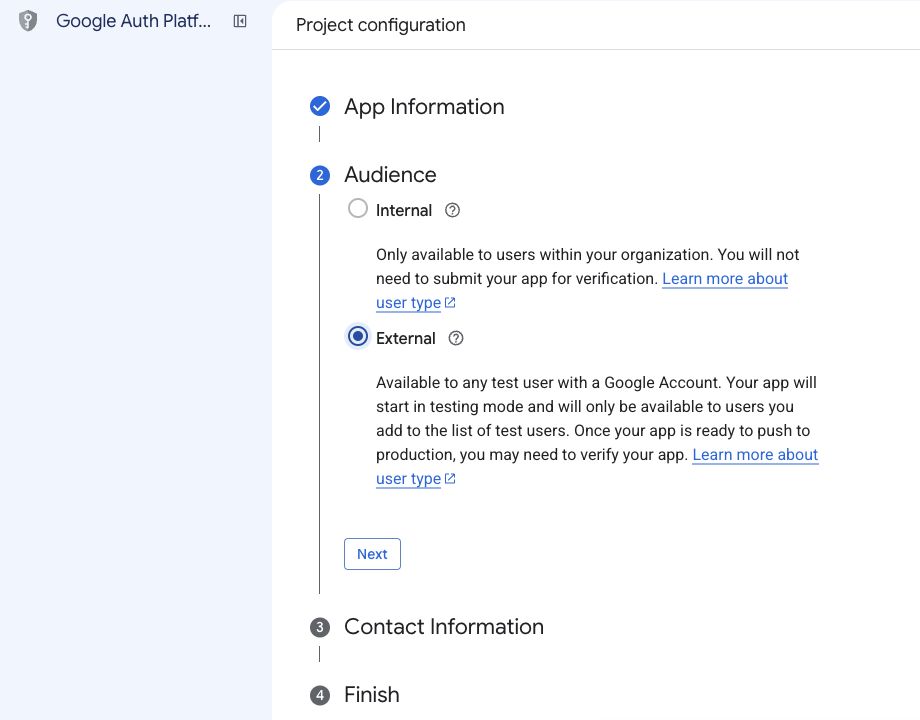
FluentSMTPand select a User support email. - Under Audience, choose:
- Internal: available when the project belongs to a Google Workspace or Cloud Identity organization. Only users in that organization can authenticate.
- External: use this for a personal Gmail account or users outside your organization. The app starts in Testing.
- Under Contact Information, enter an email address for Google to send project notices.
- Review the Google API Services: User Data Policy, accept it if you agree, then click Continue → Create.
Testing vs published
For an External app in Testing, open Google Auth Platform → Audience → Test users → Add users and add the Google address you will authenticate with.
Testing connections expire after seven days
Google issues seven-day refresh tokens for External apps in Testing when Gmail access is requested. If Publish app is disabled, follow Go to Branding and complete the missing information Google identifies. For ongoing site mail, move the app to In production from Audience → Publish app, then authenticate FluentSMTP again. Publishing does not make the app verified. See Google’s audience guidance.
A personal-use app with fewer than 100 users can qualify for Google’s verification exception. Google may show Google hasn’t verified this app during sign-in. For the app you created, check its name, then use Advanced → Go to [your app name] (unsafe) if offered. This prompt is shown to the person connecting the mailbox, not to email recipients.
Workspace Internal apps do not require public verification, but your Workspace administrator can still restrict access.
Create the OAuth client
- Open Google Auth Platform → Clients → Create client. You can also reach this through APIs & Services → Credentials → Create credentials → OAuth client ID.
- Application type: Web application.
- Name:
FluentSMTP. - Authorized redirect URIs: add exactly:
https://fluentsmtp.com/gapi/That URI is not your site. FluentSMTP uses it as a fixed OAuth bounce so you do not have to expose a callback on every WordPress install. If you skip it, or add a trailing-path variant Google does not treat as the same, authentication is refused.
Leave Authorized JavaScript origins empty. The callback belongs under Authorized redirect URIs.
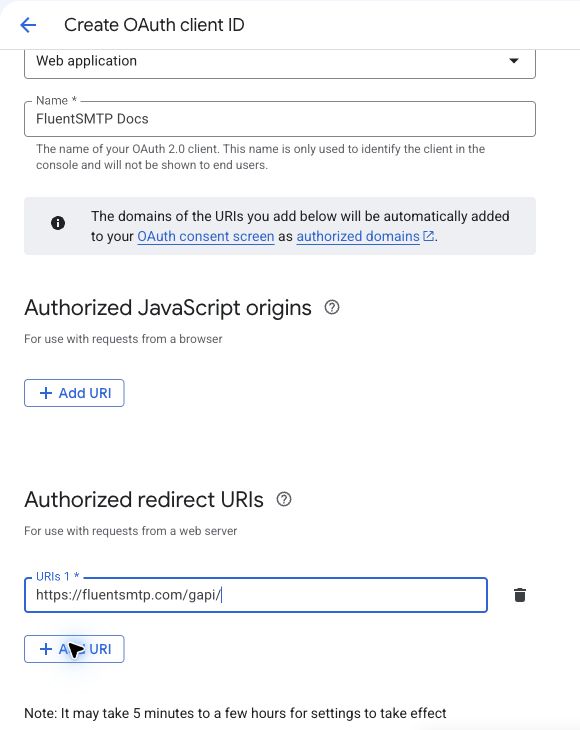
- Click Create. Copy the Client ID and Client secret and keep them private. Google shows the secret only in the creation dialog; copy it before clicking OK.
Paste into FluentSMTP and authenticate
Back on the connection form:
- Leave Store in Database selected. You can tick Disable Encryption, or switch to Store in wp-config.php. Both are optional. See Where secrets are stored.
- Paste Application Client ID and Application Client Secret.
- Confirm Authorized Redirect URI still shows
https://fluentsmtp.com/gapi/. - Click Authenticate with Google. A Google window opens.
- Pick the same account as From Email. If Google shows a testing notice for the app you created, click Continue. Review the Send email on your behalf permission, then click Continue to approve it.
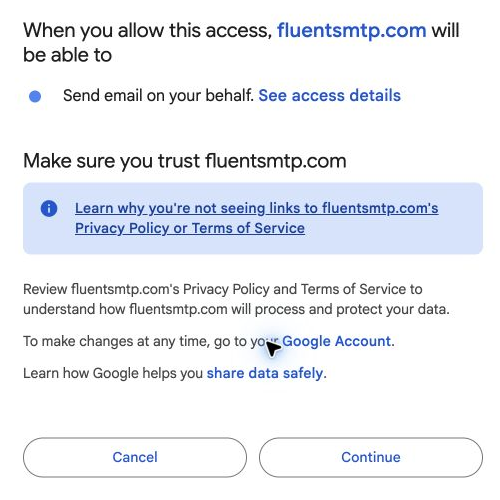
- FluentSMTP shows an access token. Paste it into Access Token if the form asks, then click Save Connection Settings.
When it works, reopen the saved connection. The form says Gmail / Google Workspace is connected.
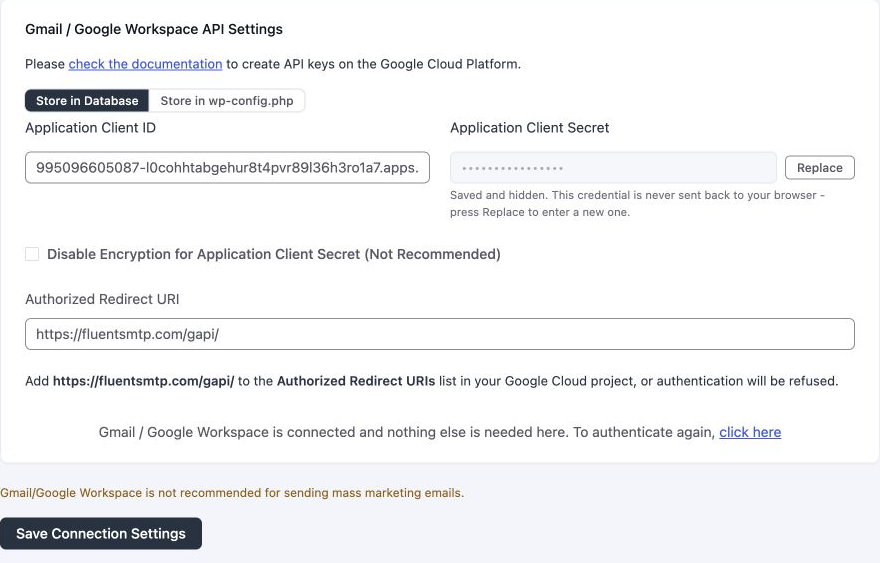
Send a test from Send Test Email.
If Google shows redirect_uri_mismatch, the Cloud client does not have https://fluentsmtp.com/gapi/ exactly. Edit the client, add it, wait a minute, try again.
If you see a yellow notice about an upgraded Google API, the old connection used a previous client. Create a new client (or reuse this one) and authenticate again. Same docs URL is linked from that notice in the plugin.
After it is connected
Send a test. Confirm it in the inbox, not only the success notice.
If you later need to authenticate again, open the connection, click the link to authenticate again, and repeat the Google window.
Next: Settings and email logs.