
FluentSMTP – WP Mail Plugin provides you options to connect with your Outlook or Office 365 emails and send emails over their API. It’s fast and secure. Using the OAuth2 authentication system for the connection, You can easily set up the connection and send your emails with Office 365 / Outlook emails.
This is a step-by-step tutorial on setting up Outlook or Office365 API with WordPress by FluentSMTP.
Configuring FluentSMTP with Outlook or Office365 Emails #
Please follow the below sections to configure Outlook or Office365 Emails with FluentSMTP.
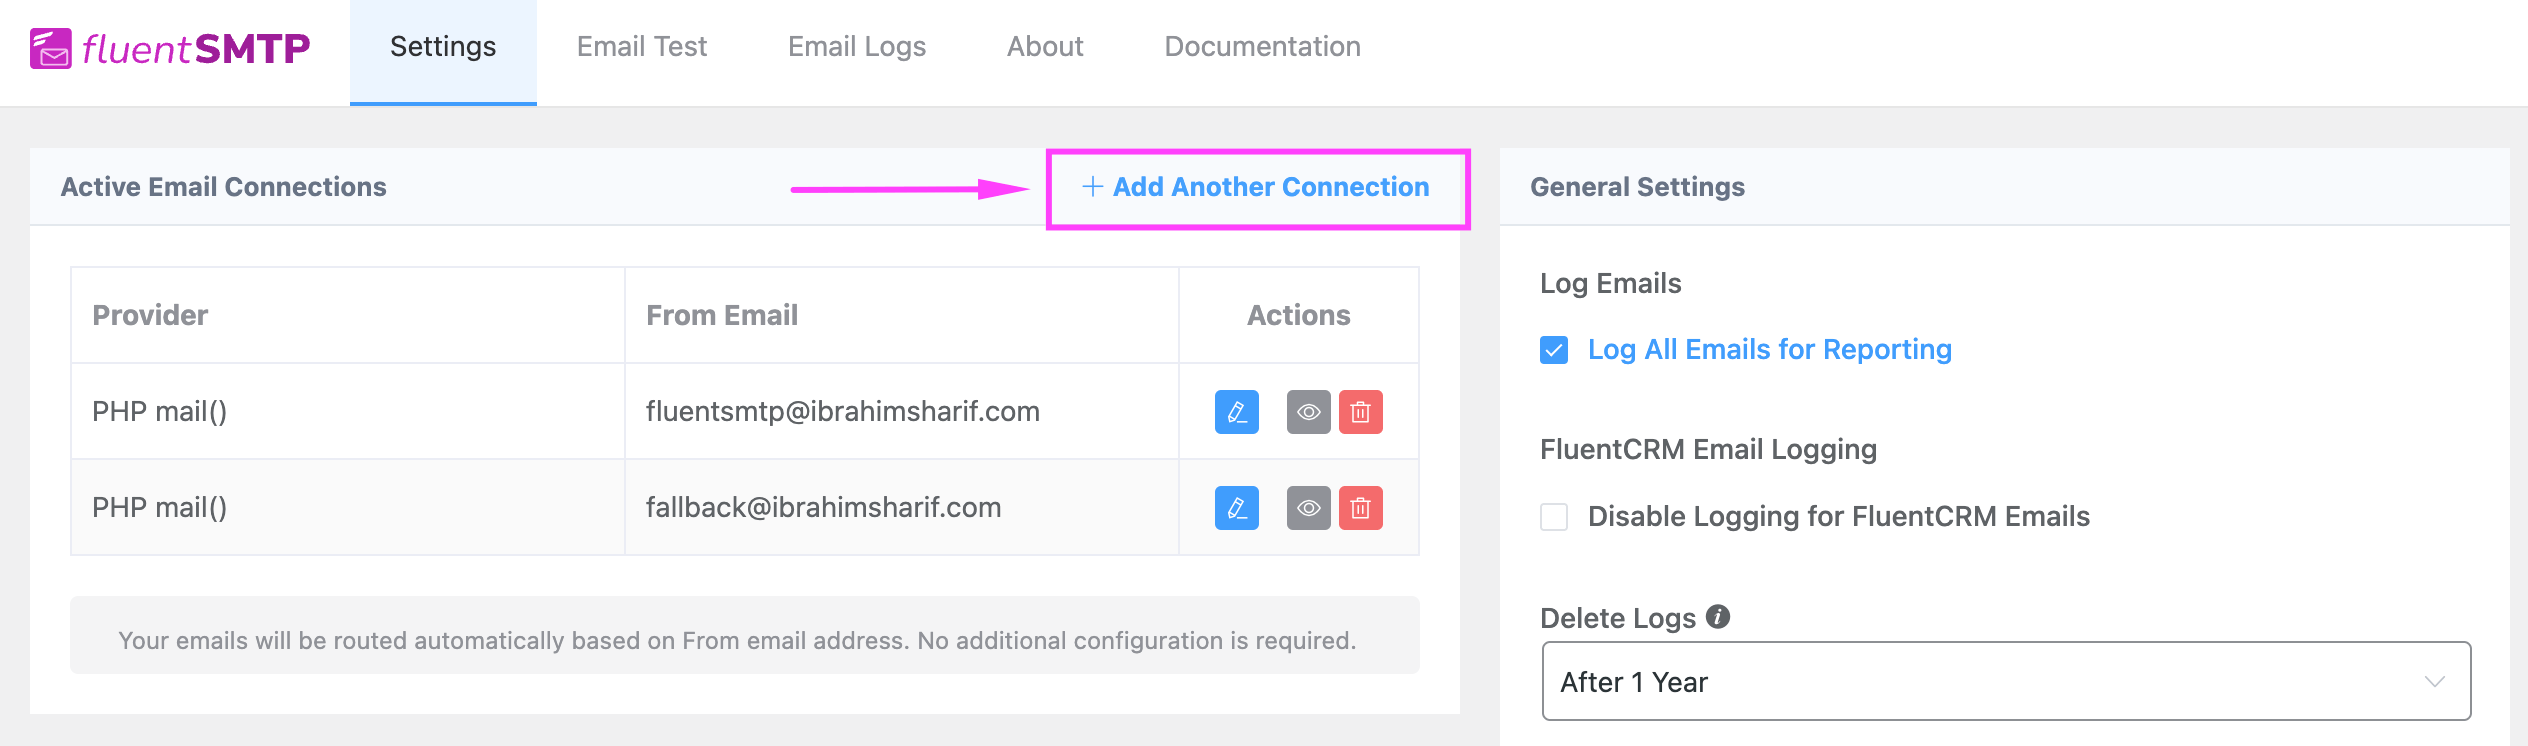
If you already have any other configured connection, then you will be in the FluentSMTP Dashboard.
Please go to WordPress Settings ⮕ FluentSMTP ⮕ Settings ⮕ Add Another Connection
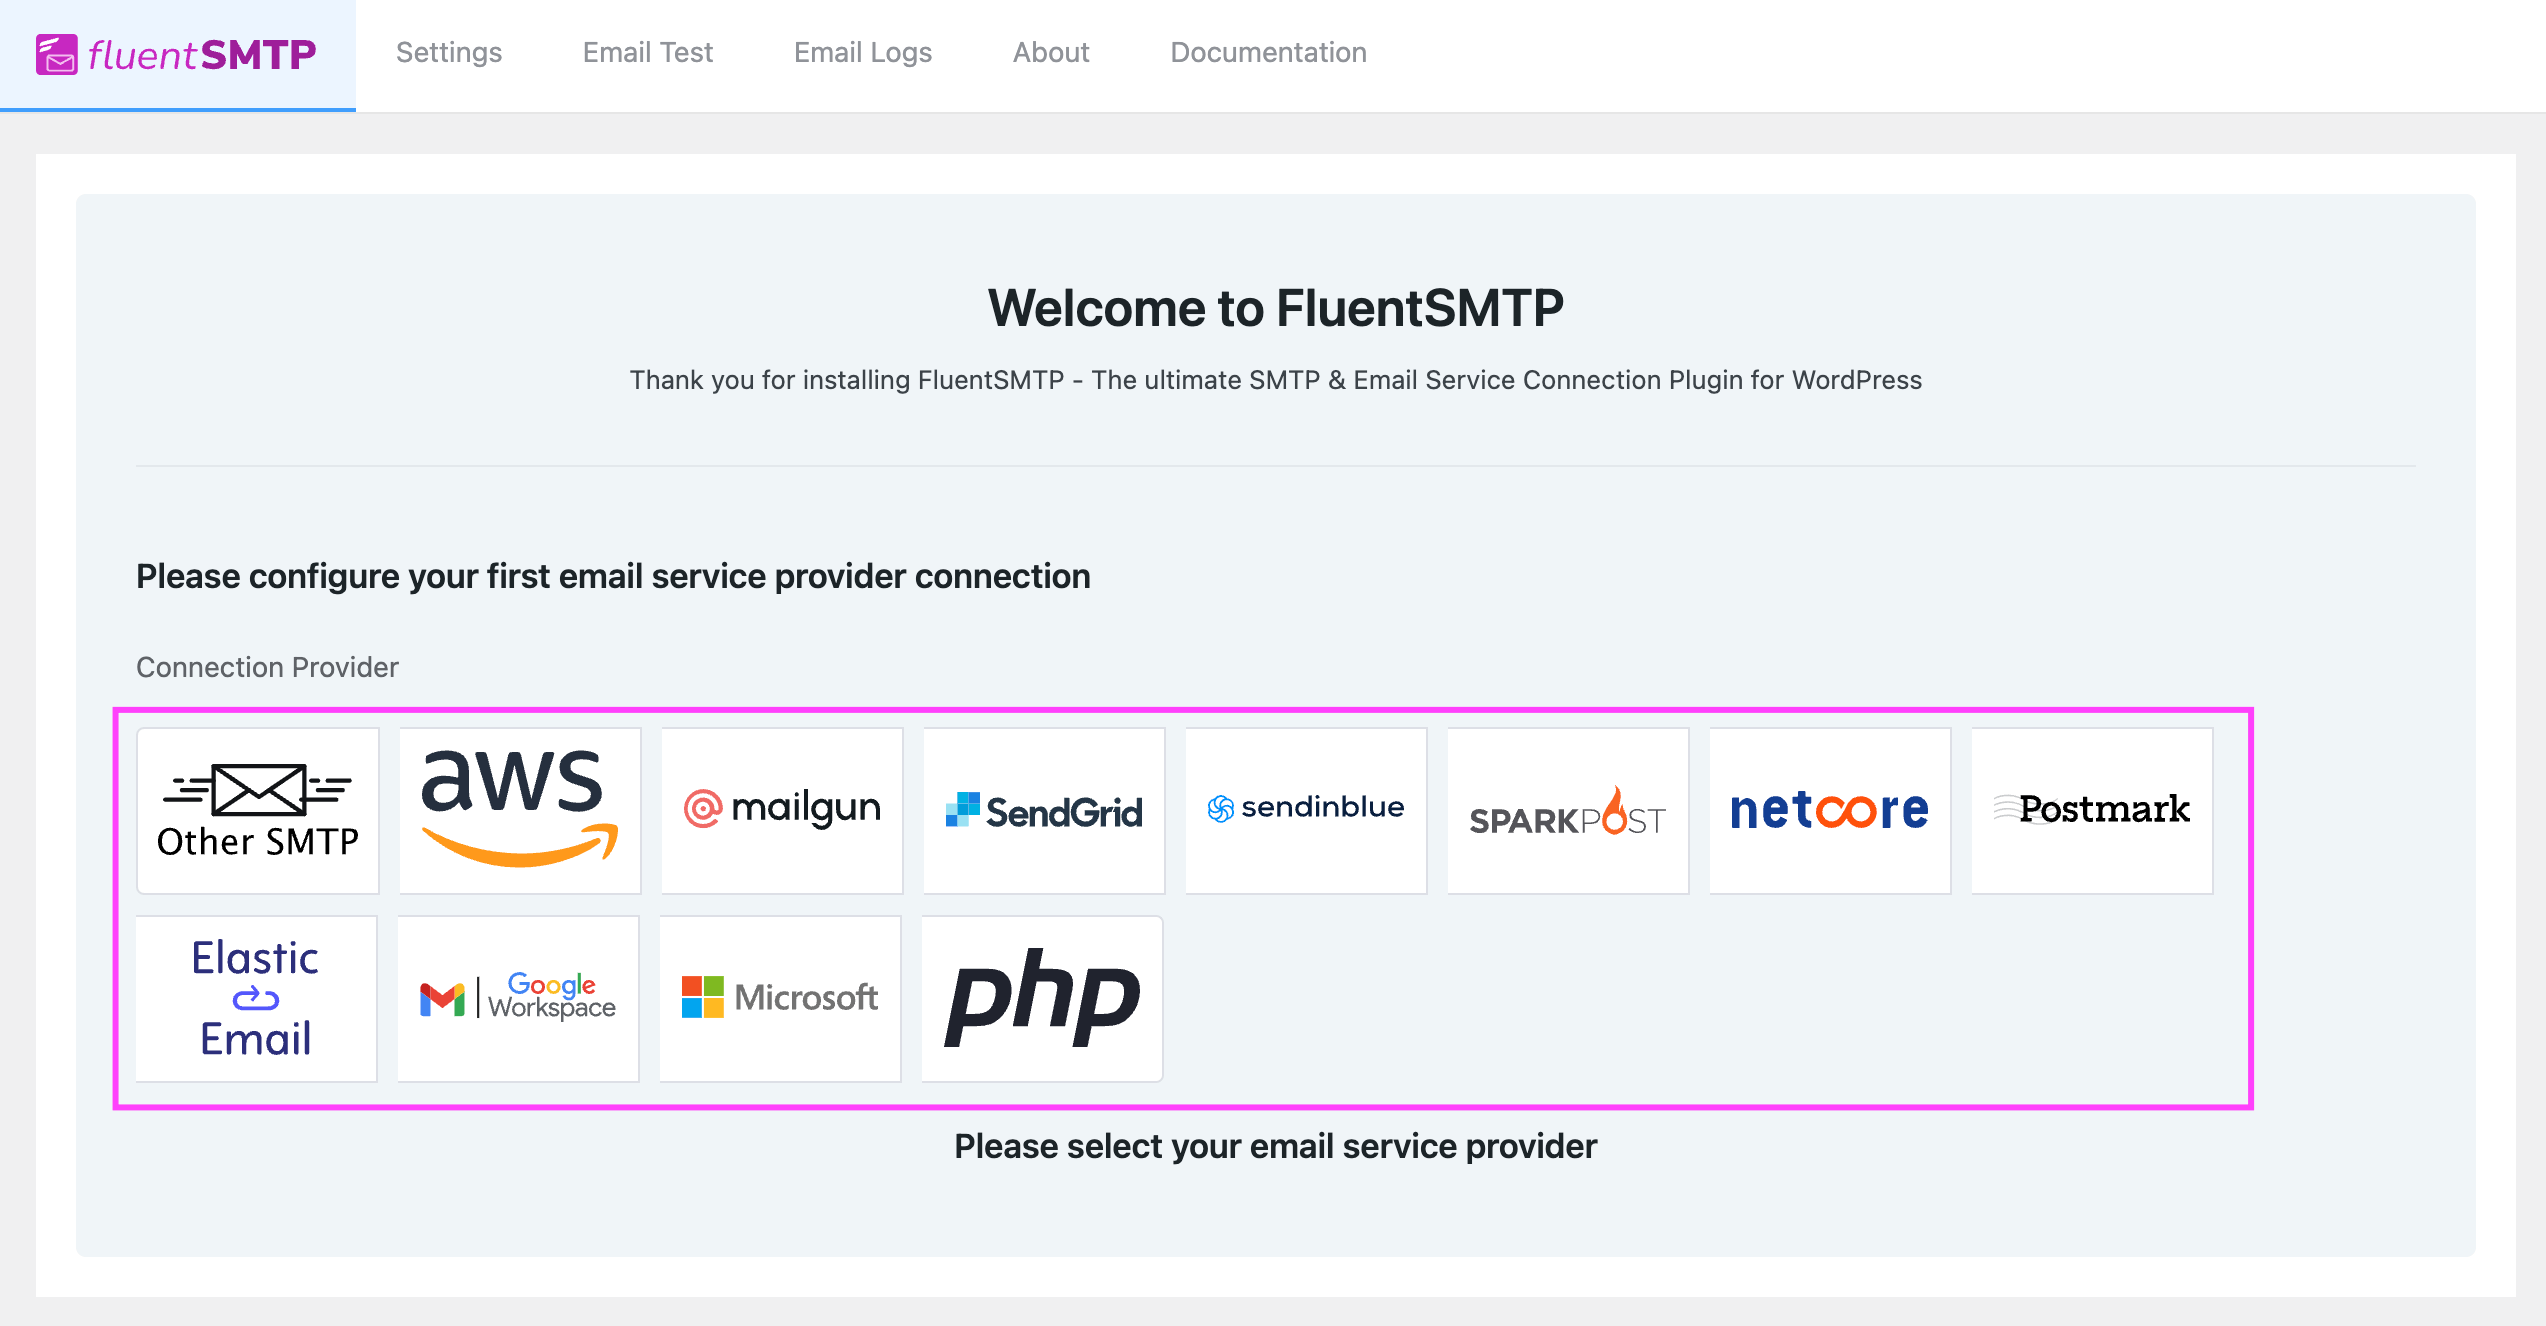
If you haven’t set up any SMTP Connection yet, you will be directed to configure a connection automatically.
Now from your WordPress Dashboard go to Settings ⮕ FluentSMTP
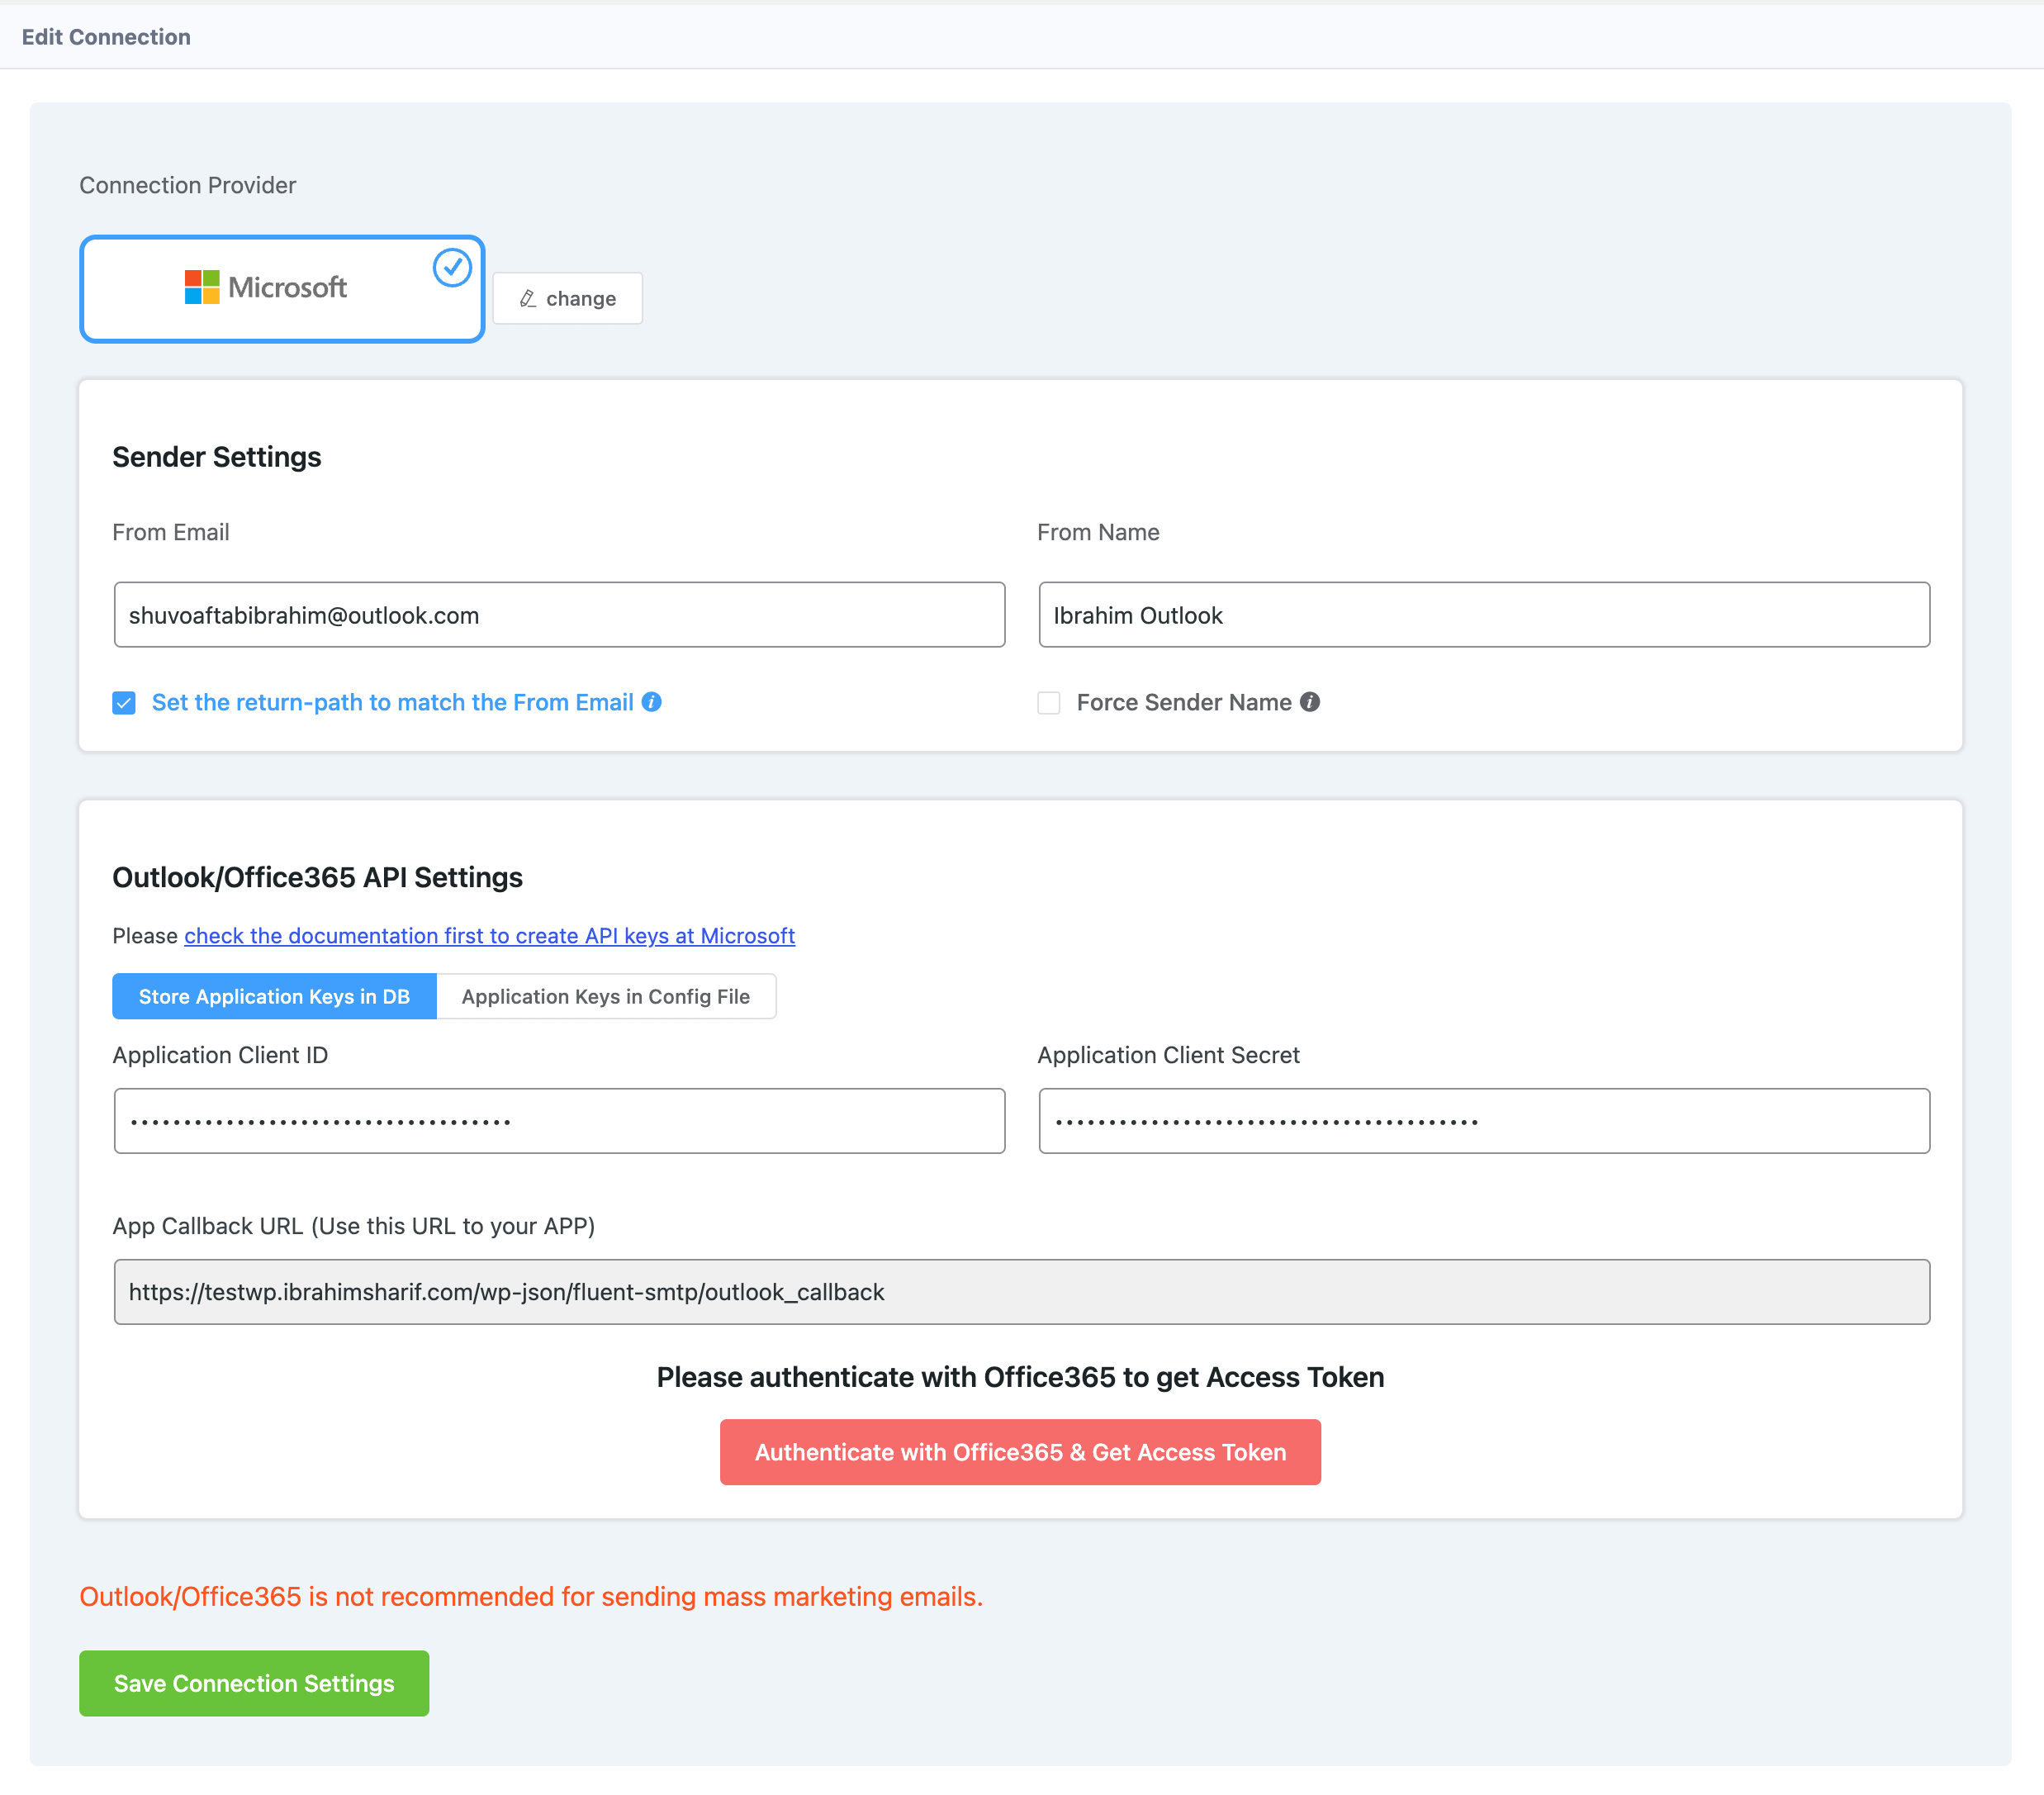
After selecting Microsoft as the mailer, a very simple settings window will open as shown in the screenshot below.
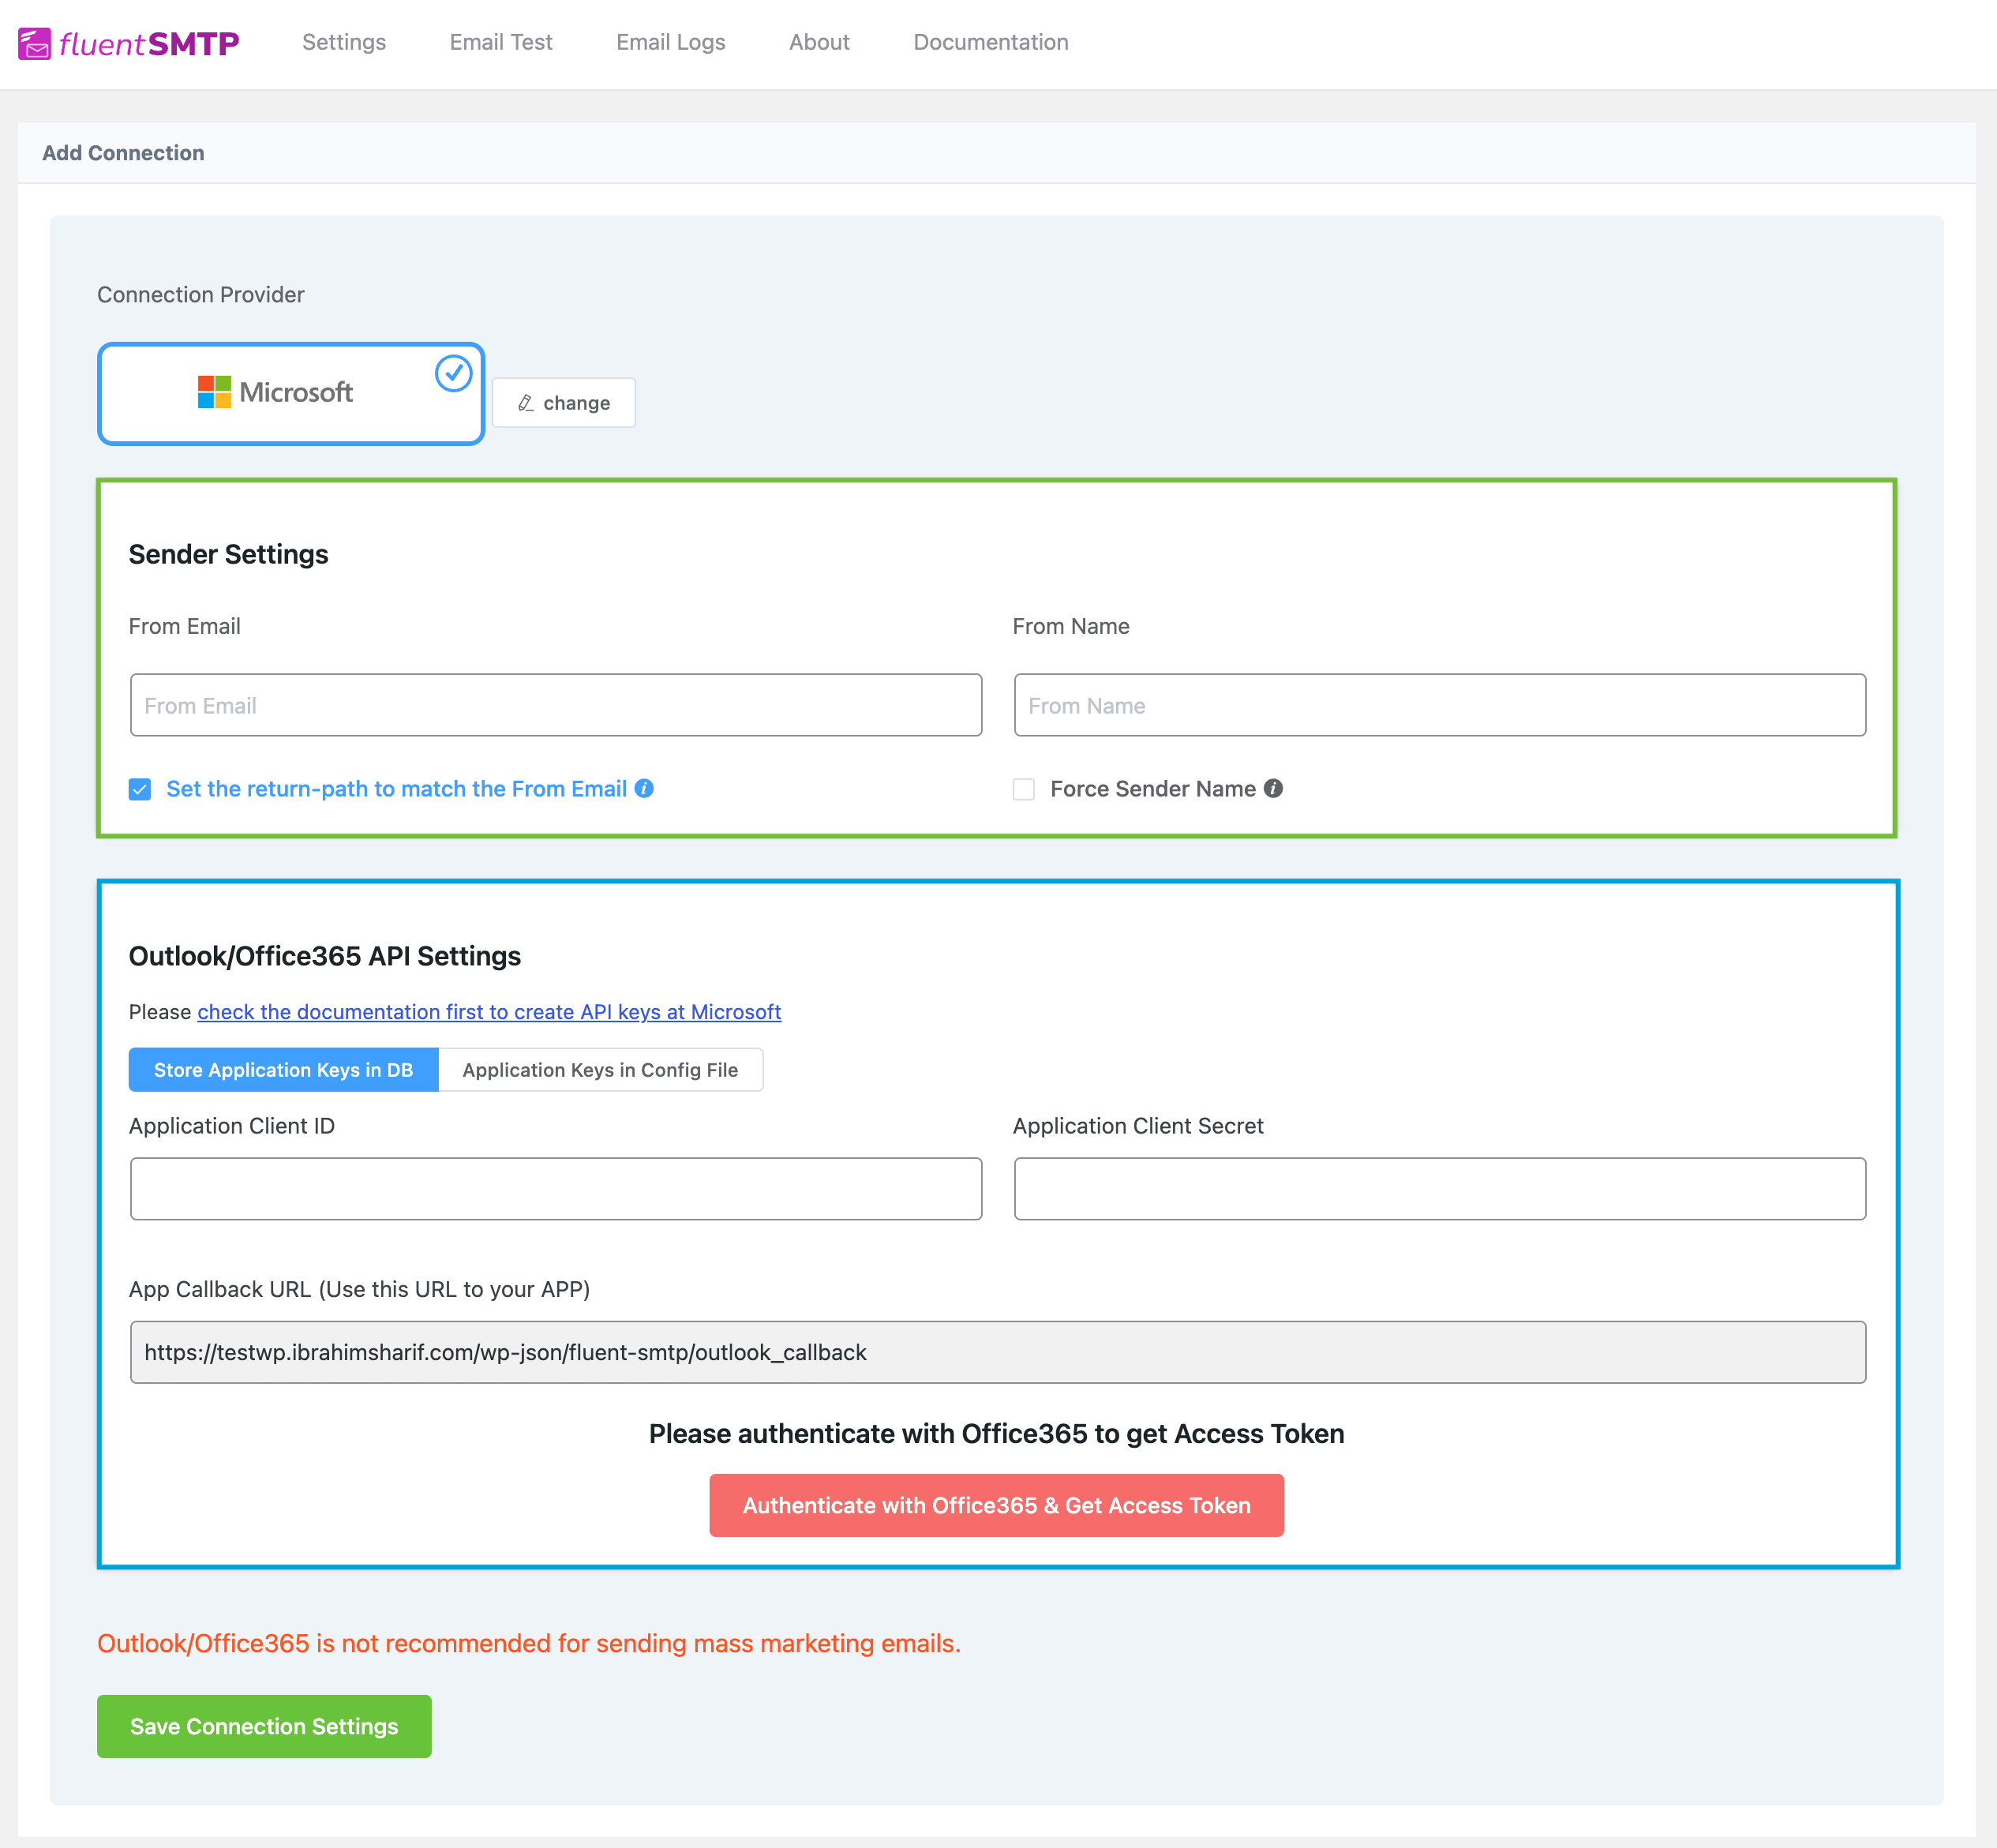
The Application Client ID and Client Secrets are parts of the Microsoft Azure Cloud Application. We need to:
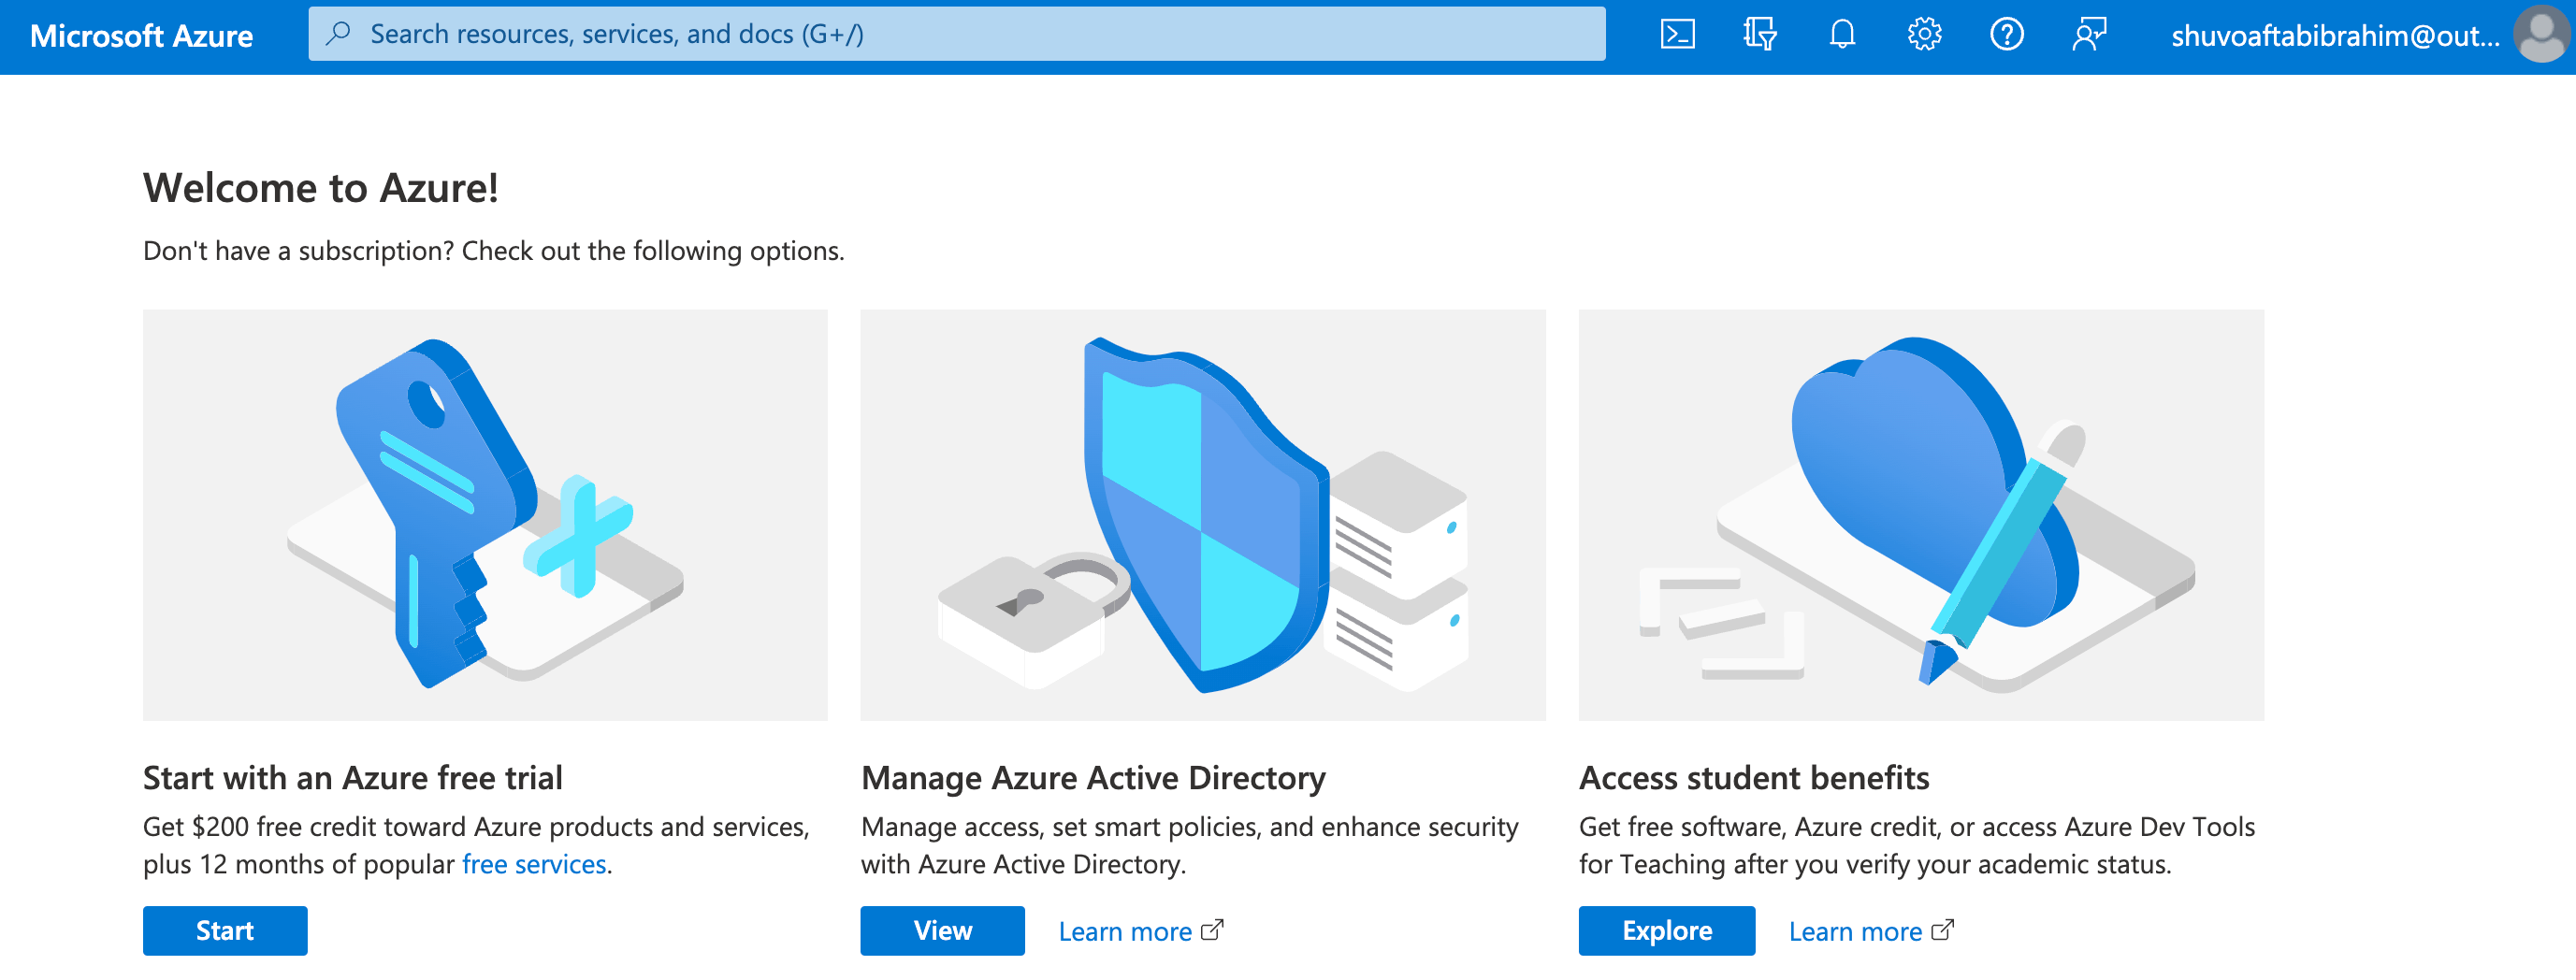
Please go to Microsoft Azure Portal from Here: Home – Microsoft Azure
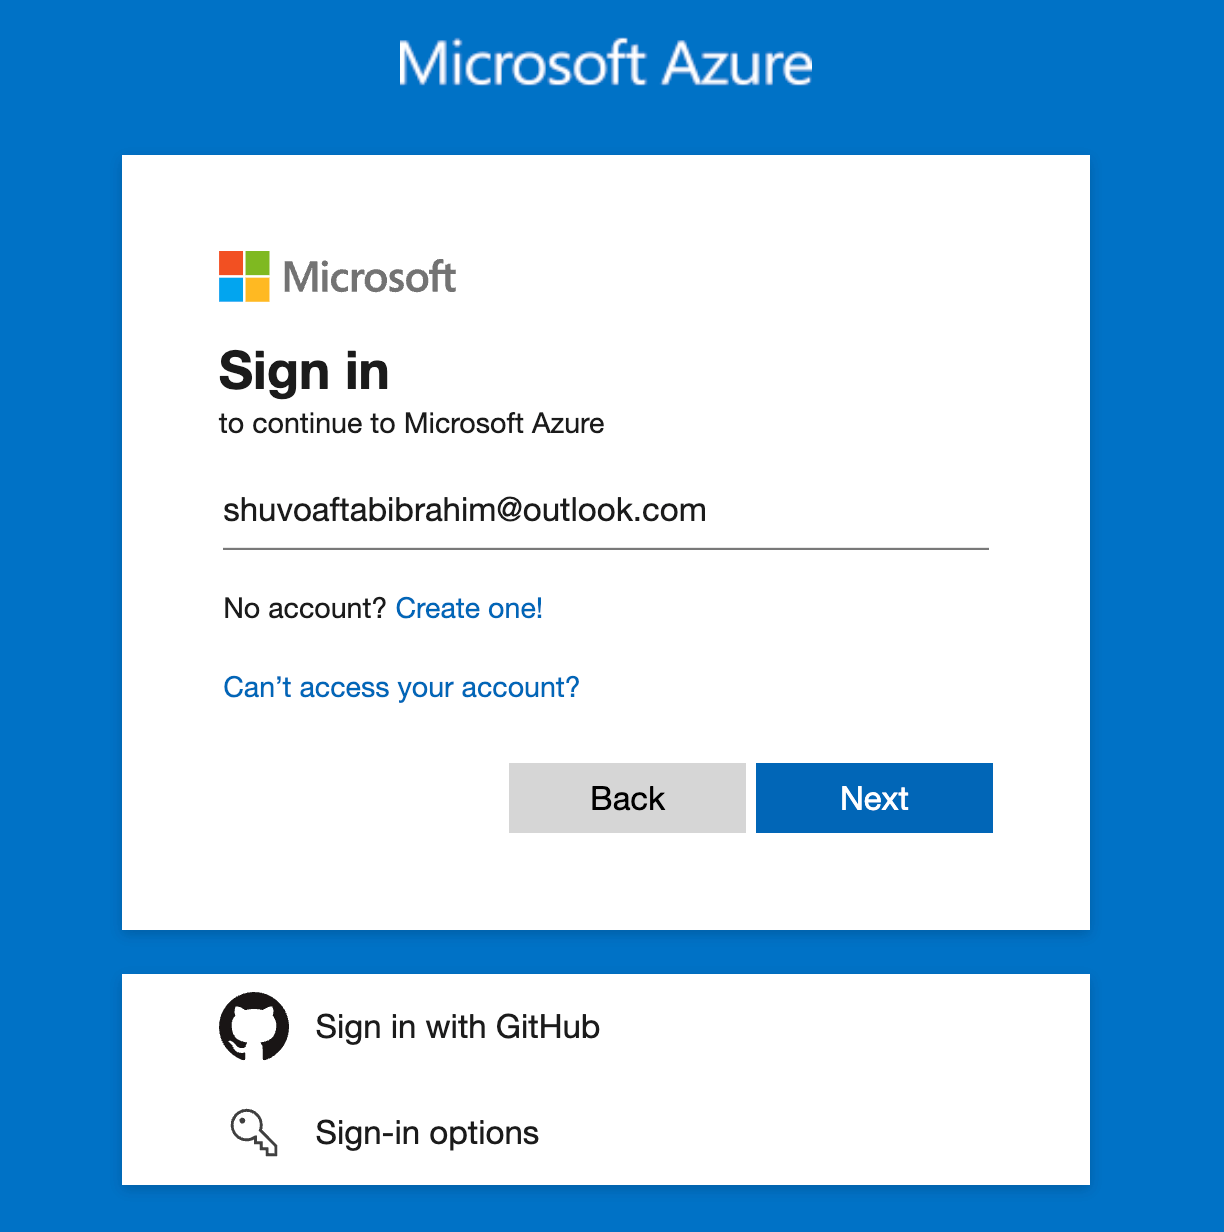
You may be asked to log in to your account using your Outlook or Office365 Account Email as the above screenshot. Once you are logged in you will be redirected to the Azure Portal Home as the below screenshot.
Now from the top search bar, Search for “app registration” and it will automatically suggest a few services and look for the App Registrations as below. Then click on this to go to the App Registration Dashboard.
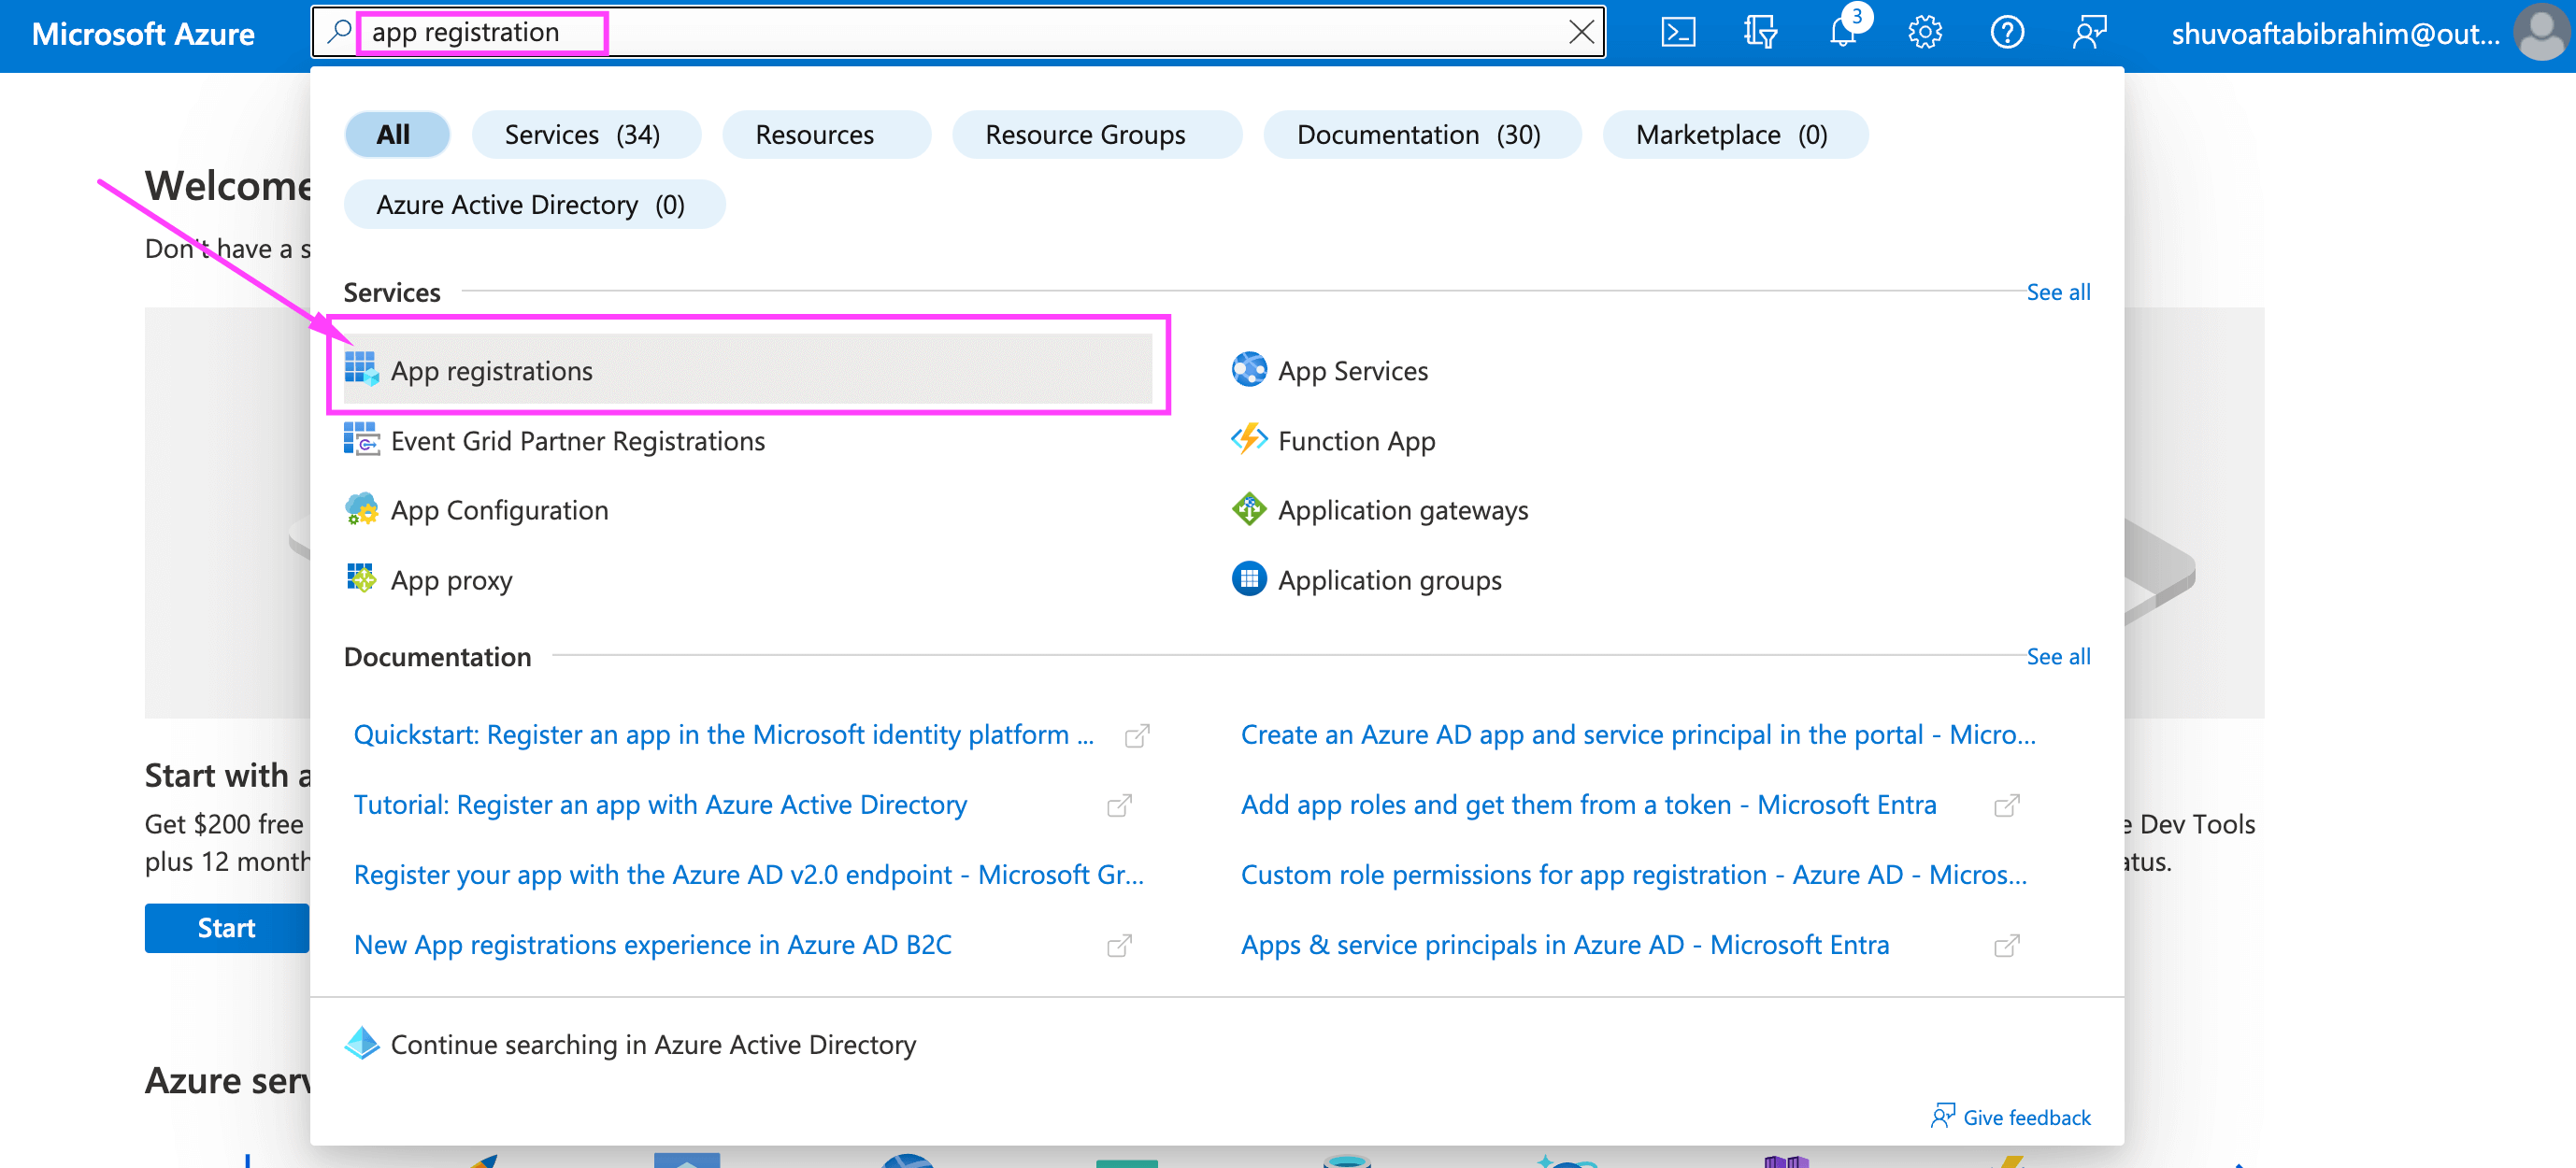
You can also directly go to New APP Registration from here: Register an application – Microsoft Azure and you will be redirected to the below dashboard once you are logged in as per the previous step.
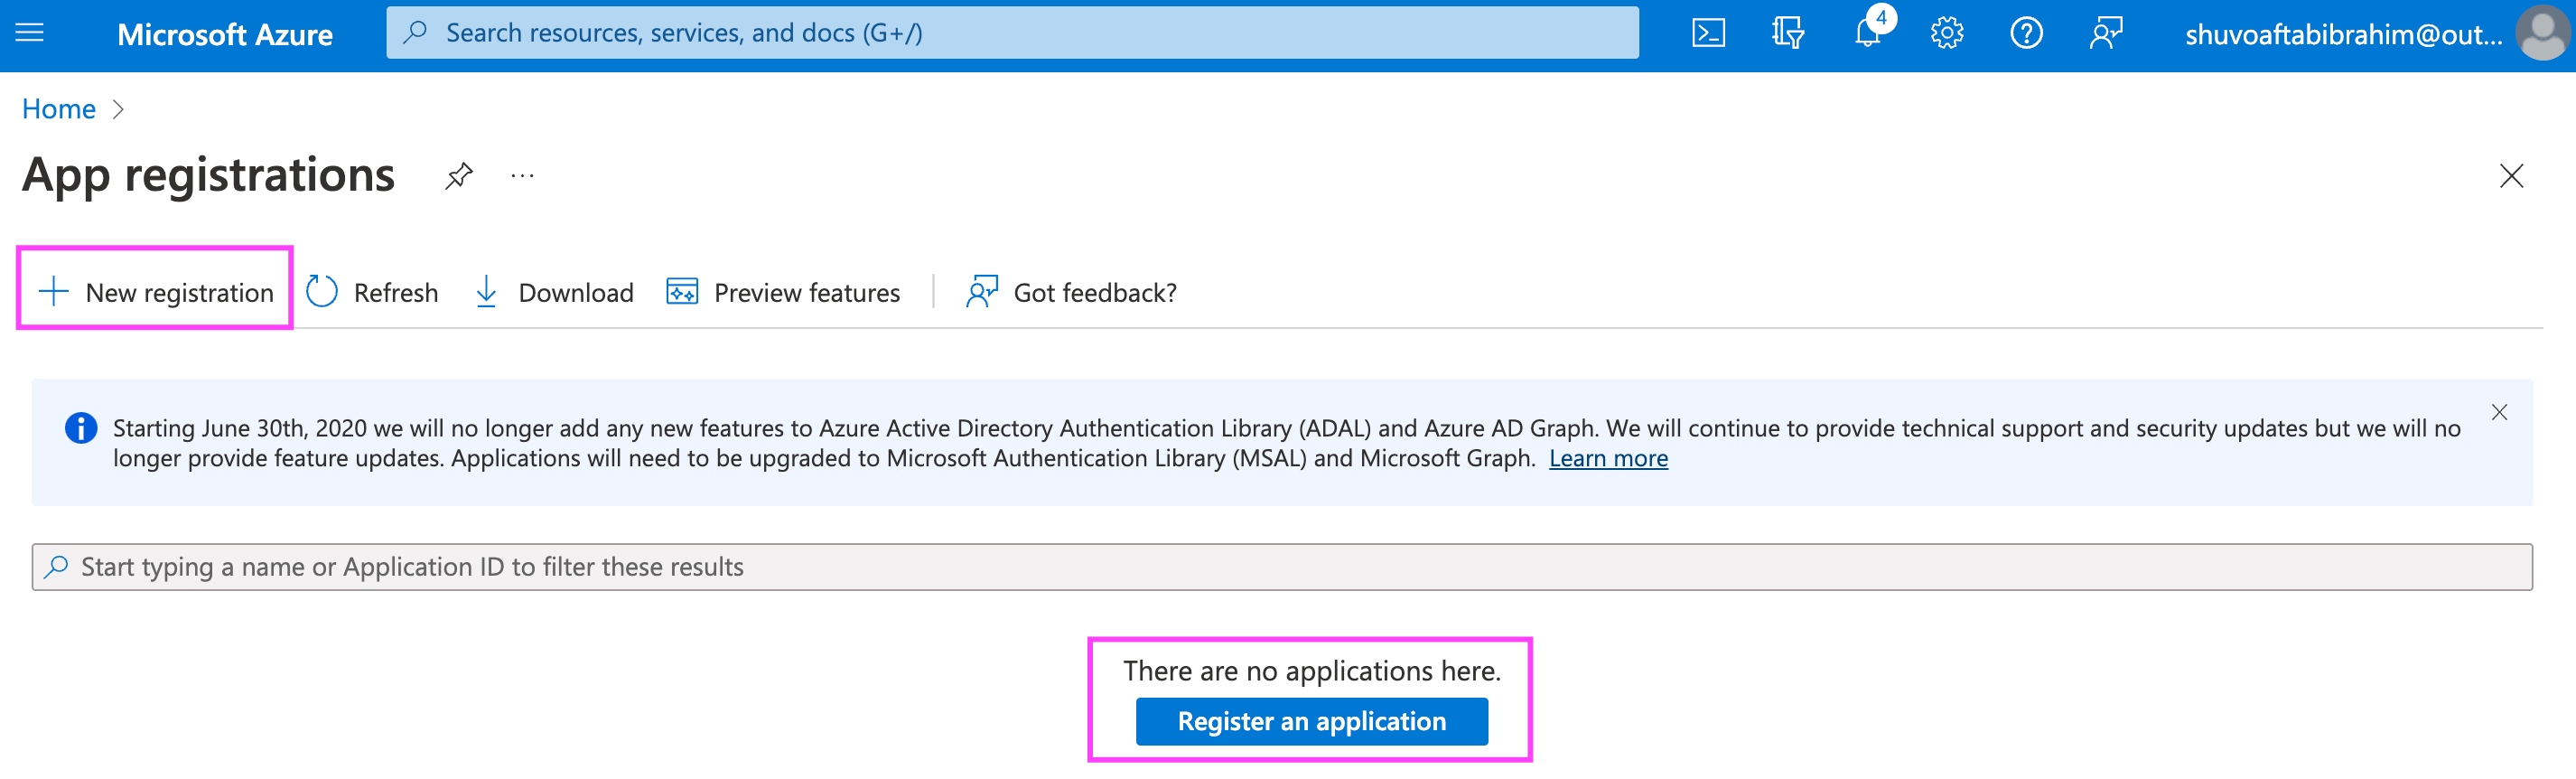
Now, if you do not have any existing Apps Registered then you will see the same dashboard as the above screenshot and can click on the Register an application button from the center.
If you already have an existing App registered, then you will have to click on the + New Registration button on the top section to Register an Azure Application.
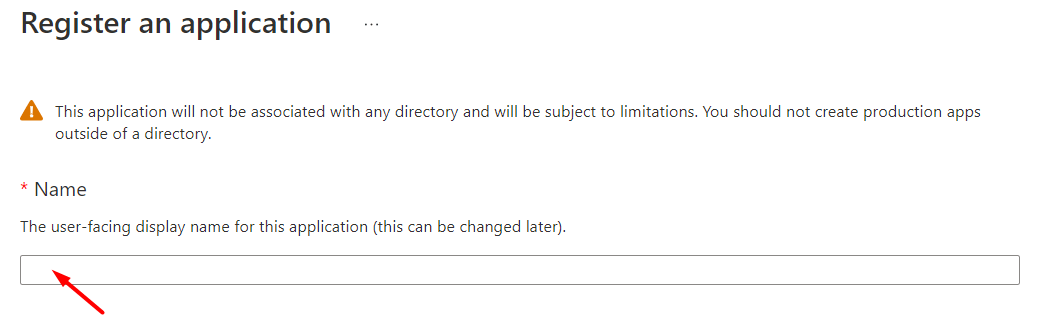
- Name: In the next section, Provide a Name for the Application as an Identifier.
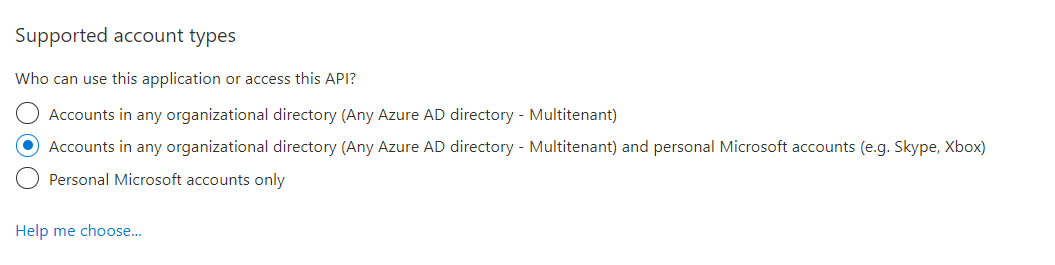
- Supported Application Type: This must be “Accounts in any organizational directory (Any Azure AD directory – Multitenant) and personal Microsoft accounts (e.g. Skype, Xbox)” to let FluentSMTP get authorized in the later steps and send emails from your Microsoft Account.
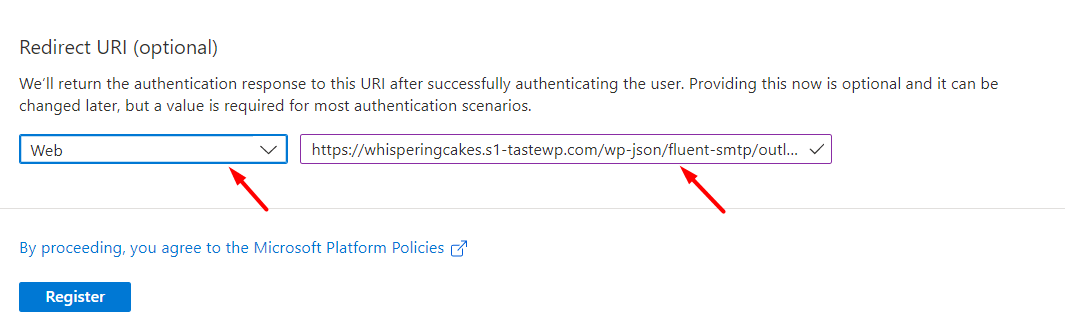
- Redirect URI: The Platform should be of Web type and the Redirect URI is the App Callback URL collected from the earlier step provided by the FluentSMTP plugin on your website.
The Redirect URI is in the following format:
https://YourDomain.com/wp-json/fluent-smtp/outlook_callback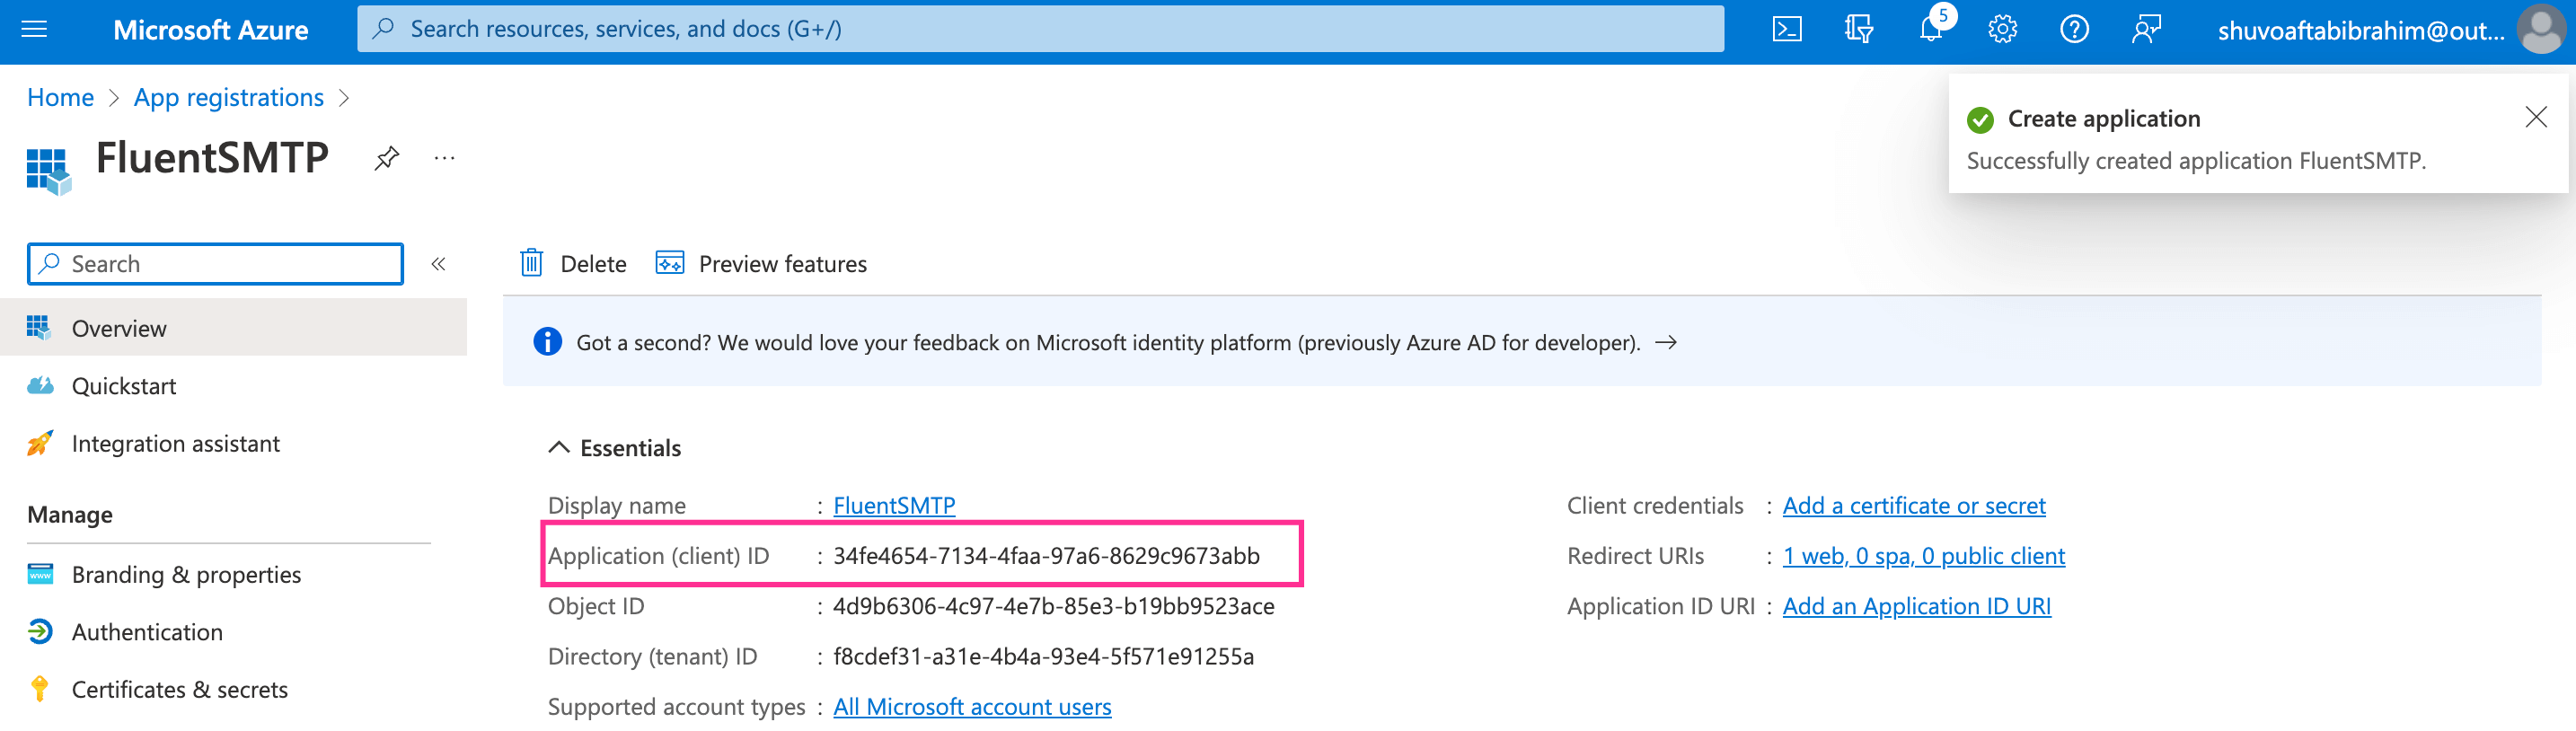
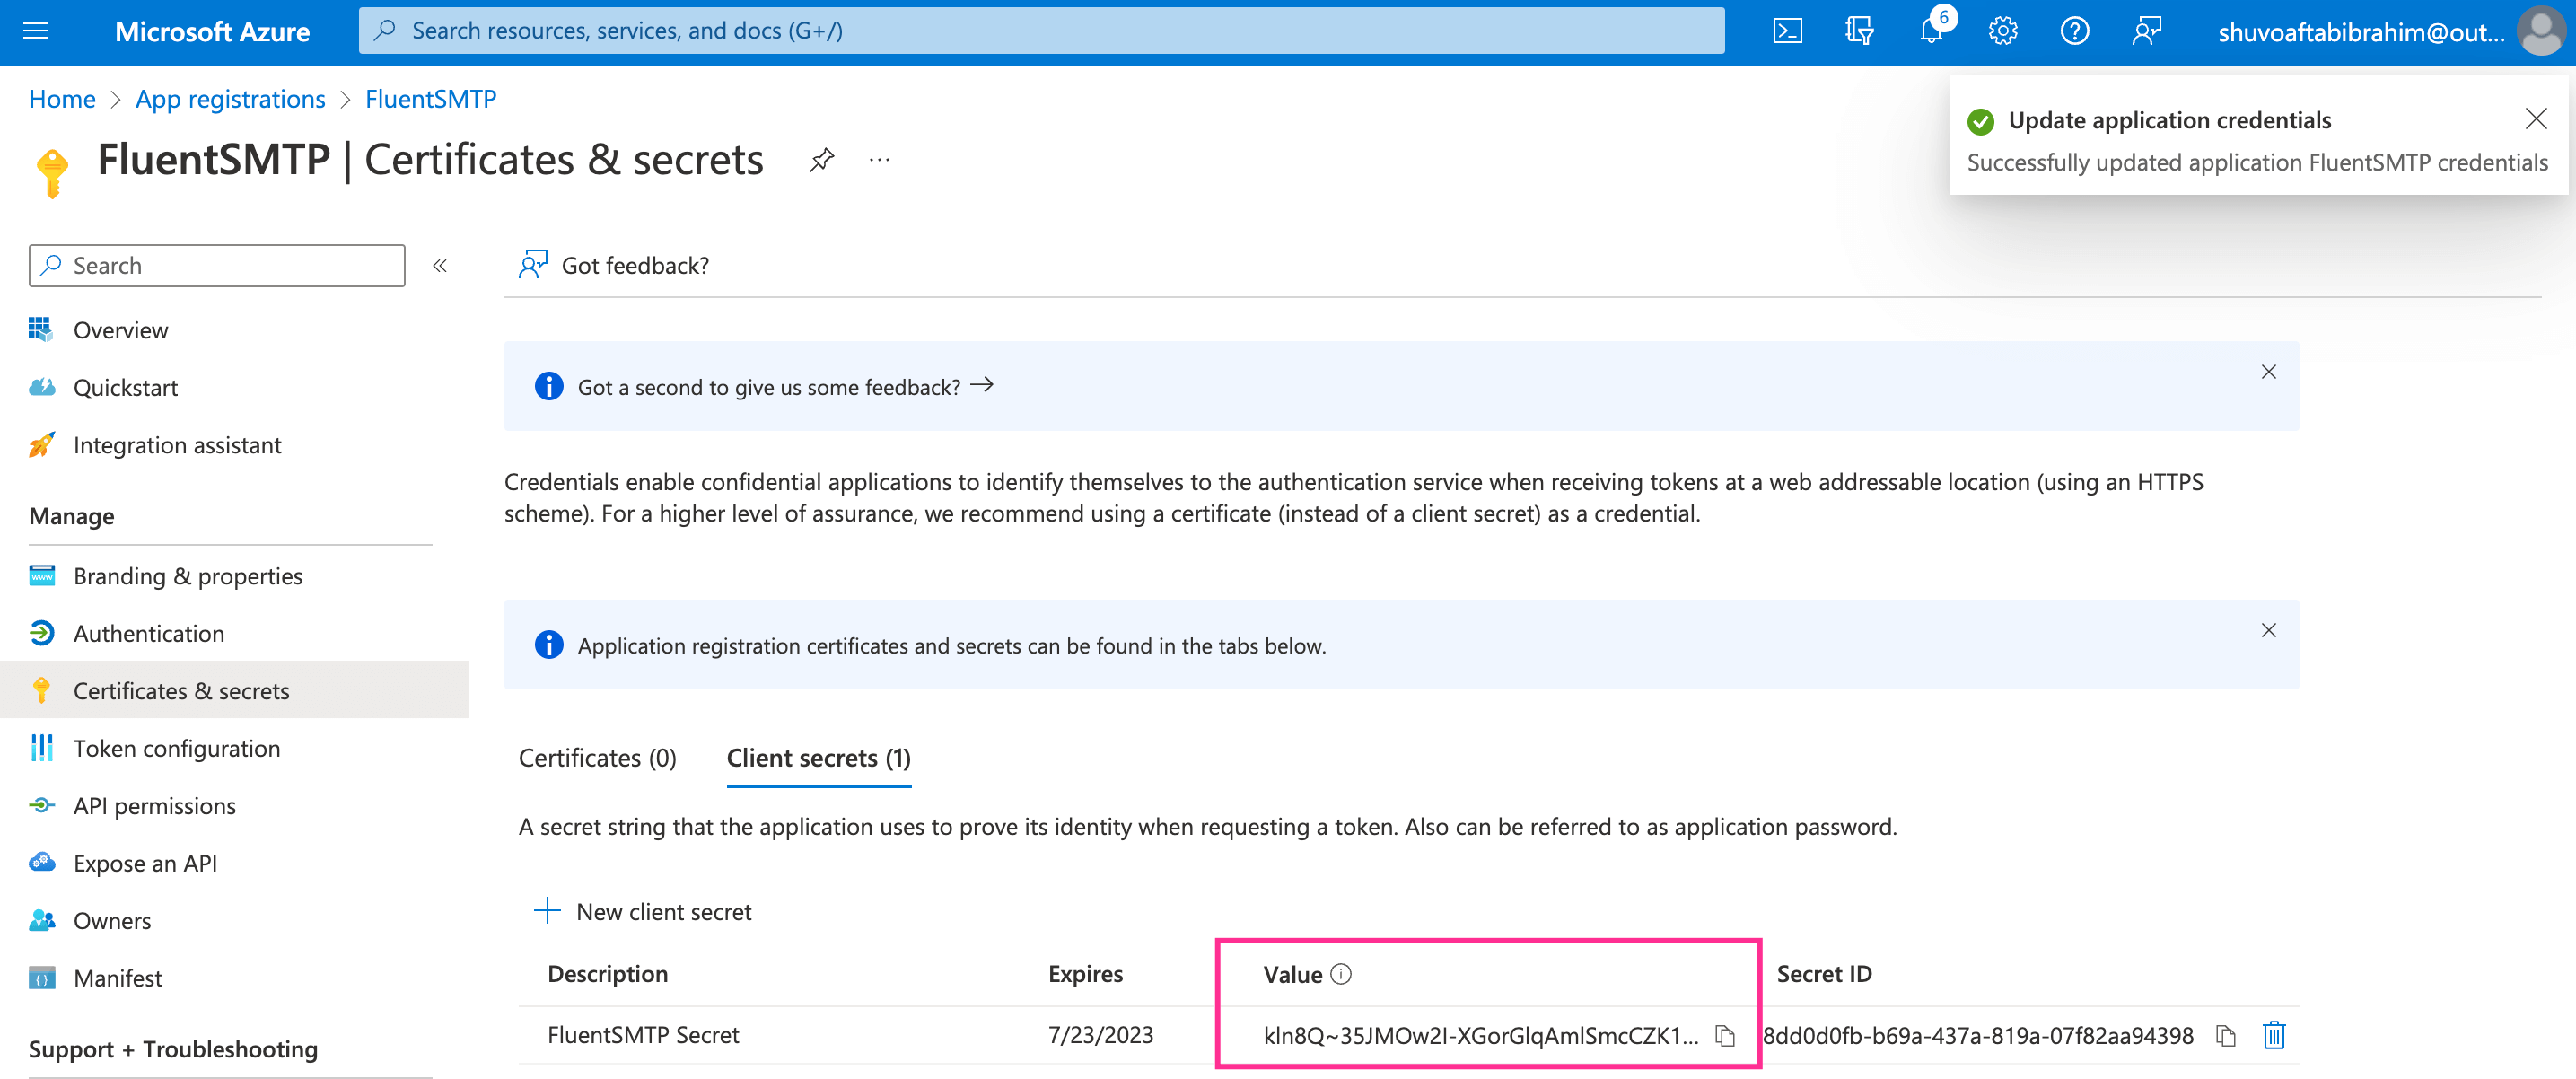
Now we need to create and store the Client Secret Value. To do this, please go to Certificates & Secrets ⮕ + New Client Secret
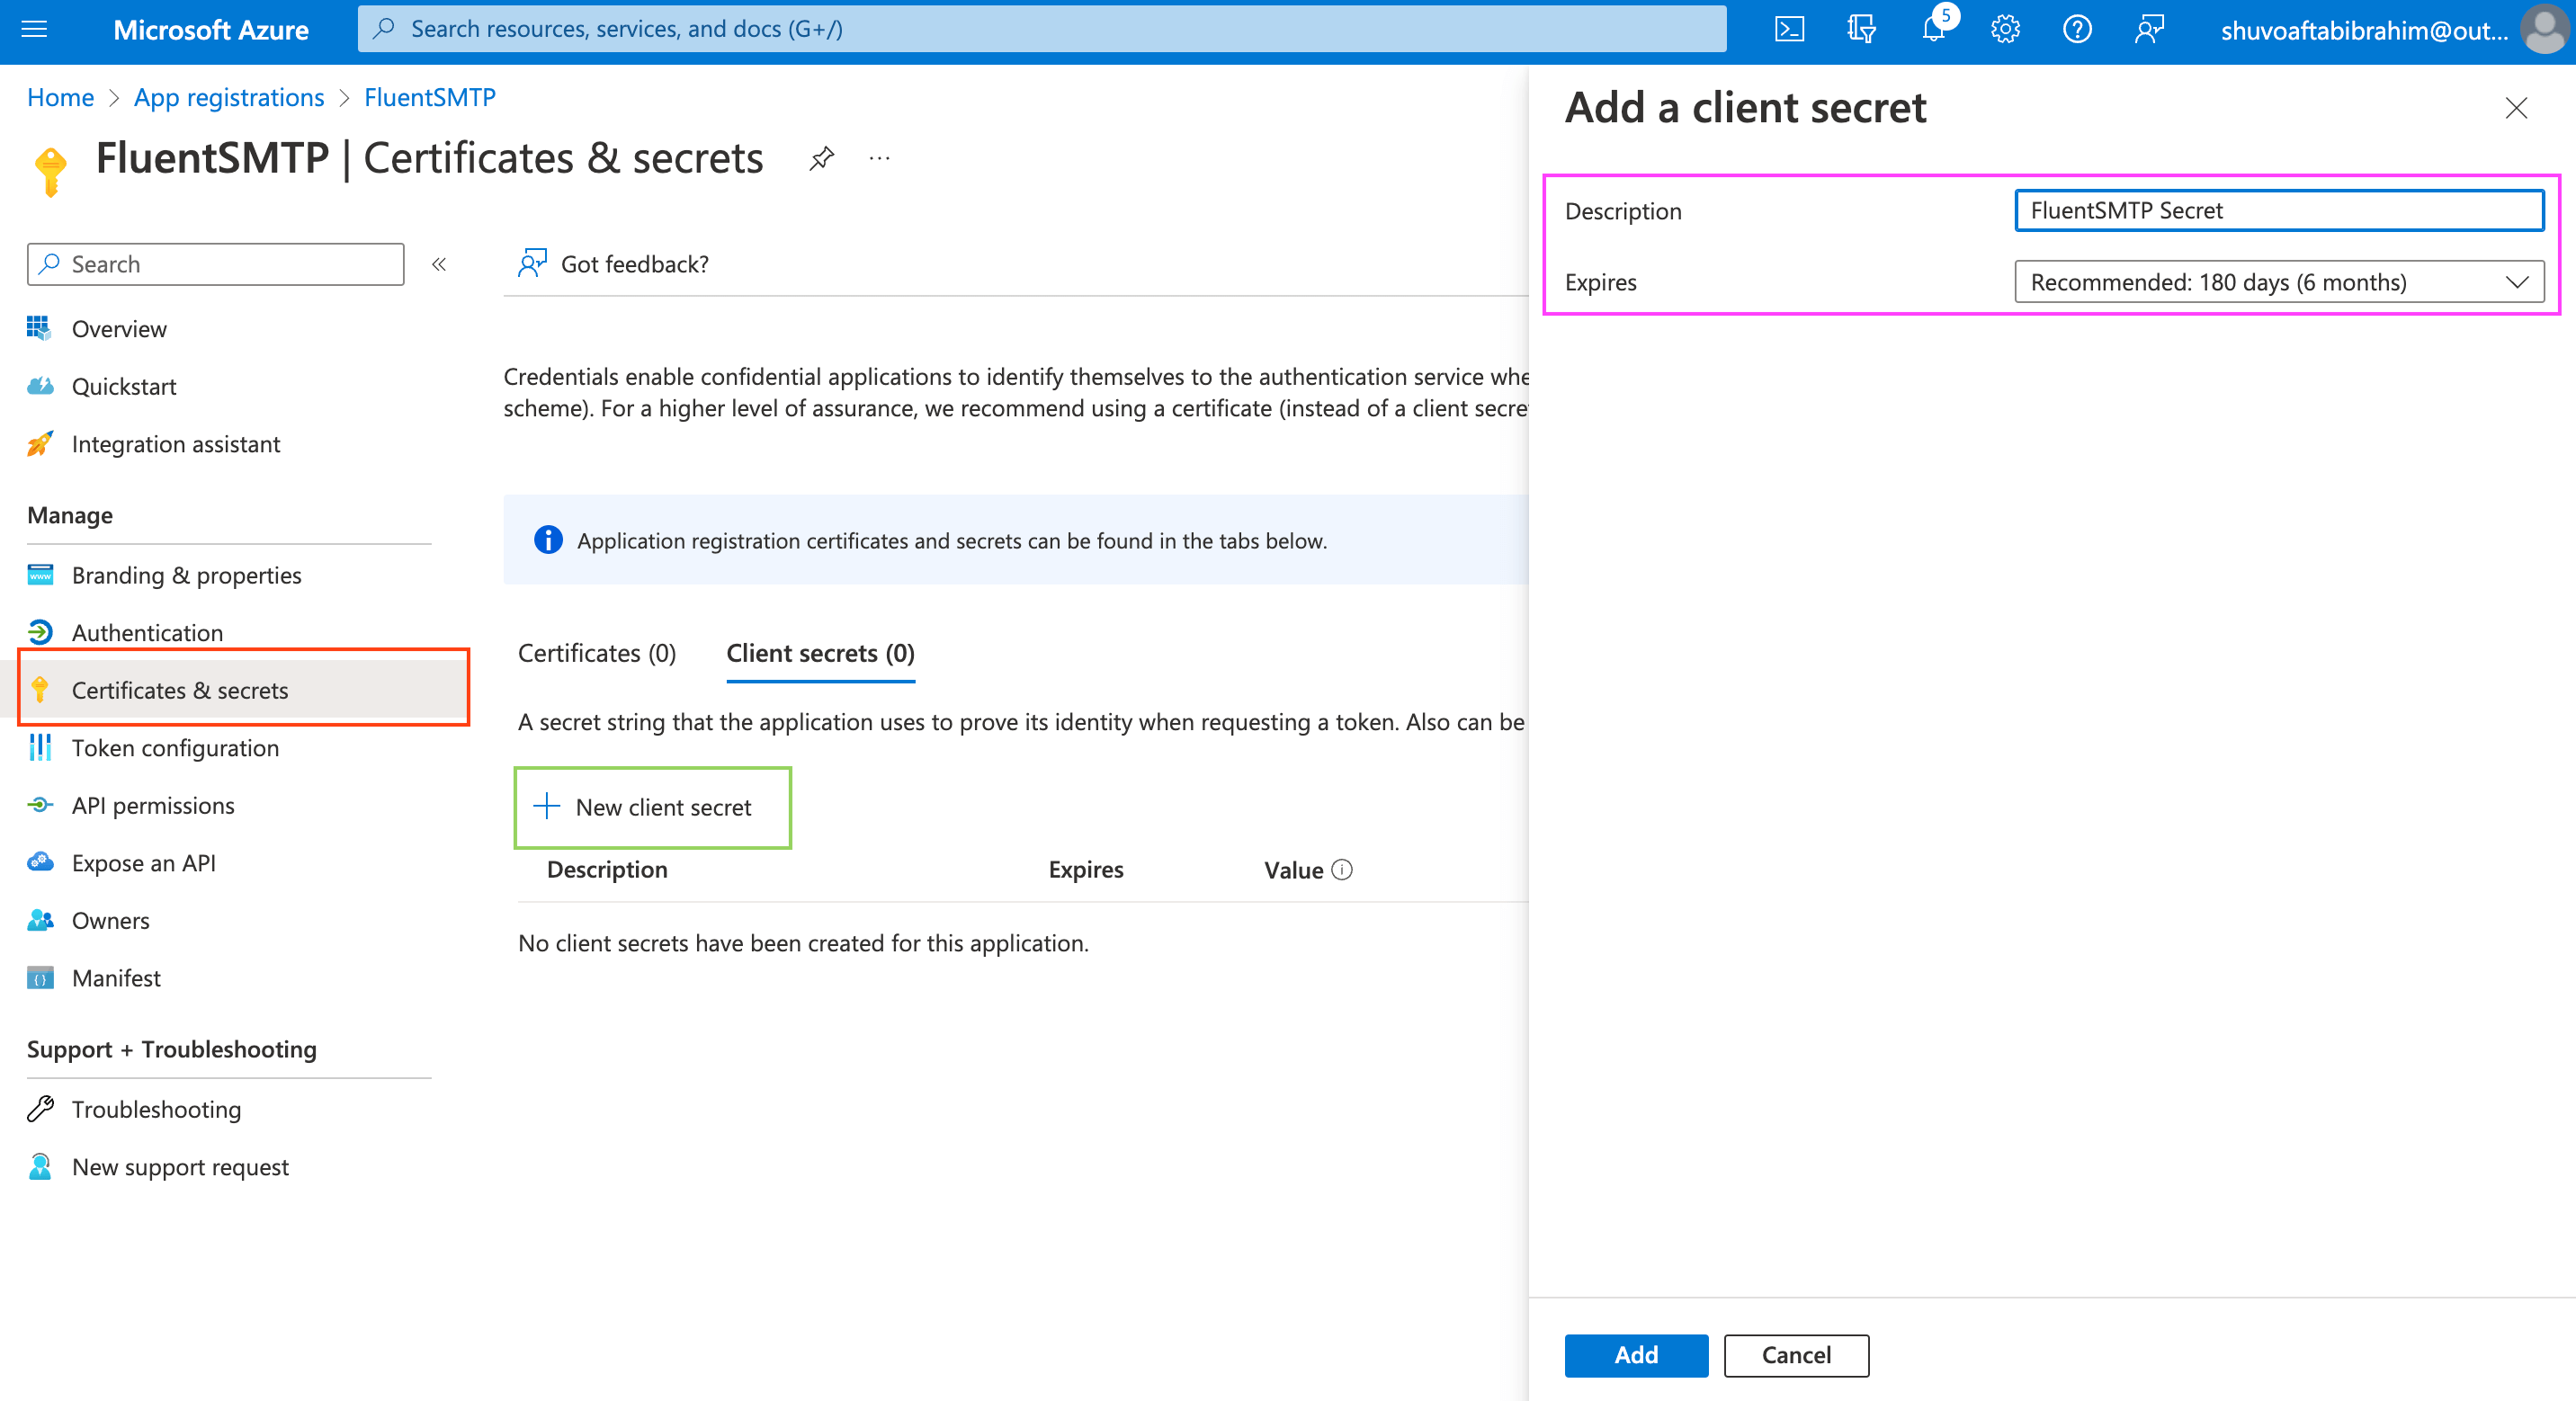
Once you are done please click on the Add button from the bottom and it will redirect you to Client Secret Overview and a Client Secret Value will be generated for you. Please copy and store this Client Secret Value as this will not be visible again once you leave this page.
FluentSMTP Microsoft Settings #
We are done obtaining the Application Client ID and Client Secret Value. After providing them in the FluentSMTP Settings, please click on the “Authenticate with Office365 & Get Access Token” button.
Application Details #
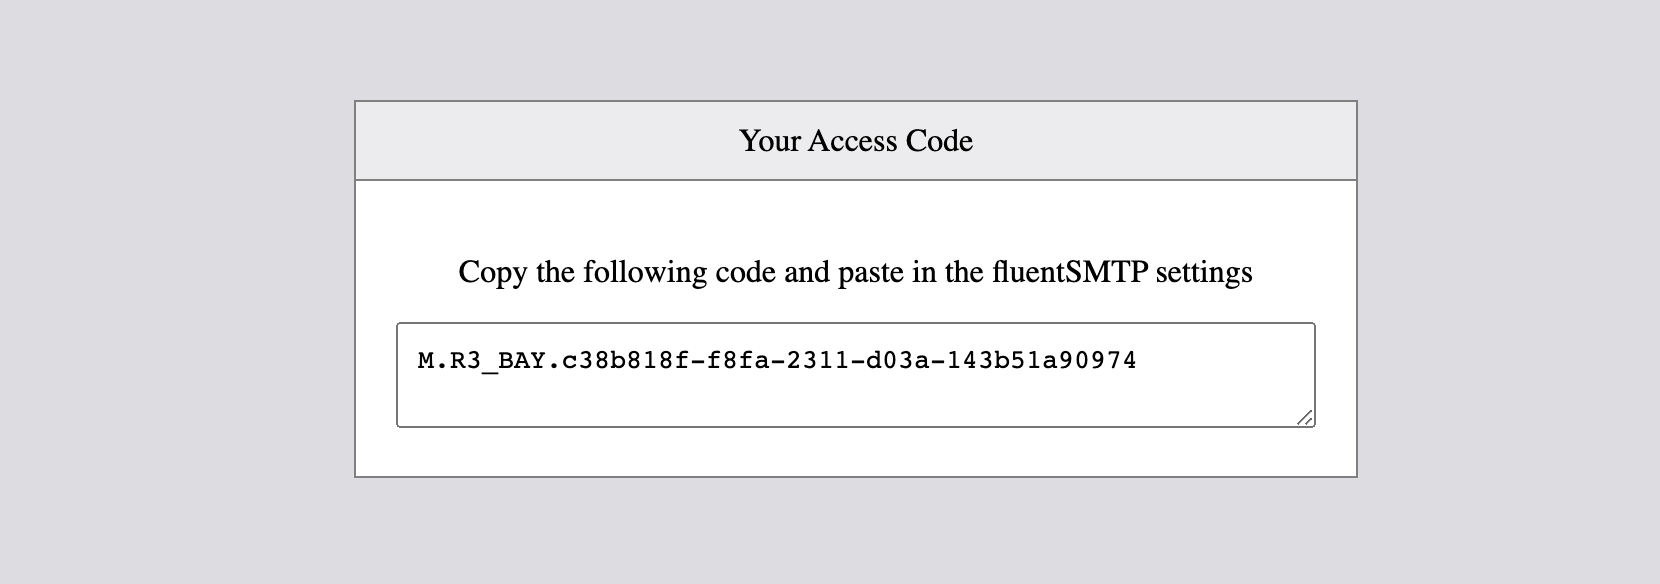
Token Generation #
Then you will be redirected to the Token Generation Page from where we need to copy and store the generated Token to use in the FluentSMTP Settings as below:
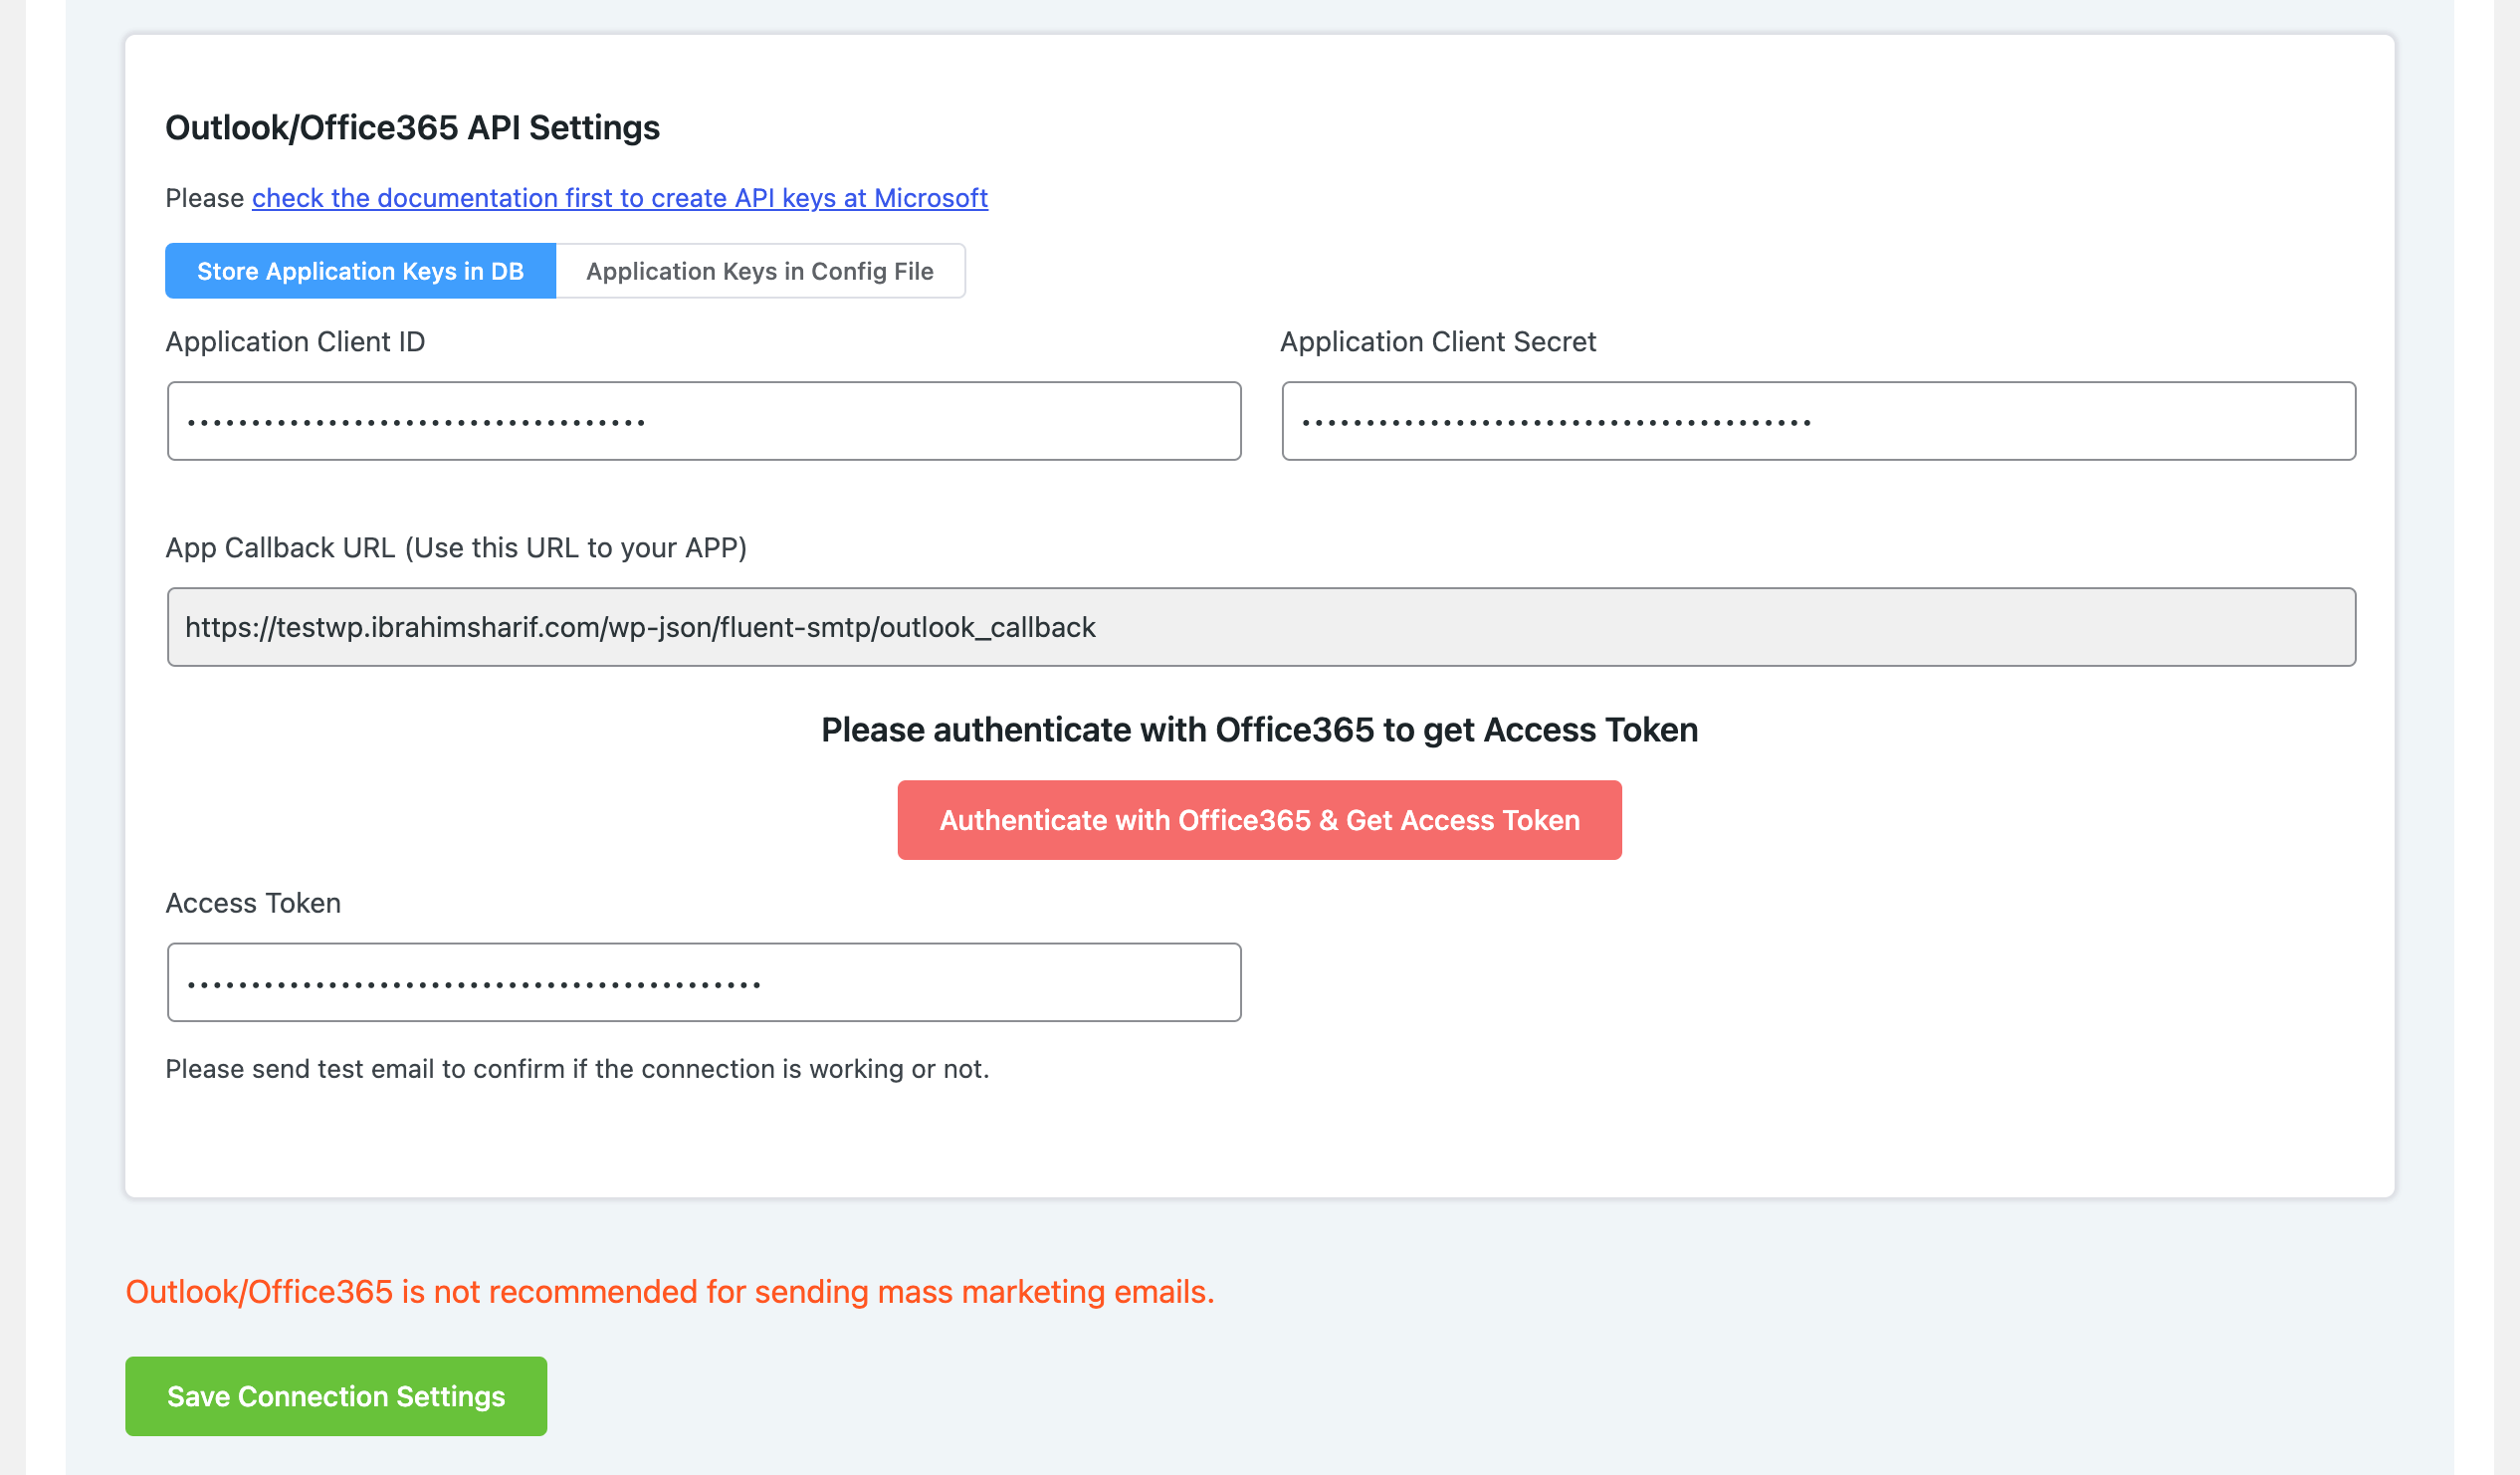
Save Microsoft Connection Settings #
Now provide the earlier generated Token in the FluentSMTP Settings and finally click on the Save Connection Settings button.
That’s all about Configuring FluentSMTP with Microsoft Outlook, Hotmail, or Office365 Emails to send emails from the WordPress website. Additionally, it is recommended to Send a test email, Test Email Confirmation, and then Confirm Test Email Deliverability.


Okay, this help document needs to be rewritten slightly. There are steps that are unclear what need to be done, like what is the Application Client ID and which value to use in the Cpplication Client Secret.
Hello!
Used FluentSMTP to solve my problem of everything being marked as spam (thank you)
Have 2 contact forms on my website (we’re an NPO, they each route to a different place) and I’d like to make my “from” email be the email that the contact form is getting sent to – both emails are in the same domain. Is this possible to do?
Hi Team,
Great article, but I have a problem I am needing to be resovled…When I try to send the test email, I receive this email in my Outlook inbox:
“Delivery has failed to these recipients or groups:
‘[email protected]’
Your message wasn’t delivered because the recipient’s email provider rejected it.”
Can you please help, as we need the SMTP live ASAP?
Thank you in advance!
I made all the settings and after that this is the result:
Token Validity: Invalid. Please re-authenticate
Can you tell how to resolve this problem?
Hi,
I followed the steps. However, when I try send a test email, It prompts me an error message “Unauthorized”. I’m using an Microsoft 365 email. Why does it happen?
im getting a 404 when i click the button to authenticate with office 365. what am i doing wrong. followed instructions perfectly.
Per the March 23 comment
I also performed all for the steps and on test email send I receive
“Forbidden” on plugin result page. Any new guidance on how to remedy?
Confusing as a prior test deployment to another office365 account worked as documented.
Hi, thanks for your great content, i have a question, why Token Validity just Valid for (70m)?
I’ve followed the instructions for MS356 and get ‘Unauthorized’ when I try running the Email Test. I’ve followed the procedure a few times to check and get the same each time.
The authorisation code shown in the screenshots is quite short, but the one I get from MS is VERY long – I don’t know if that’s important?
I have done all, but it keeps showing forbiden
Hi, I am just getting a blank access token when I try to authenticate. What can I do to resolve this issue?
i tried it says its authenticated but I get forbidden when I try to send an email
Hello, I get the forbidden message too! How can I resolve this? Thanks.
Hi,
I have a few questions:
– does Fluent automatically generate a new token when a client secret expires (default 6 months)?
– will php mailer be used as fallback automatically when a problem occurred with the default connection? (and send a notification the the admin email?)
OK I had wrongly put the Client secret value you circled in red instead of Application CLient ID.
But it still shouts ‘Unauthorized’ after performing email test…
AADSTS700016: Application with identifier was not found in the directory This can happen if the application has not been installed by the administrator of the tenant or consented to by any user in the tenant. You may have sent your authentication request to the wrong tenant.
Who is the tenant etc?
After clicking Get Access Token despite being even logged in to Office 365 as my From admin account it shouts:
Sorry, but we’re having trouble with signing you in.
AADSTS900561: The endpoint only accepts POST requests. Received a GET request.
I have this error when i click on the ‘Please authenticate with Office365 to get Access Token’
Request Id: 3aac76ce-feee-469a-89f1-6625c691b700
Correlation Id: da875e49-2b35-4b71-9c39-cdcd1ba4a7a1
Timestamp: 2023-05-06T15:37:45Z
Message: AADSTS700016: Application with identifier ‘lqd8Q~RvMC0B2LL2Pr.Mjgy9YGEvHcB4Rf5BBdda’ was not found in the directory ‘my site’. This can happen if the application has not been installed by the administrator of the tenant or consented to by any user in the tenant. You may have sent your authentication request to the wrong tenant.
Can the “From” email be the same as the “Destination” email.
For example, can I use [email protected] for both the sending and receipent on these forms?
I get a Unauthorized error when i try the Email Test Tab.
Enabling security defaults on the domain causes this setup to not be able send any emails. What is the solution when security defaults must be enabled on 365
Hello, could you please clarify why your screenshots say “Outlook/Office 365 is not recommended for sending mass marketing emails” and what is considered “mass”?
Thanks
Hi Michelle, When we say “mass”, we essentially mean a bulk amount of marketing emails. Office 365 isn’t optimized for sending a large number of marketing emails. You can use providers like Amazon SES, Mailgun, Sendgrid, etc.
Same here. I’ll contact support.
We followed the exact steps, connection was created but trying to send a test mail gives us a simple “not found” error
Hi guys,
I got the same error as “Forbidden”.
Also I would not sure where I can find “wp-config.php”
Could you please guide me where I need to check for “wp-config.php”?
Thanks.
Hi
I’ve done all the steps but when I test my connection it says “Forbidden”.
Regards
Hi Mark, please contact our support team so that they can take a look.
How did you solved this? Same here.
Same thing happened for me. Spent too much time on this., Will use an alternative unless you have a quick fix.
I’m having the same issue. Did you find a fix?
how would you configure an outlook client using fluent SMTP instead of Microsoft as I depend on using outlook for leads and at this moment in time my leads are landing in the Fluent entries and not going to my outlook clients