
Importance of SMTP Delivery Protocol #
WordPress uses the PHP mail() function to send all emails which aren’t configured properly with many web hosting providers even many hosting providers also disabled it entirely to avoid abusive use like almost all Cloud Providers such as Amazon EC2 & Lightsail Instances, Google Cloud Platform, Oracle Cloud Servers, etc. In both cases, WordPress emails will not be delivered to users.
In this tutorial, we will be configuring such a Direct SMTP-based connection with the “Other SMTP” method to send out emails from our domain.
Obtain SMTP Credentials #
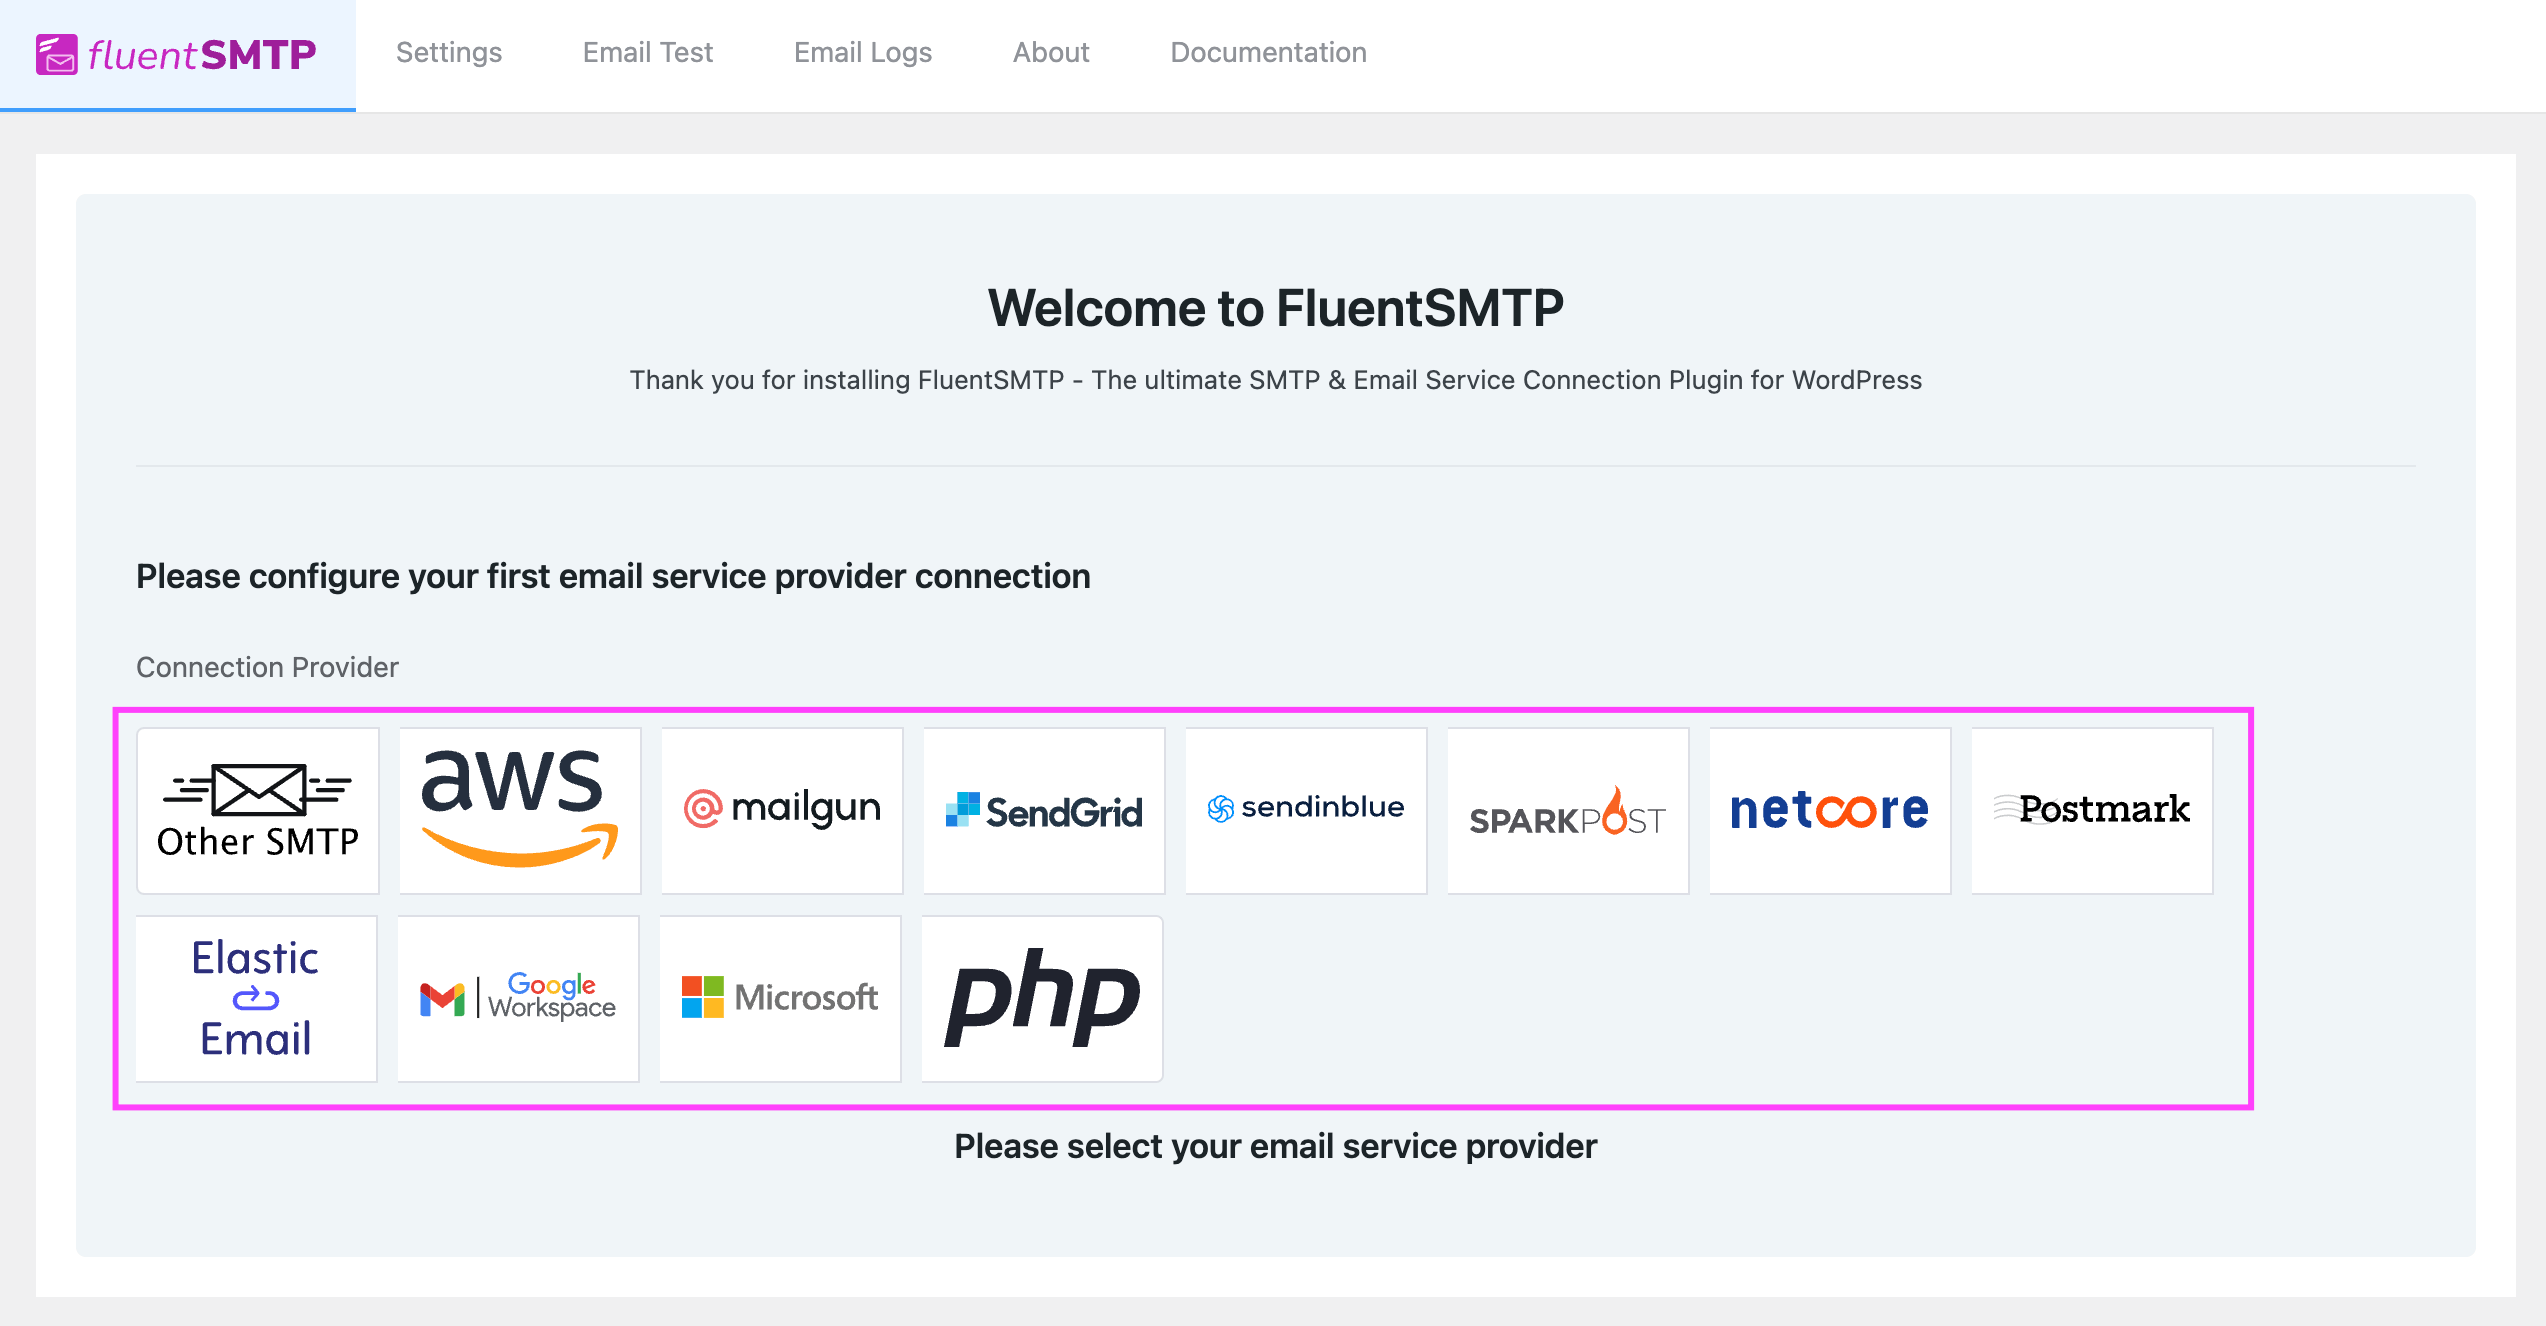
There a lot of different Email Delivery Providers can be configured natively via API-based connection as listed below:
- Amazon SES API.
- Mailgun API.
- SendGrid API.
- Sendinblue API.
- SparkPost API.
- Netcore API (formerly Pepipost).
- PostMark API.
- Elastic Mail API.
- Gmail & Google Workspace OAuth API.
- Outlook OAuth API.
If your desired Email delivery Service is not listed above, you can still connect to your Email Delivery Provider via SMTP. You would need to obtain SMTP Credentials from your Email Delivery Provider or the Mail Server.
Additionally, we have curated a list of obtaining SMTP Credentials from different providers to be used in the same way we are going to be configuring FluentSMTP in the following sections here:
This is the information we need to collect from Email Delivery Provider. Please check the documentation section of your host’s website about how to get such SMTP information if it is not still listed above.
Surely there will be a guide but If not, you should contact your Hosting Support.
Configure FluentSMTP Email Connection #
It is time to use the obtained SMTP Credentials in FluentSMTP and send emails from WordPress Website.
Add New SMTP Connection #
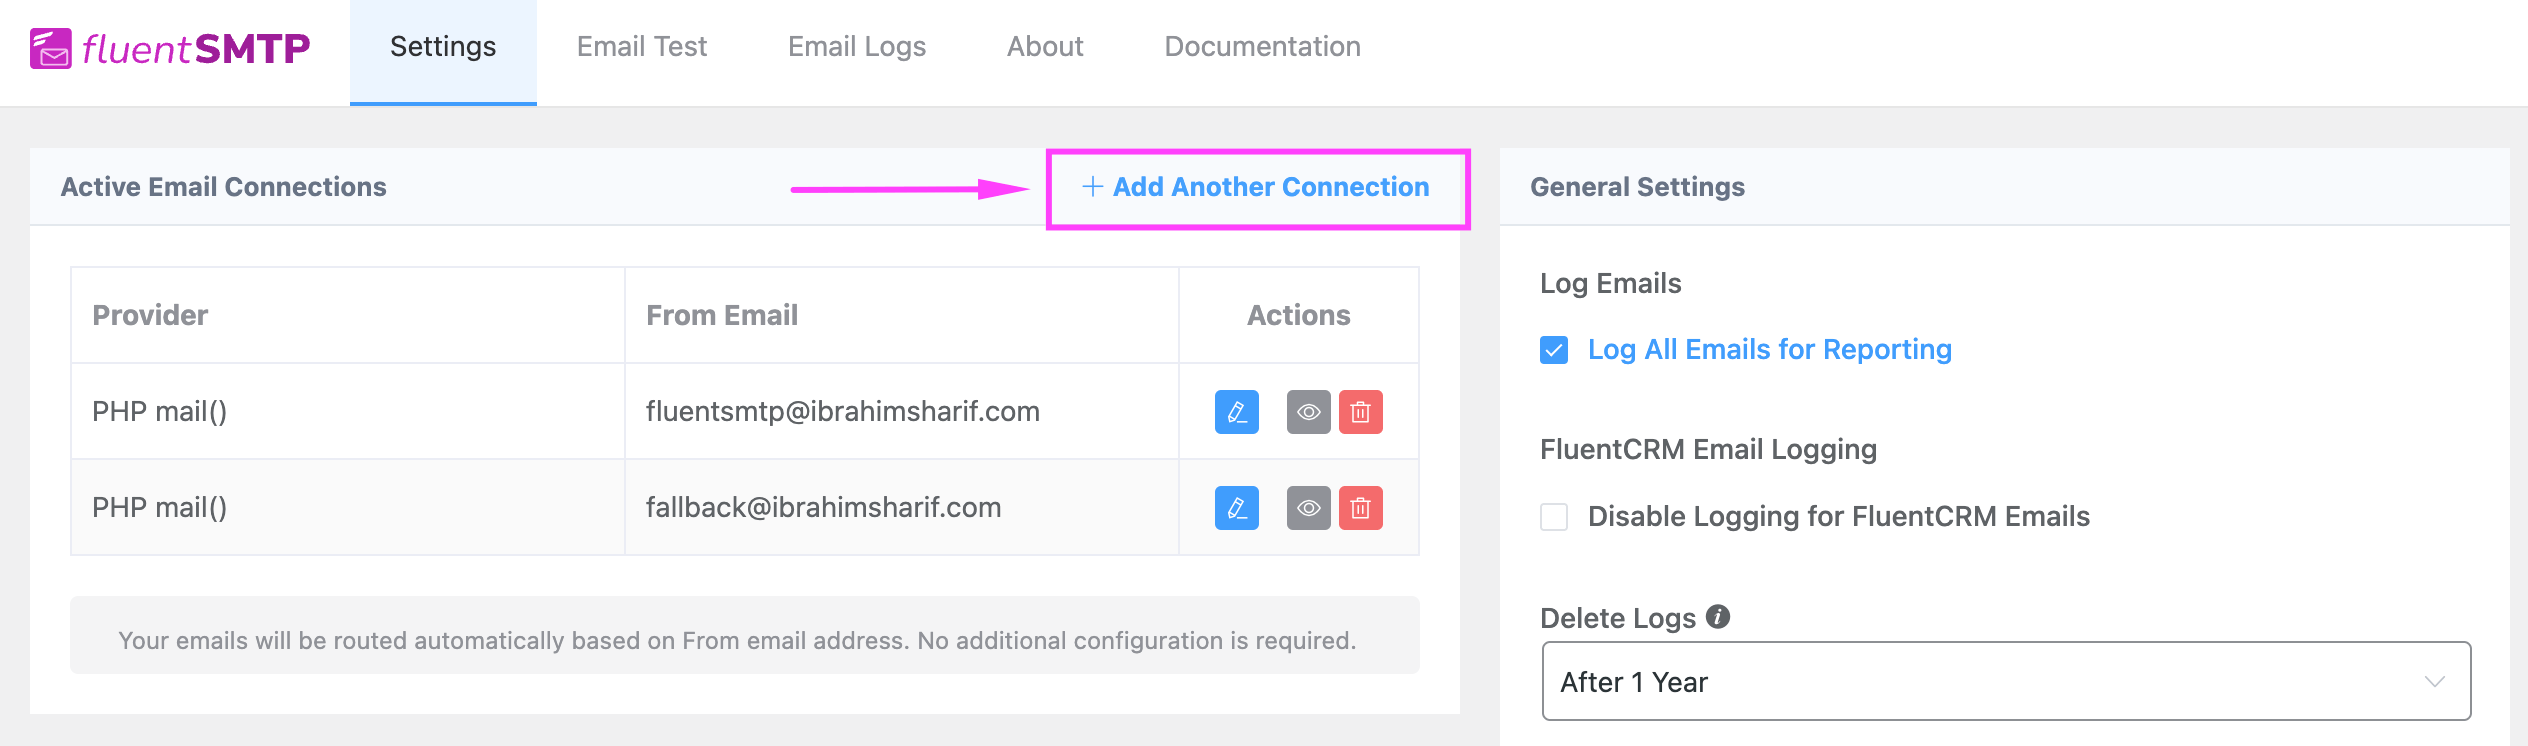
If you already have any other configured connection, then you will be in the FluentSMTP Dashboard.
Please go to WordPress Settings ⮕ FluentSMTP ⮕ Settings ⮕ Add Another Connection
If you haven’t set up any SMTP Connection yet, you will be directed to configure a connection automatically.
Now from your WordPress Dashboard go to Settings ⮕ FluentSMTP
SMTP Details #
After selecting Other SMTP, you will need to configure some settings including Sender Settings and SMTP Authentication Credentials.
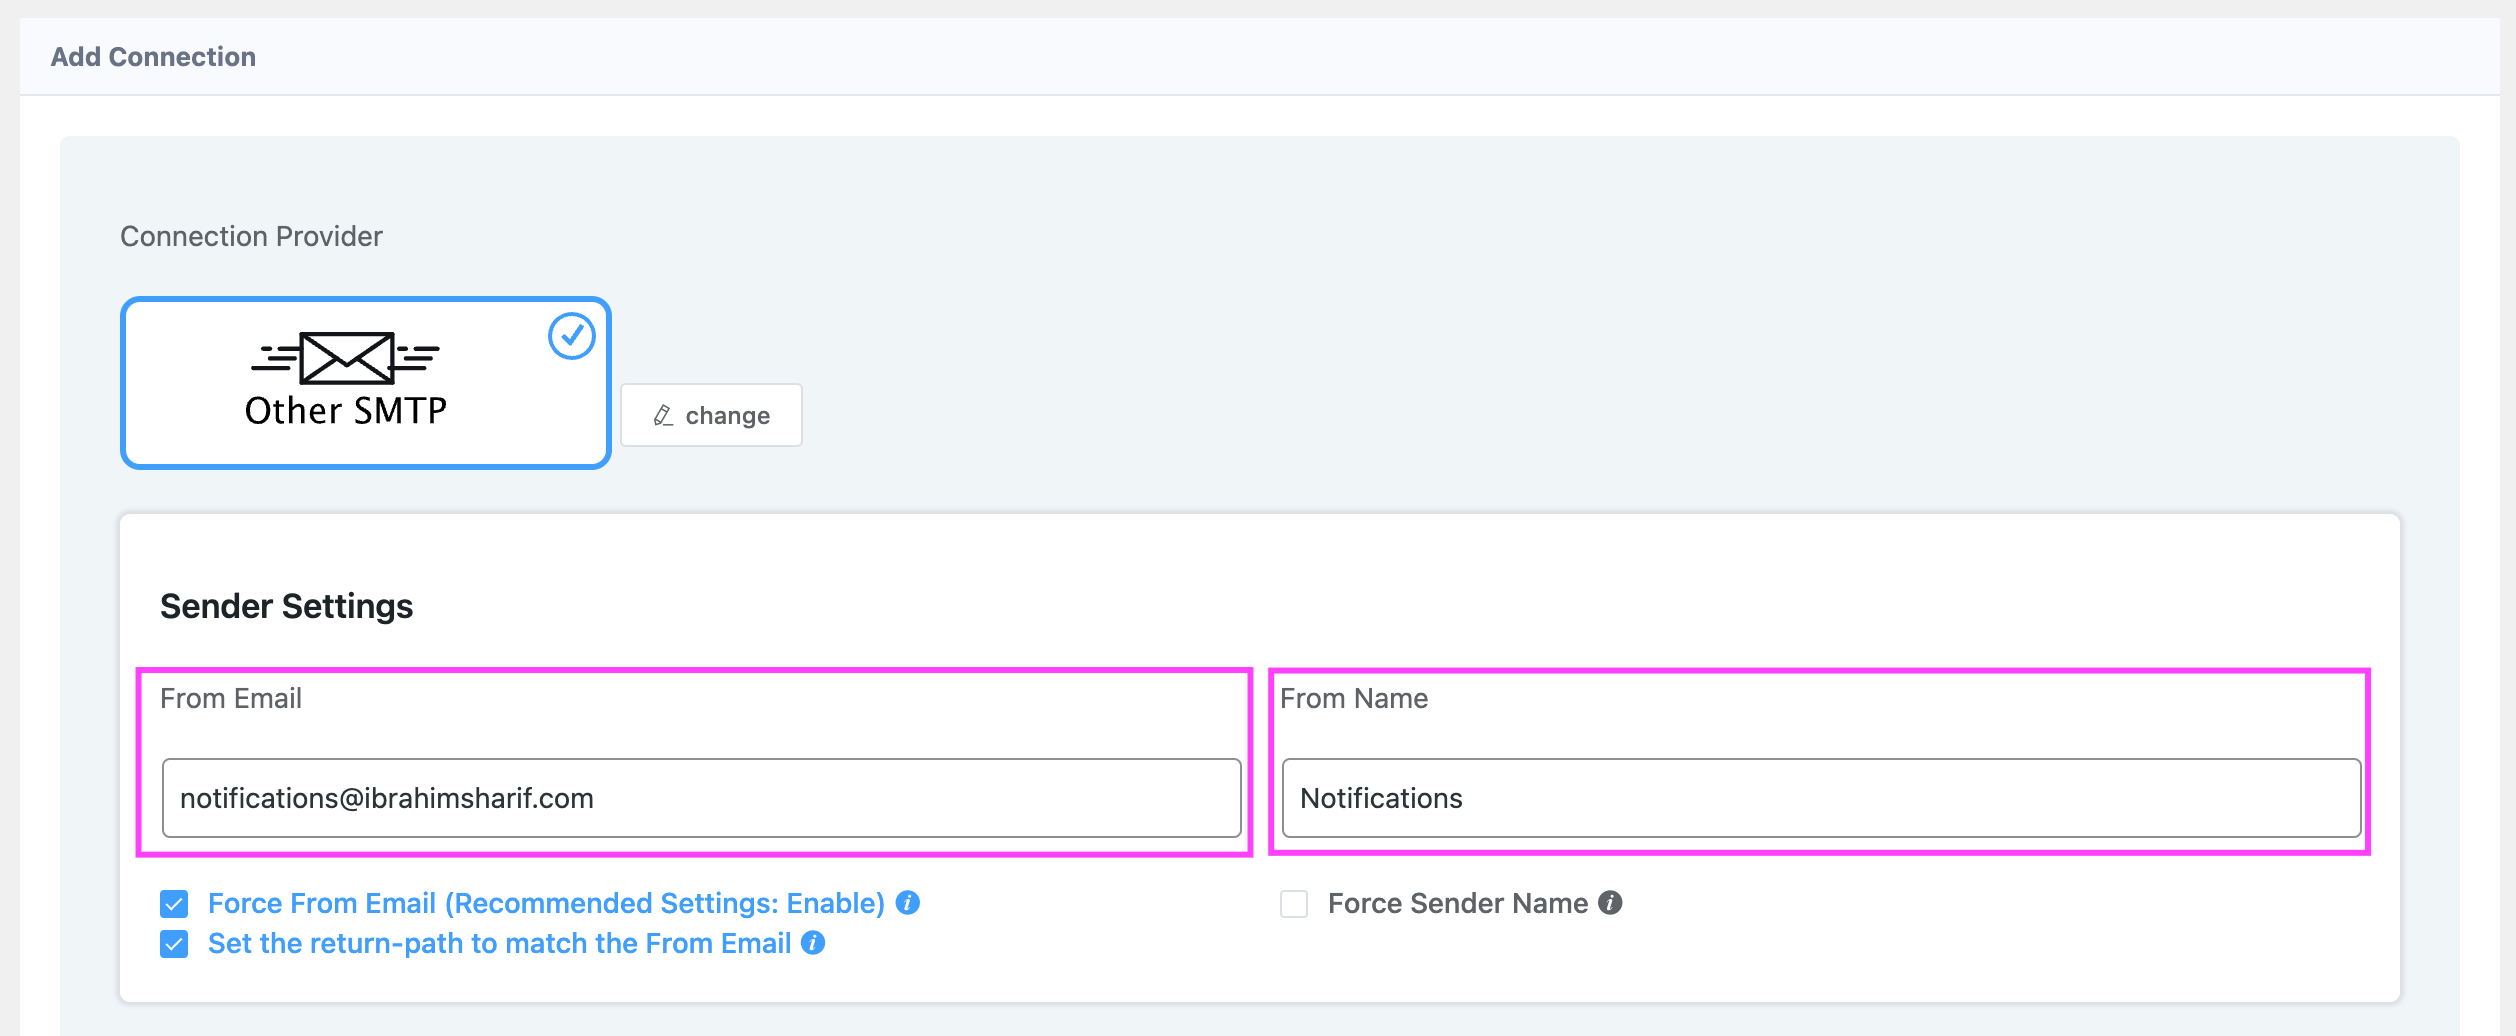
Sender Settings #
- From Email:
The “From Email” is the Mail From Address that will be used to send all WordPress Emails. Check the box to set the return path to match the Mail From Address.
The Return Path indicates where non-delivery receipts or bounce messages are to be sent. If unchecked, bounce messages will be lost. With this enabled, you’ll be emailed using “From Email” if any messages bounce as a result of issues with the recipient’s email. - From Name:
From Name can be anything you want. You can use a combination of your name and company name. In the above example, only “Notifications” is used.
If you check the Force Sender Name, then this name will be forced to be shown in the Recipient’s Email Client. It is also dependent if your Email Delivery Provider supports it or not.
SMTP Server Settings #
The next part is to provide SMTP Server Authentication Credentials. This has 3 parts that are described below:
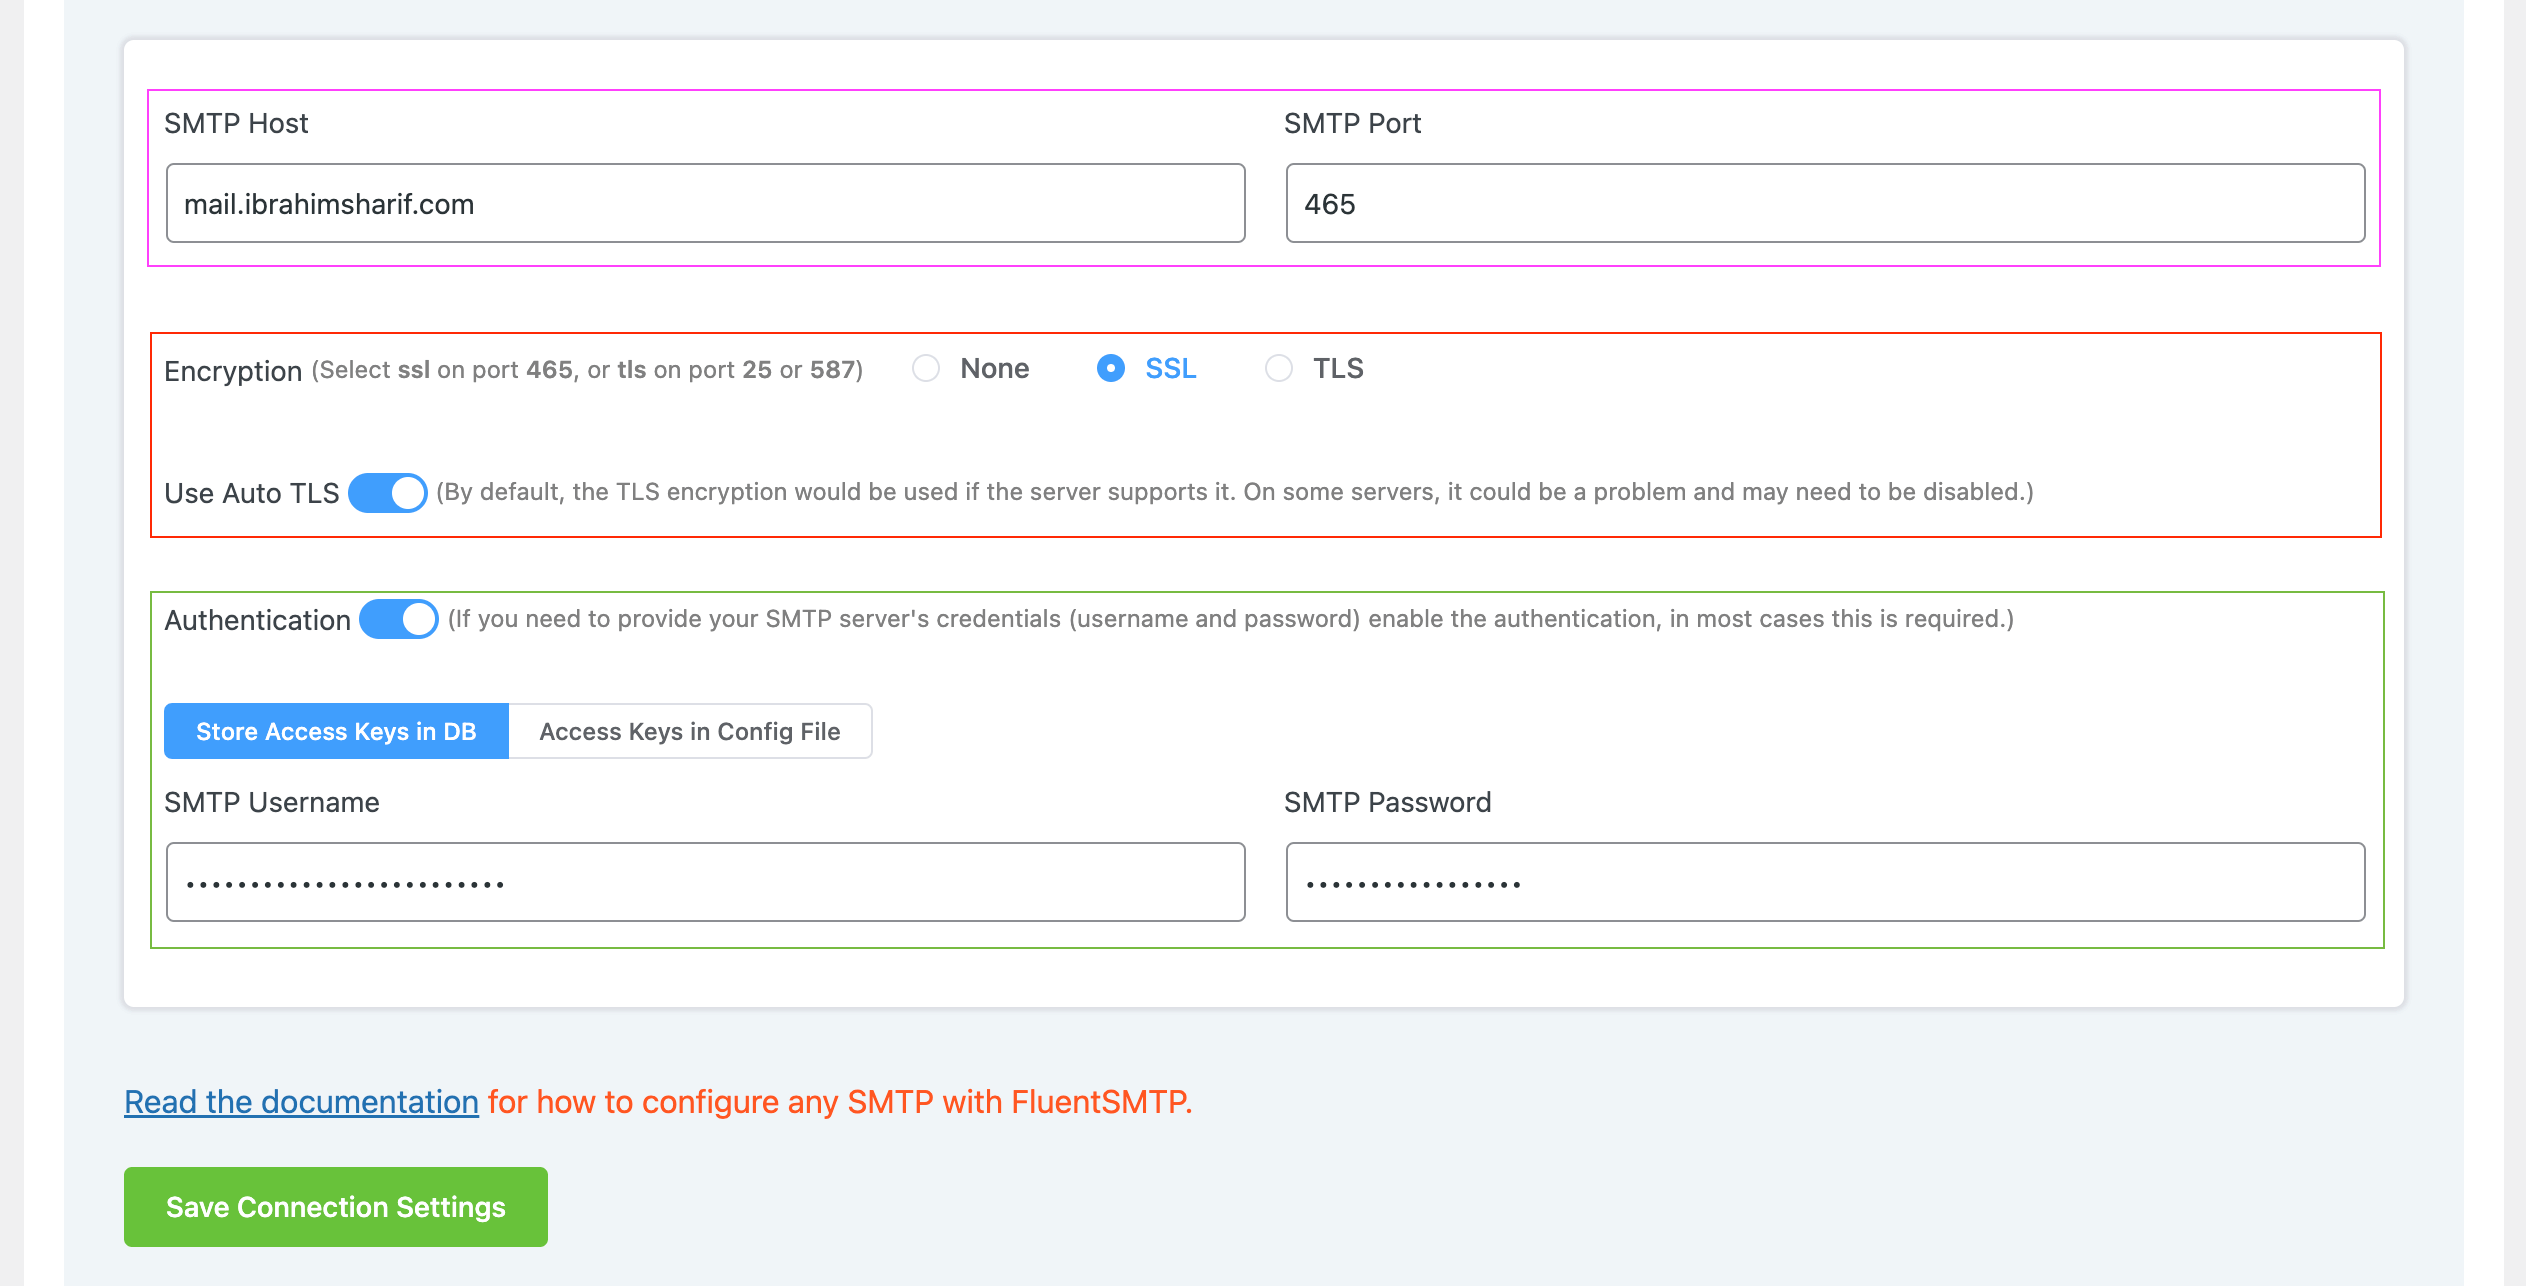
- Authentication:
If you need to provide your SMTP server’s credentials (username and password) to enable the authentication, in our case, this is required for cPanel Mail Servers.- SMTP Username: This is usually the email address you are using to send emails.
- SMTP Password: This is usually the password for the email account while you created the mailbox.
- Access Keys Storage:
- Store Access Keys in DB: By default, this is enabled and strongly recommended. This will keep the information in the Databases in Encrypted format.
- Access Keys in Config File: This allows you to store the access keys in the following section inside the wp-config.php file by the following directives.
Simply copy the following snippet and replace the stars with the corresponding credential. Then simply paste it to the wp-config.php file of your WordPress installation
define( 'FLUENTMAIL_SMTP_USERNAME', '********************' );
define( 'FLUENTMAIL_SMTP_PASSWORD', '********************' );
Once you are done with providing the correct details, please save the settings by clicking on the Save Connection Settings button. Then follow this documentation: Send a test email, Test Email Confirmation, and Confirm Test Email Deliverability using this SMTP Connection to your own Email Address and confirm the delivery.
That’s all! Enjoy the robustness of FluentSMTP in your WordPress Website and never face any issues with Email Delivery Again!


email not sent why