
FluentSMTP is a plugin that takes over WordPress’s default mailing system, ensures email delivery from the website, and keeps logs of them. The unique feature of FluentSMTP is that it can be configured with multiple email delivery methods(connections) and all of them can be used later by configuring the Mail From address.
Google is one of the best email delivery methods available in the market. Free and Paid (Google Workspace formerly known as GSuite) emails can be configured with FluentSMTP.
This article will guide you through configuring Gmail/Google Workspace with FluentSMTP.
Configuring Gmail or Google Workspace #
To learn how you can configure the Gmail/Google Workspace with FluentSMTP, follow the steps accordingly –
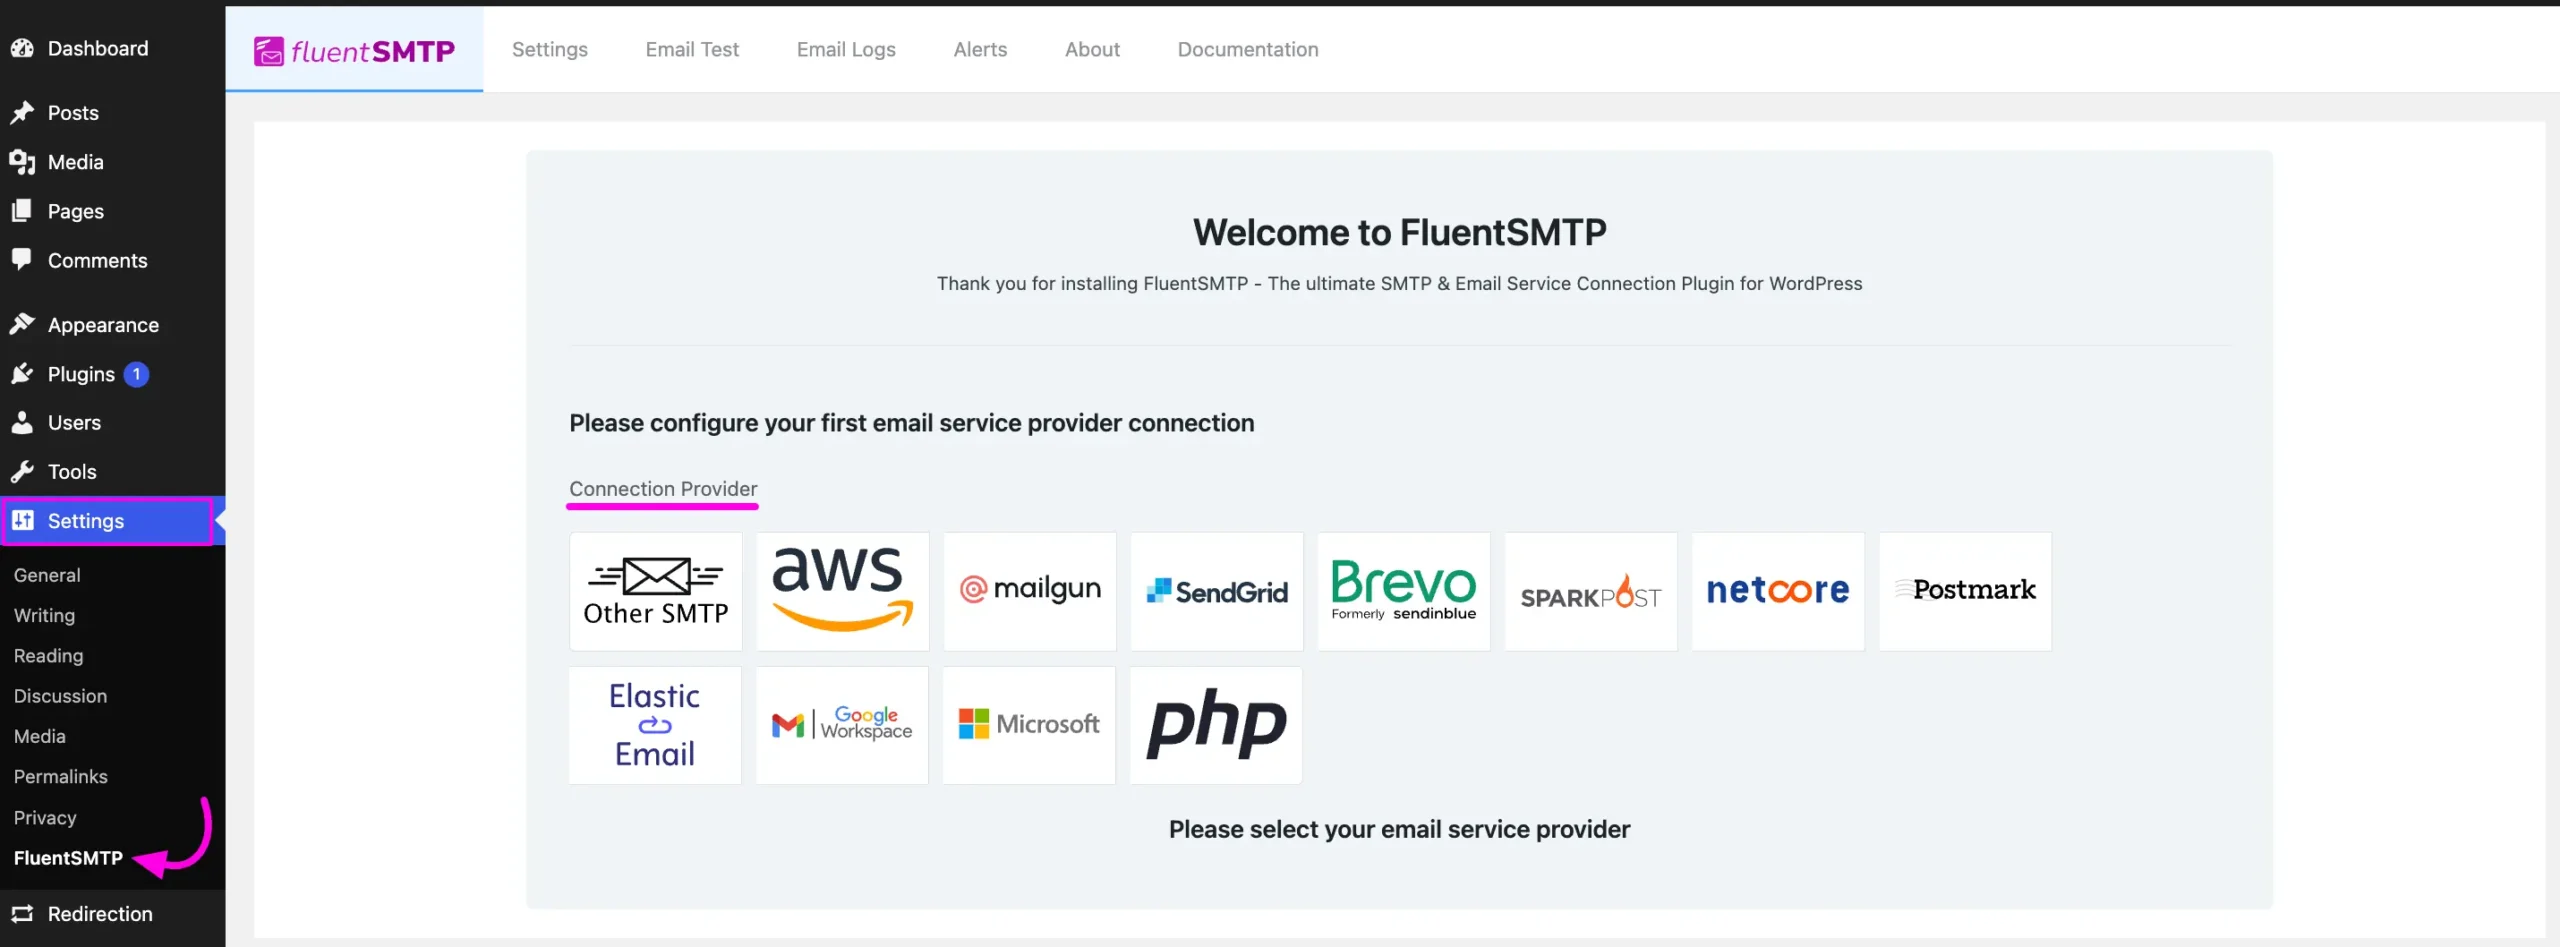
First, go to FluentSMTP from Settings of WordPress Dashboard in the left sidebar, and select your email service provider as per your needs from the given Connection Providers.
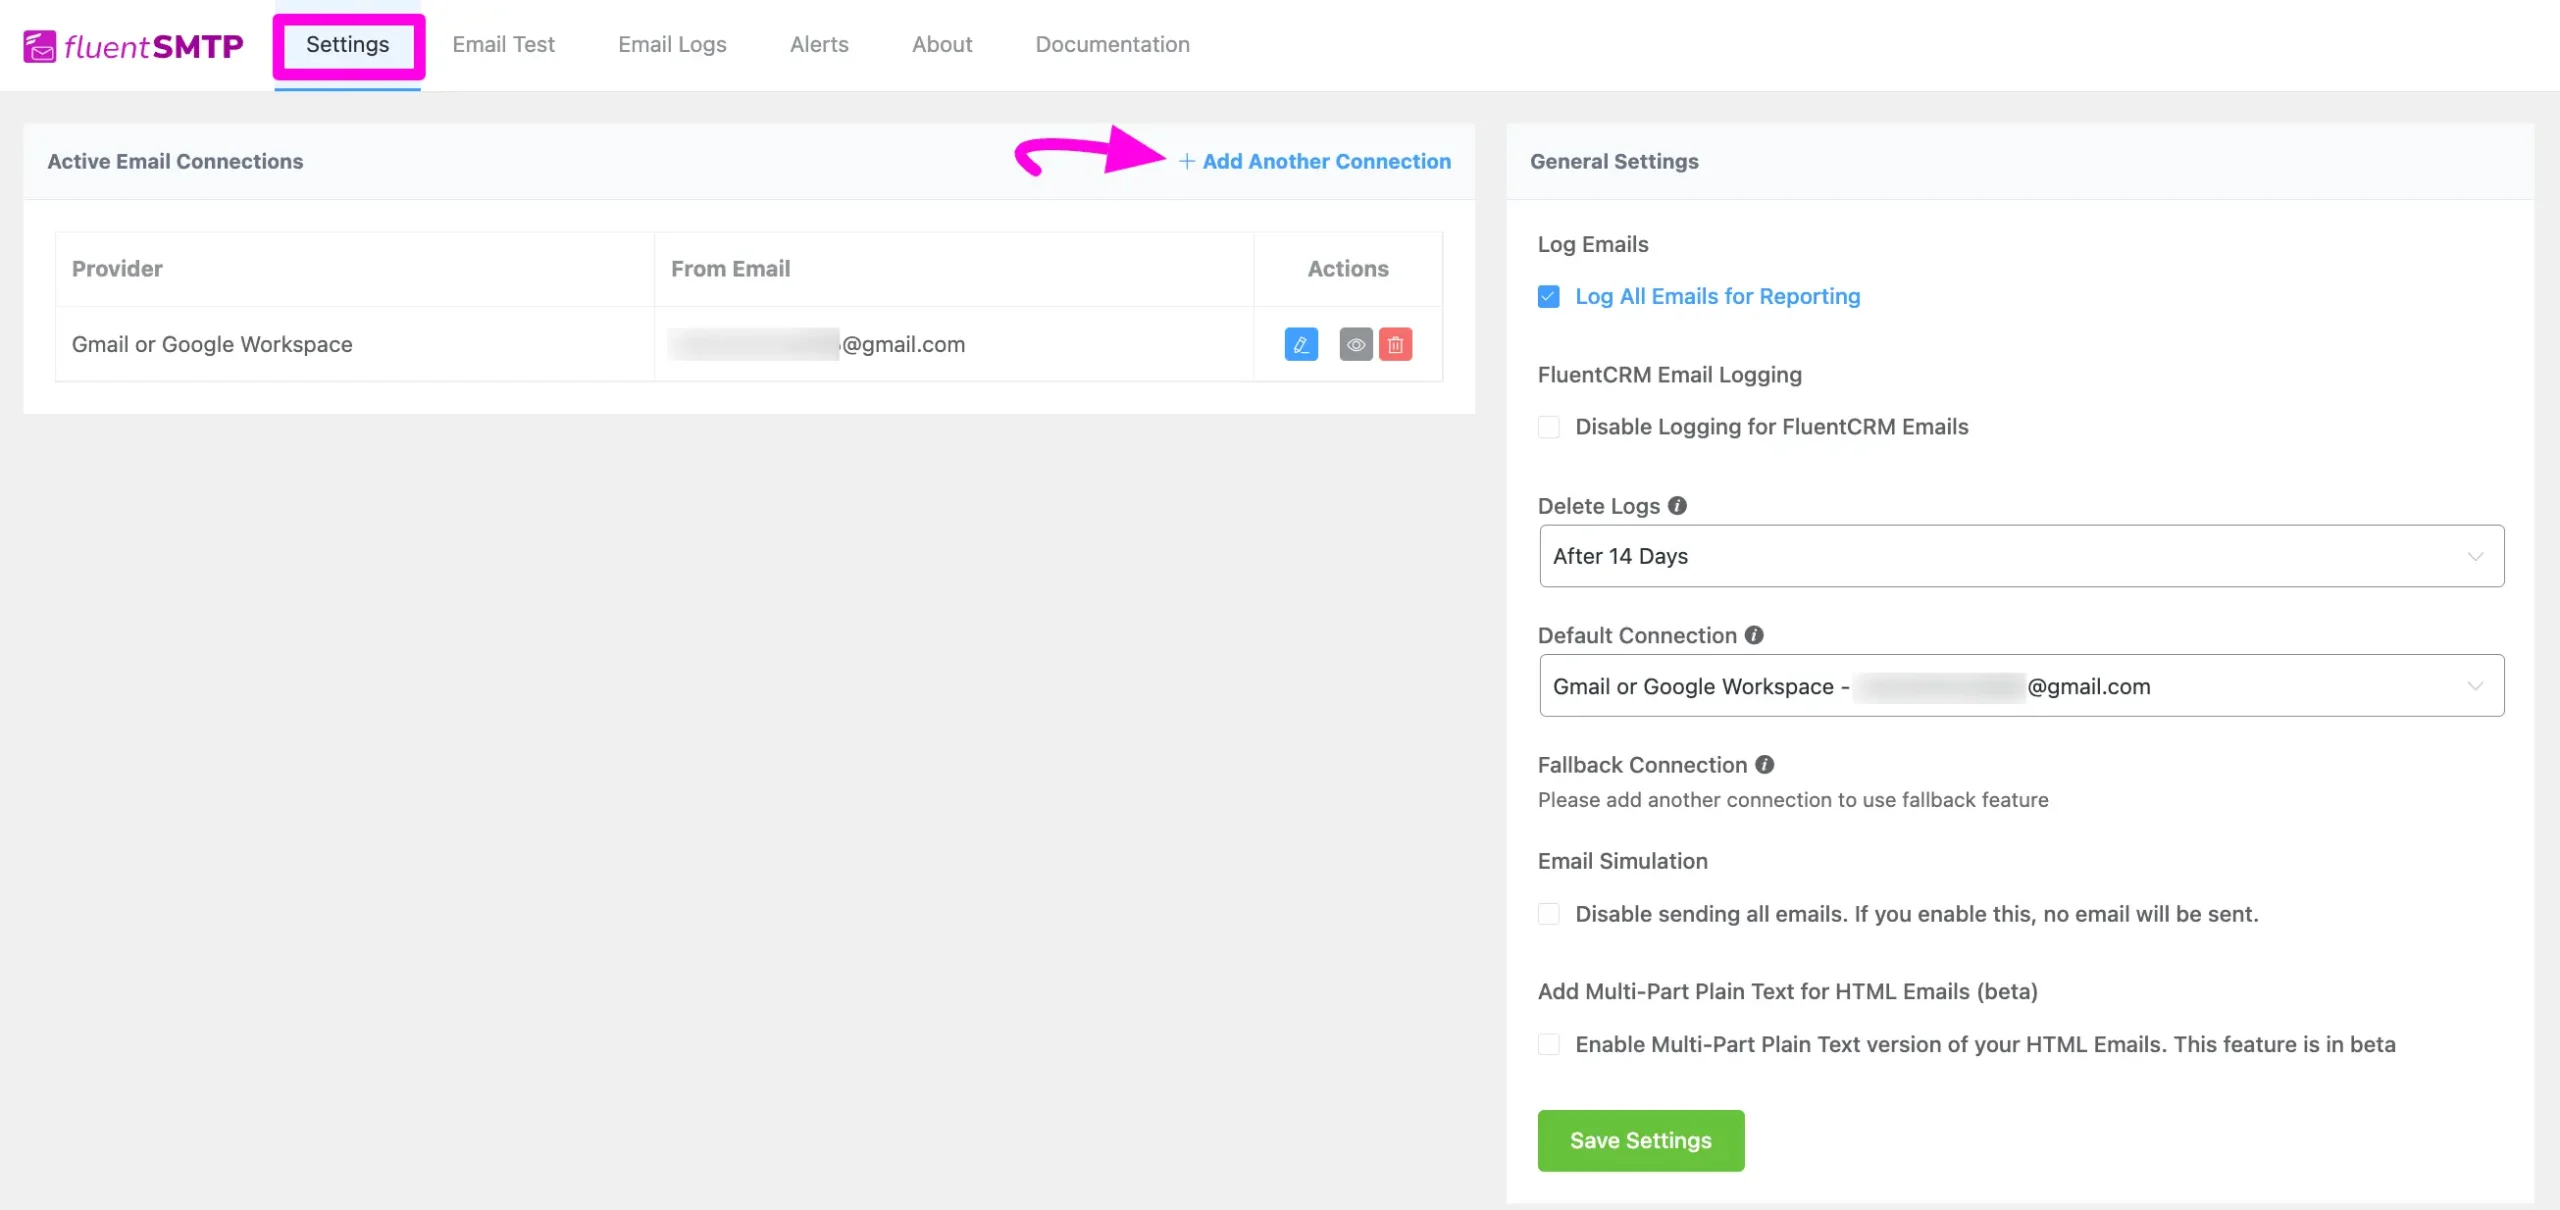
But if you are already connected to any email service provider, go to the Settings section from the FluentSMTP Navbar and click the + Add Another Connection button.
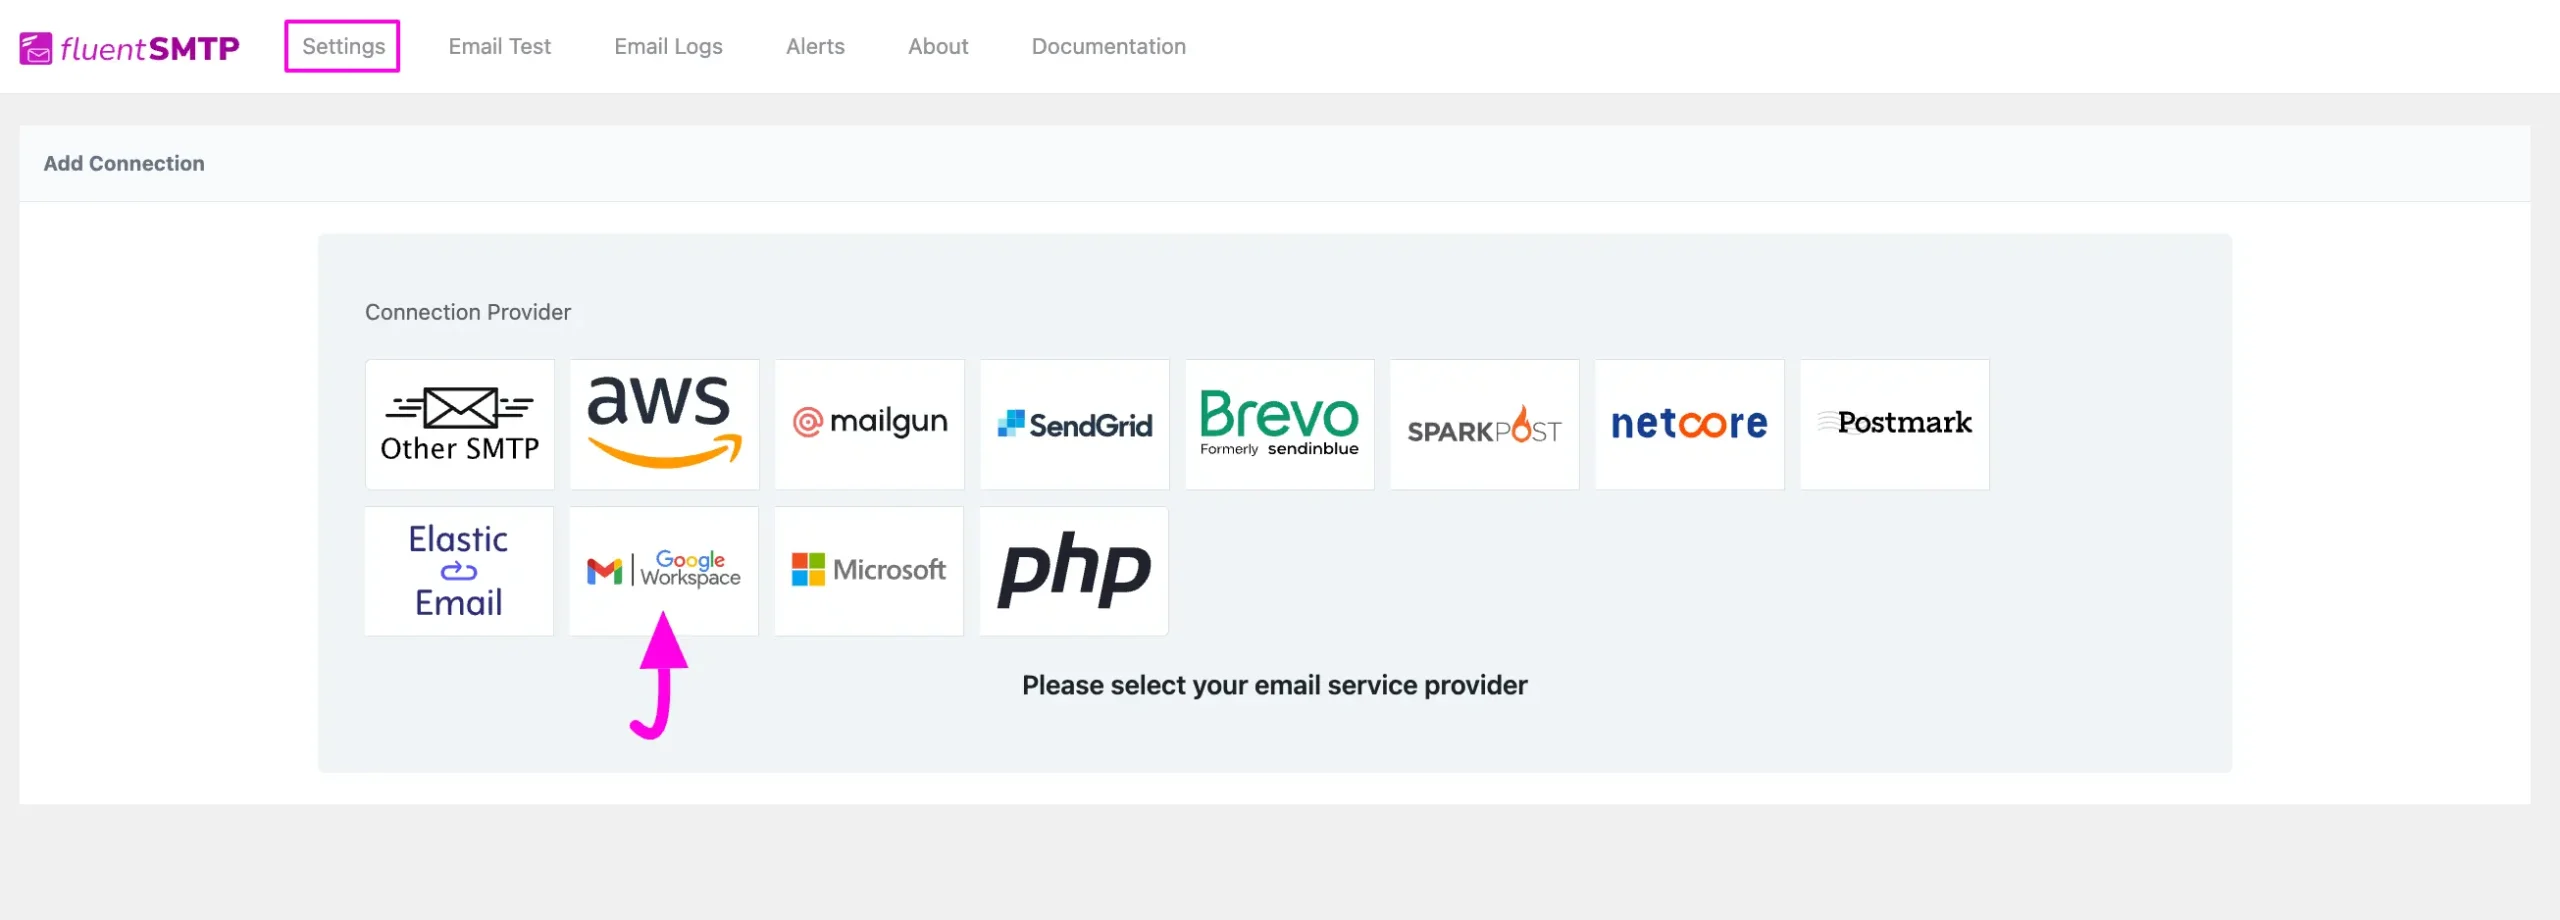
Click the Gmail/Google Workspace tab to connect to this provider.
After you choose the provider, it will take you to the Add Connection page where you will get all the options to connect your Gmail/Google Workspace.
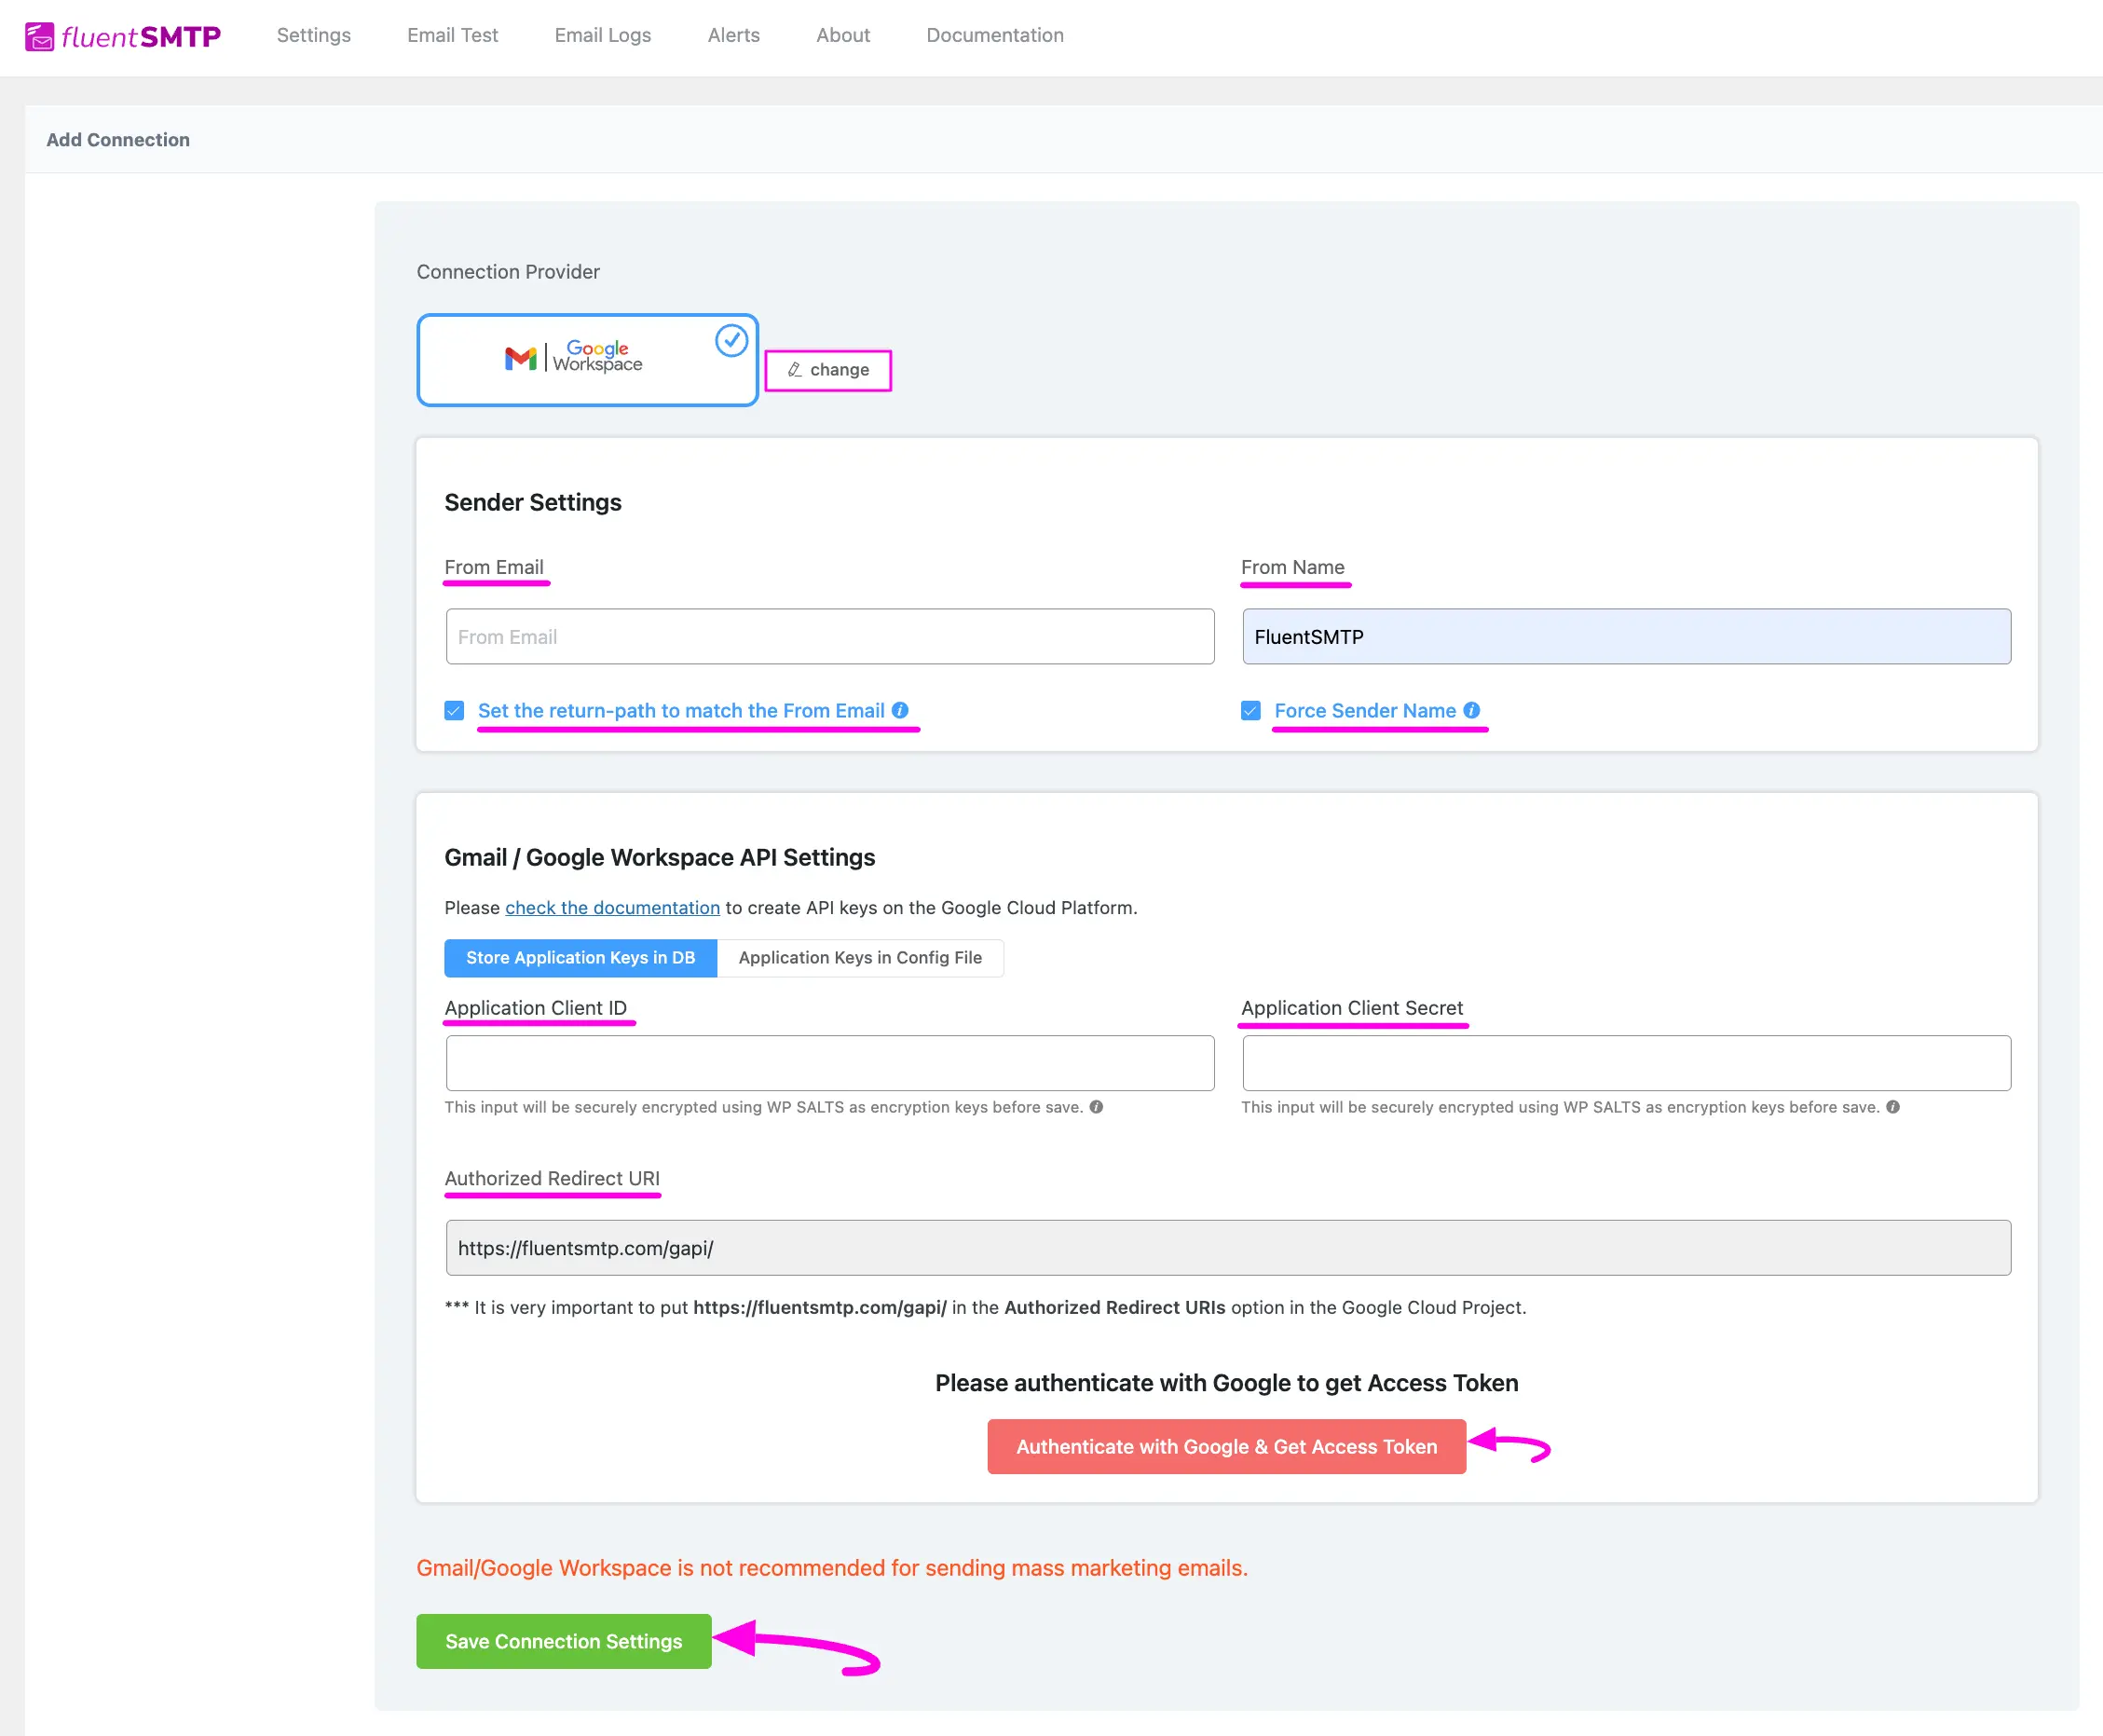
Additionally, if you want to change the connection provider, simply click the Change button right next to the Gmail/Google Workspace tab at the top of the page.
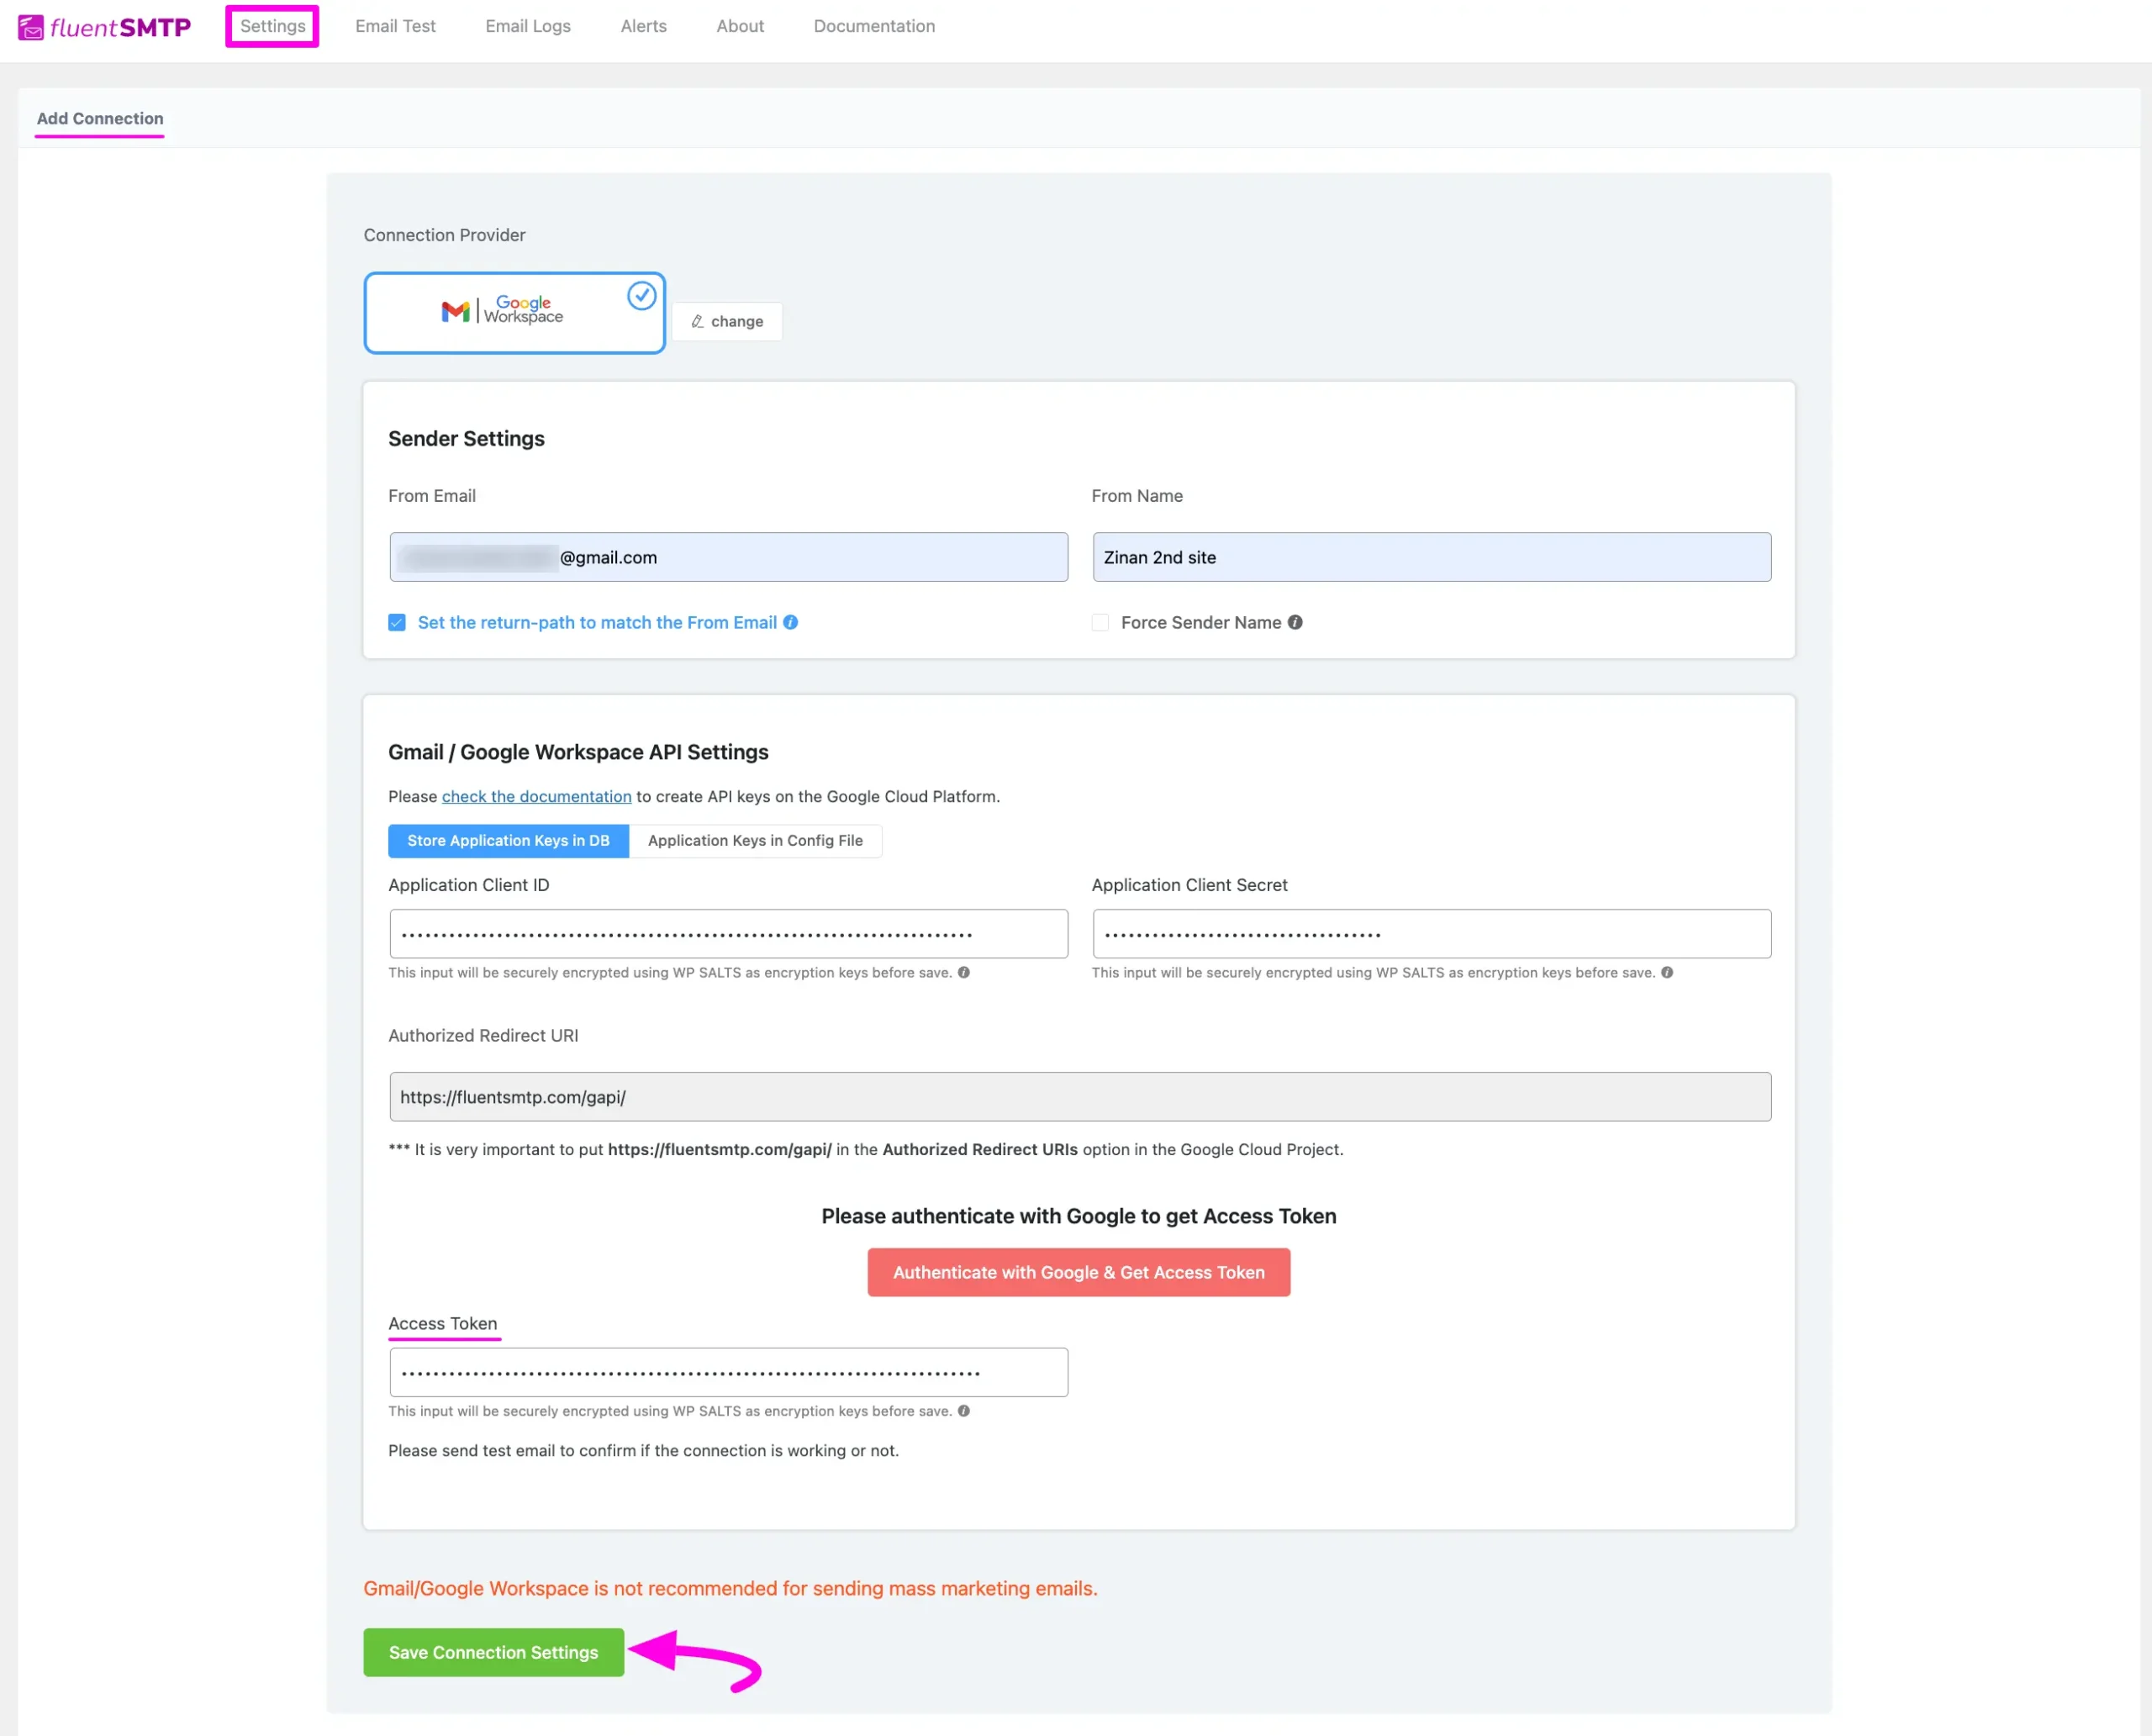
Here, you need to provide –
- From Email: Write the Gmail address that you use in your Google Cloud platform.
- From Name: Here, your WordPress site name is fetched by default which you can change.
- Set the return-path to match the From Email: Return Path indicates where non-delivery receipts or bounce messages will be sent. If you enable this, you’ll be emailed using “From Email” if any messages bounce due to recipient email issues. If you keep it unchecked, bounce messages may be lost.
- Force Sender Name: Check the box to align the return path with the form. This setting indicates where bounce messages are sent. If unchecked, bounce messages will be lost. When enabled, you will receive an email at the “From Email” address for any bounced messages due to recipient email issues.
- Application Client ID & Application Client Secret: The Client ID & Client Secret have to be obtained from the Google Cloud Platform where you are going to use the From Email for this Google Workspace Connection.
- Authorized Redirect URL: Copy this URL as you need it later to connect to the Google Cloud Platform.
- Access Token: Once you fill up all the necessary information, you can get the Access token by clicking the Authentication with Google & Get Access Token button.
Once you provide all the necessary information, click the Save Connection Settings button.
And, your Gmail or Google Workspace will be connected with your FluentSMTP plugin.
Obtain Google Cloud Application Client ID & Client Secret #
To learn how to obtain the essential Client ID and Client Secret from the Google Cloud application, follow the steps with screenshots below –
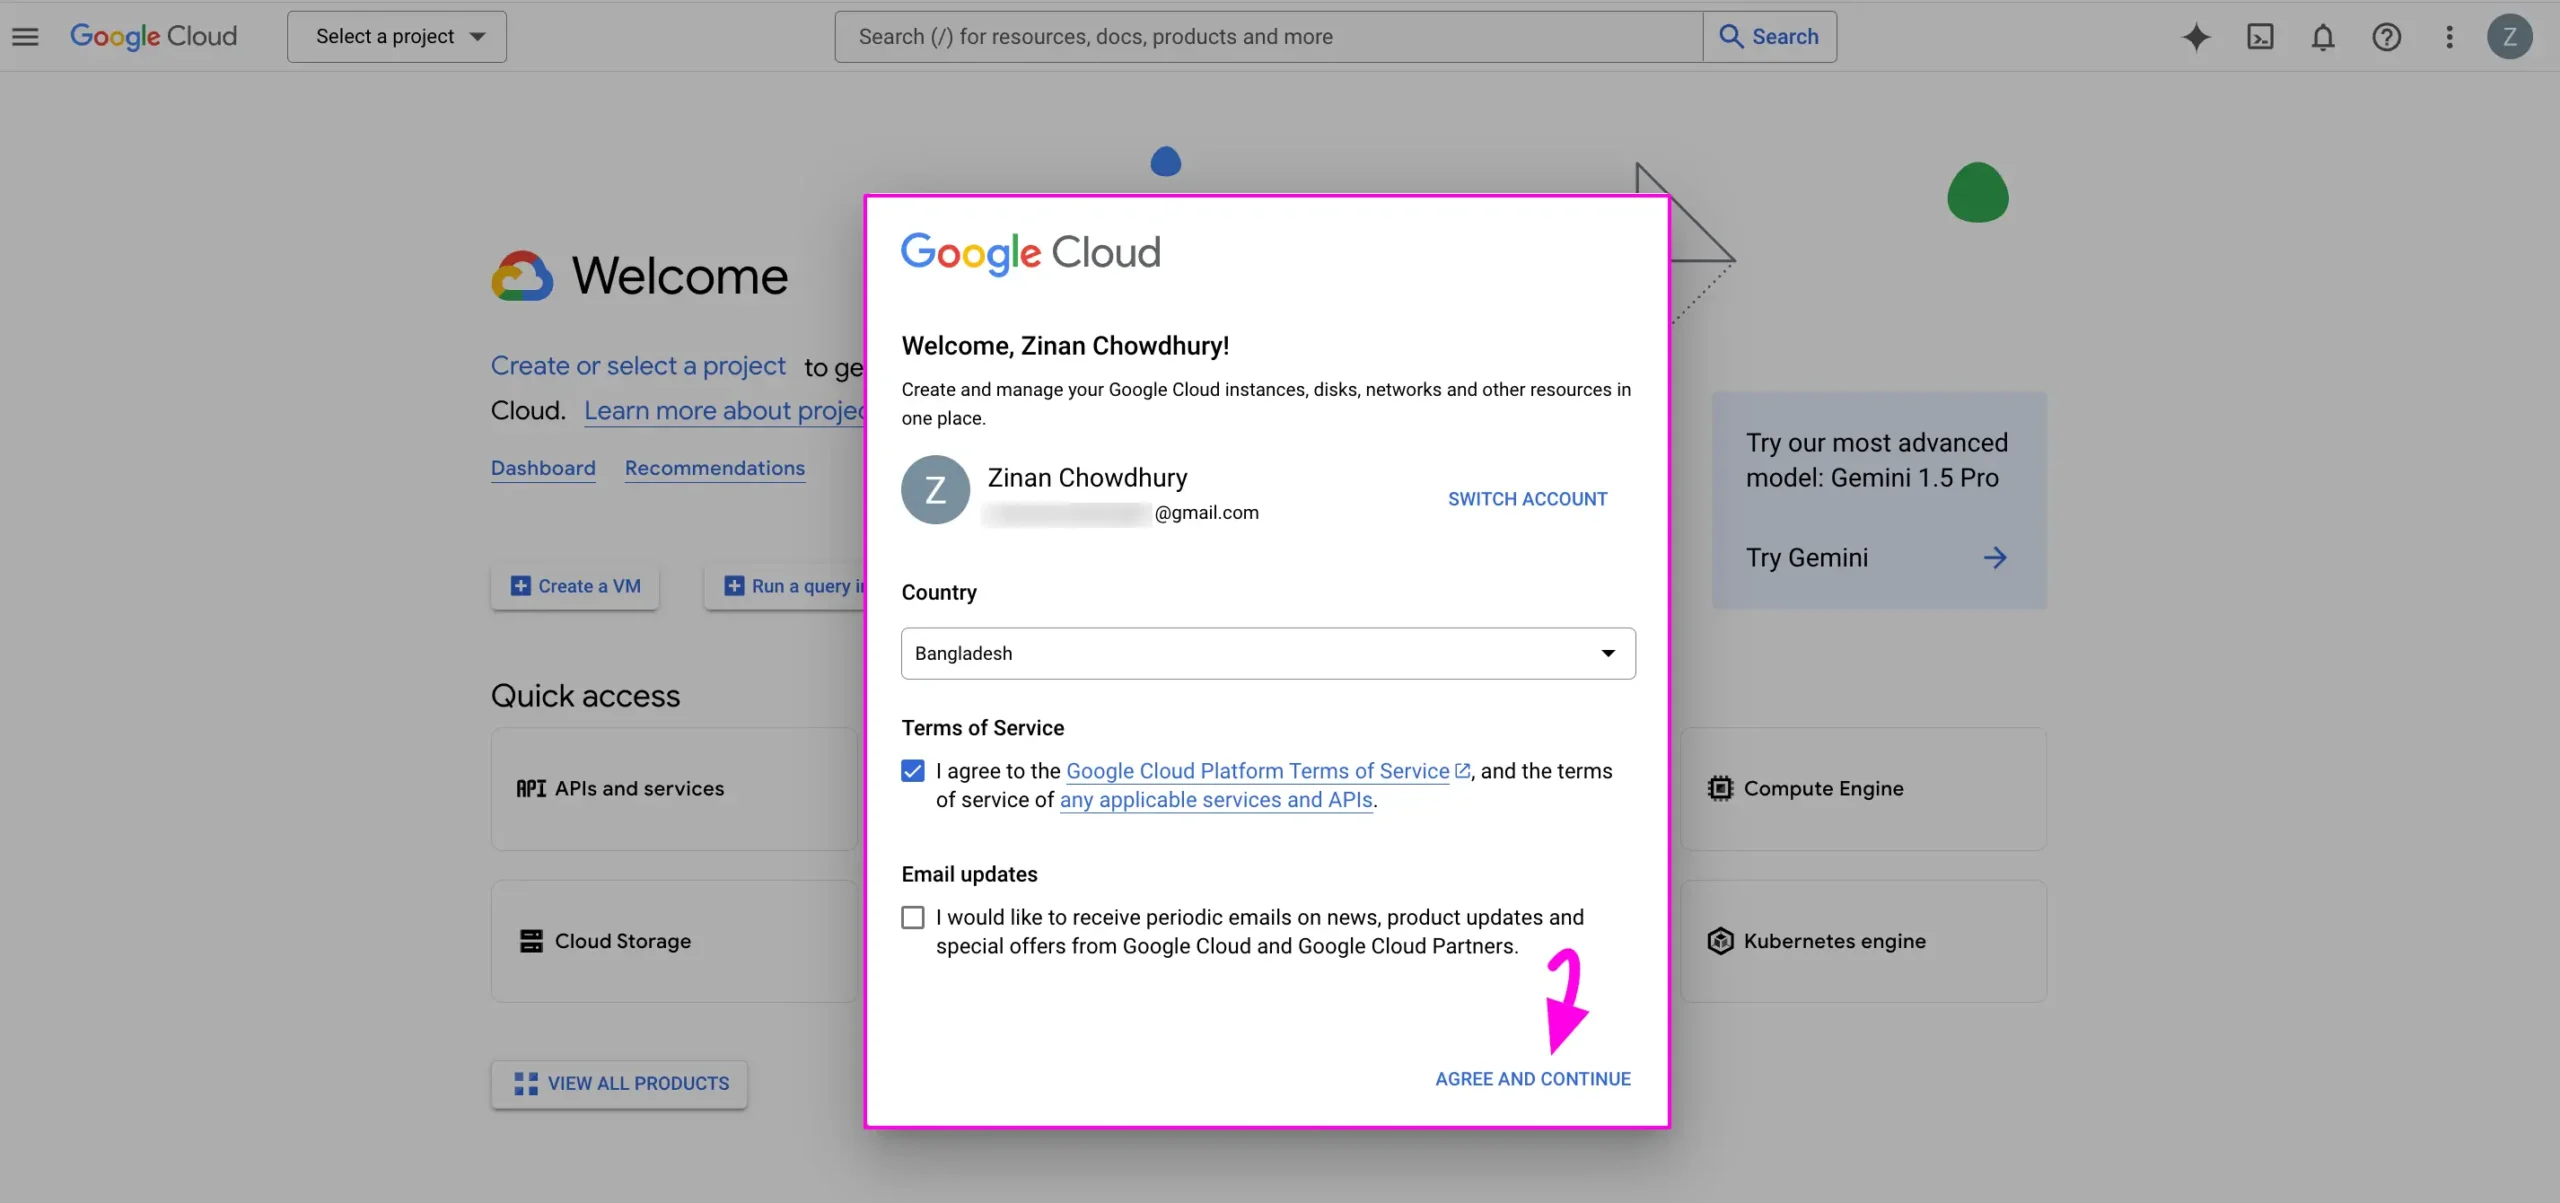
First, go to your Google Cloud Console platform from where you need to create a new project to get started with the Cloud Console.
The first time accessing Google Cloud Console, you may see a popup asking you to select your country and agree to the Terms of Service. Go ahead and do so, then click on AGREE AND CONTINUE to move on to the next step.
Creating New Project #
To create a new project in the Google Cloud, follow the steps with screenshots below –
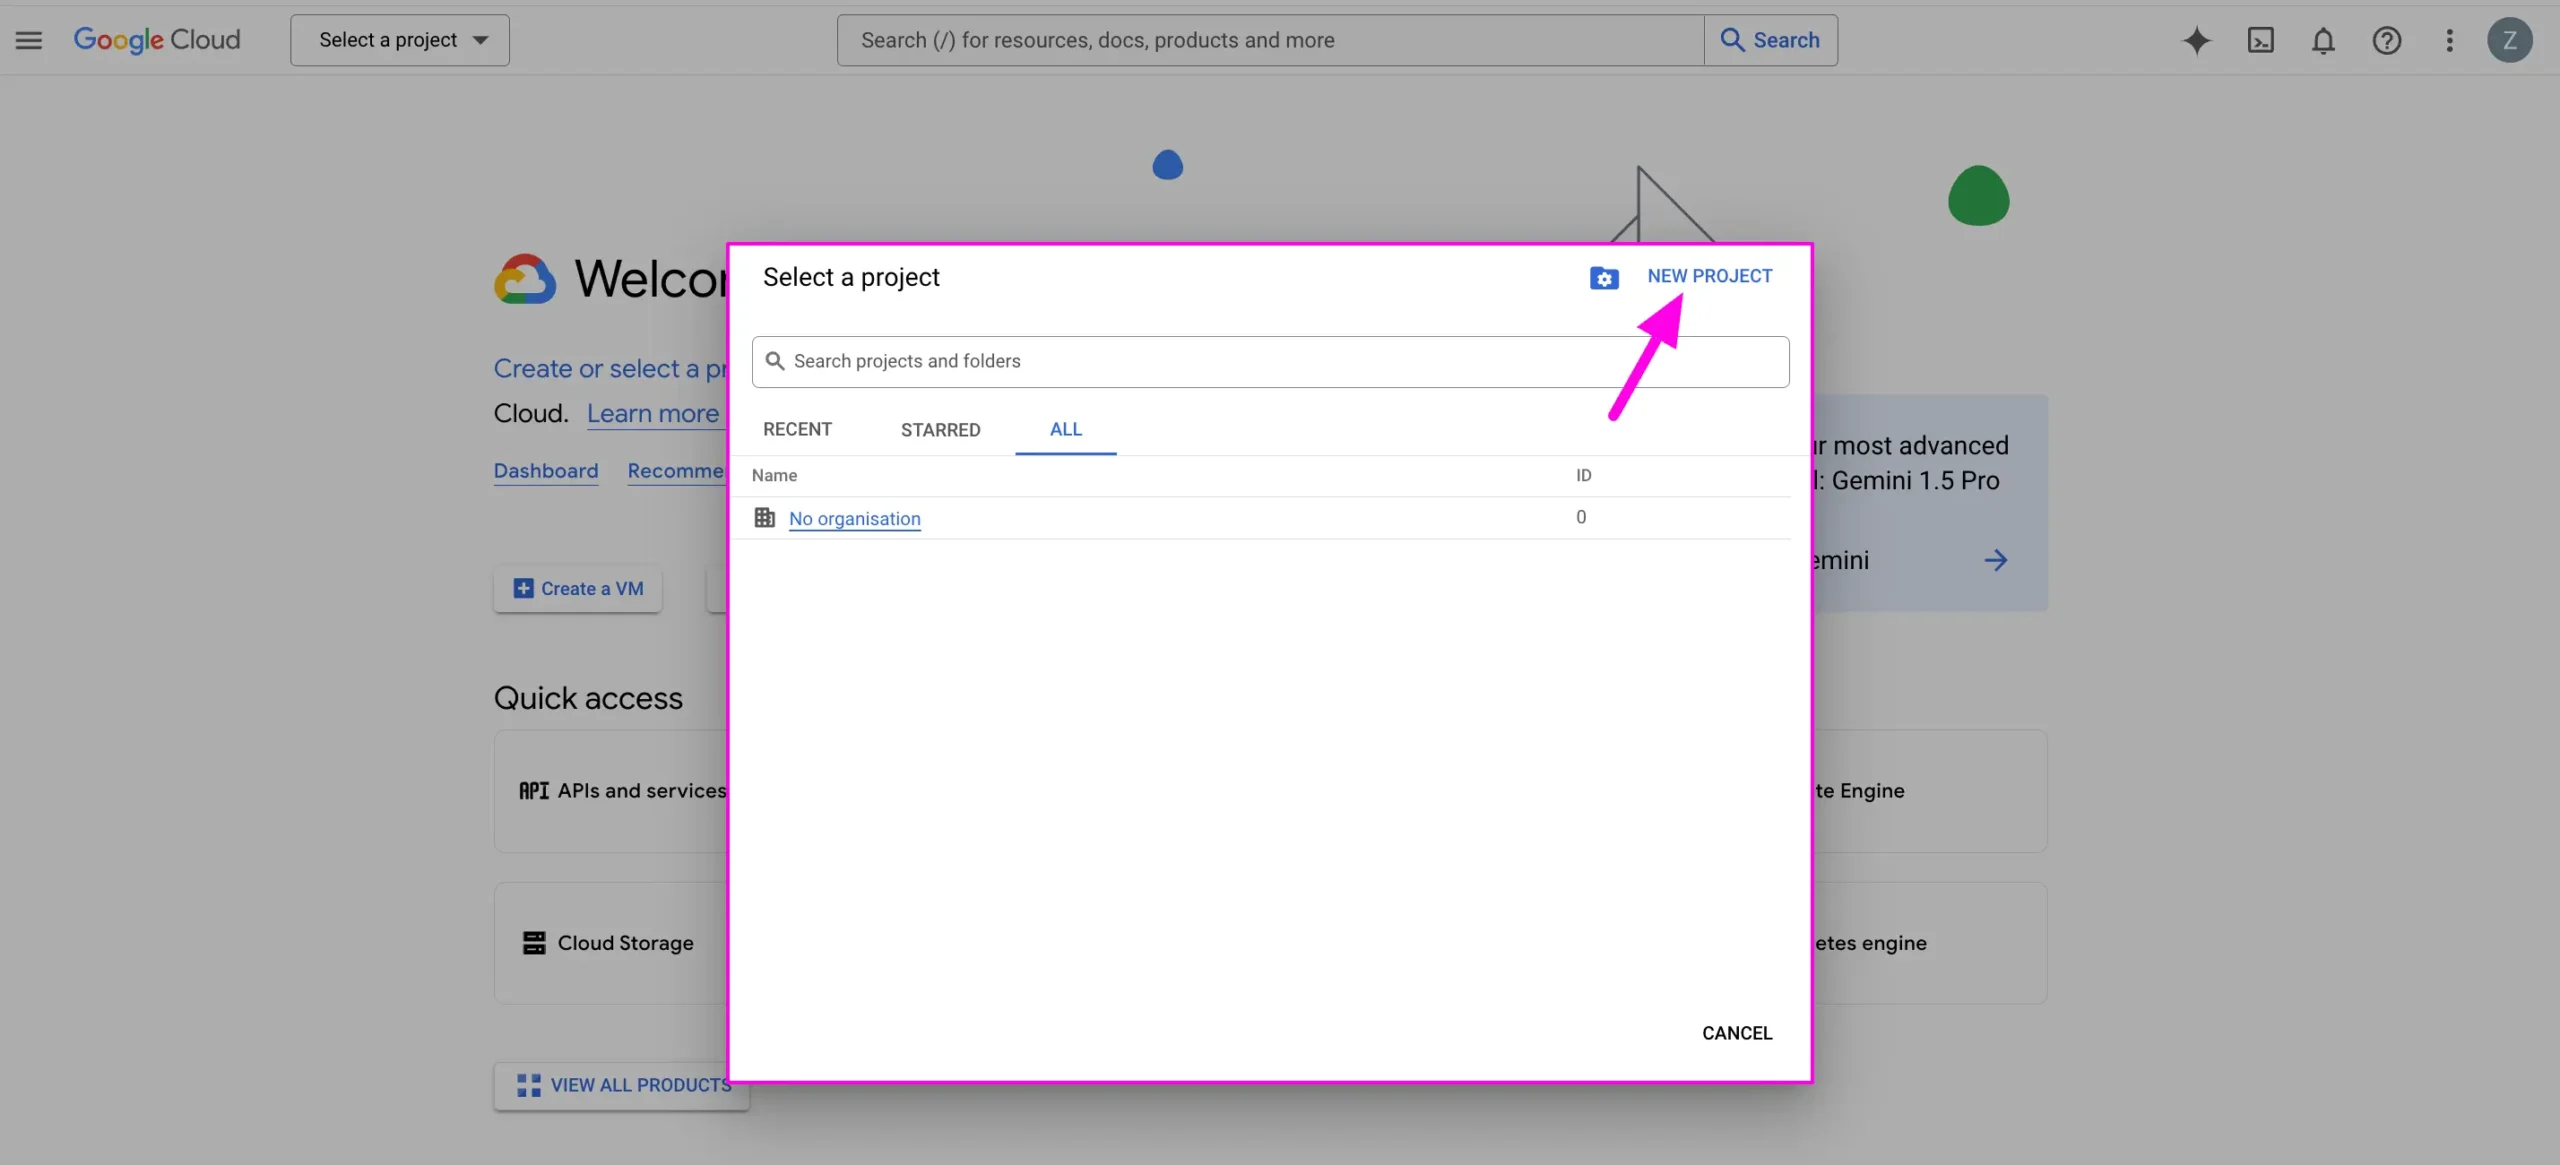
First, click the Select a project dropdown arrow and a pop-up will appear to create a new project.
Now, press the NEW PROJECT button placed in the top right corner.
Give a name to your project (location is optional) and press the CREATE button.
You can also change the Project ID by clicking the Edit button.
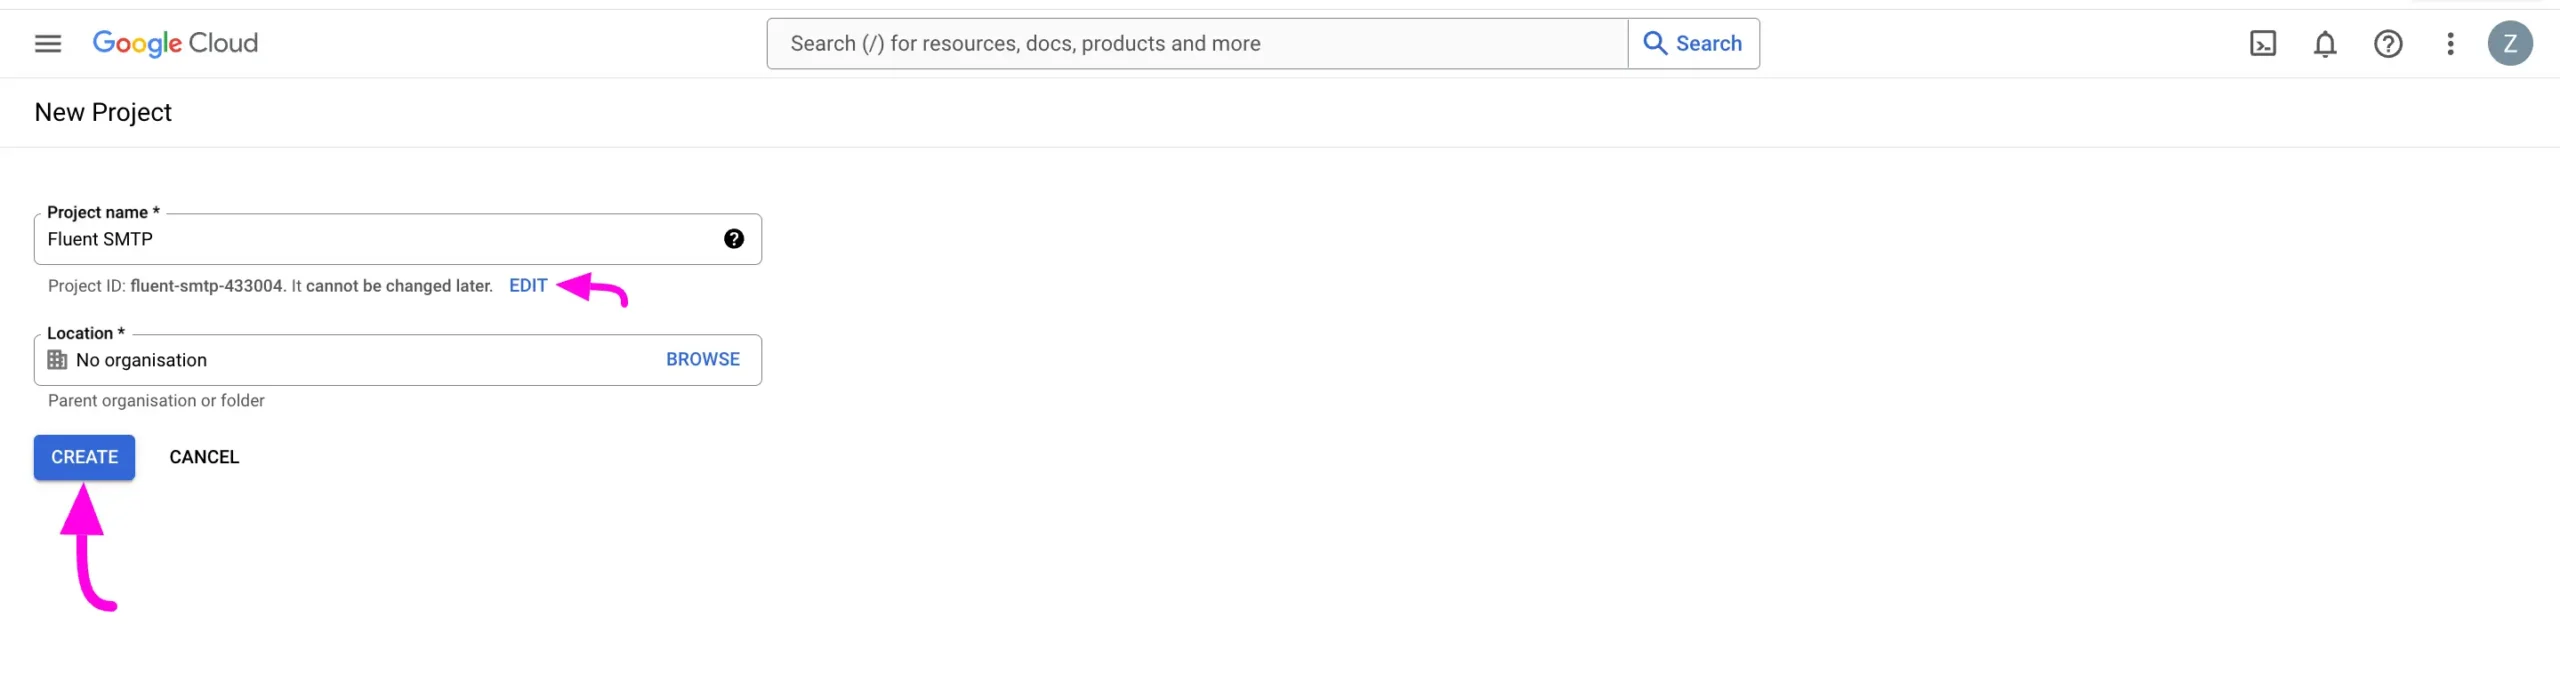
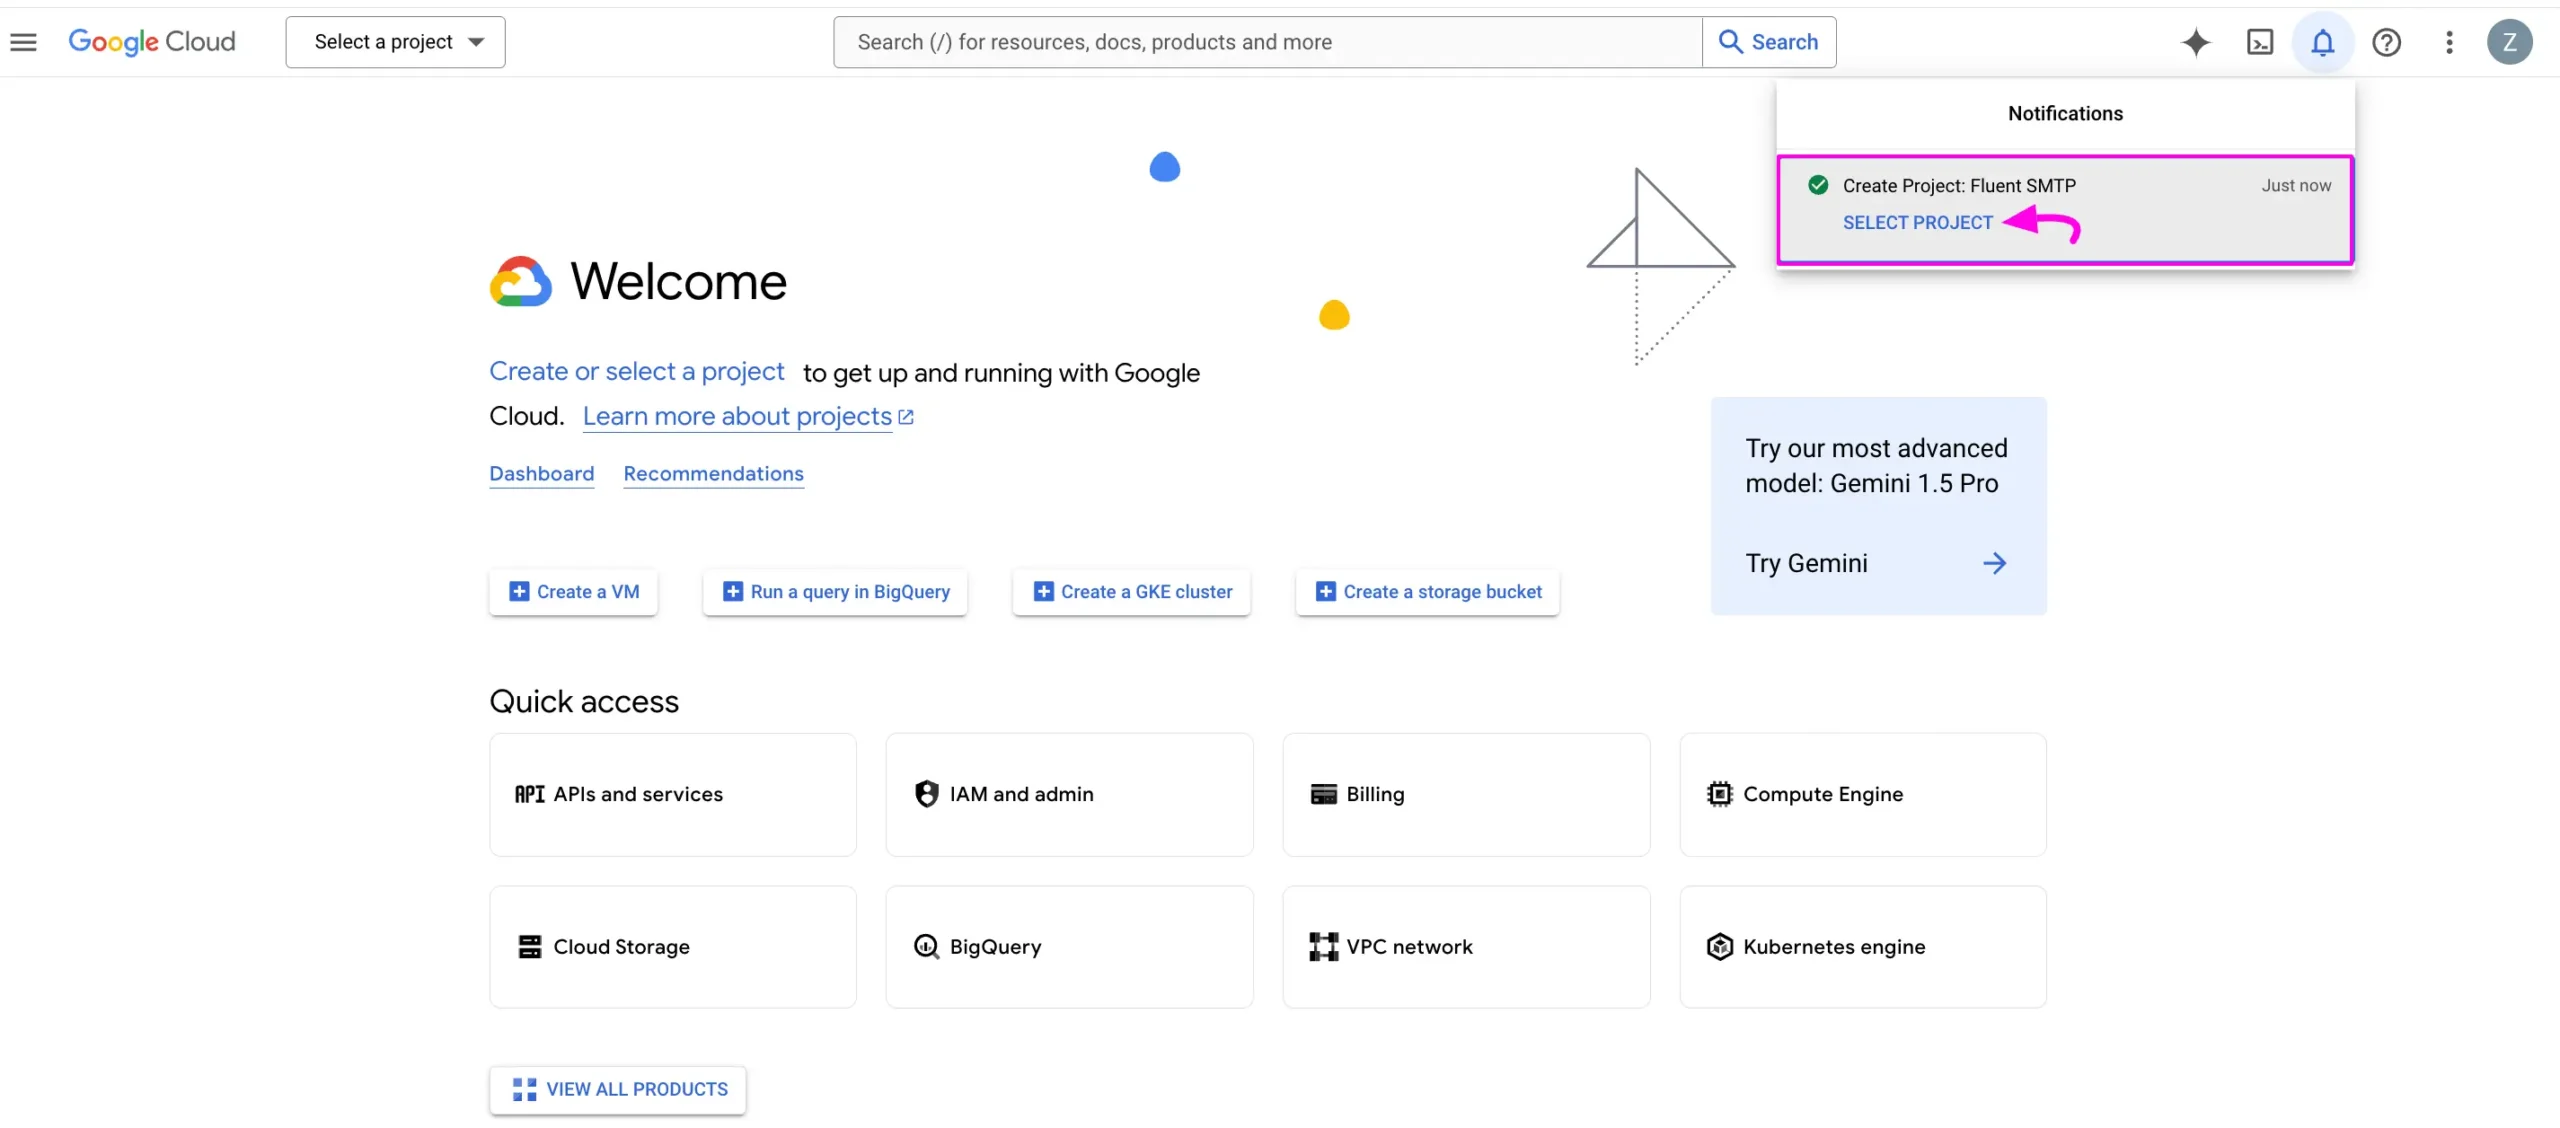
Once you click the create button your new project will be created.
Now, click the SELECT PROJECT button to enable the Gmail API services.
Enabling Gmail API #
After creating the Project google will redirect you to the project dashboard where you need to enable the GMAIL API for the project. To learn how to enable the API, follow the steps with screenshots below –
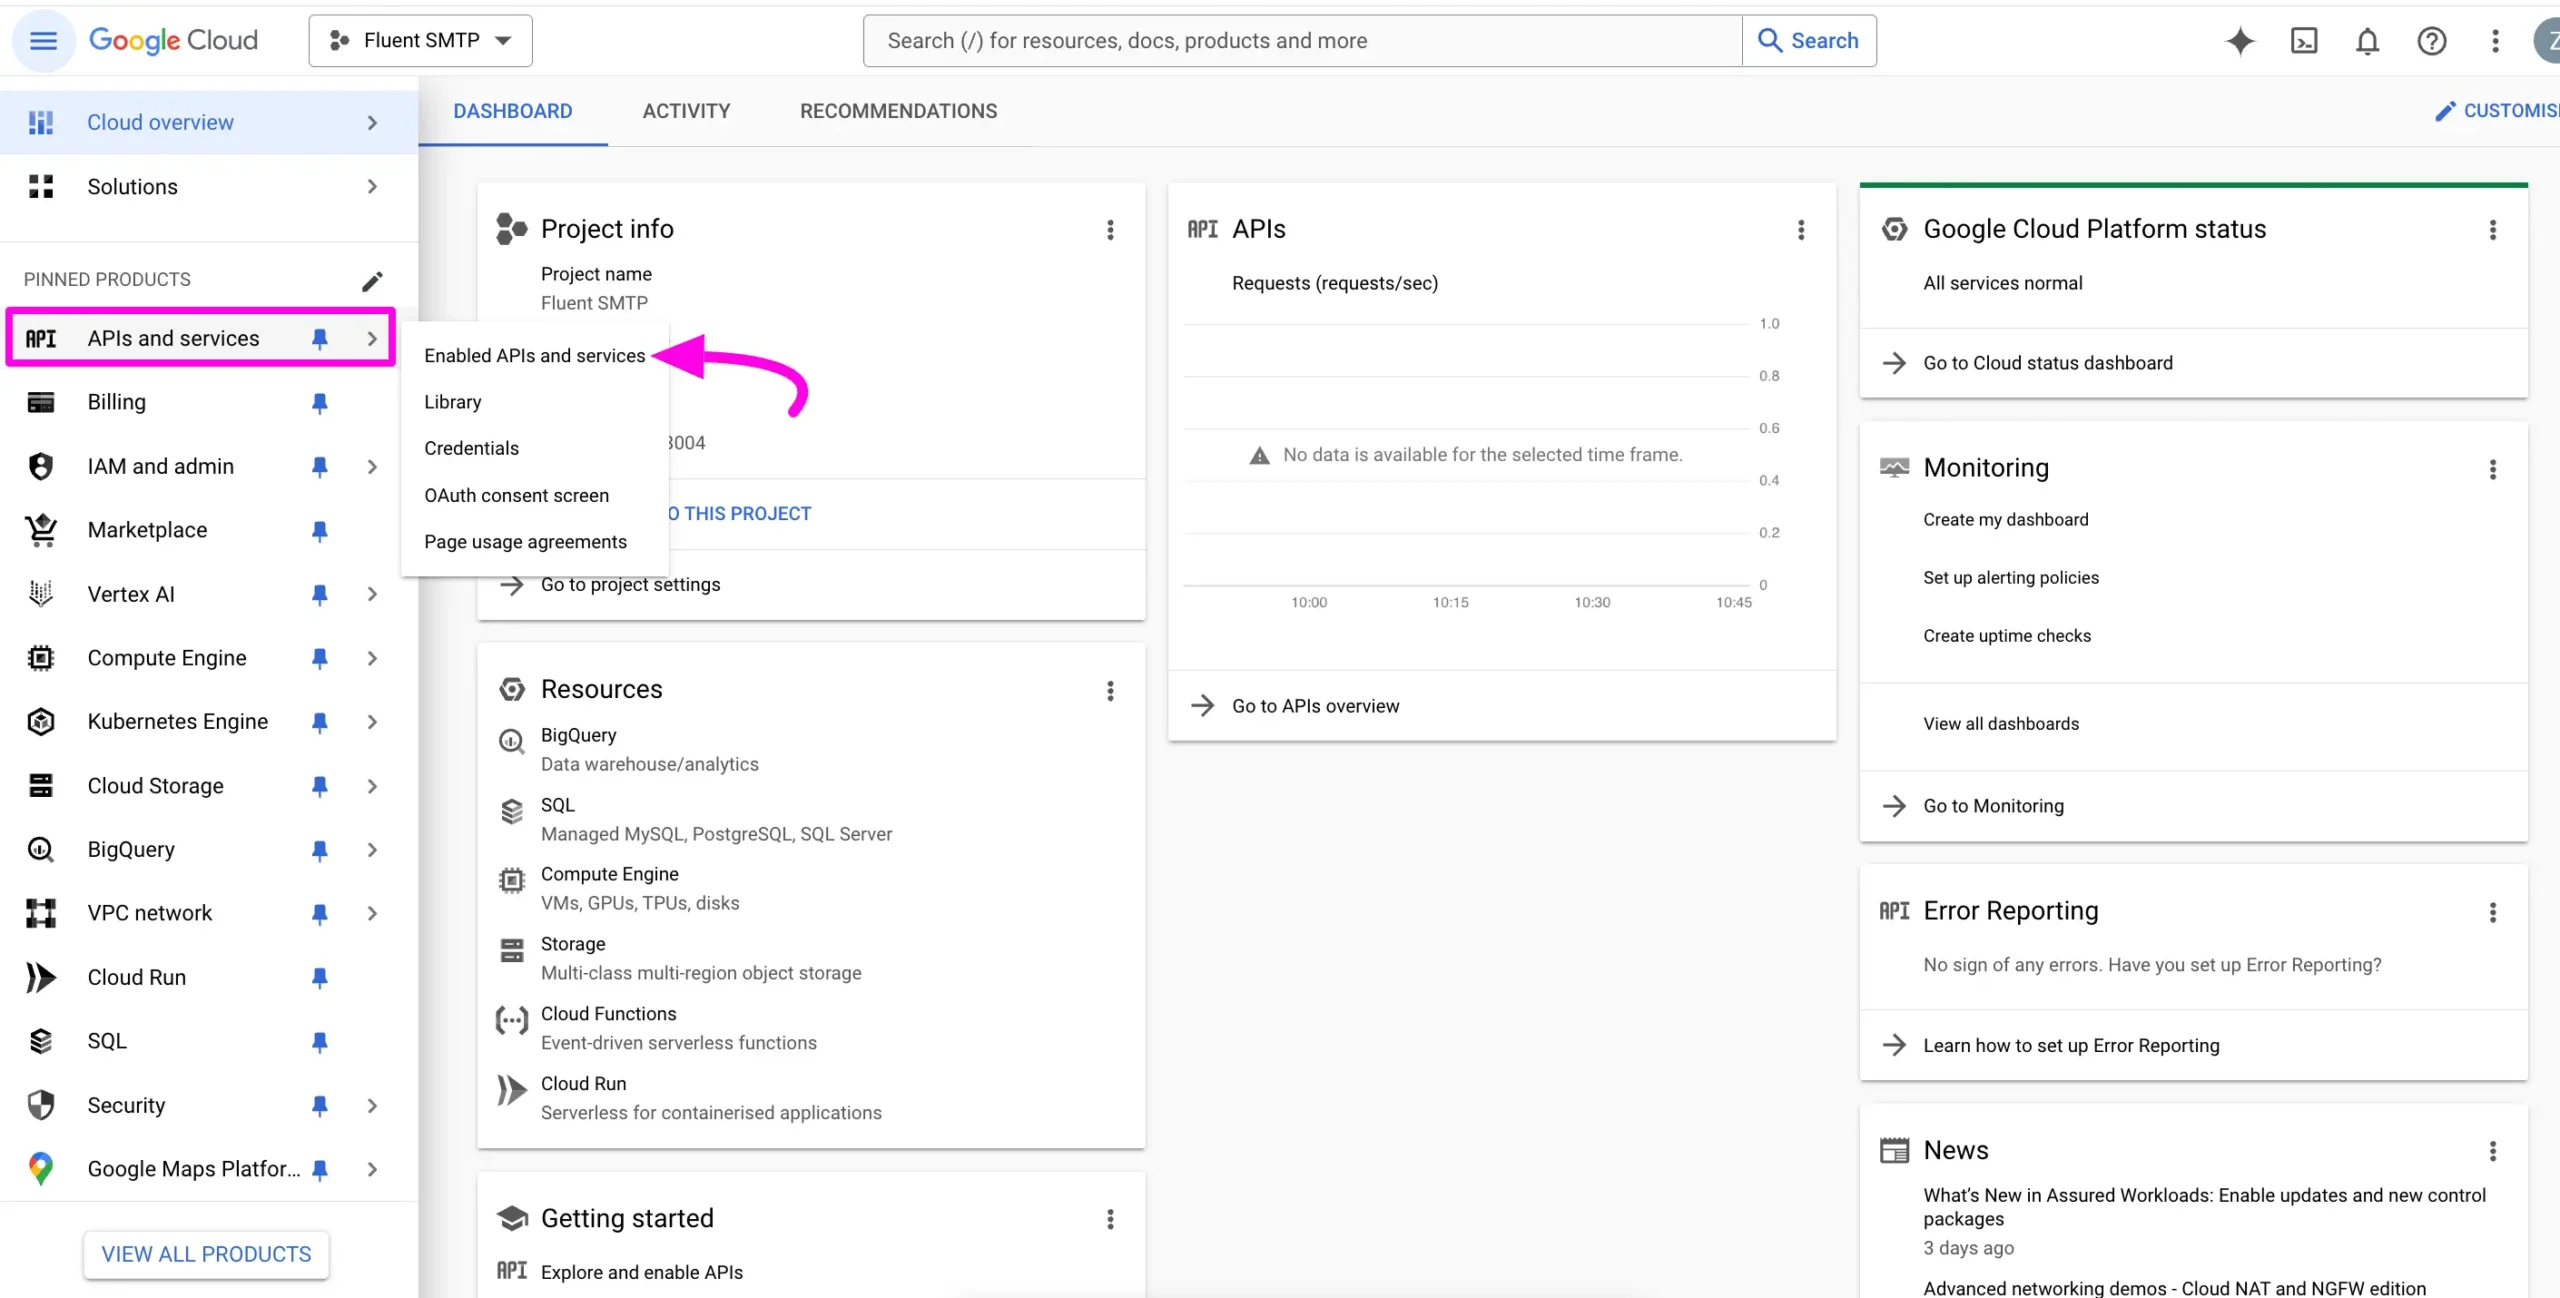
First, click the APIs & Services arrow icon from the left sidebar and then click on the Enable APIs & services option.
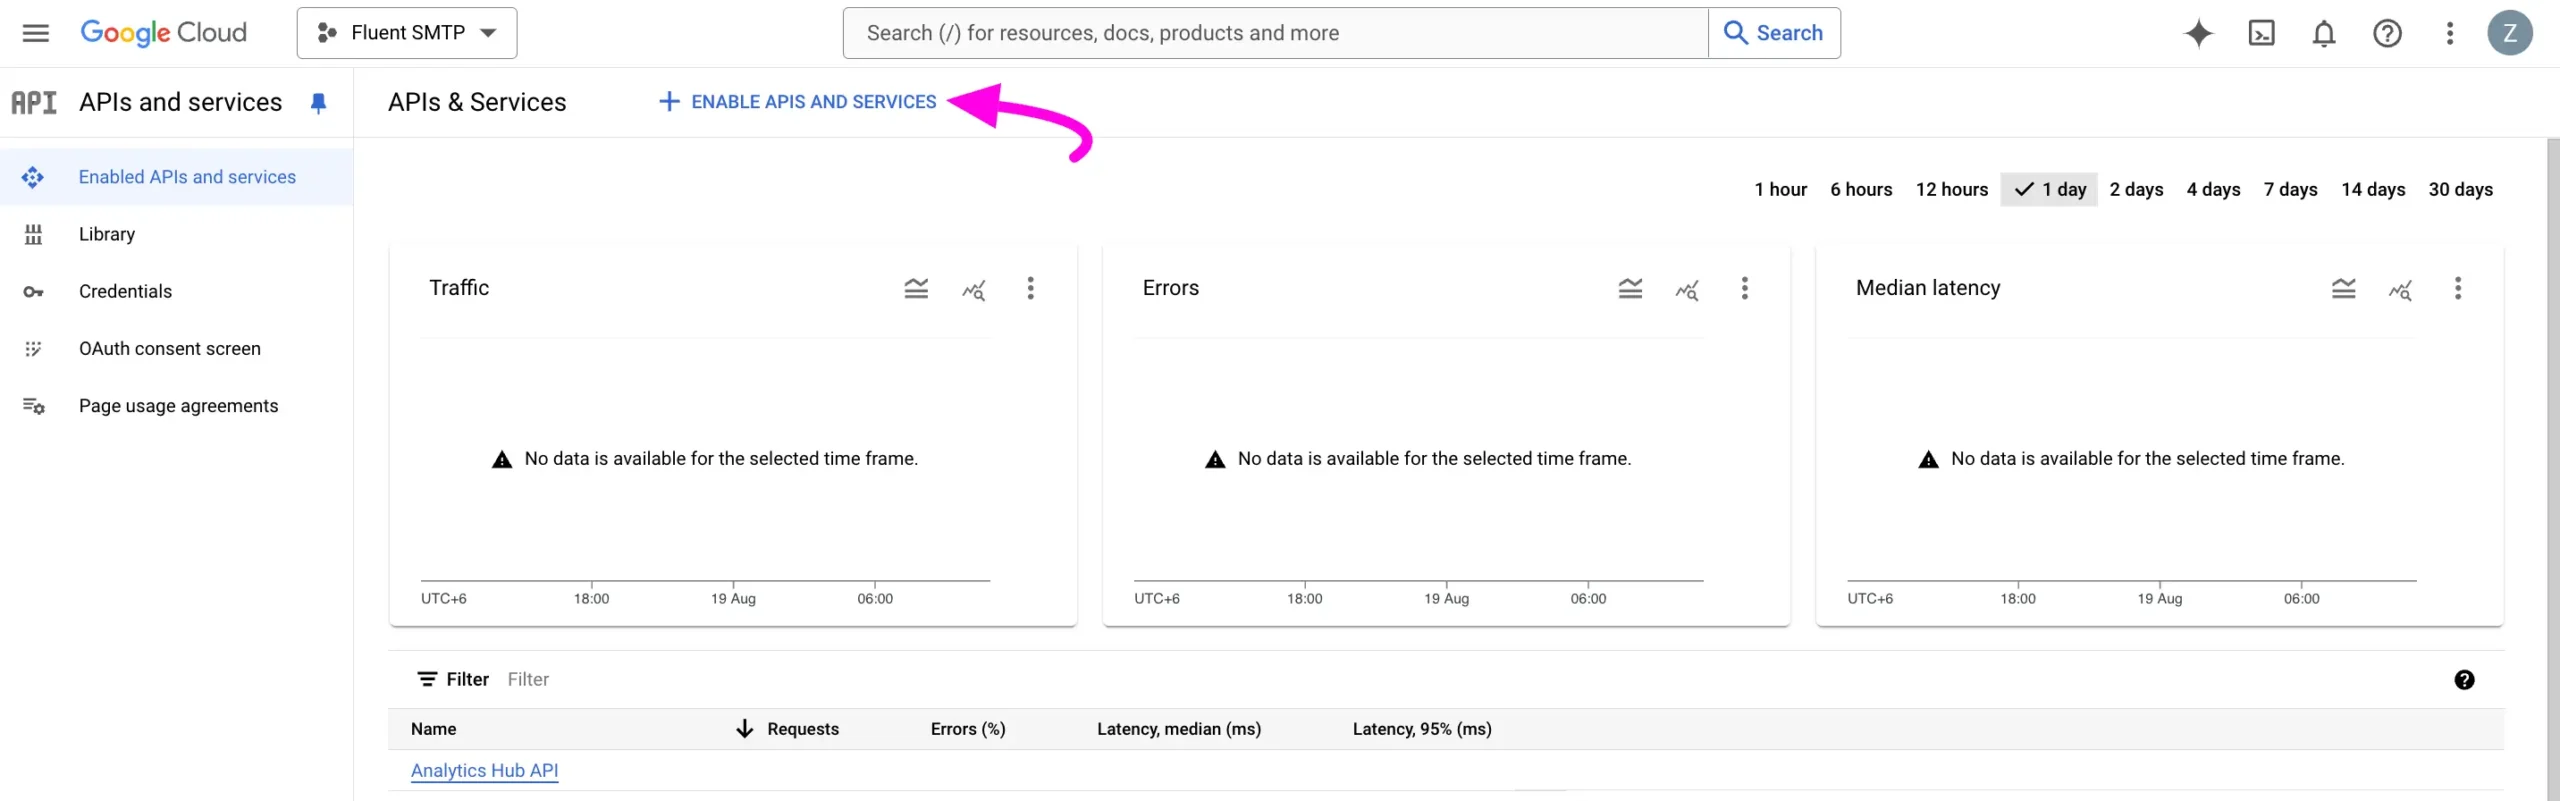
Click on the + ENABLE APIS AND SERVICES button.
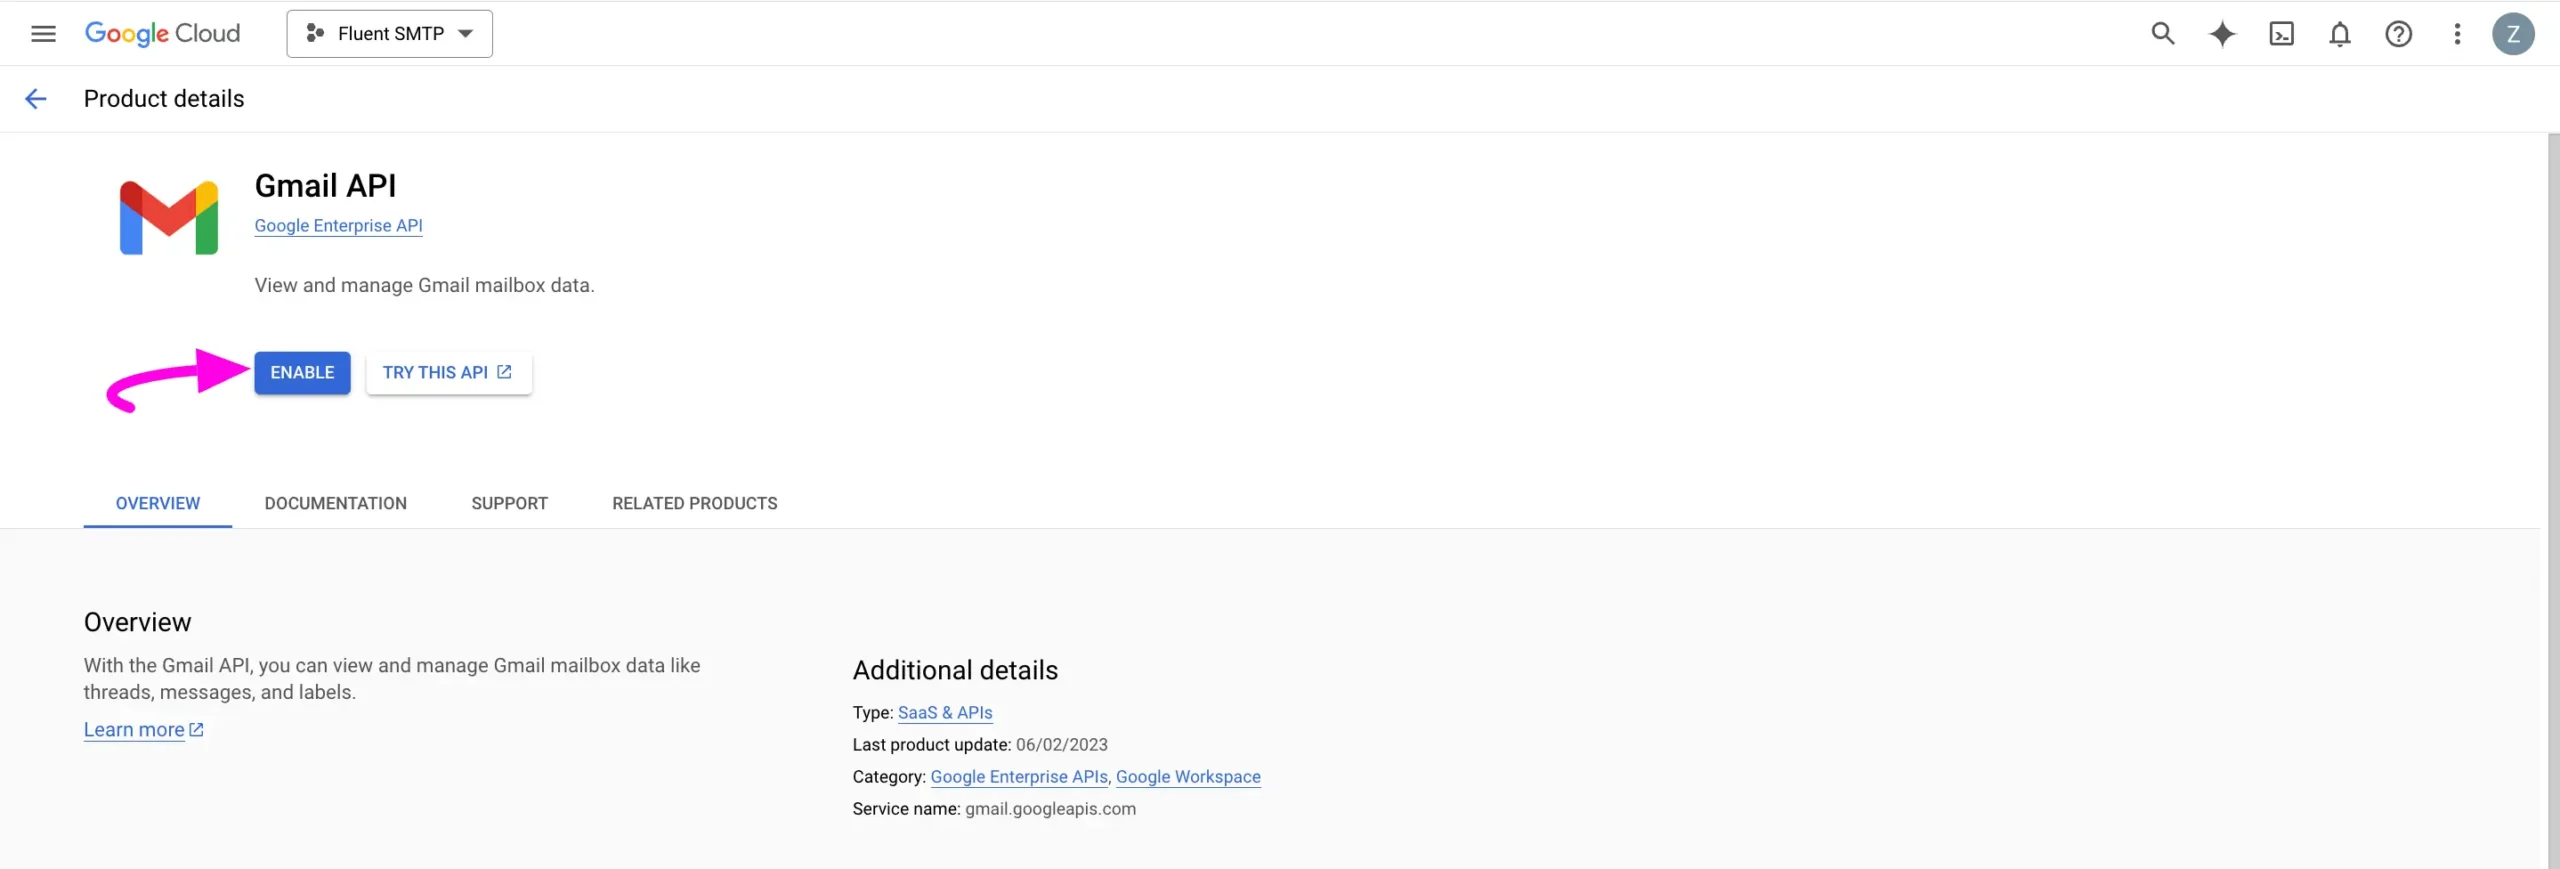
Select the Gmail API tab under the Google Workspace.
Now, click on the ENABLE button to activate the Gmail API. It takes a few seconds to enable the API and then redirect you to the GMAIL API Dashboard.
Creating Credentials #
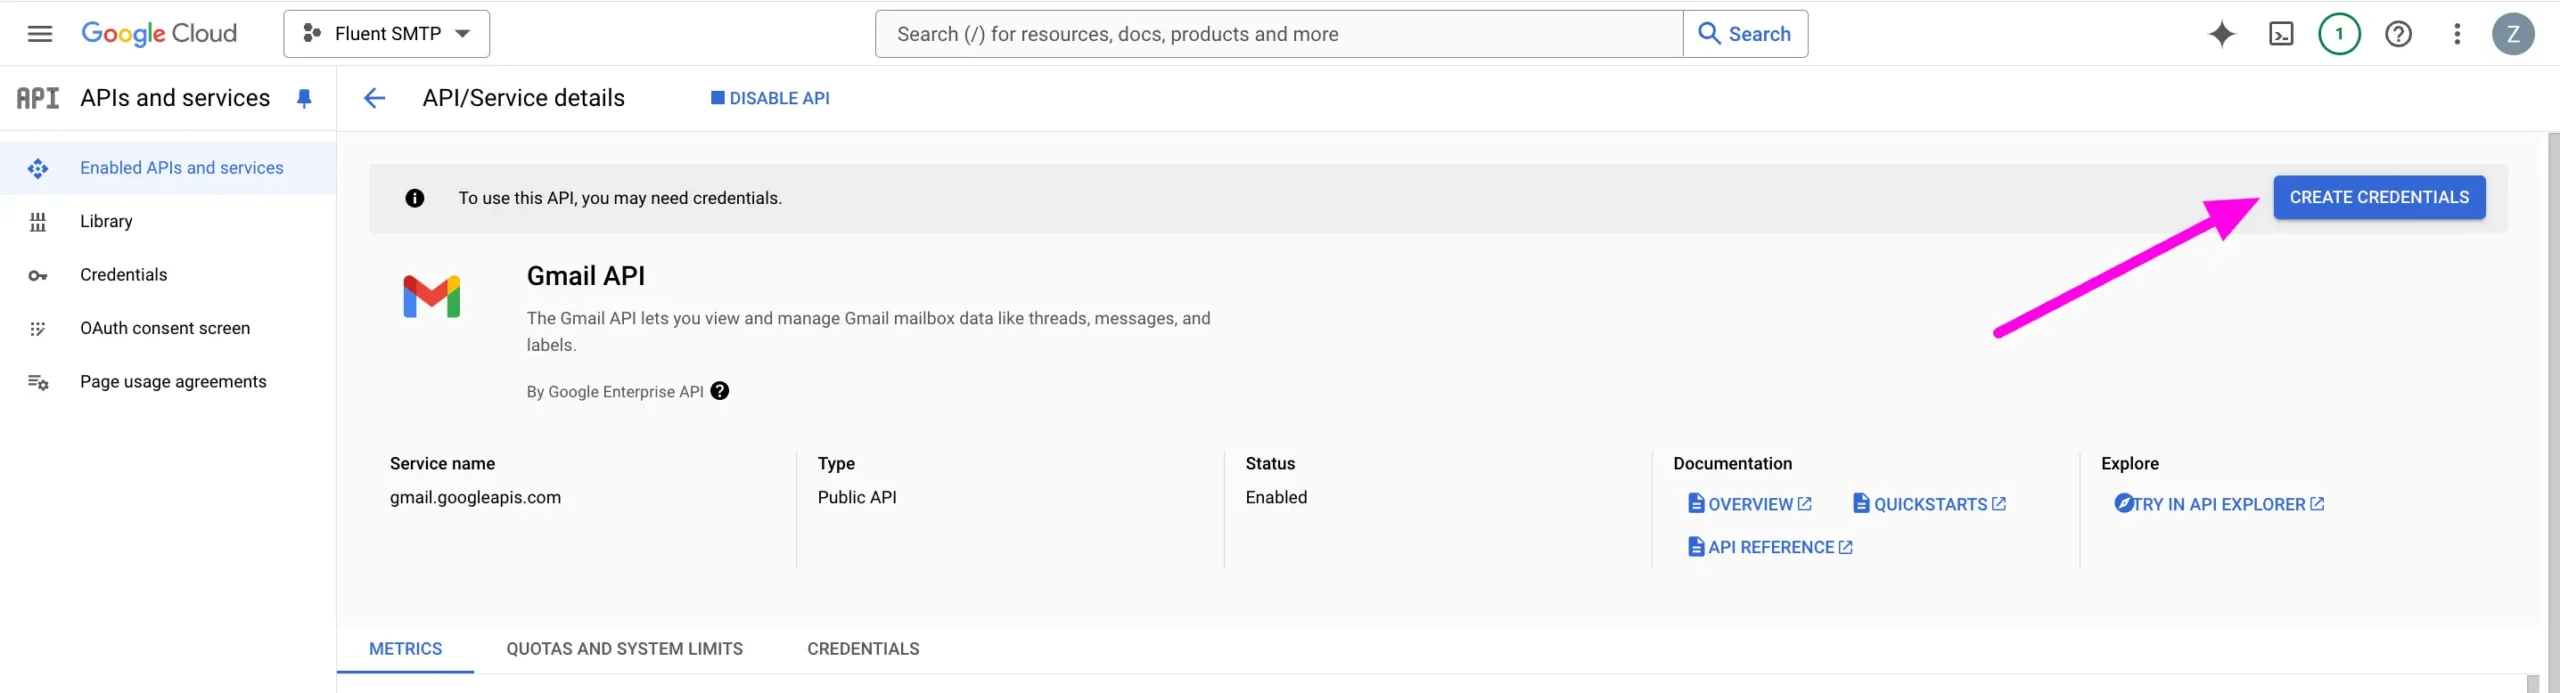
Once you enable the Gmail API, you need to create credentials to get the Client ID & Client Secret of your Gmail. To learn how to create the credentials, follow the steps with screenshots below –
First, click on the CREATE CREDENTIALS button on the top right side of the page.
Here, you will find five steps that you need to complete. These are:
- Credential Type
- OAuth consent screen
- Scopes
- OAuth Client ID
- Your Credentials.
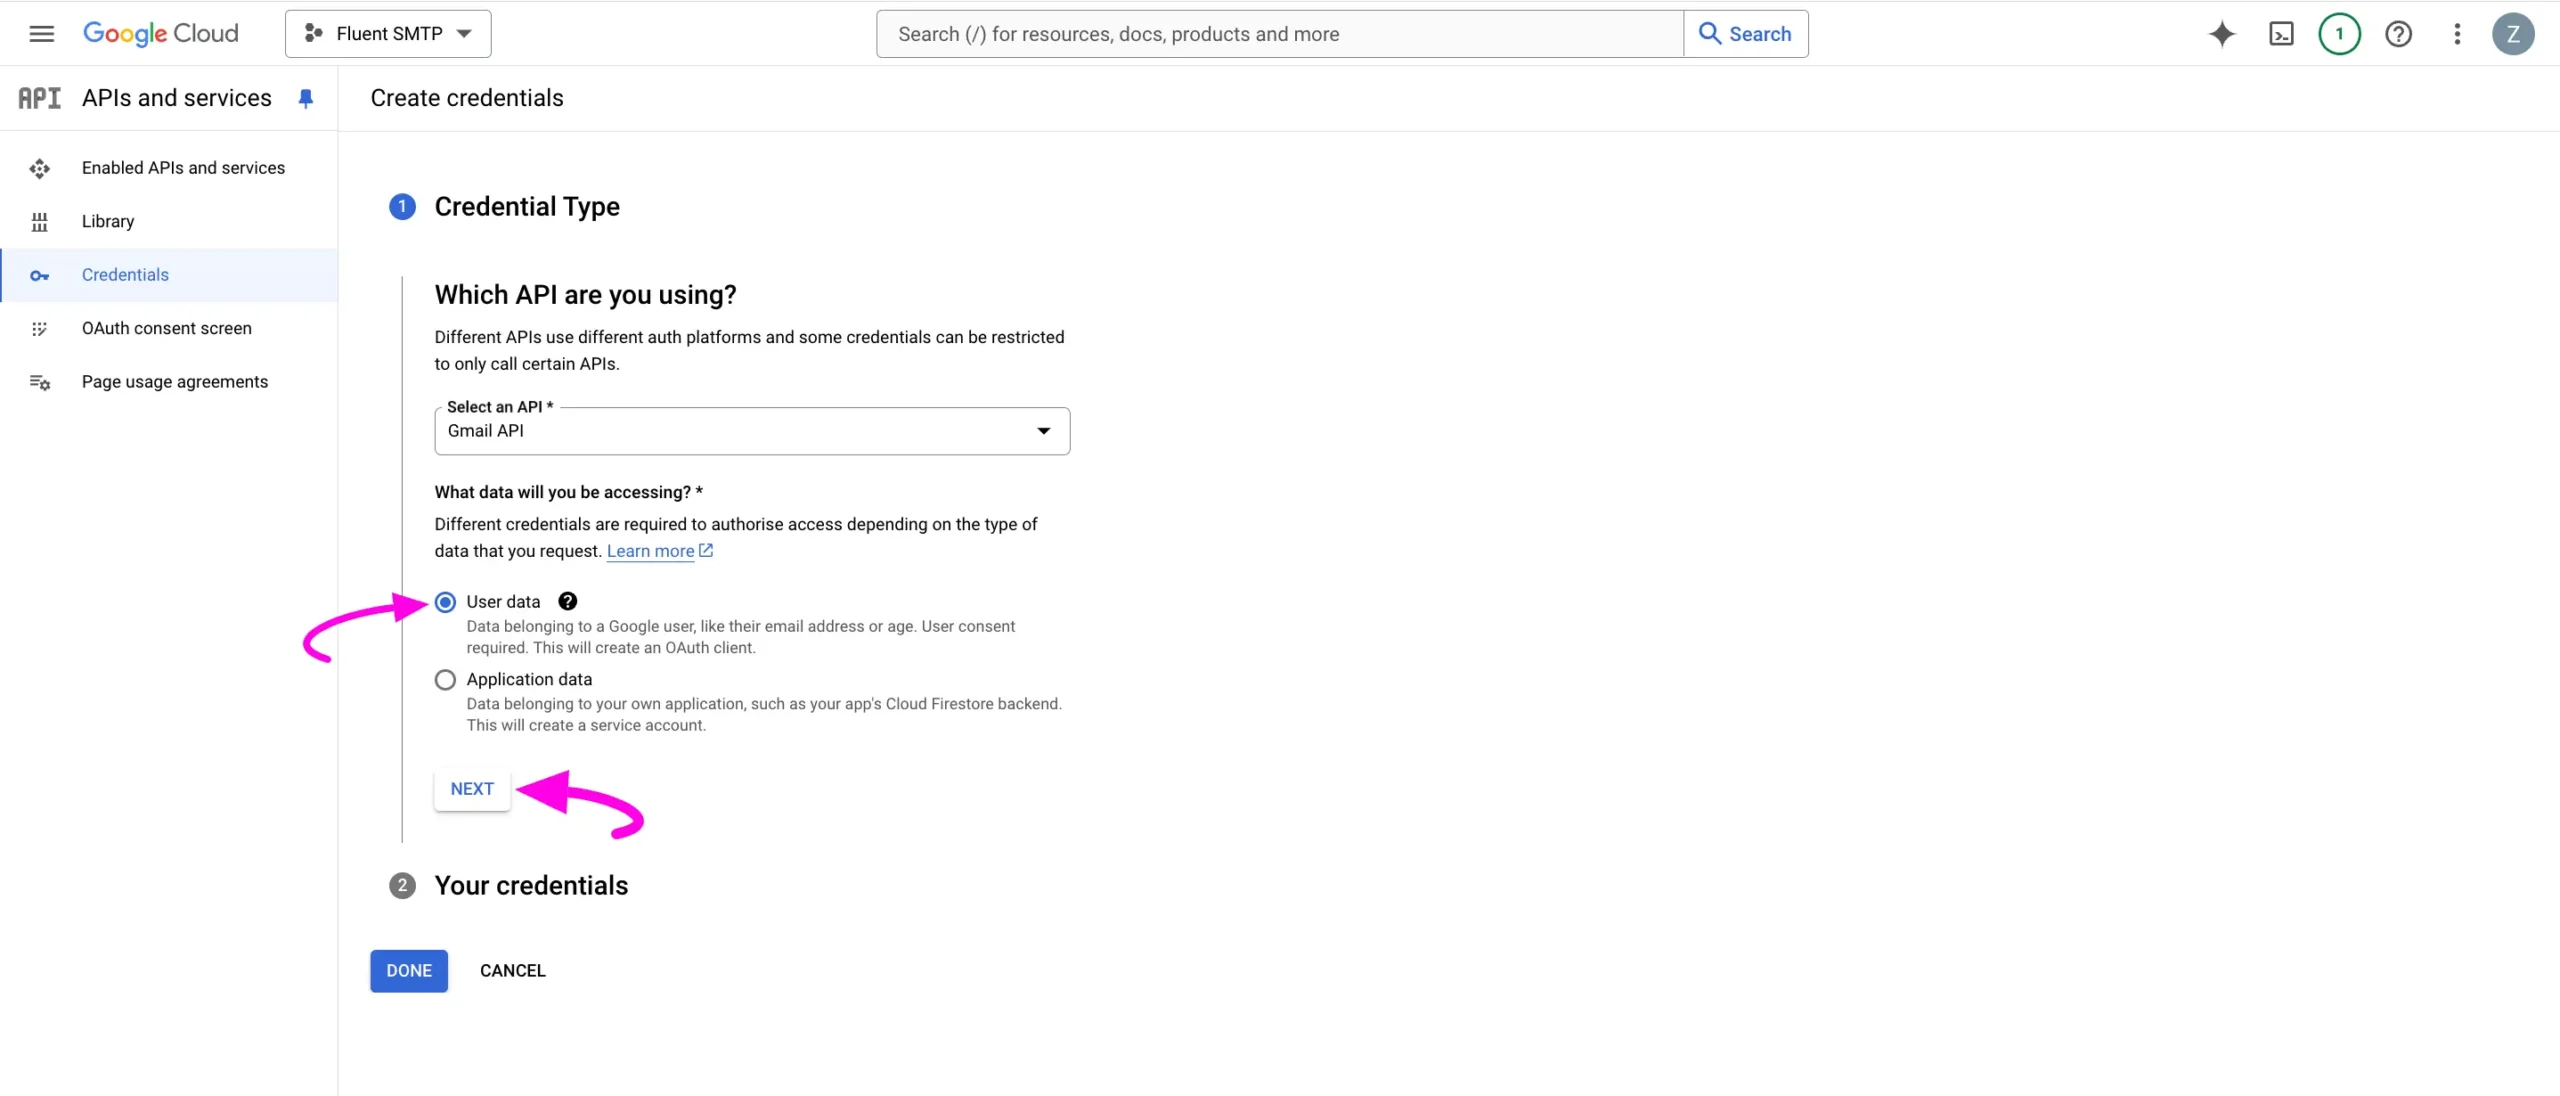
Credential Type #
In Credential Type, you need to select the GMAIL API from the dropdown list as the target GMAIL API that is selected by default, check the User data as the target accessible data, and press the Next button.
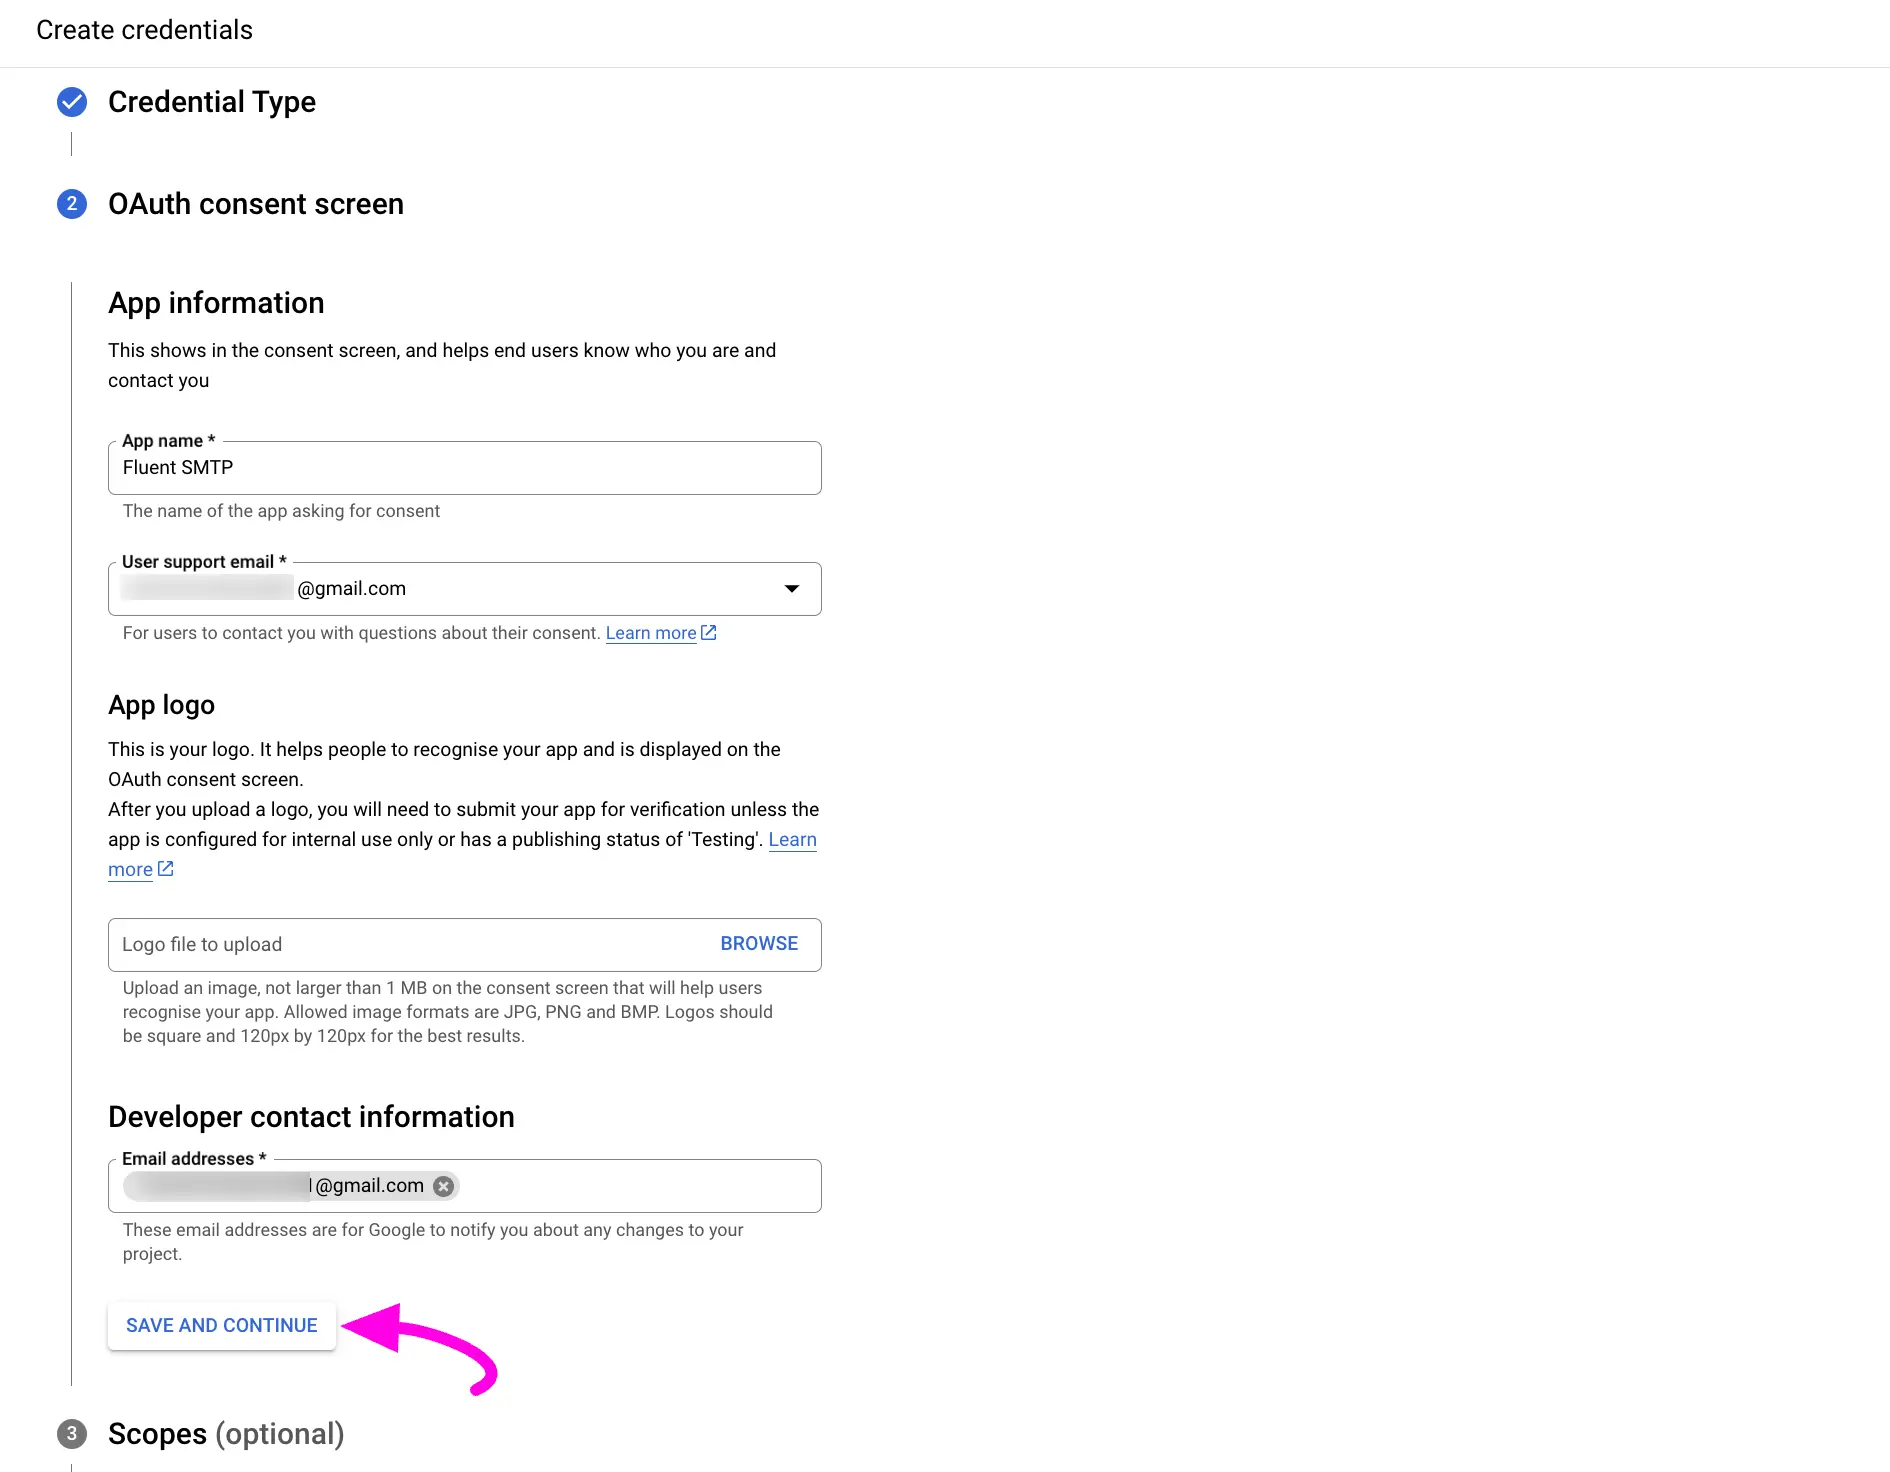
OAuth consent screen #
In the OAuth Consent Screen, give a name for the App Name, an email address for the User support email, and also an email for the Developer contact information. You can also upload the App logo from your device by clicking the BROWSE button.
Remember, here, the email addresses are used as the Email Addresses you will be using to deliver emails from WordPress using the FluentSMTP plugin.
Once the inputs are done click on SAVE AND CONTINUE button.
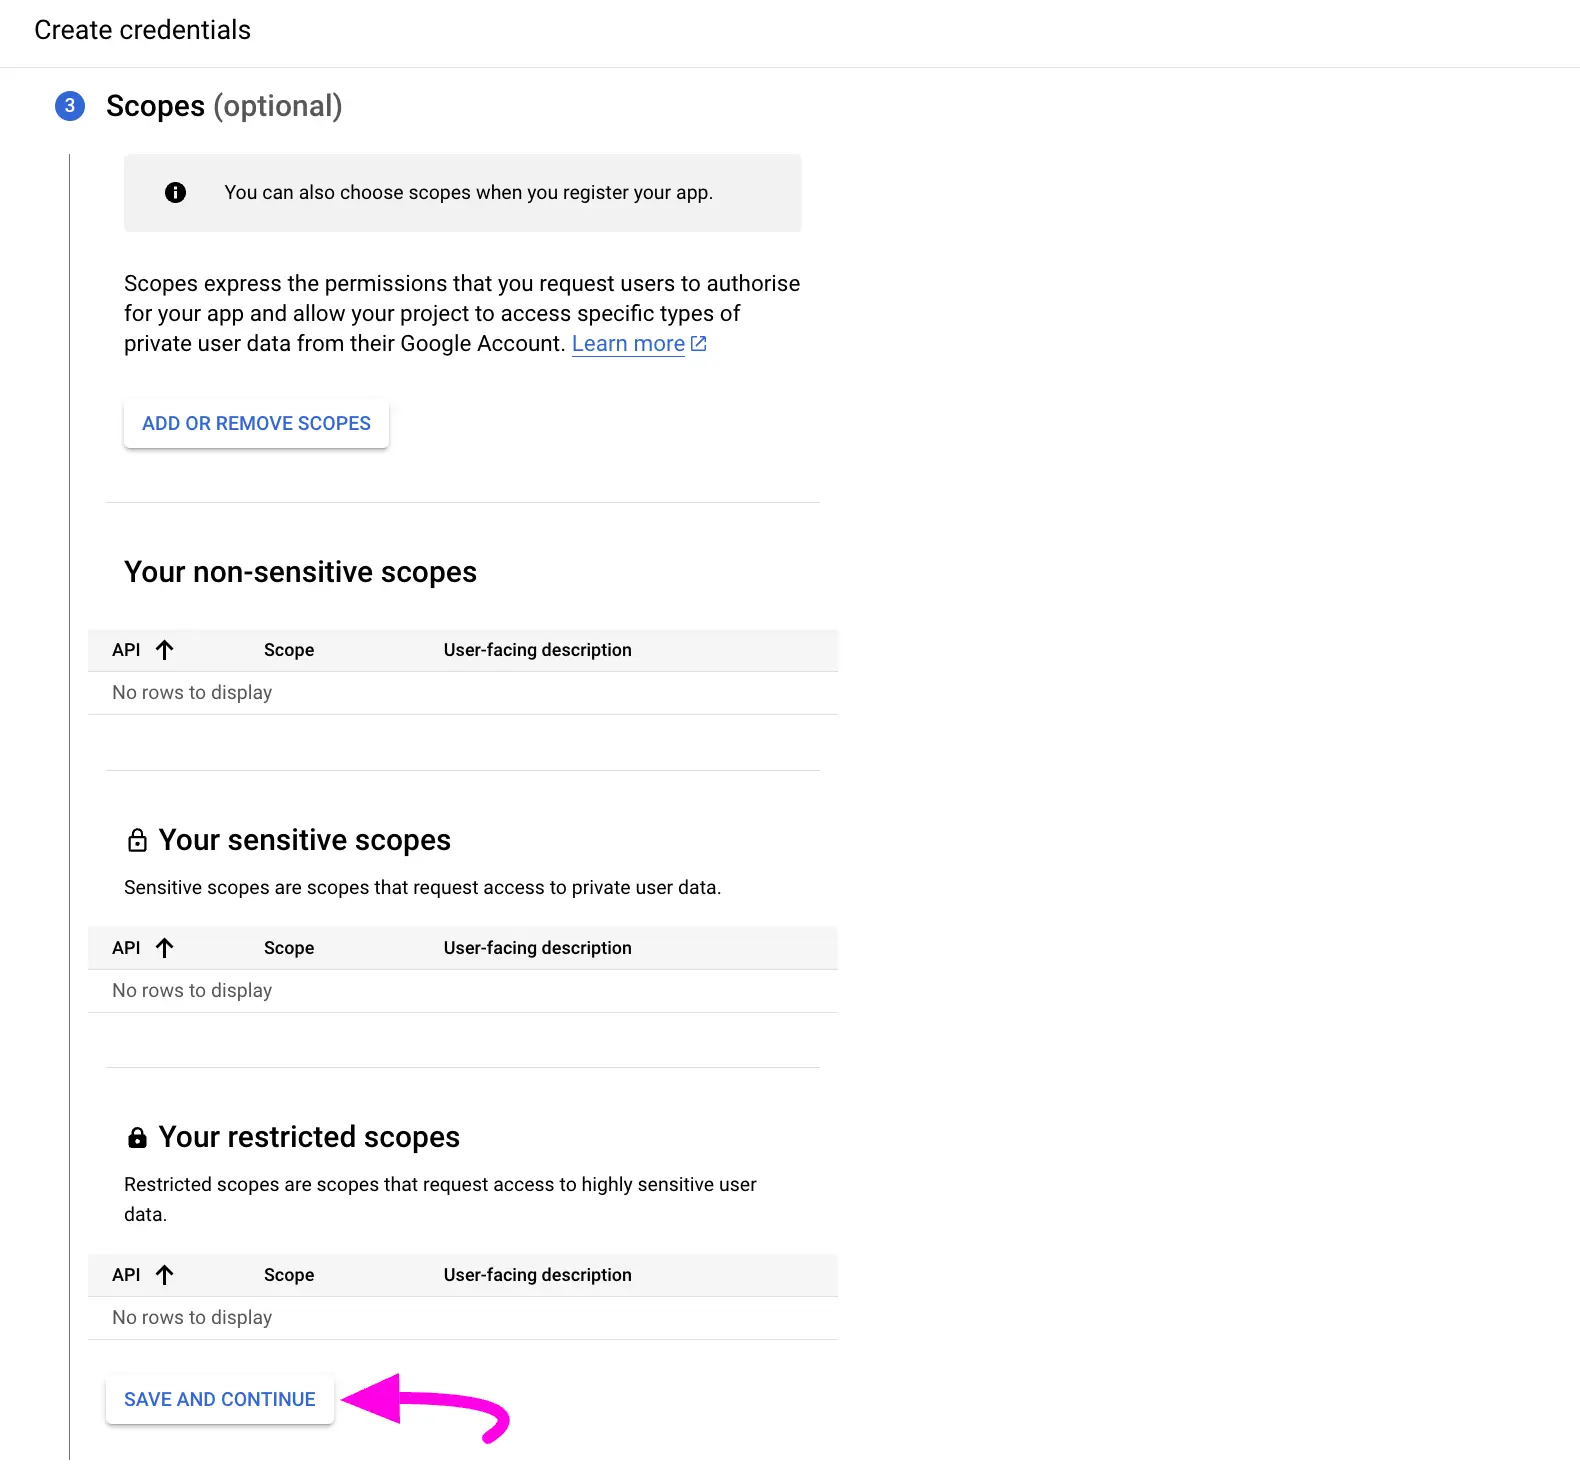
Scopes (optional) #
For FluentSMTP email delivery, you do not need to do anything for Scopes options. But, you can still configure your requirements if you need to. As it is optional, you can skip it and go to the next step by clicking the SAVE AND CONTINUE button.
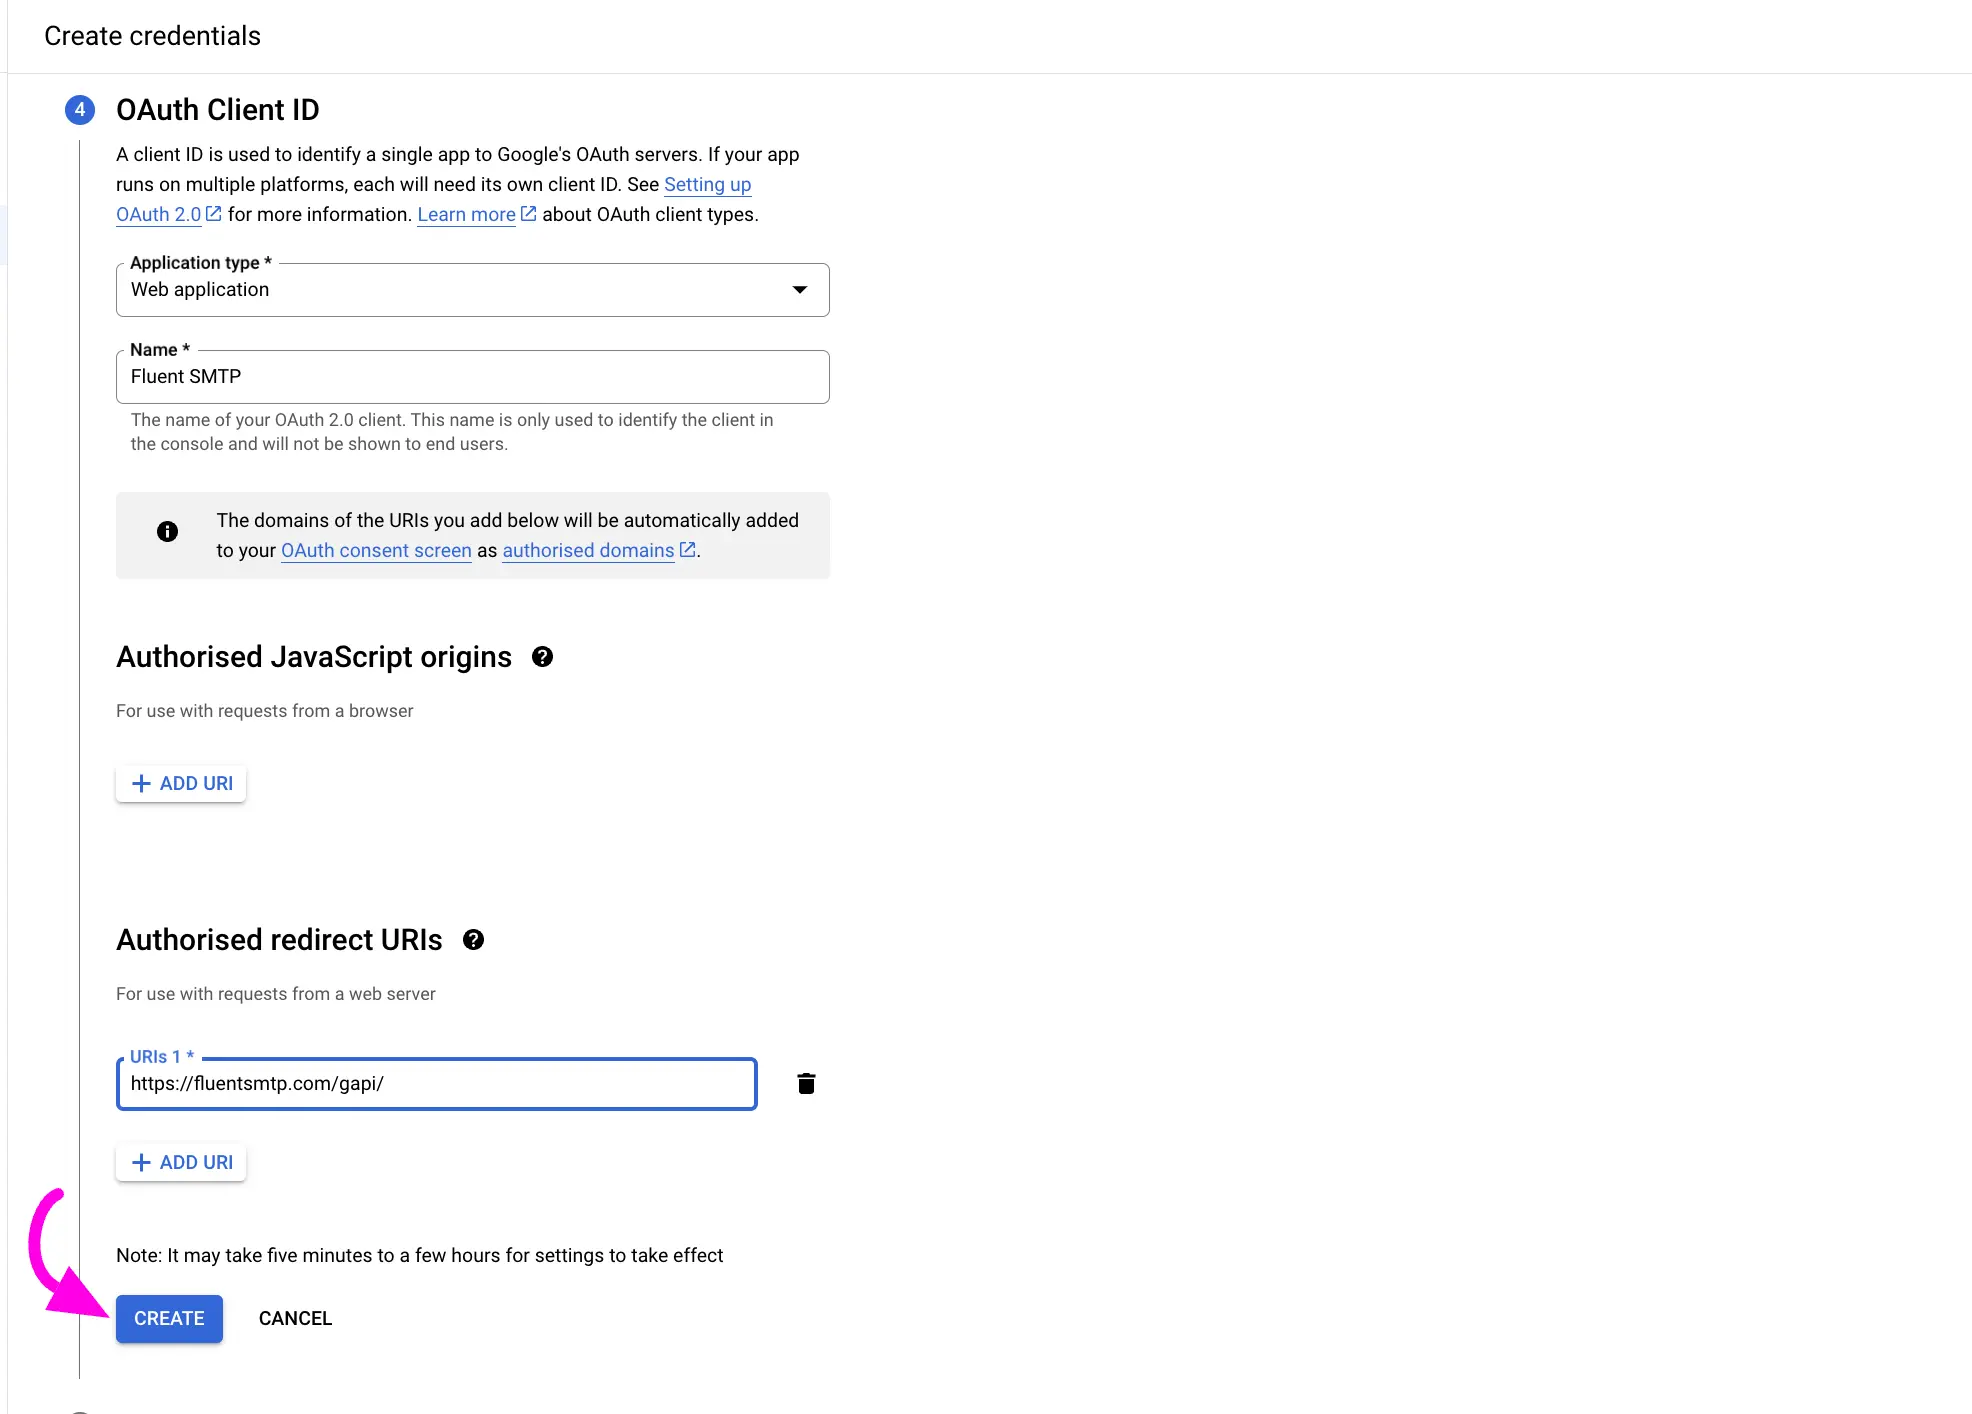
OAuth Client ID #
Now, in the OAuth Client ID, you need to provide –
- The Application Type as Web Application from the dropdown list.
- A Name for the Application.
- The Authorized Redirect URL that you have copied before from the Gmail / Google Workspace API settings in Fluent SMTP.
Once you are done, click the CREATE button.
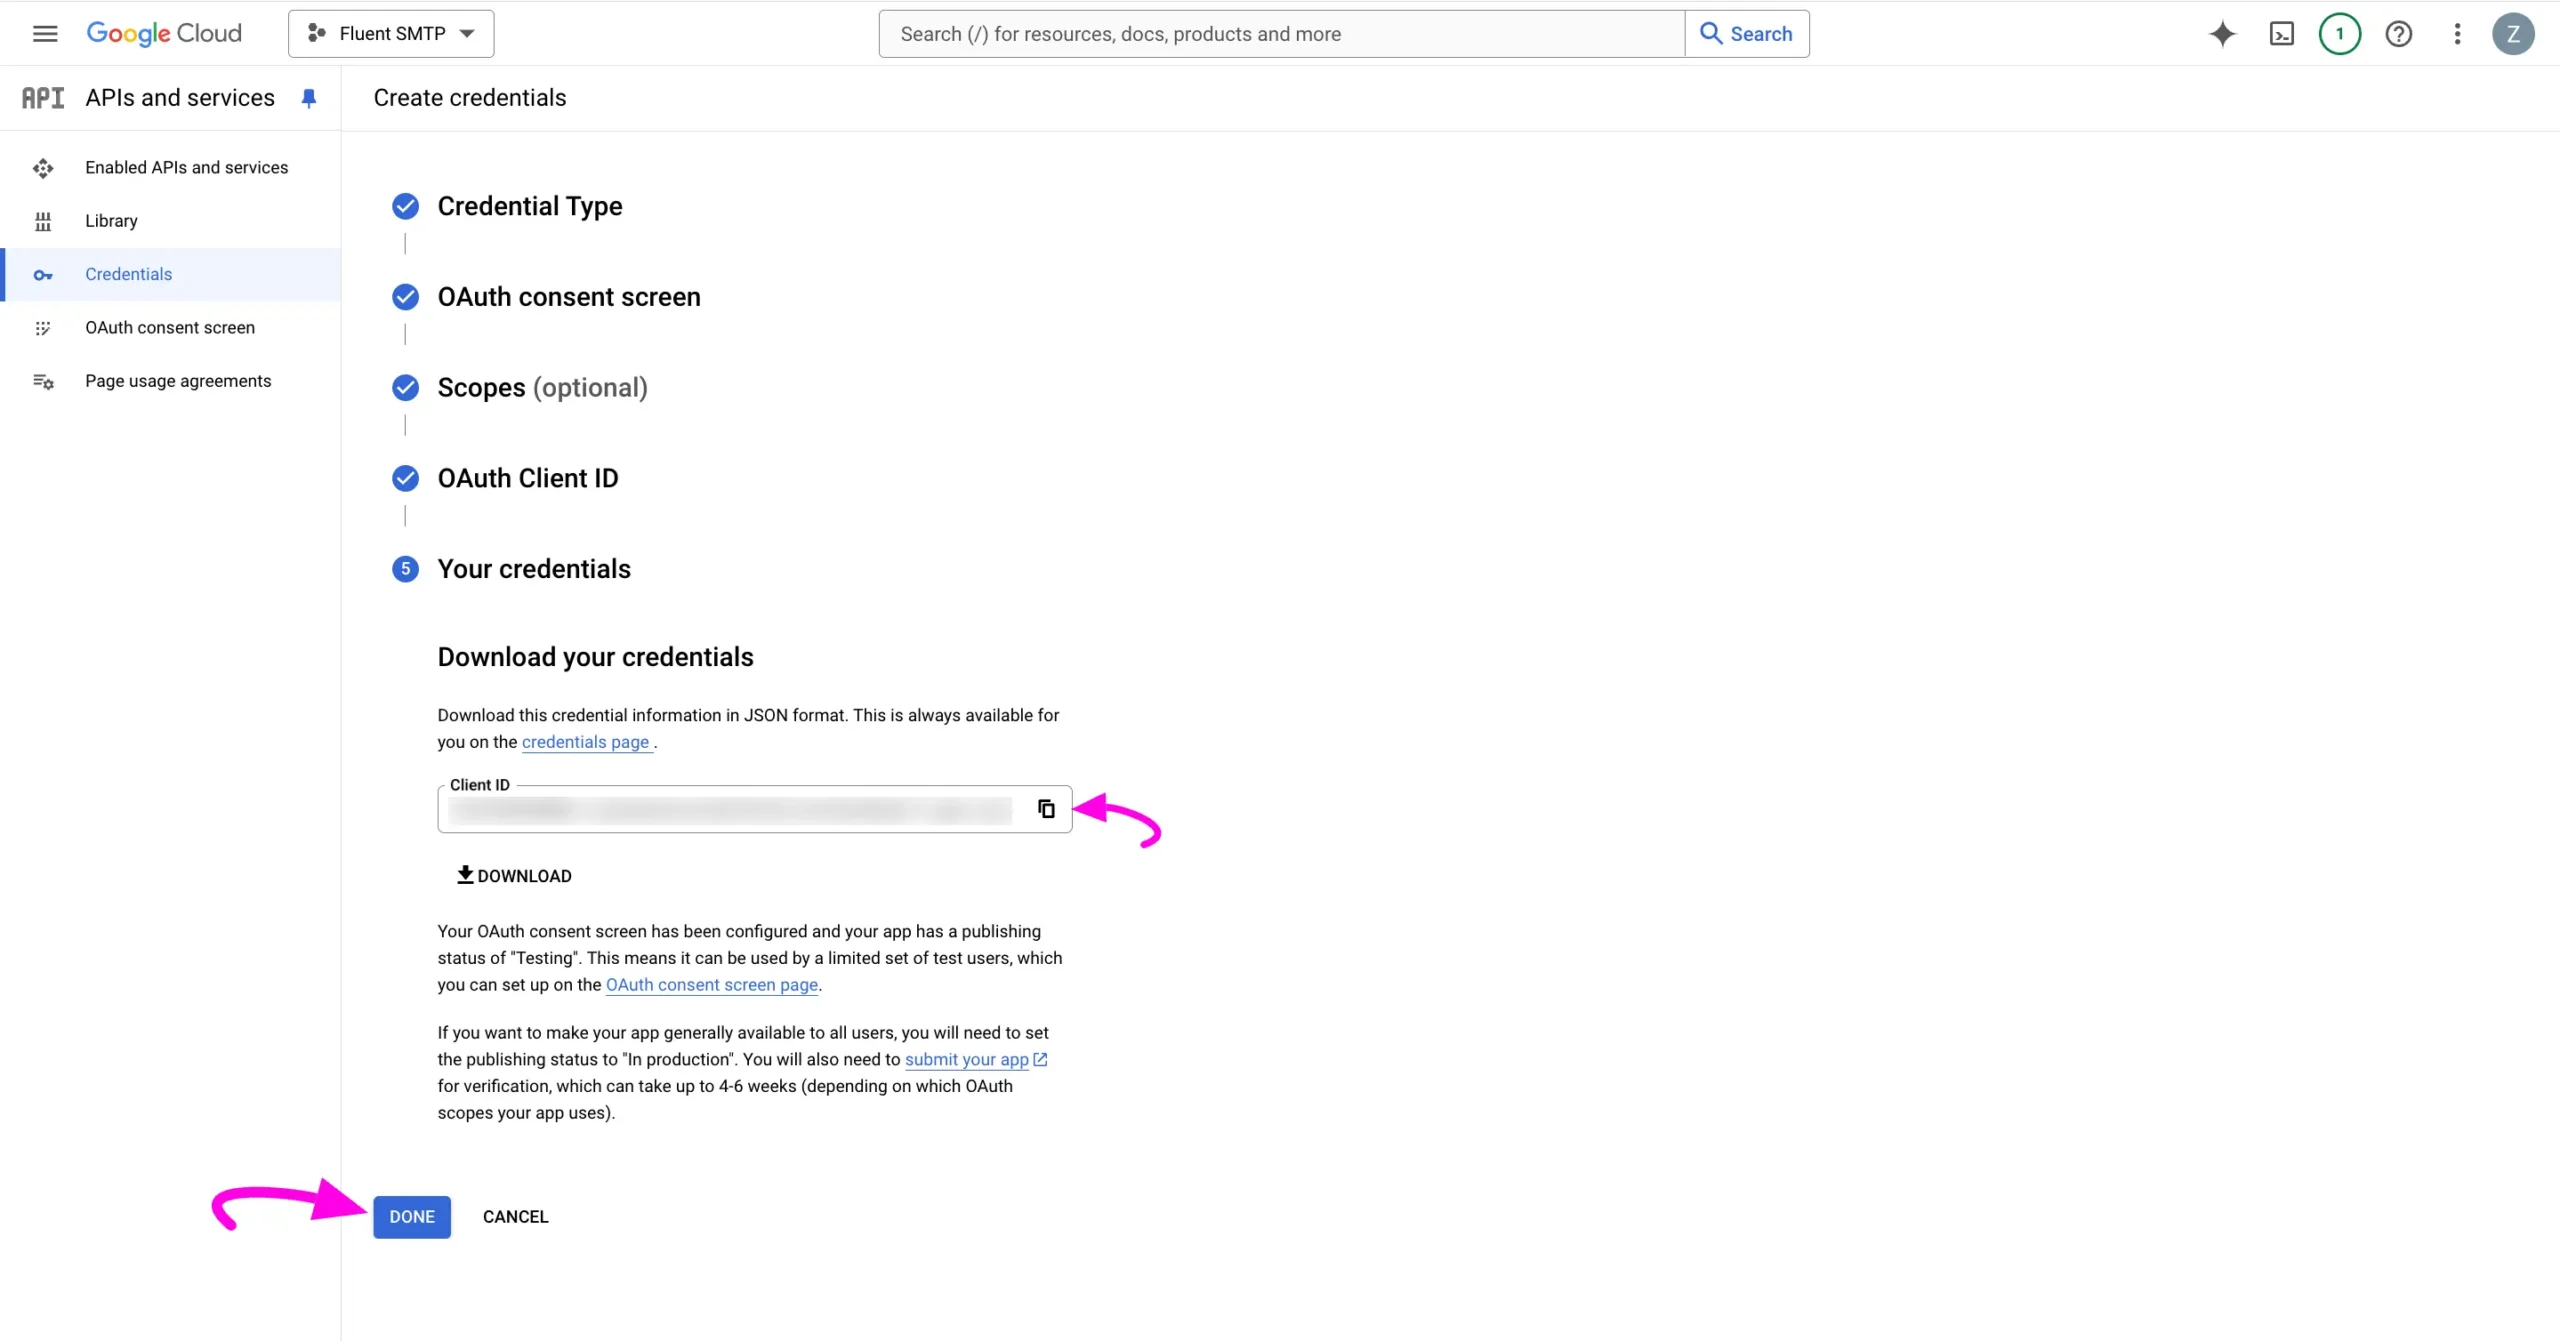
Your Credentials #
In this step, you will be offered a Client ID as a credential. You can skip downloading or copying it as of now.
Now click on the DONE button and the credentials for Fluent SMTP will be ready which you will collect later.
OAuth Publish App #
Now you need to publish the app you just created. Go to the OAuth Consent Screen from the left sidebar and you will find your App detailed page.
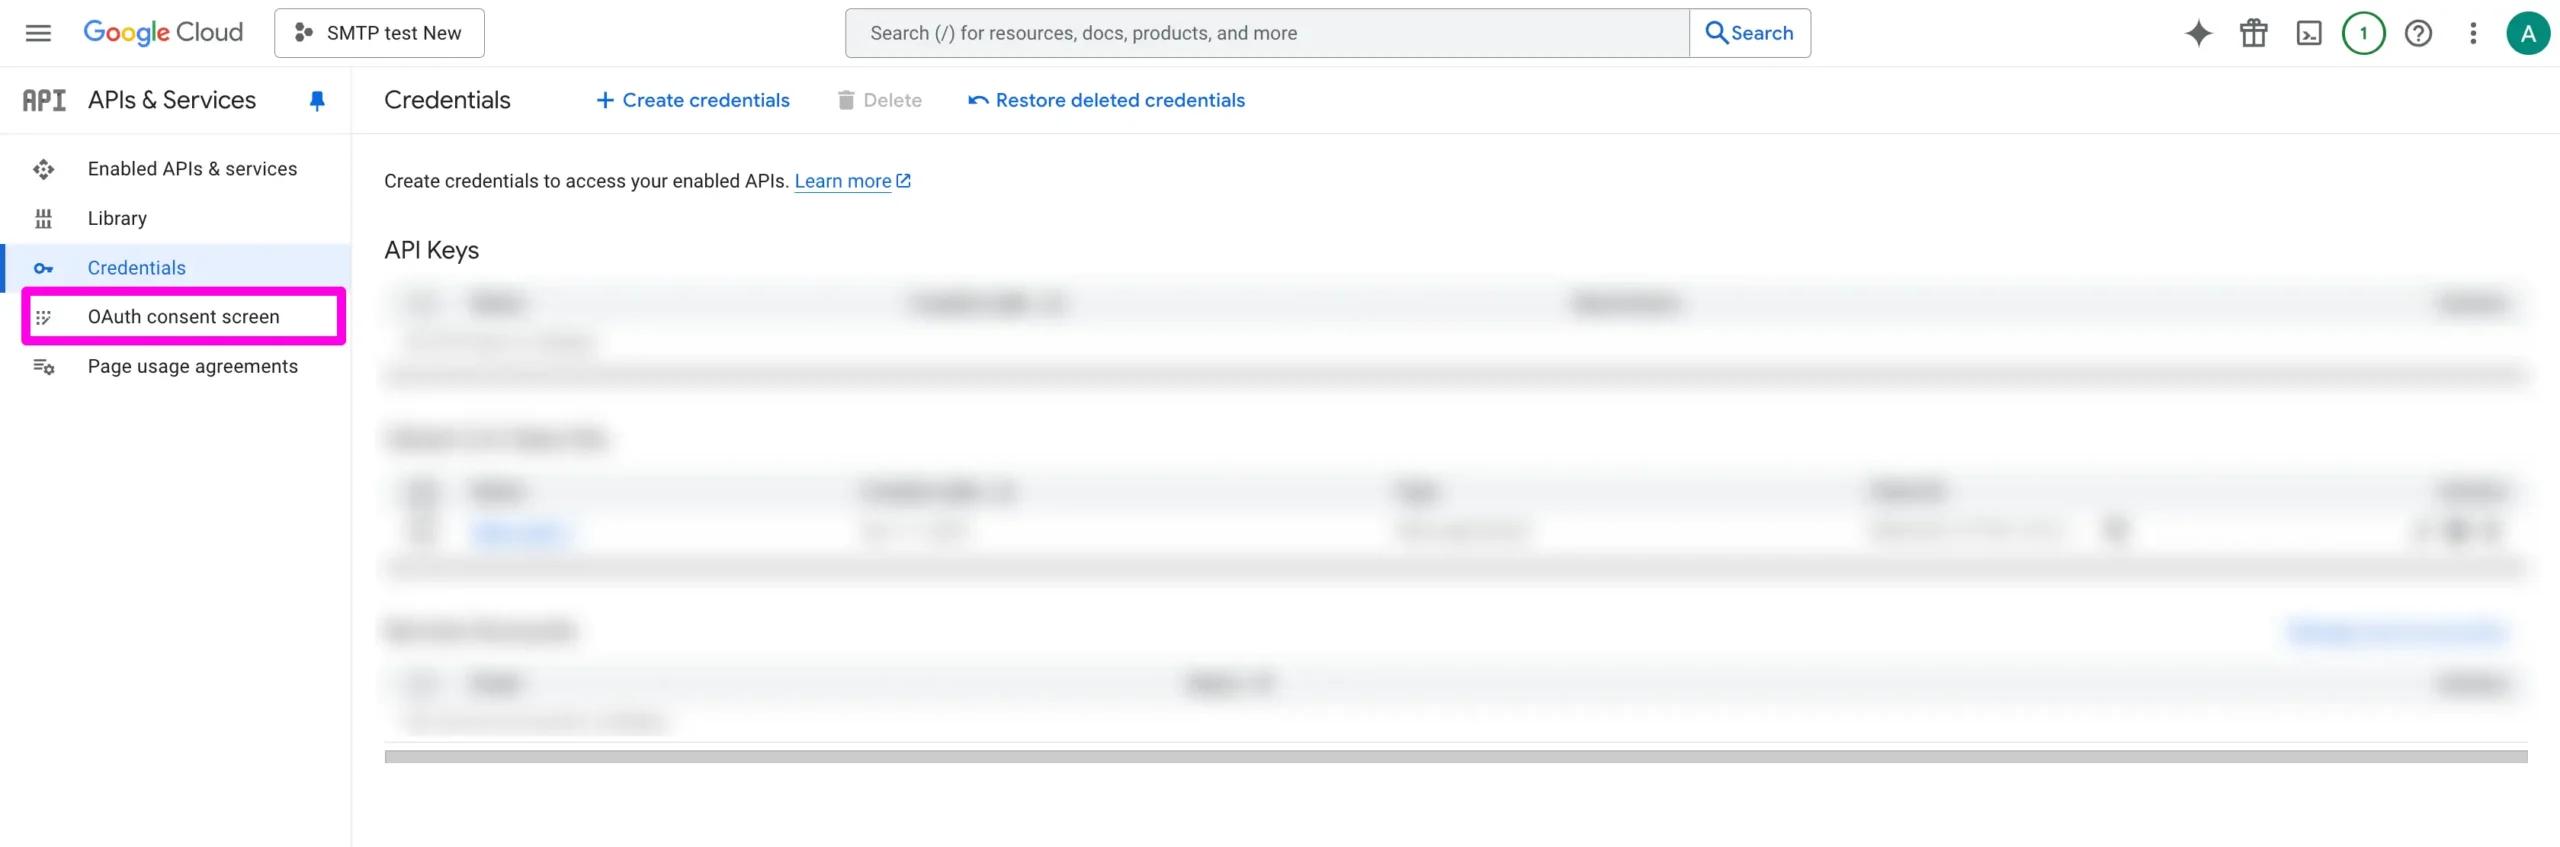
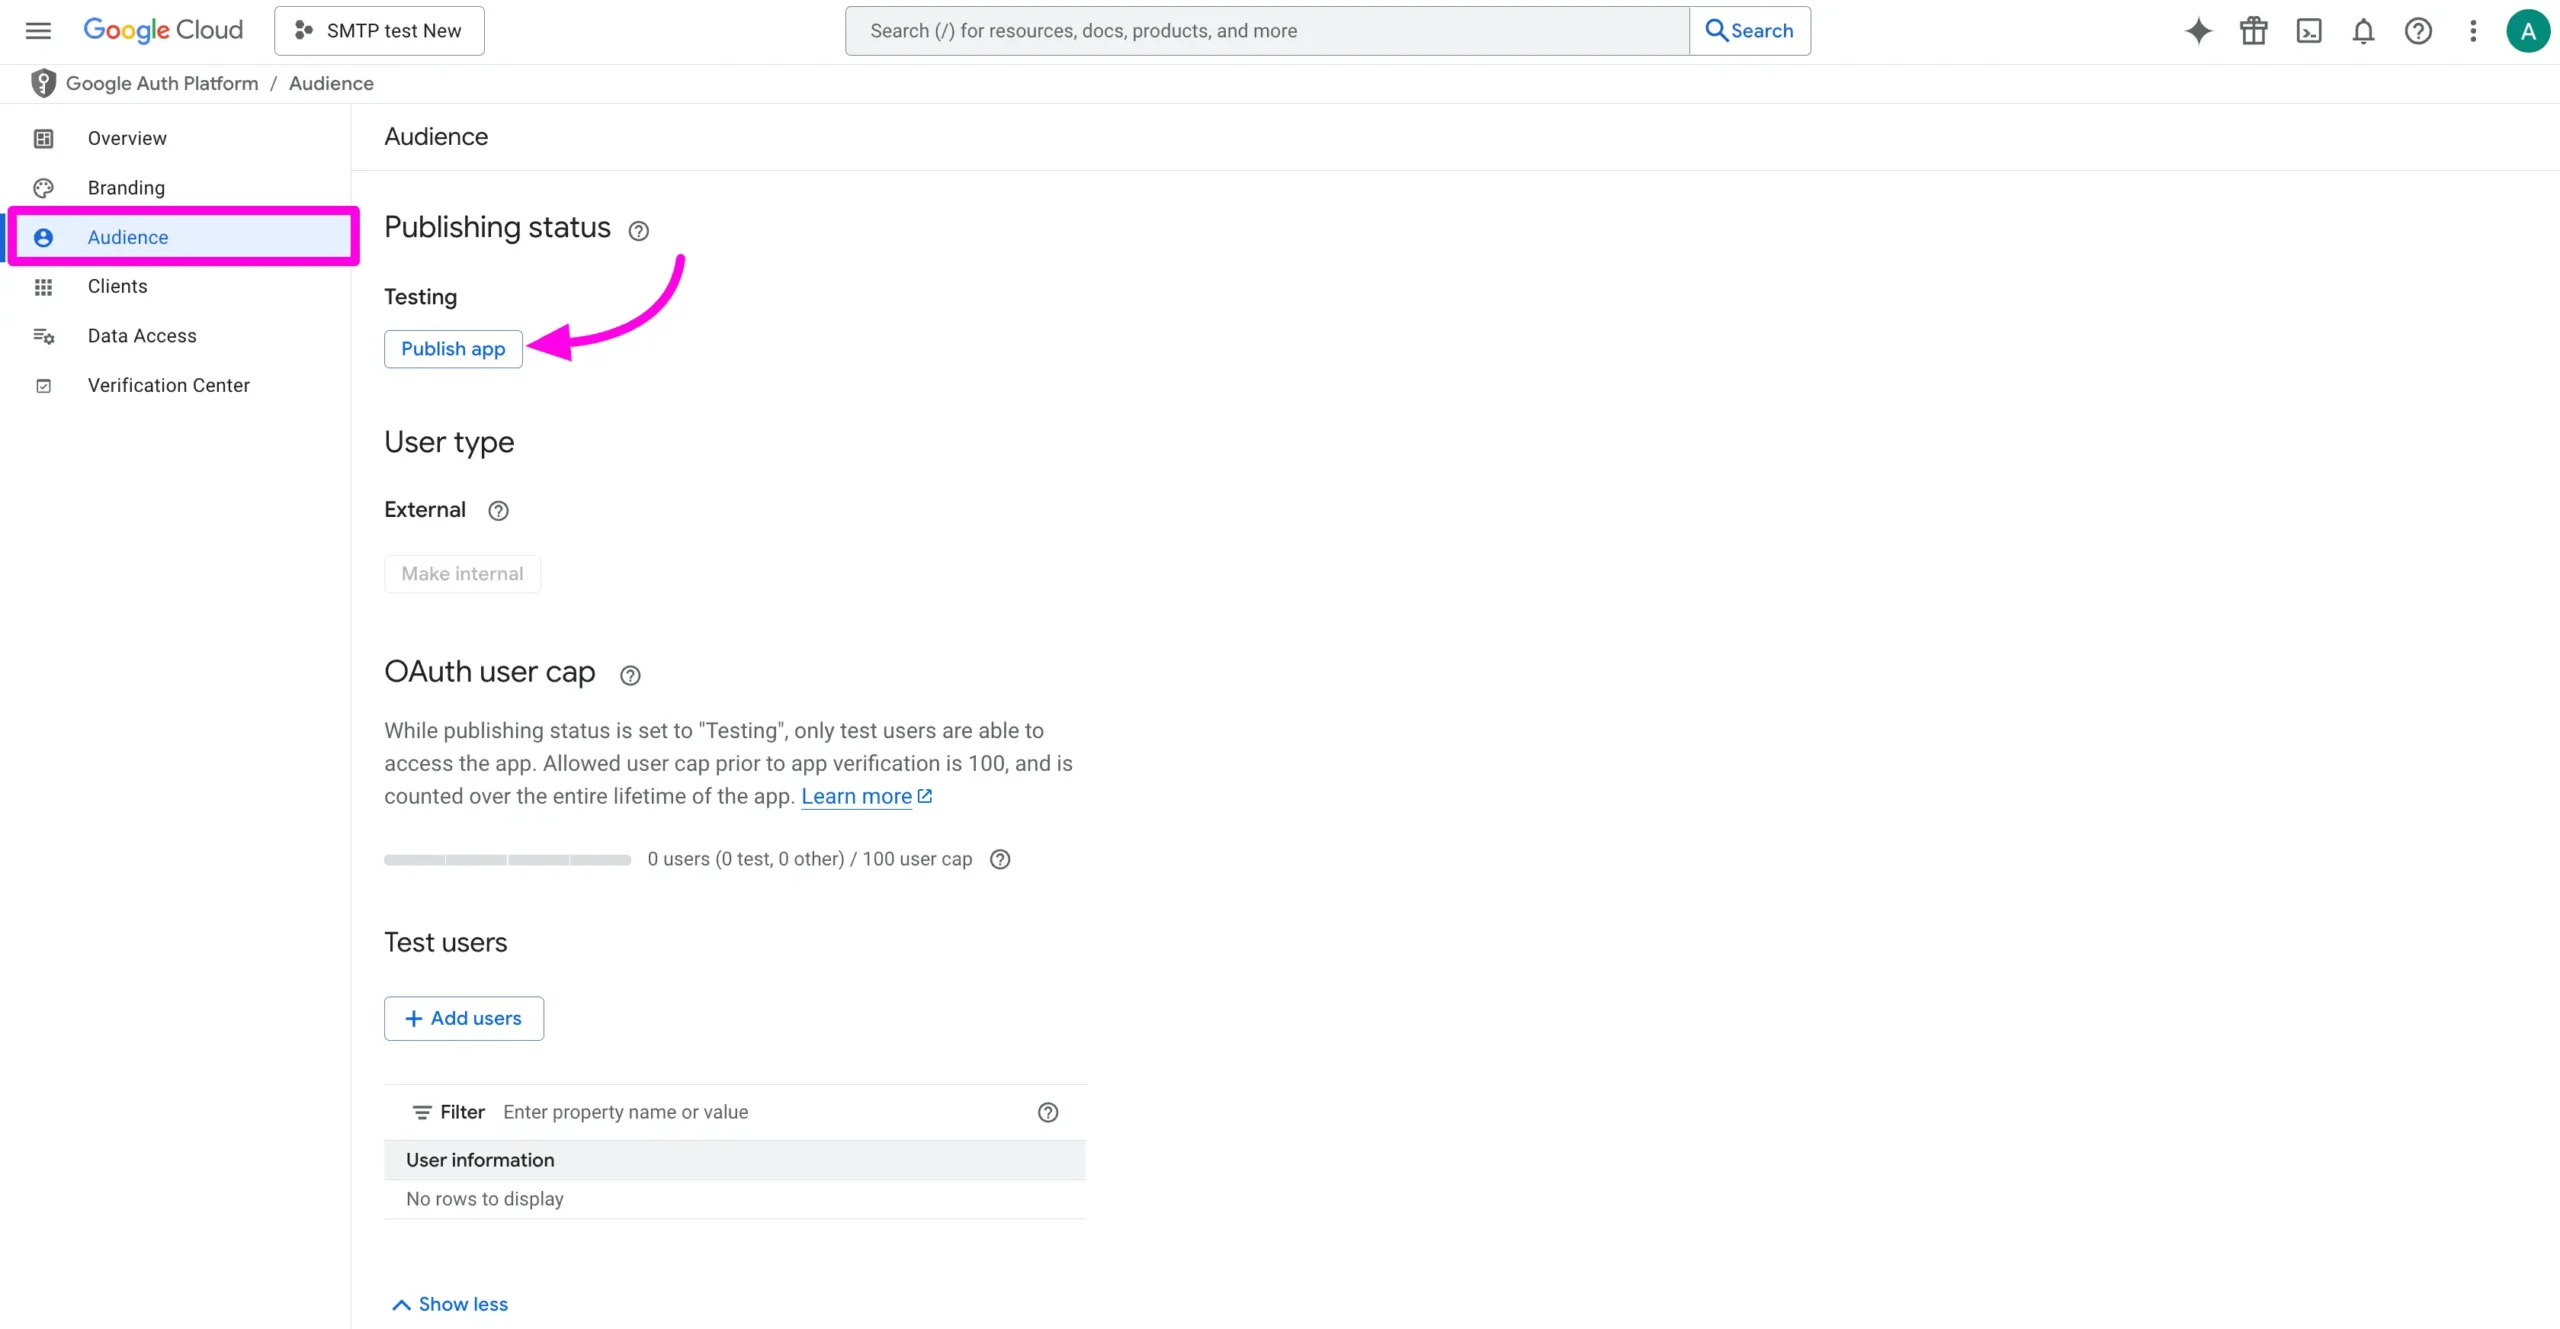
From the left sidebar, click on Audience to navigate to the Audience page. Here, you’ll find the Publish option available for your setup.
Click on the PUBLISH APP button right under the Testing section of Publishing Status.
Then, click on the CONFIRM button from the Push to Production? popup window if asked and your app will be published.
Collect Credentials #
Finally, you can collect your necessary Credentials (Client ID and Client Secret) to configure your Gmail with your Fluent SMTP plugin. To learn how to get all credentials, follow the steps with screenshots below –
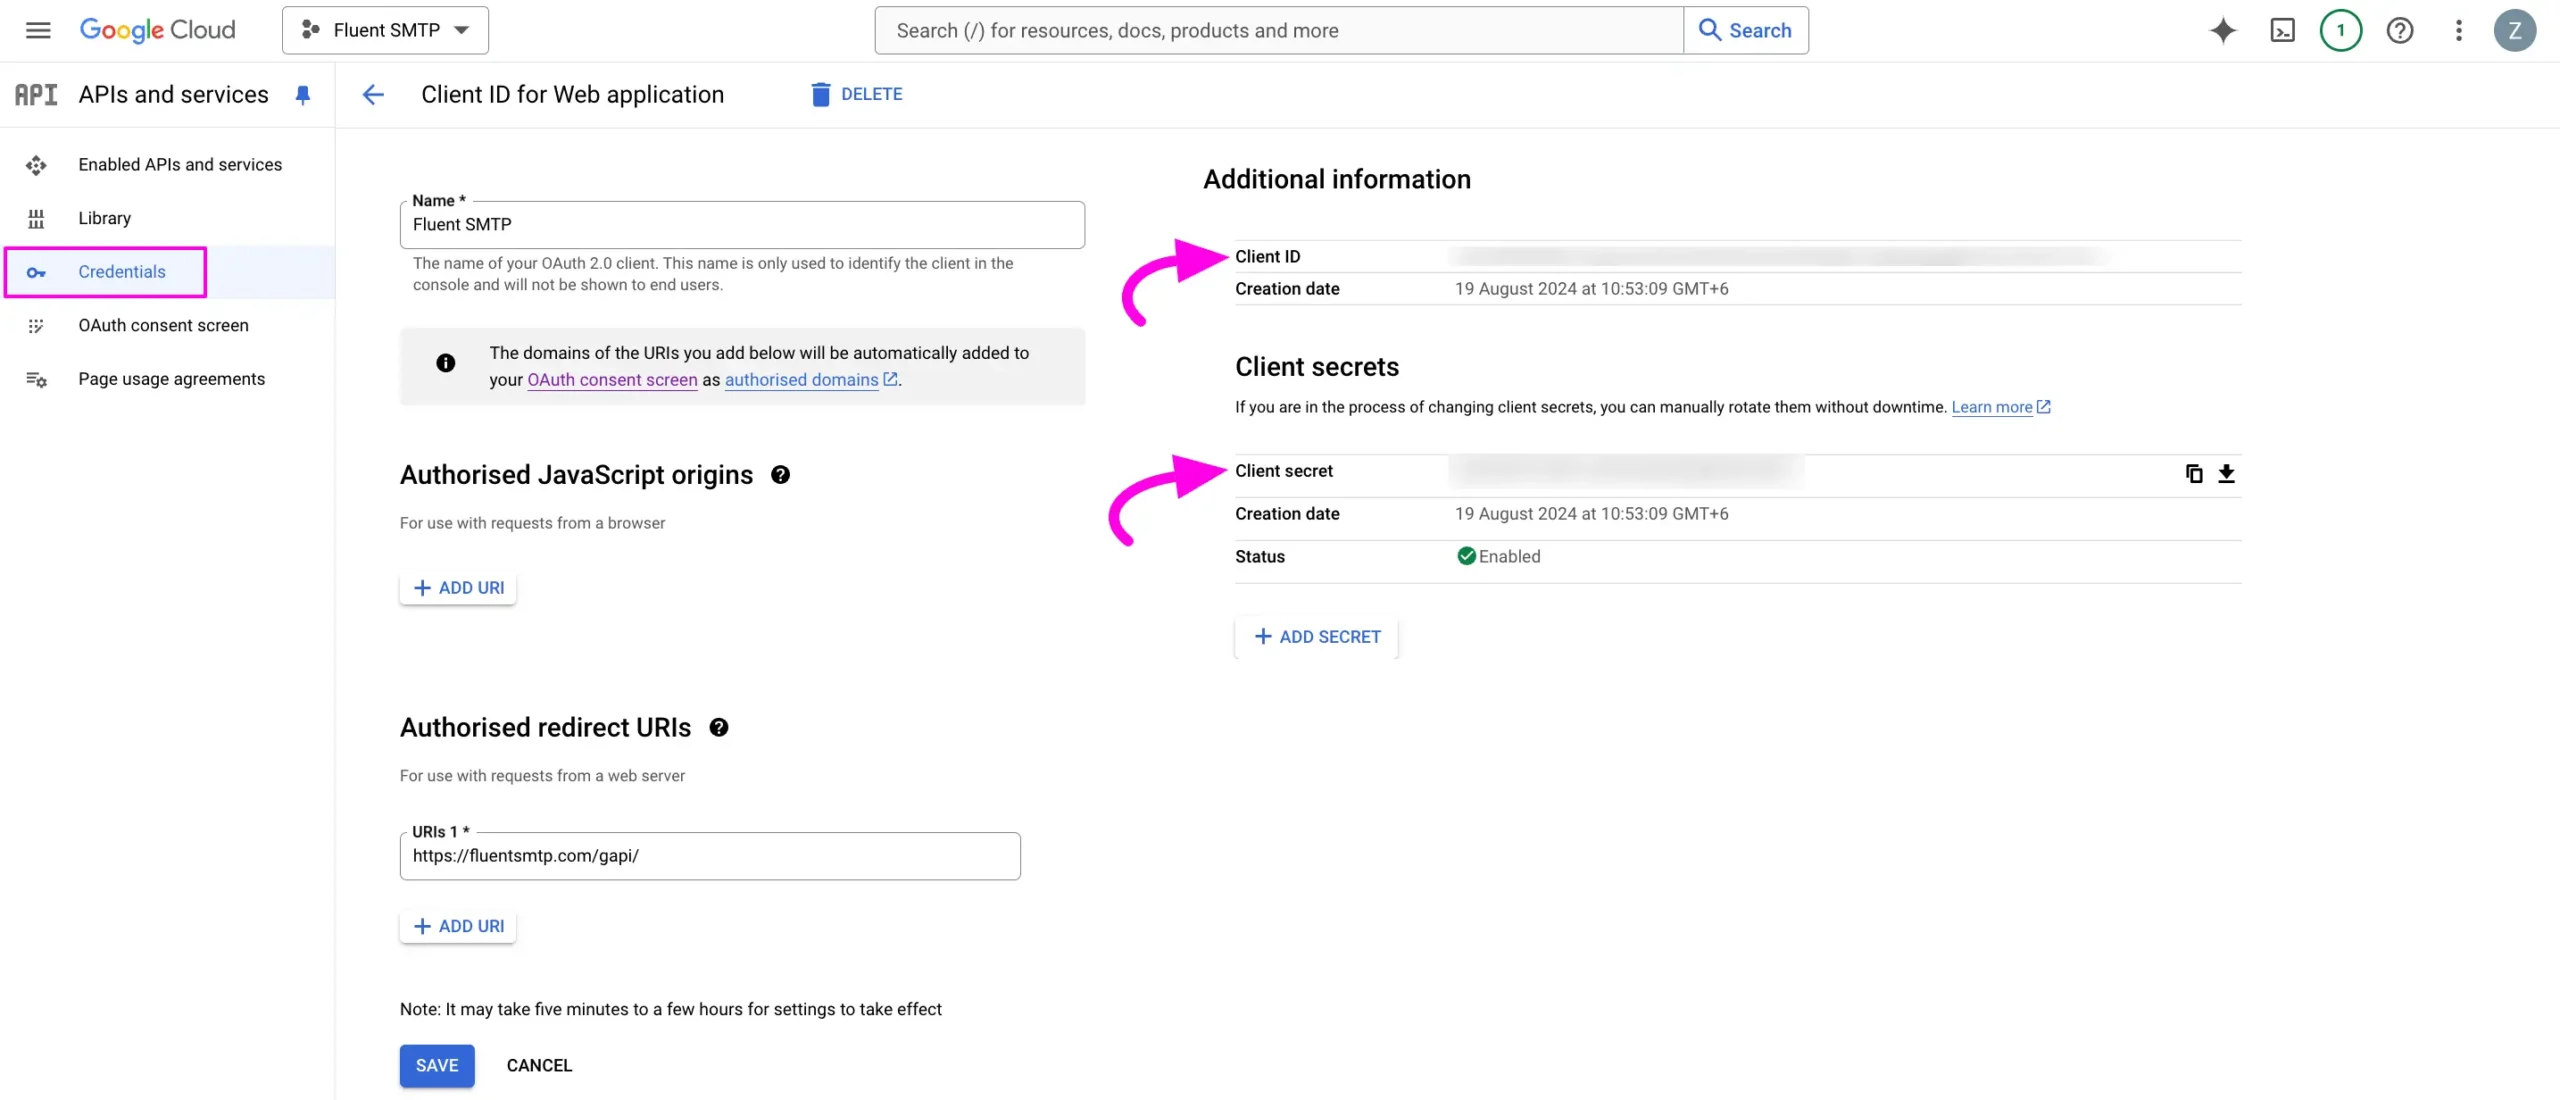
First, go to Credentials from the left sidebar of your Google Cloud dashboard, find the Project Name you created (e.g., FluentSMTP), and click on it.
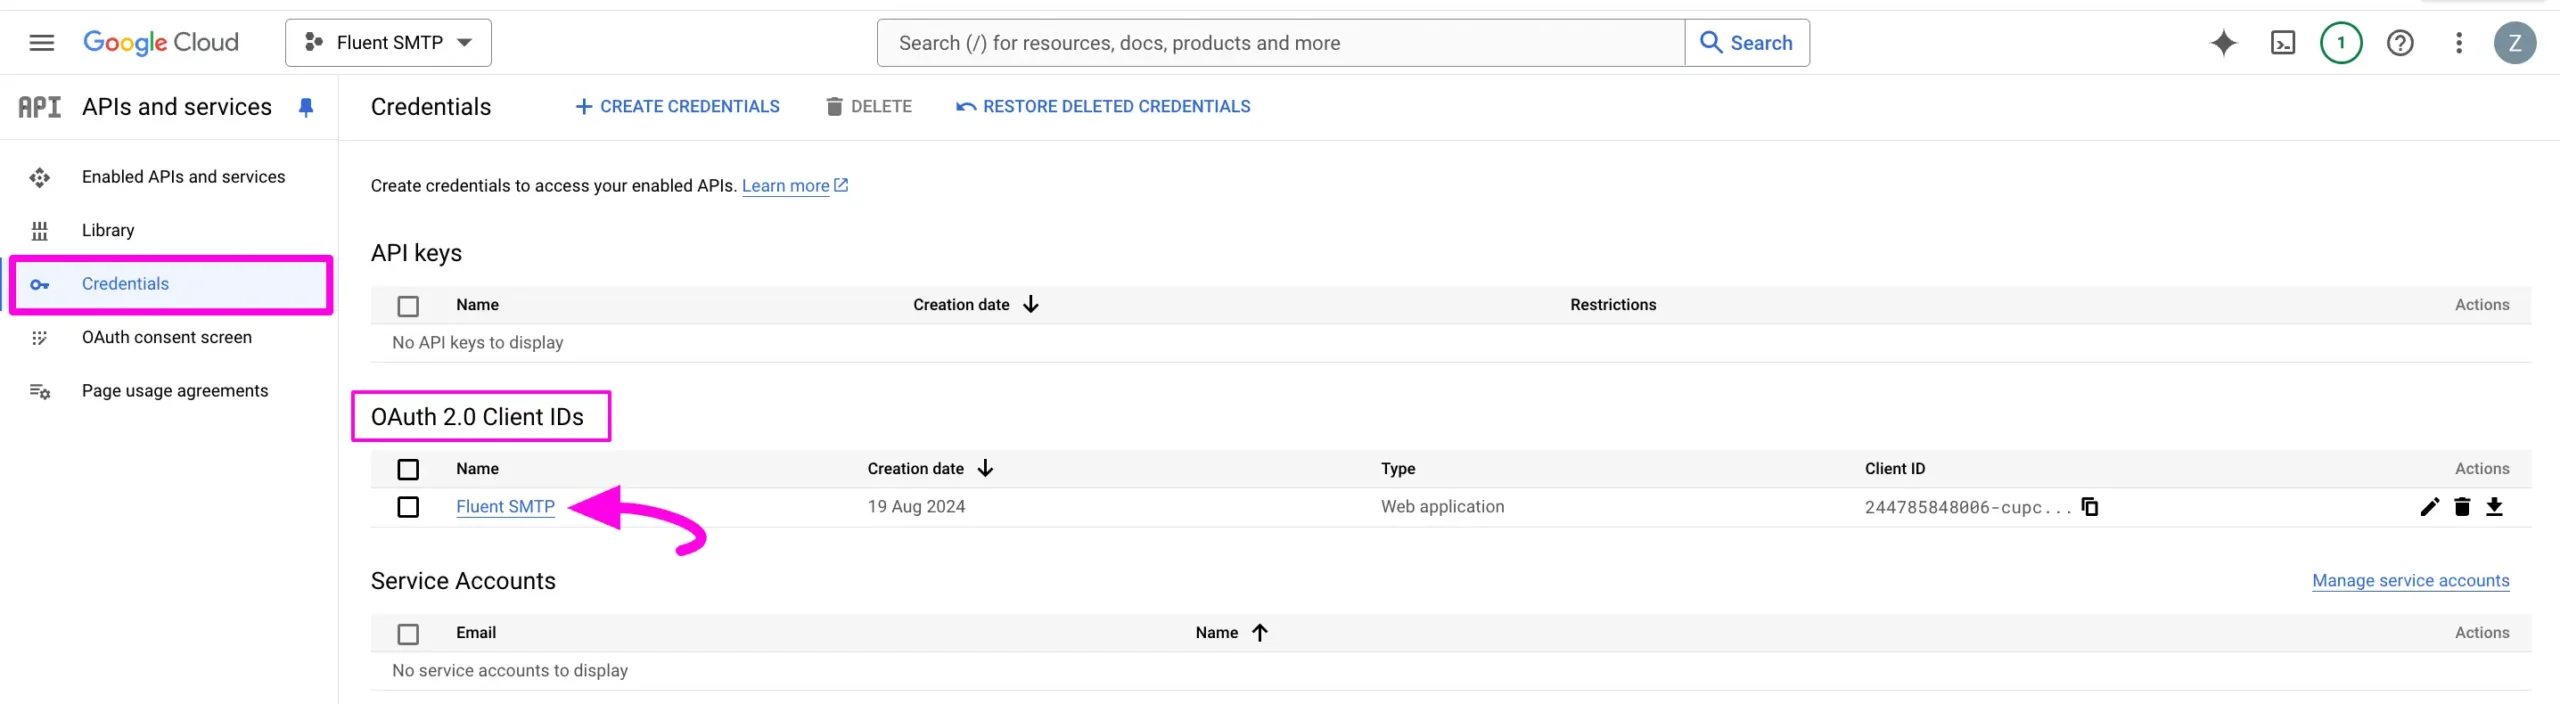
Here is your Client ID and Client Secret that is shown on the right side. You need to copy these 2 values and paste them into the FluentSMTP Connection settings page in the next step.
Connect FluentSMTP with Gmail/Google Workspace Settings #
Once you create and collect all the credentials of your Gmail or Google Workspace from the Google Cloud platform, you can now configure this to your Fluent SMTP.
To learn how to connect Gmail/Google Workspace with Fluent SMTP, follow the steps with screenshots below –
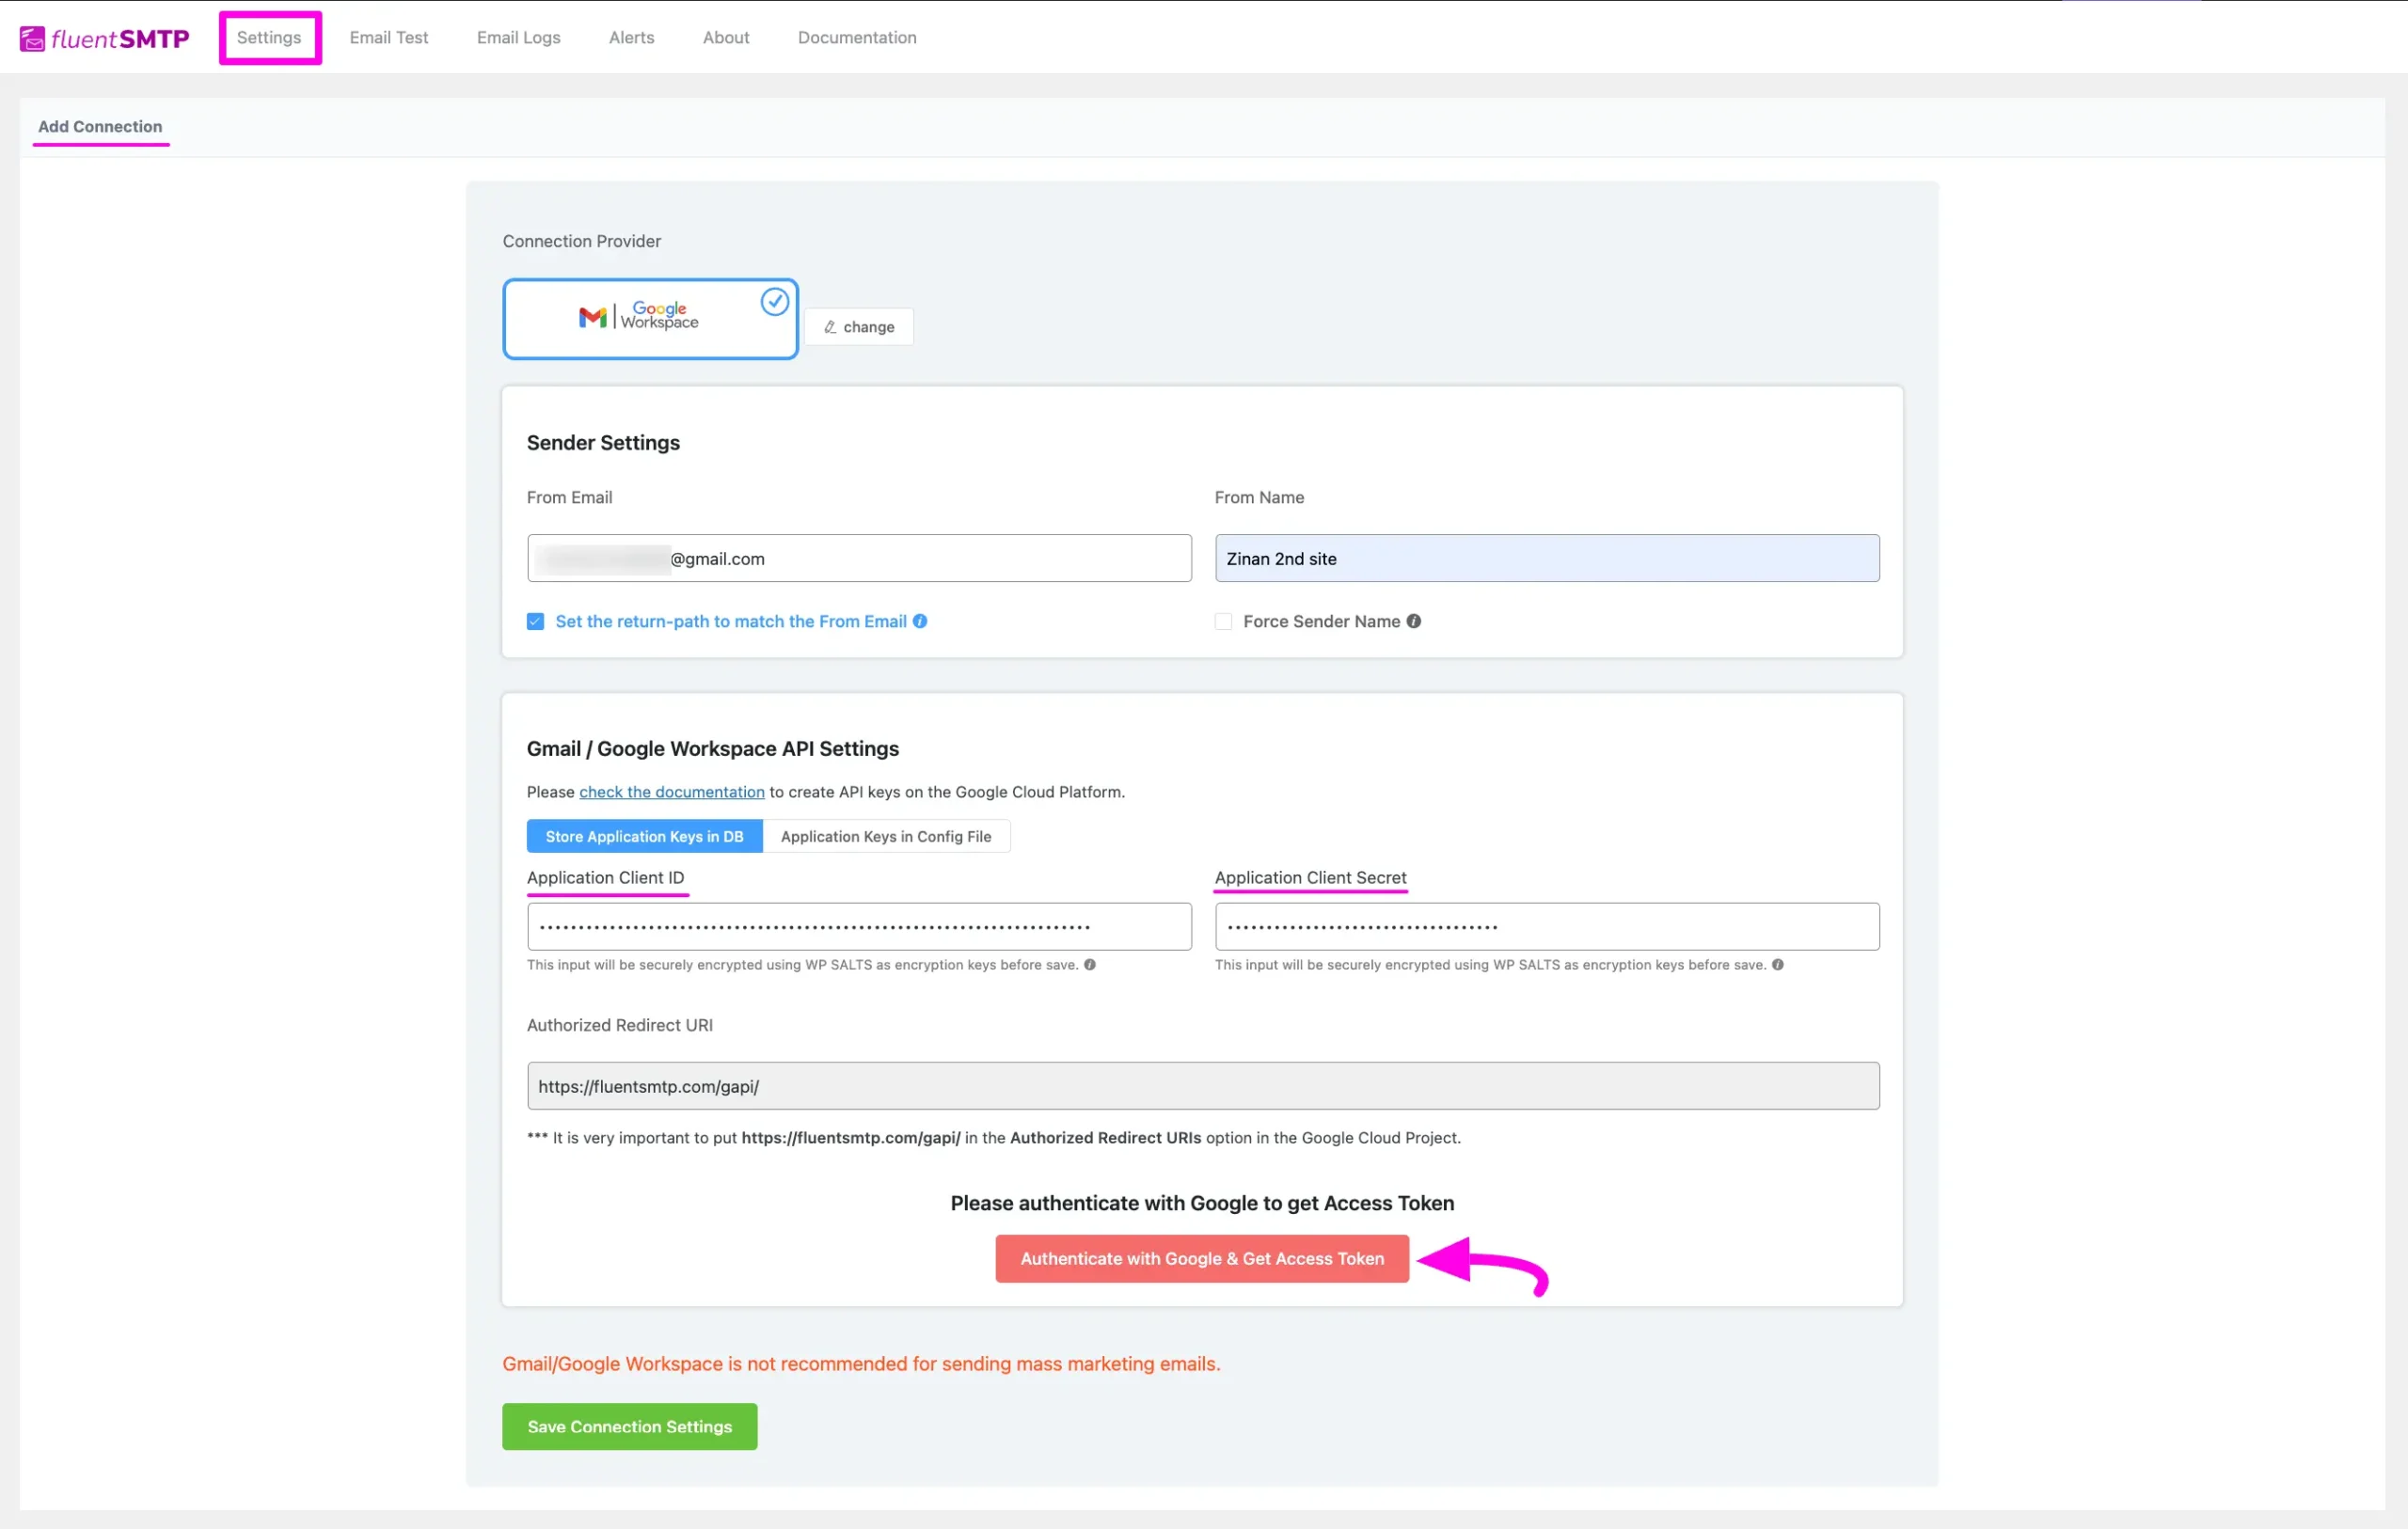
First, go to the desired Add Connection page under Settings from the Fluent SMTP Navbar and paste the Client ID and Client Secret that you created and collected earlier in the previous steps.
Now click on the Authenticate with Google & Get Access Token button to get the access token for authentication.
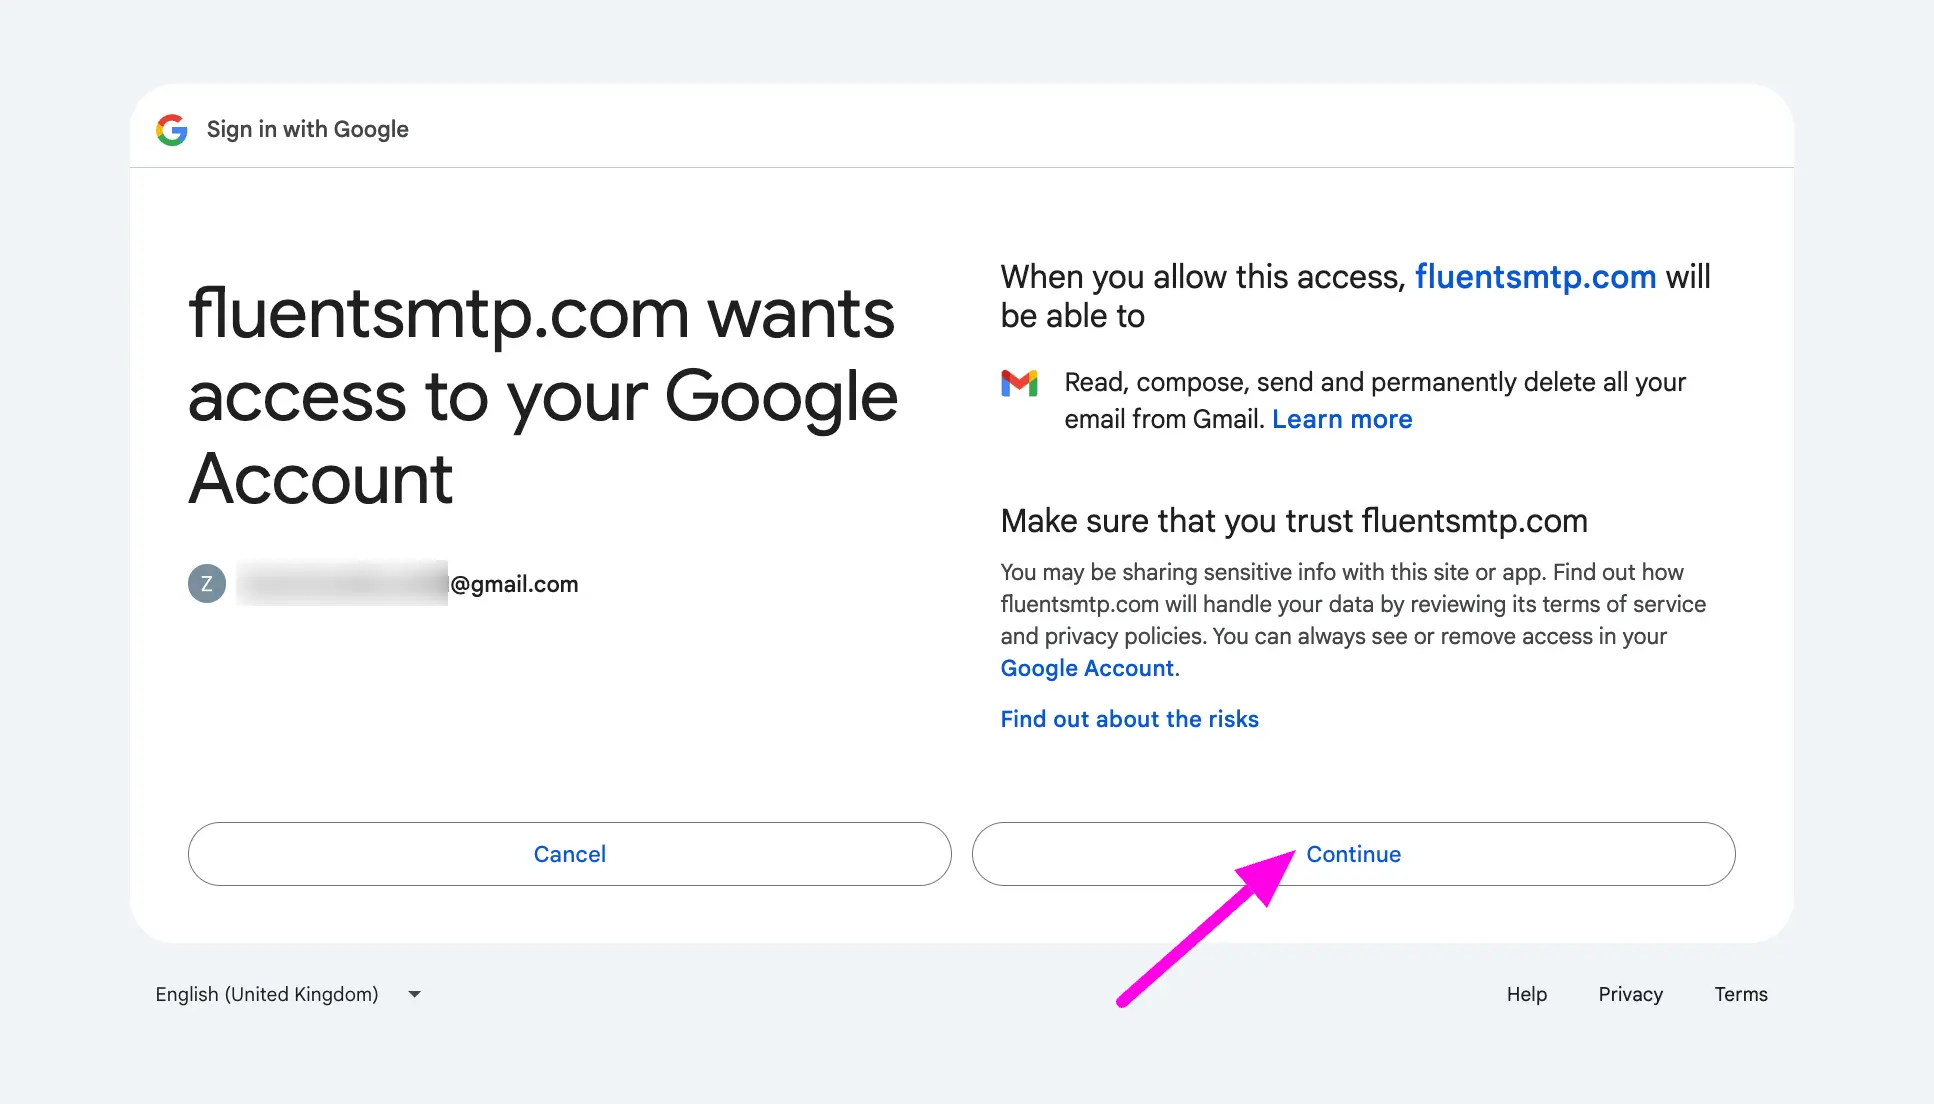
This will redirect you to the FluentSMTP server and in the process, Google will ask for the account that you want to allow access to your Gmail or Google Workspace account.

Then you will see an approval window to approve your project to access the user information from the Google Cloud Project. Please click on the Continue button to proceed to the next step.
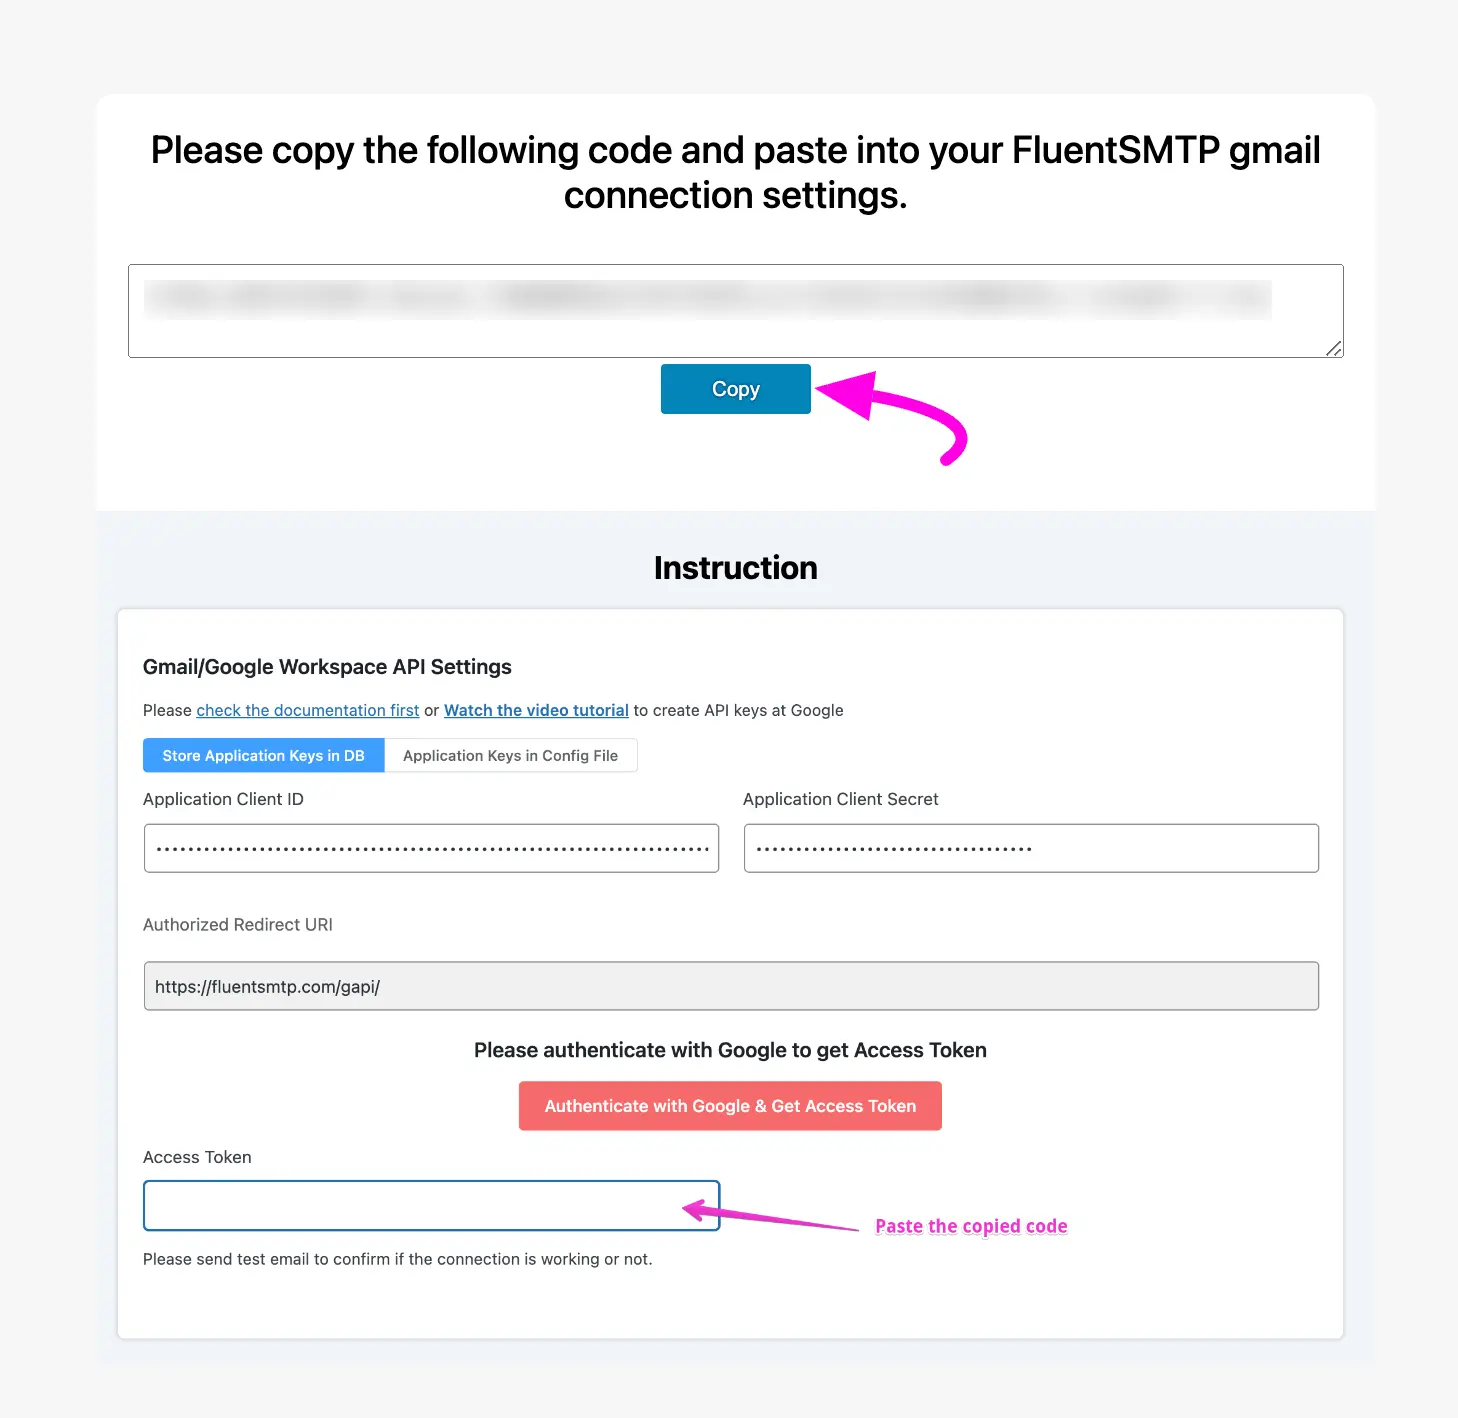
This will take you to the FluentSMTP Server and provide you with a generated Access Token. Click on the Copy button to copy the access token that you need in the next step.
And, you are in the last step to configure our FluentSMTP with the Google Workspace or Gmail Email address.
Now, paste the copied access token from the earlier step in the FluentSMTP connection setting.
Once you input all the necessary information, finally, click the Save Connection Settings button and your Gmail server will be connected to your Fluent SMTP.
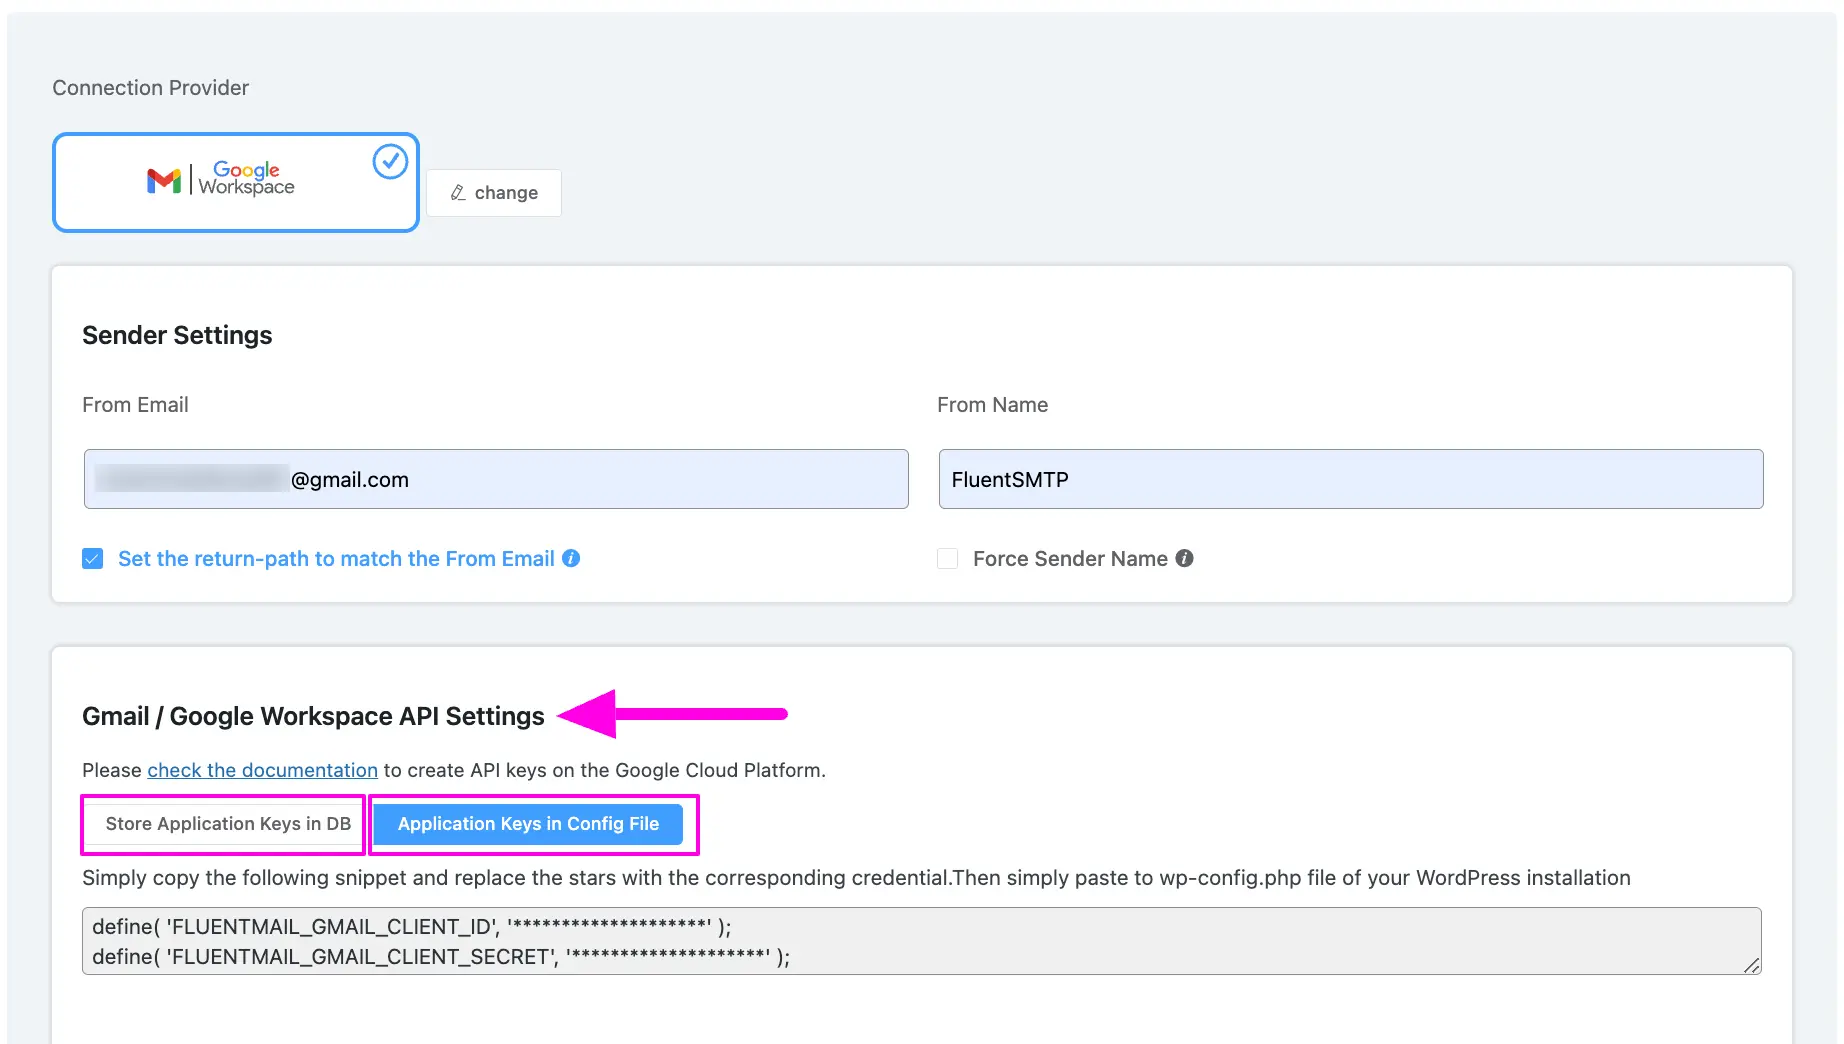
Details of Gmail / Google Workspace API Settings #
- Store Application Keys in DB: By default, this is enabled and strongly recommended. This will keep the information in the Databases in Encrypted format.
- Application Keys in Config File: This allows you to store the access keys in the following section inside the wp-config.php file by the following directives.
Simply copy the following snippet and replace the stars with the corresponding credential. Then simply paste it to the wp-config.php file of your WordPress installation.
define( ‘FLUENTMAIL_GMAIL_CLIENT_ID’, ‘********************’ );
define( ‘FLUENTMAIL_GMAIL_CLIENT_SECRET’, ‘********************’ );
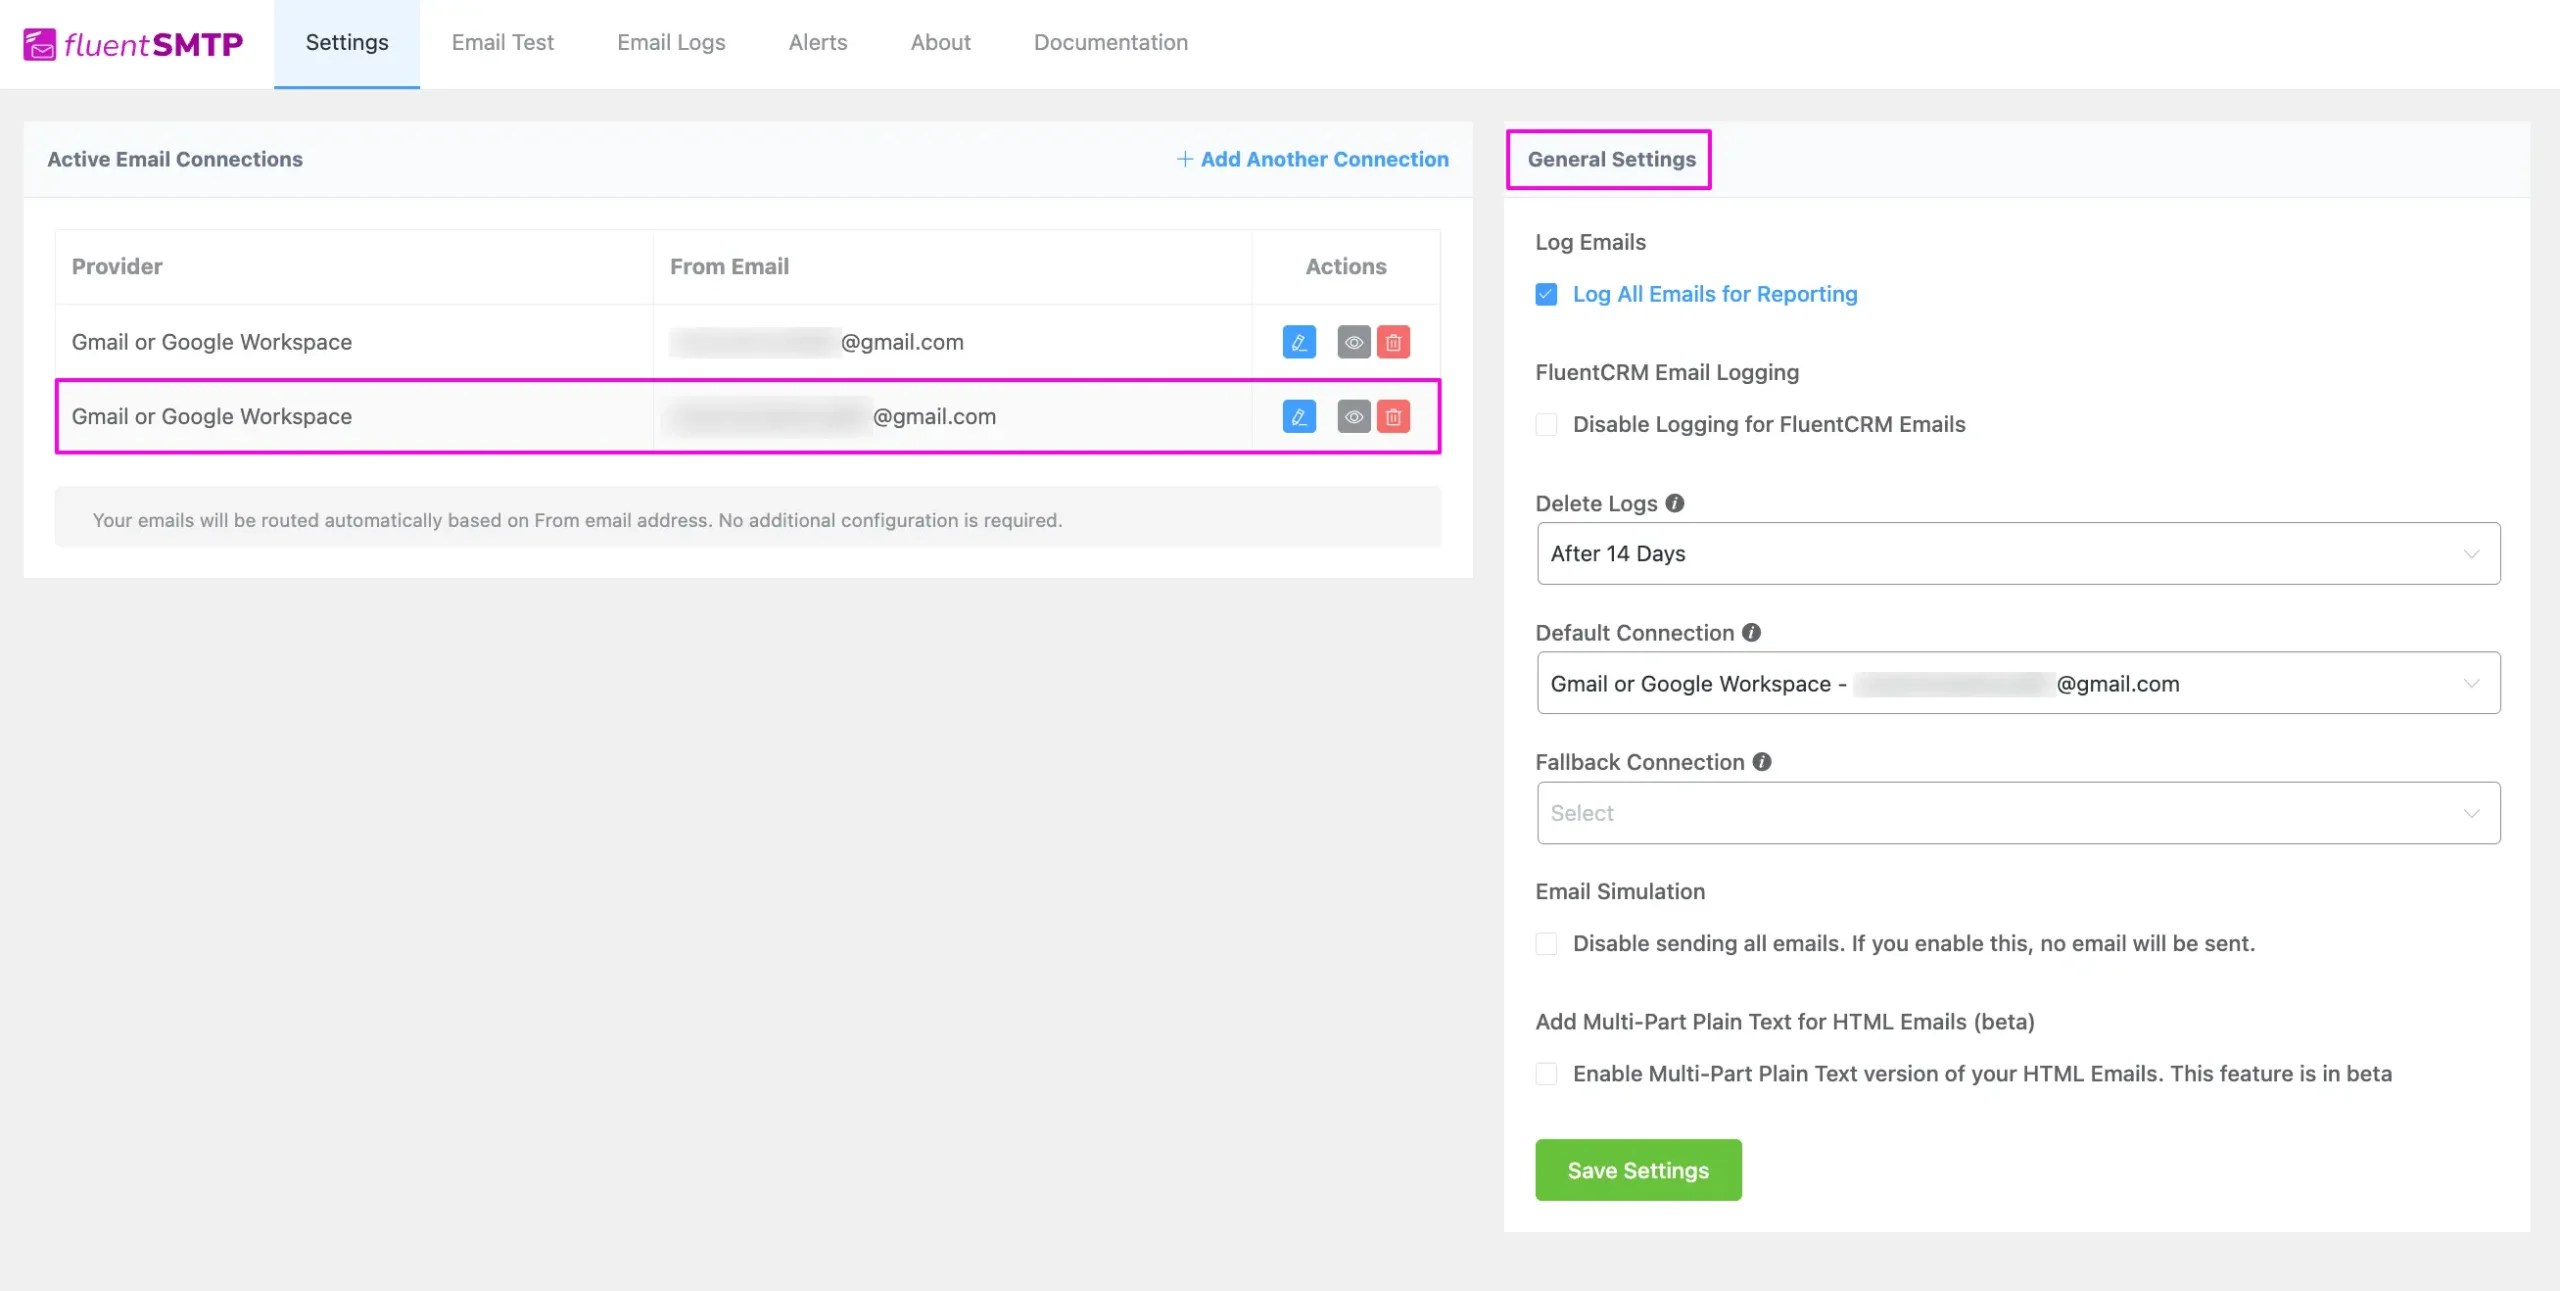
Configured Gmail/Google Workspace #
Here you can see that the new Gmail or Google Workspace server is connected.
To learn the details about General Settings, read this Documentation.
Additionally, it is recommended to send a test email to check whether the configuration is successful or not, to learn how to send a test email in detail, read this Documentation.
That’s all about Configuring FluentSMTP with Gmail or Google Workspace Emails to send emails from the WordPress website. If you have any further questions, concerns, or suggestions, please do not hesitate to contact our @support team. Thank you.


Add your first comment to this post