
With FluentSMTP, you can integrate Mailgun into WordPress to improve email deliverability and authenticity. Mailgun is one of the leading mailer options for WordPress, that is reliable and easy to set up.
This article will guide you through integrating Mailgun into WordPress using the FluentSMTP plugin to send emails via SMTP.
Configuring Mailgun #
To learn how to configure the Mailgun with FluentSMTP, follow the steps with screenshots below –
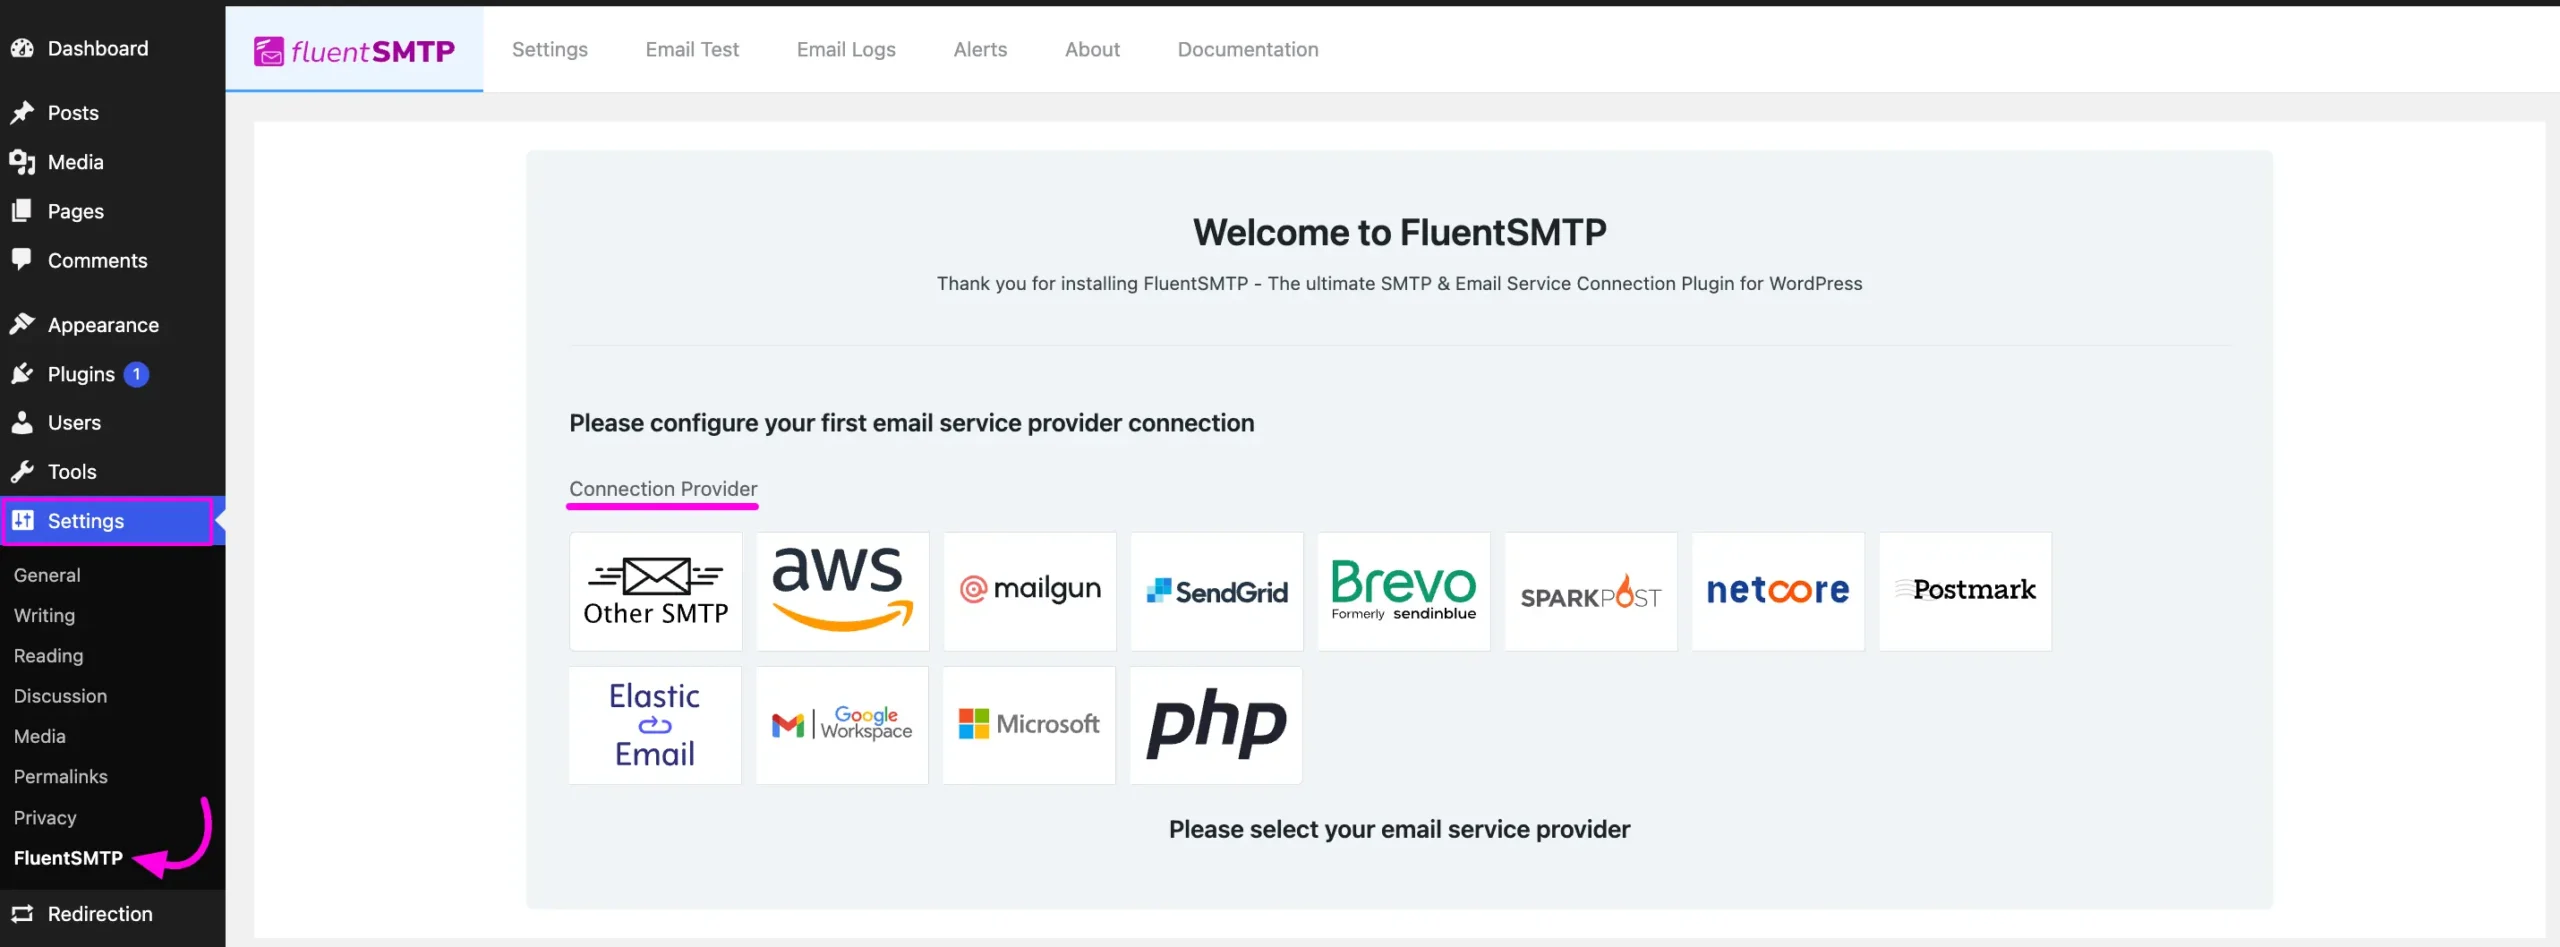
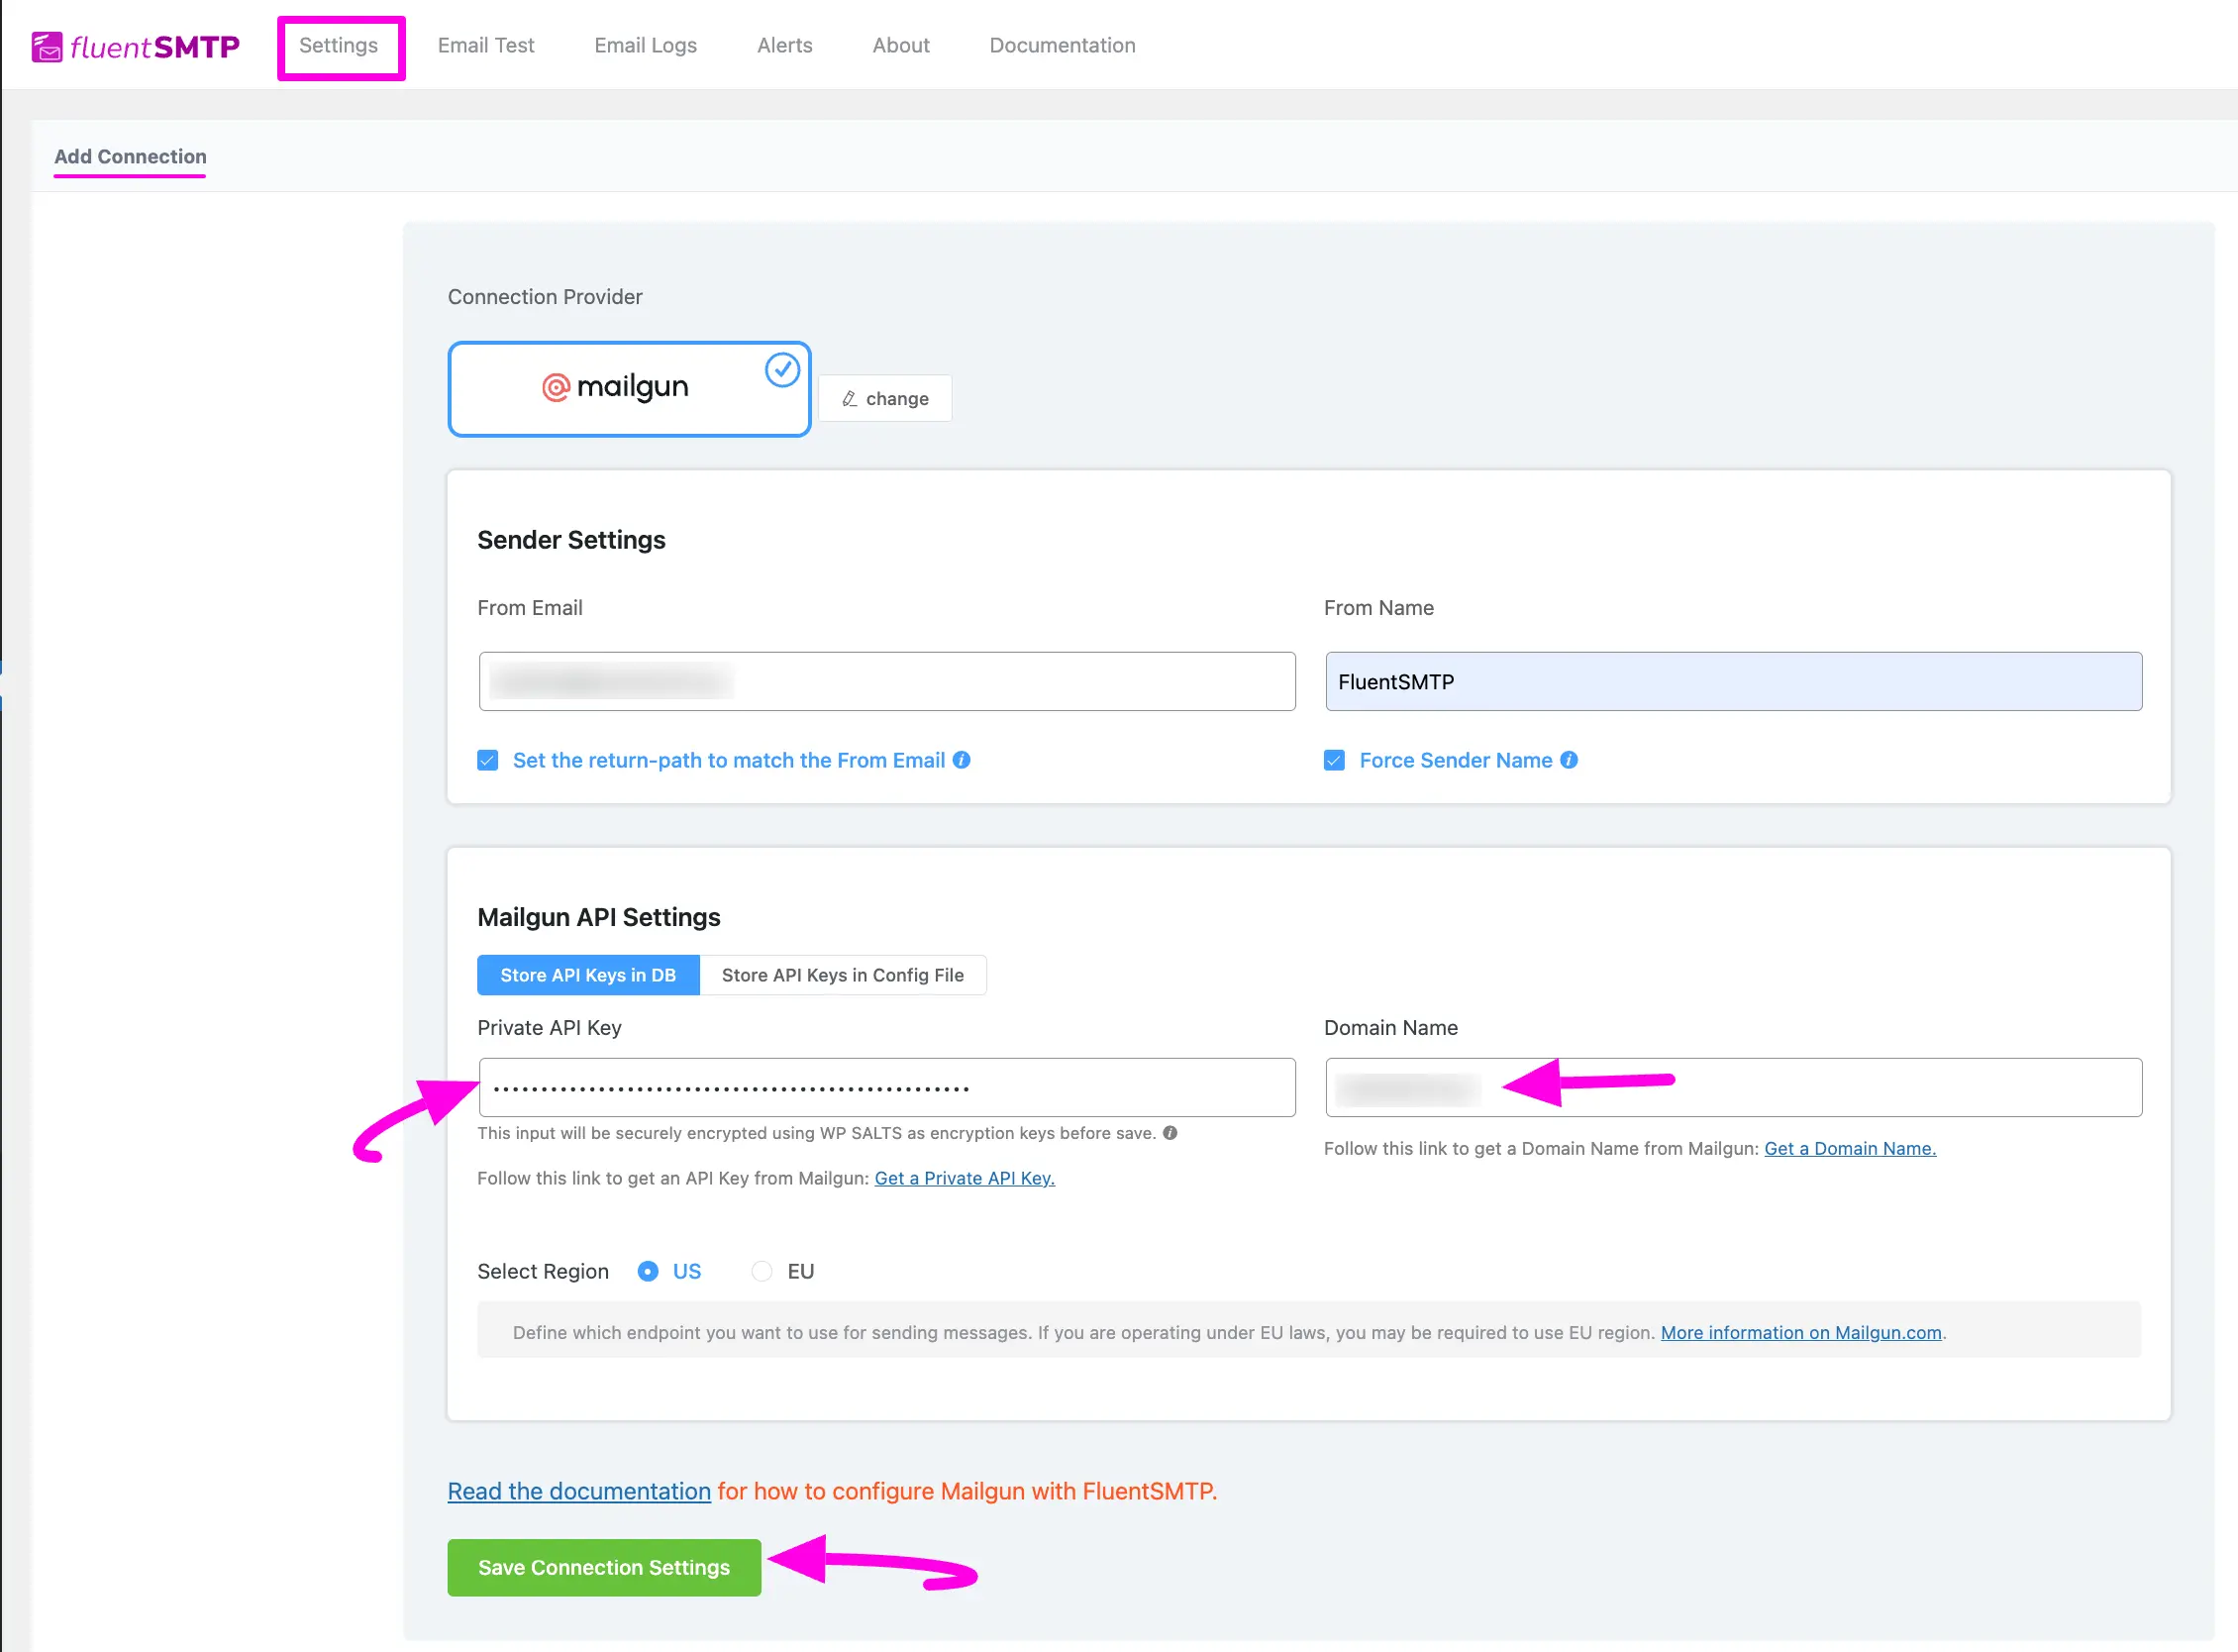
First, go to FluentSMTP from Settings of WordPress Dashboard in the left sidebar, and select Mailgun from the given Connection Providers.
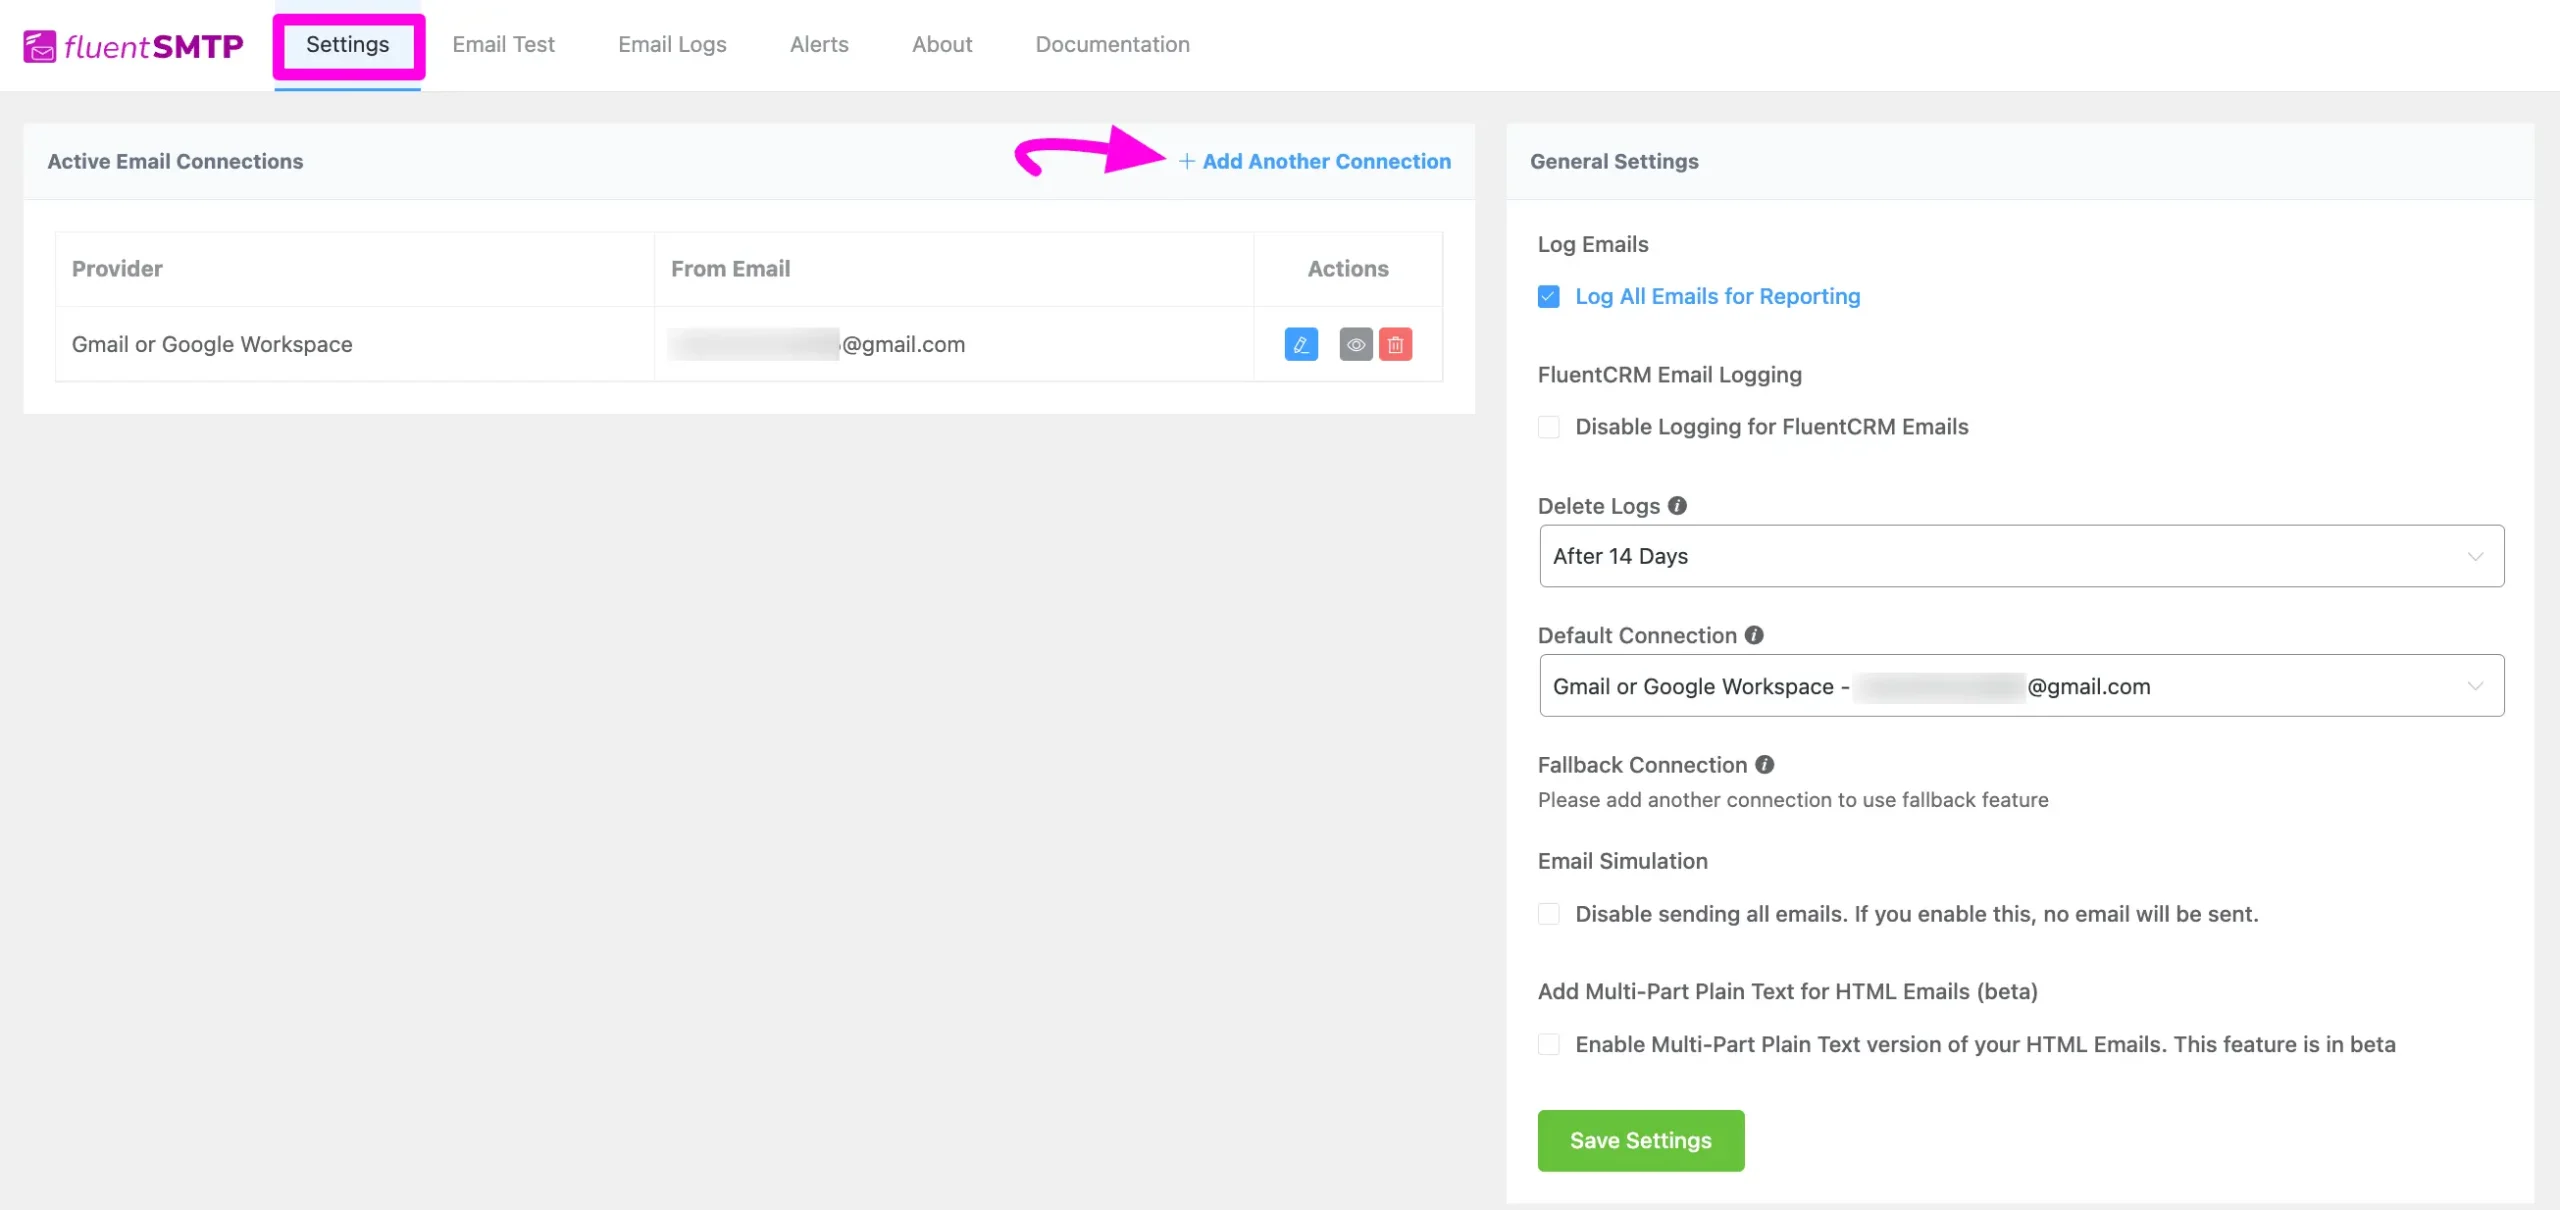
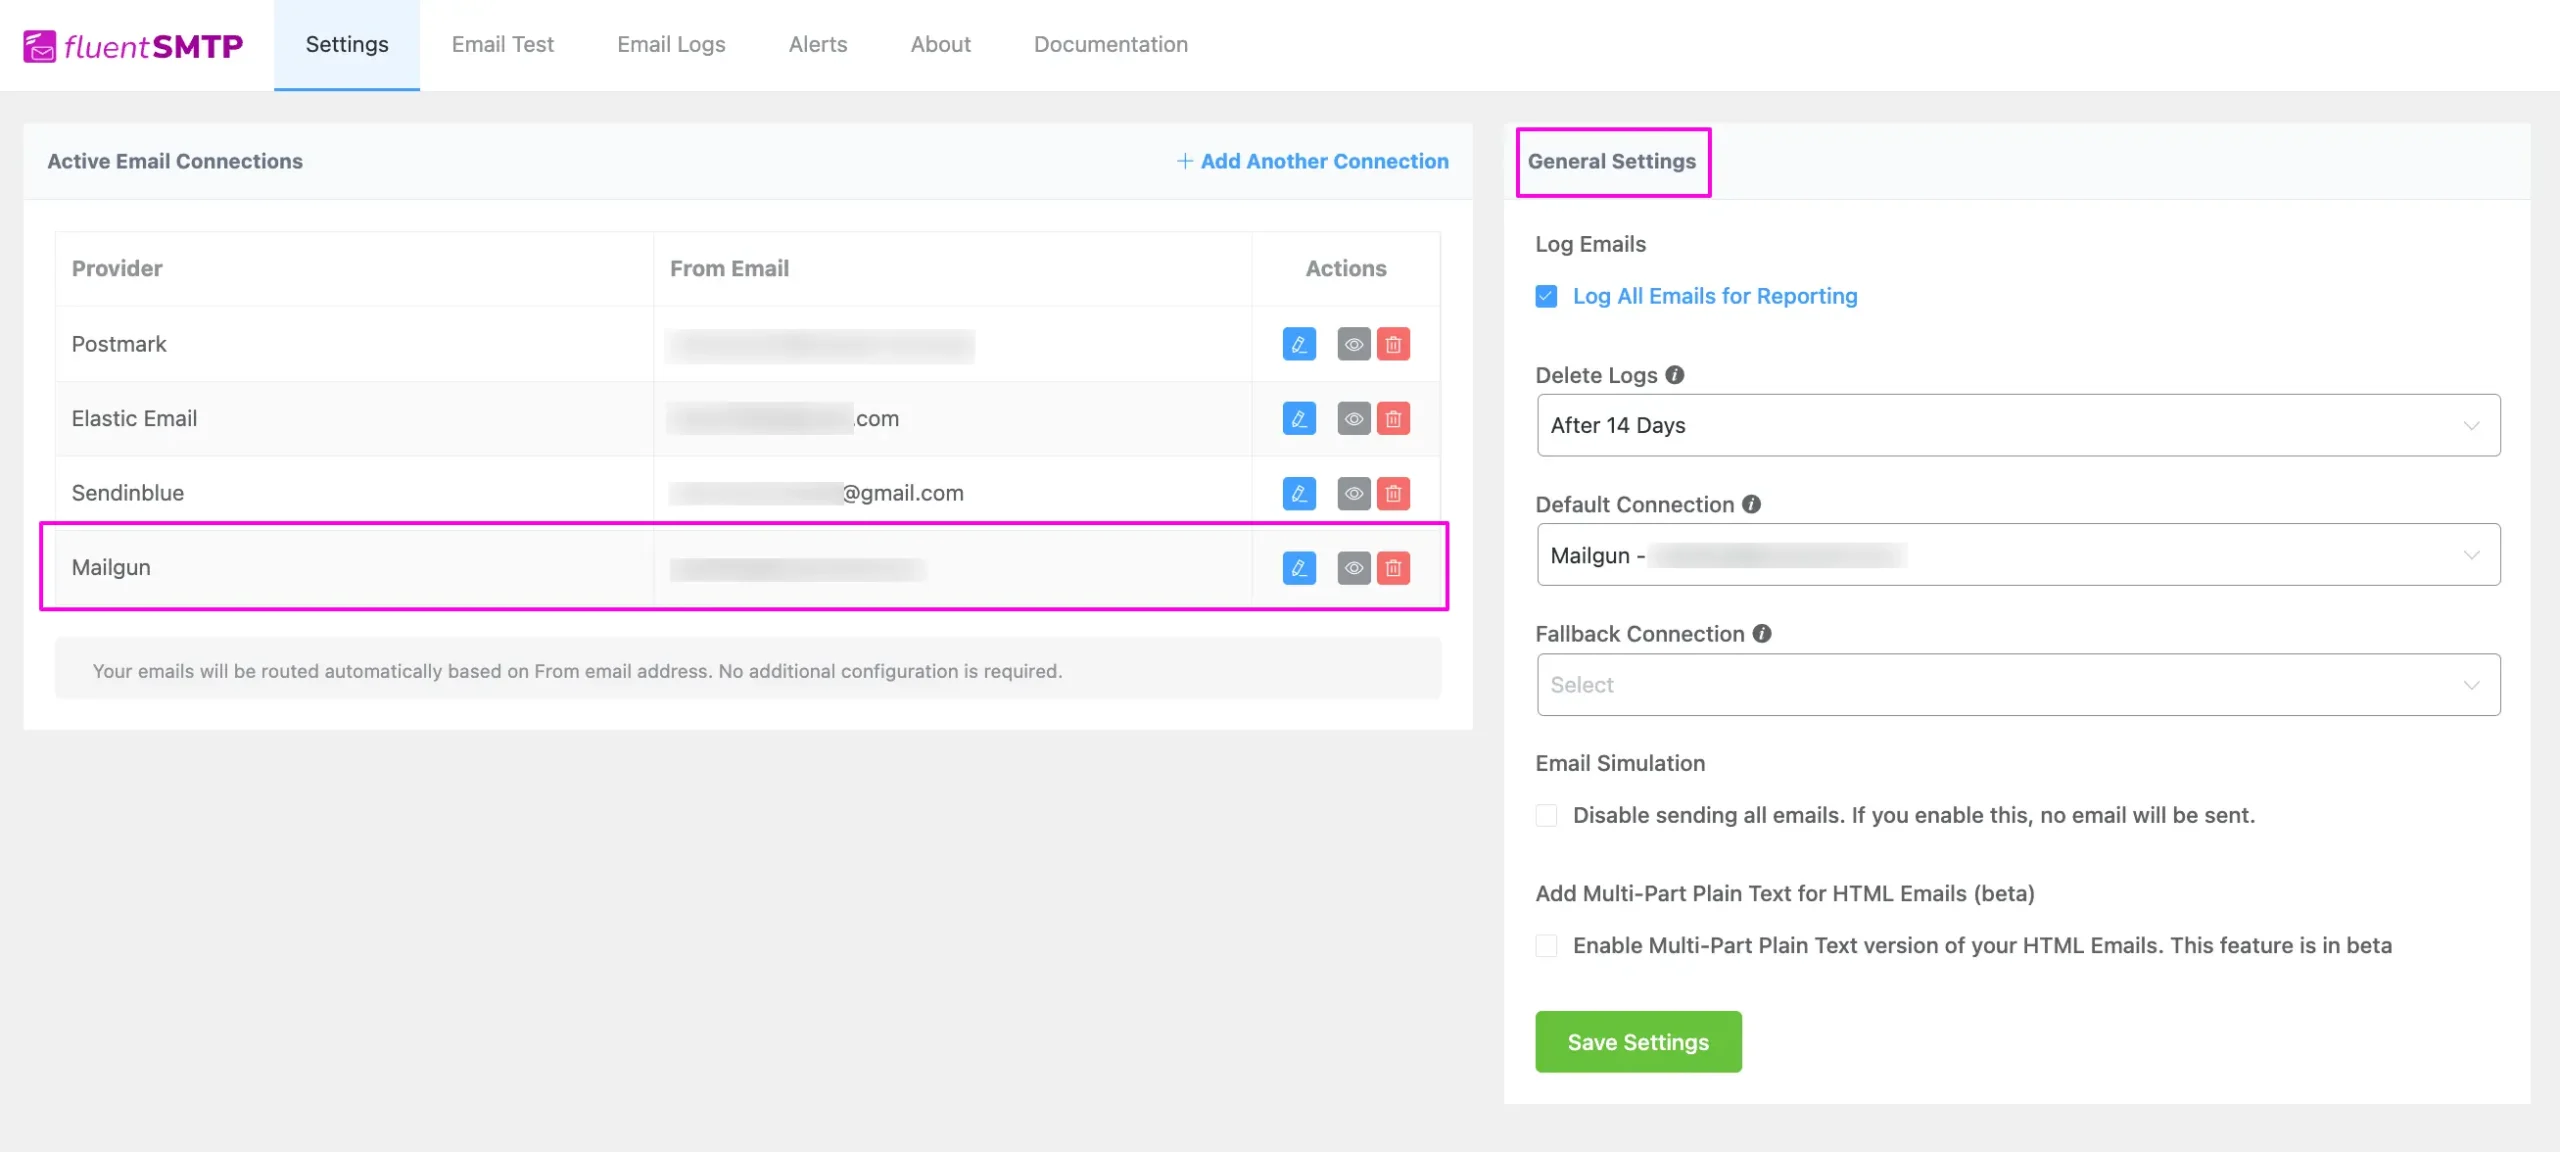
But if you are already connected to any email service provider, go to the Settings section from the FluentSMTP Navbar and click the + Add Another Connection button.
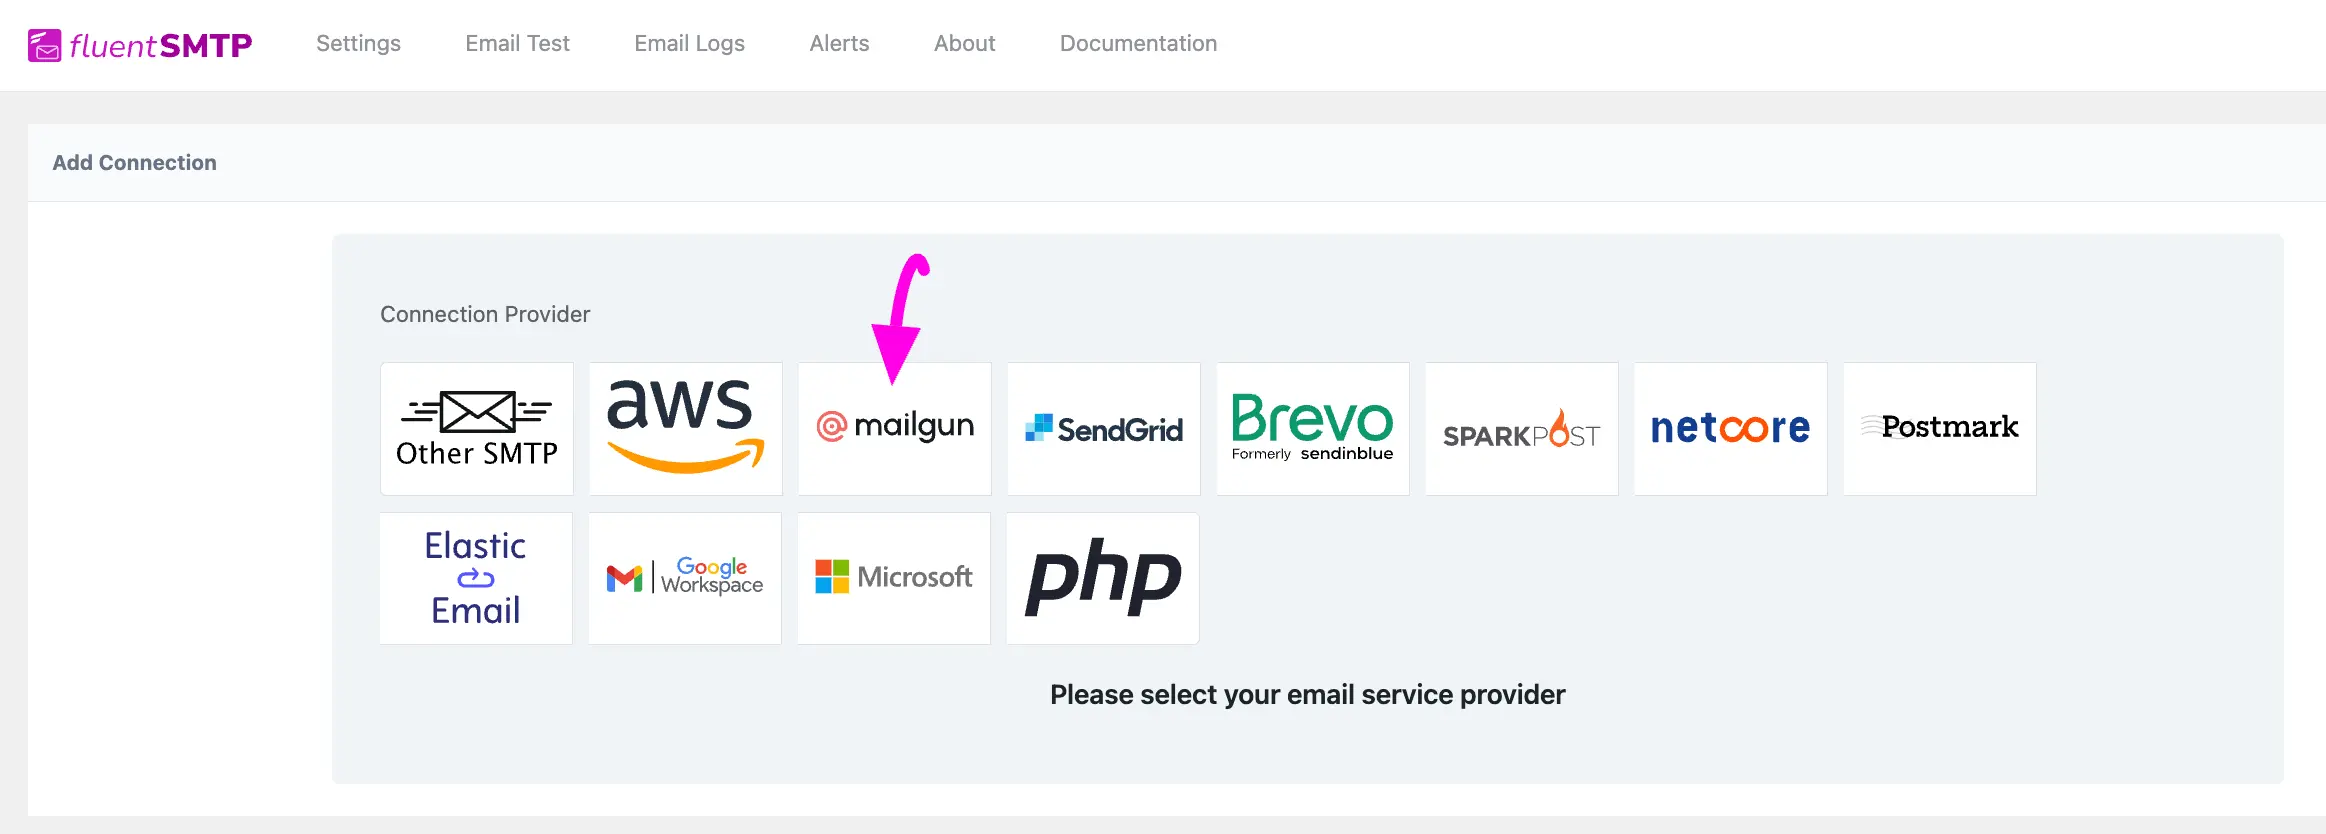
Click the Mailgun tab to connect to this provider.
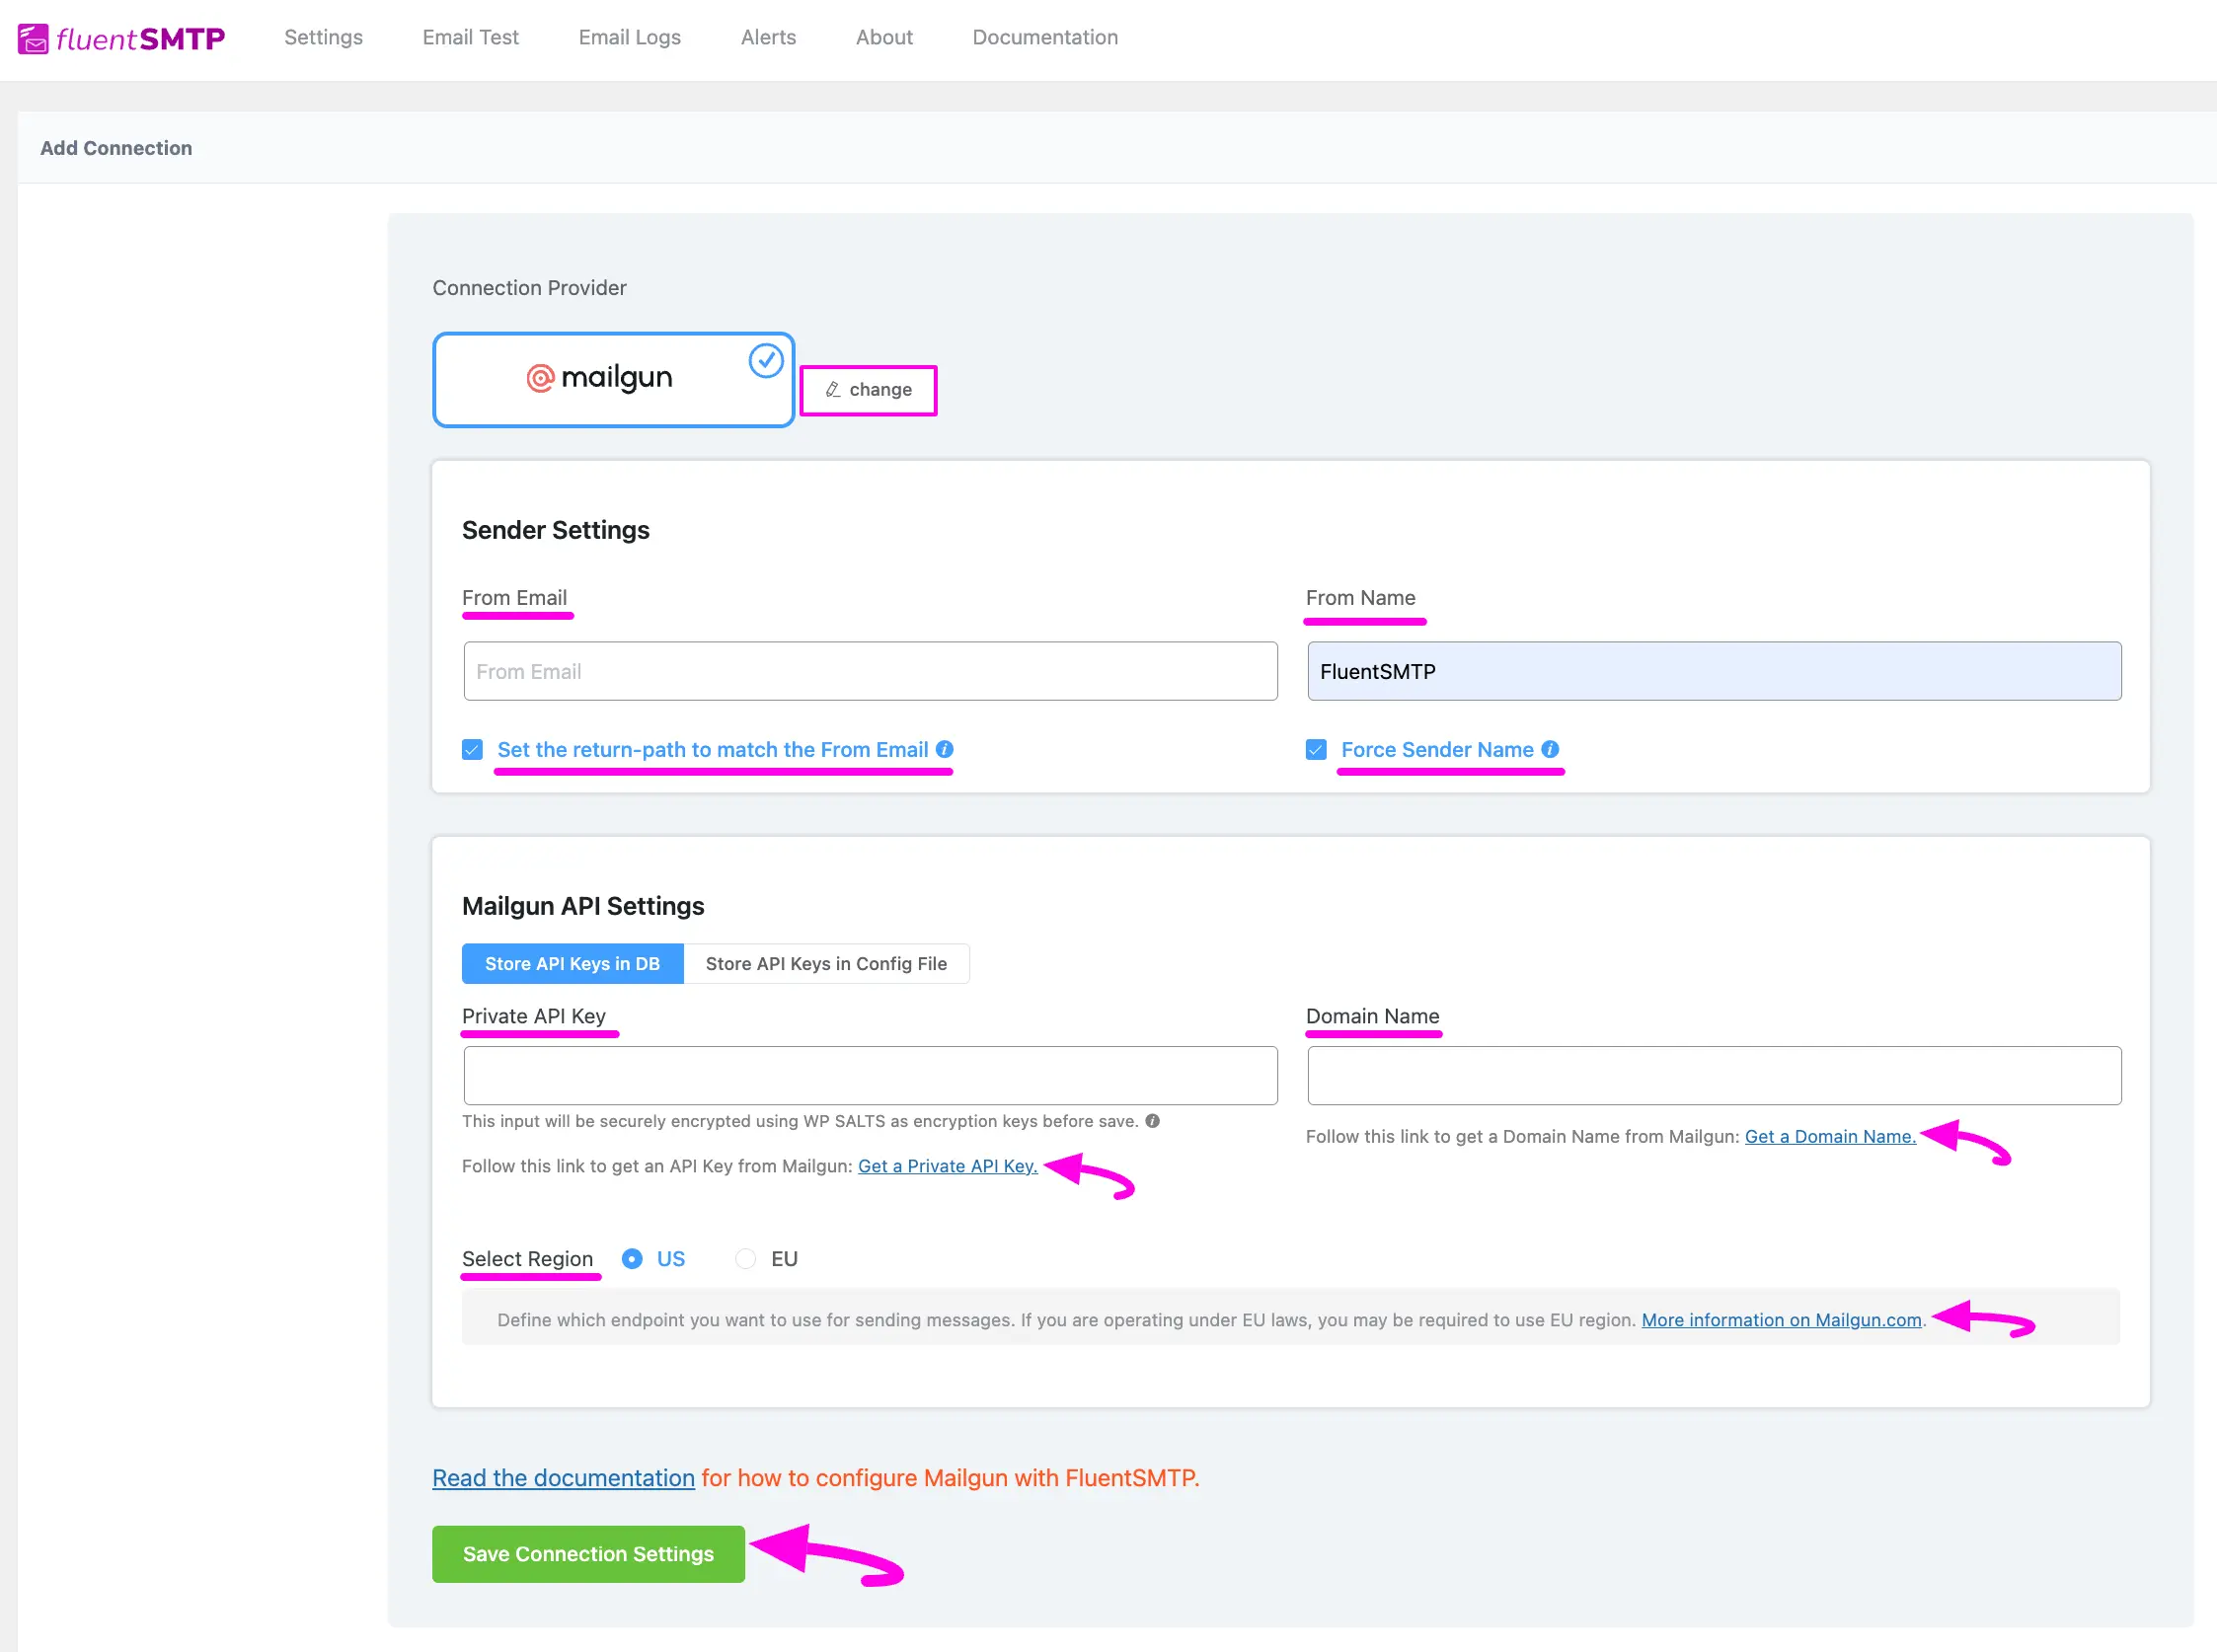
After you choose the provider, it will take you to the Add Connection page where you will get all the options to connect your Mailgun.
Additionally, if you want to change the connection provider, simply click the Change button right next to the Mailgun tab at the top of the page.
Here, you need to provide –
- From Email: The “From Email” should be the email you verified with Mailgun.
- From Name: From name can be anything you want. You can use a combination of your name and company name.
- Set the return-path to match the From Email: Return Path indicates where non-delivery receipts or bounce messages will be sent. If you enable this, you’ll be emailed using “From Email” if any messages bounce due to recipient email issues. If you keep it unchecked, bounce messages may be lost
- Force Sender Name: Check the box to align the return path with the form. This setting indicates where bounce messages are sent. If unchecked, bounce messages will be lost. When enabled, you will receive an email at the “From Email” address for any bounced messages due to recipient email issues.
- Private API Key: The API Key has to be obtained from the Mailgun. To get it you can click on the Get a Private API Key link under the Private API Key box.
- Domain Name: Here, you have to provide the domain that you added and verified in your Mailgun. To get it you can click on the Get a Domain Name link under the Domain Name box.
- Select Region: Select the region by checking the US or EU. This should match what you set up in Mailgun (anyone outside of the European Union should select the US option). To learn details, click the More information on Mailgun.com link.
Once you provide all the necessary information, click the Save Connection Settings button.
And, your Mailgun will be connected with your FluentSMTP plugin.
Get Private API Key from Mailgun #
Learn how to get the Private API Key from Mailgun by following the steps with the screenshots below –
First, log into your Mailgun Account Dashboard, click the Dropdown Arrow right next to the profile section from the top navbar, and open the API Security tab.
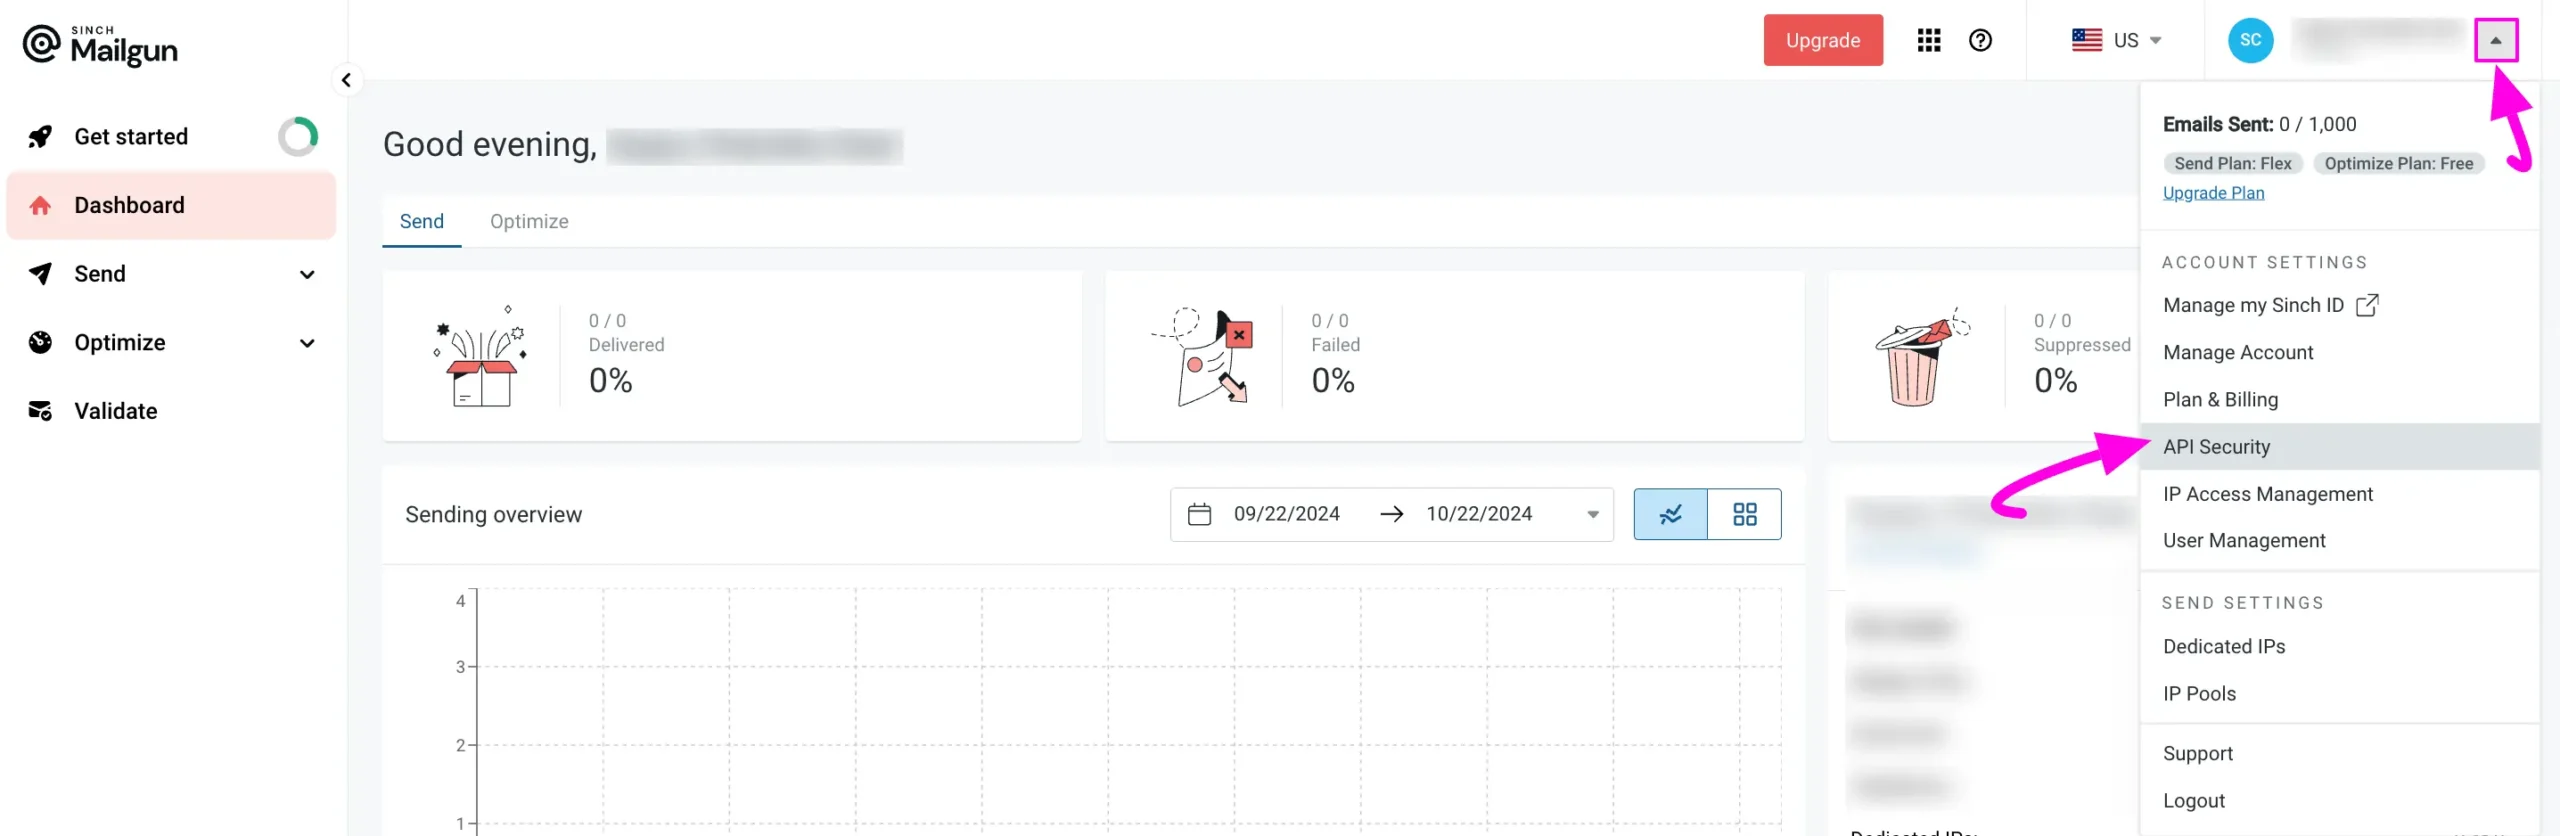
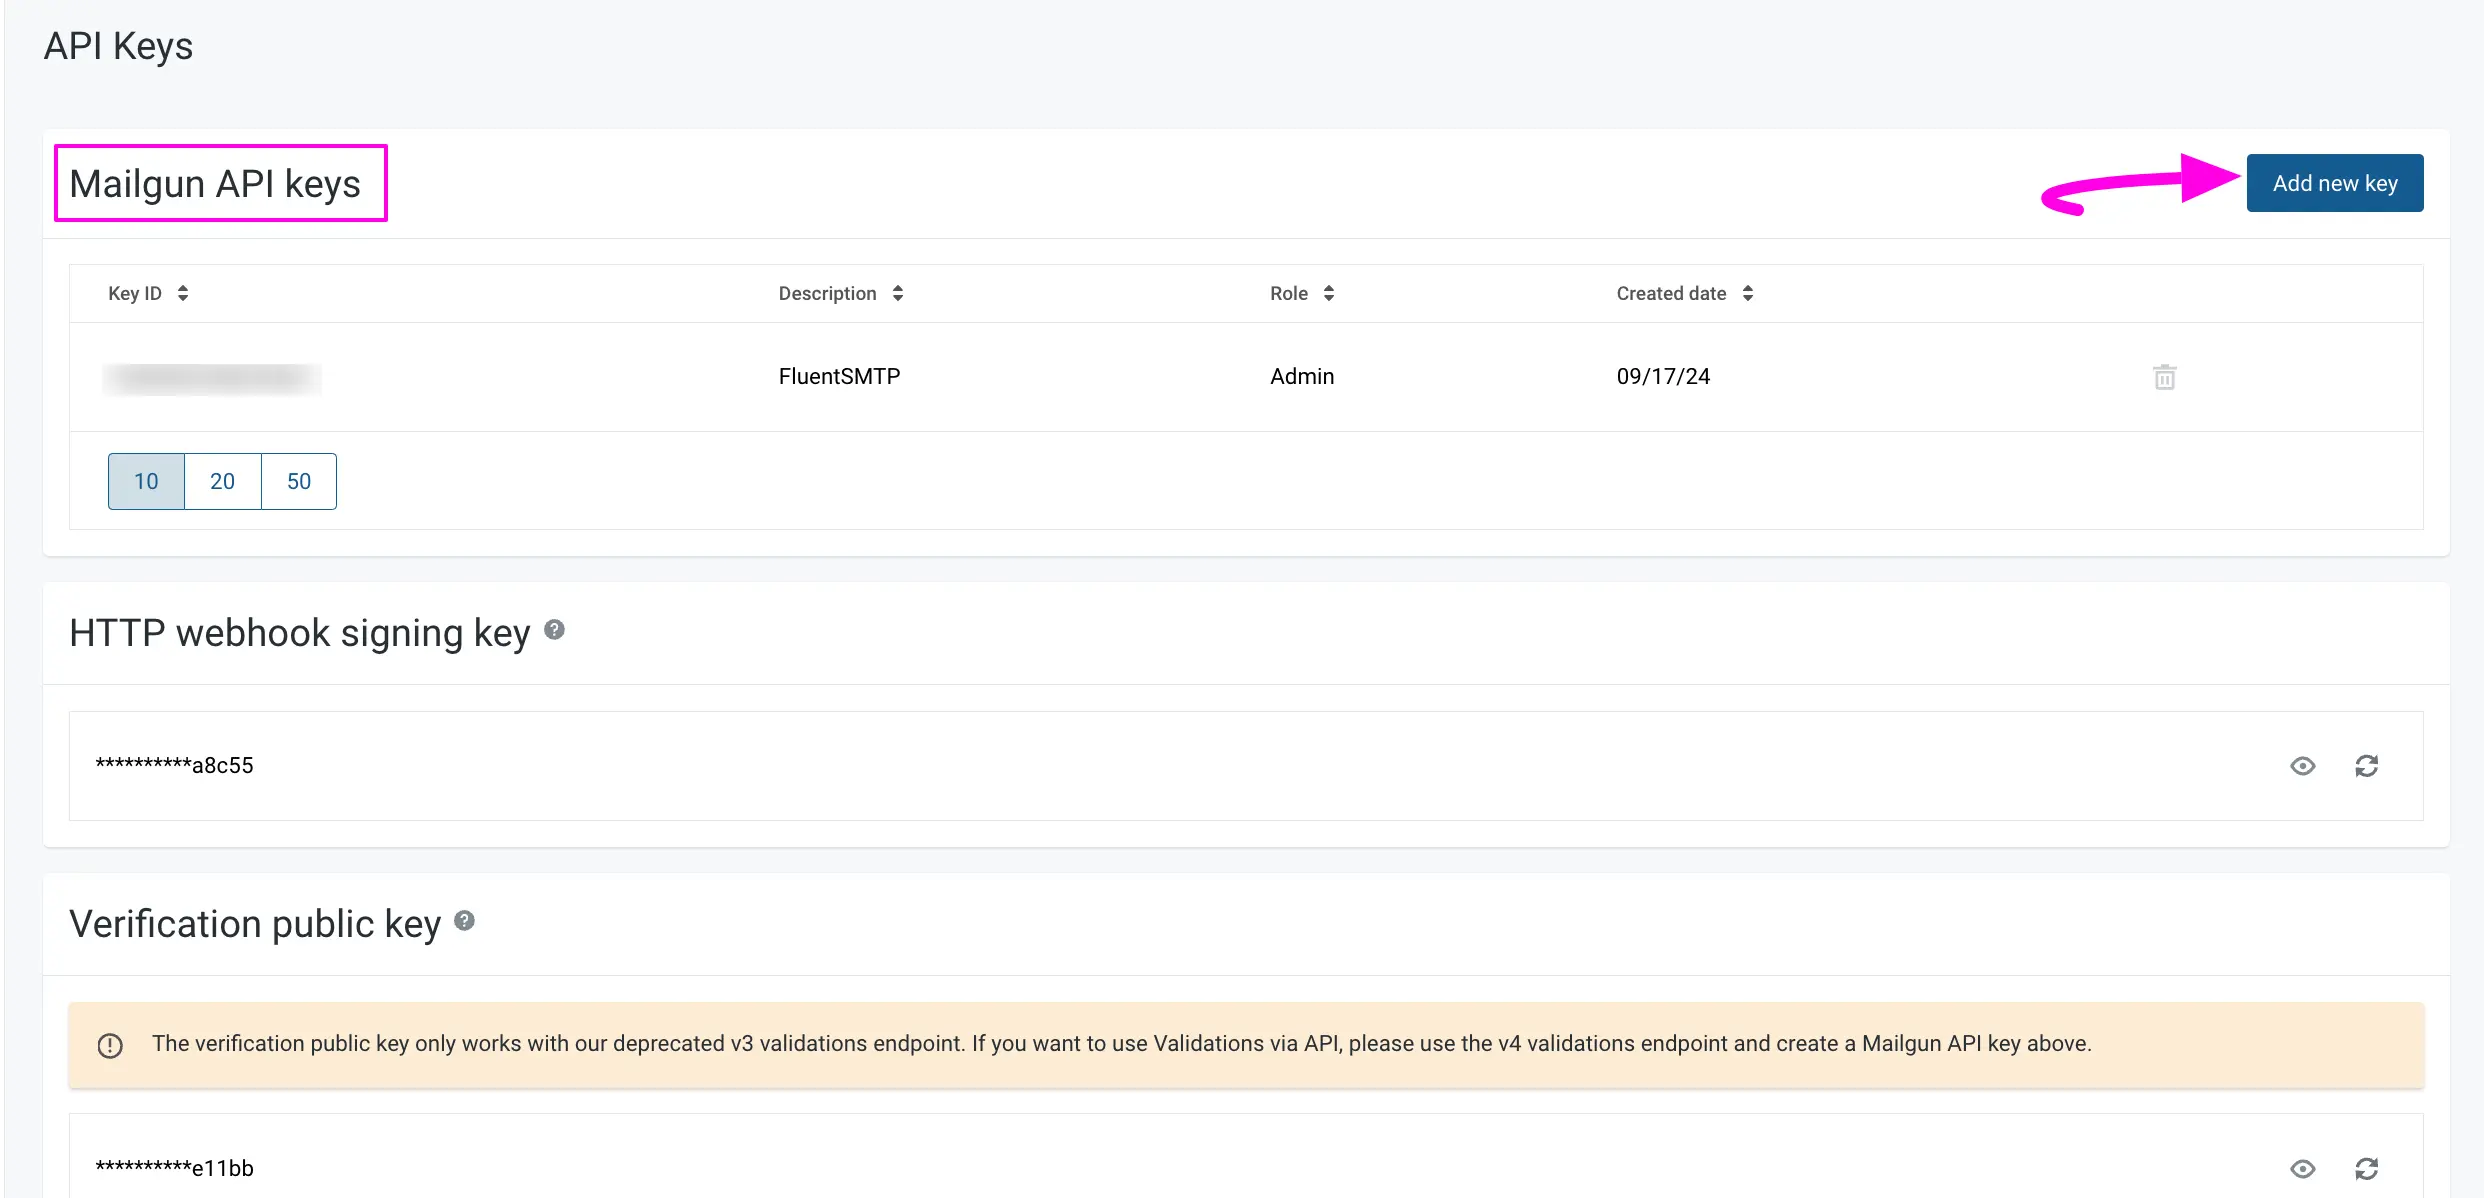
This will take you to a page that includes your Mailgun API keys.
Remember, in your Mailgun account, you will see 3 API keys; Mailgun API keys, HTTP Webhook Signing key, and Verification Public key. We recommend using your Mailgun API Key to configure FluentSMTP.
Now, if you want to generate a new API key for the configuration, click the Add new key button.
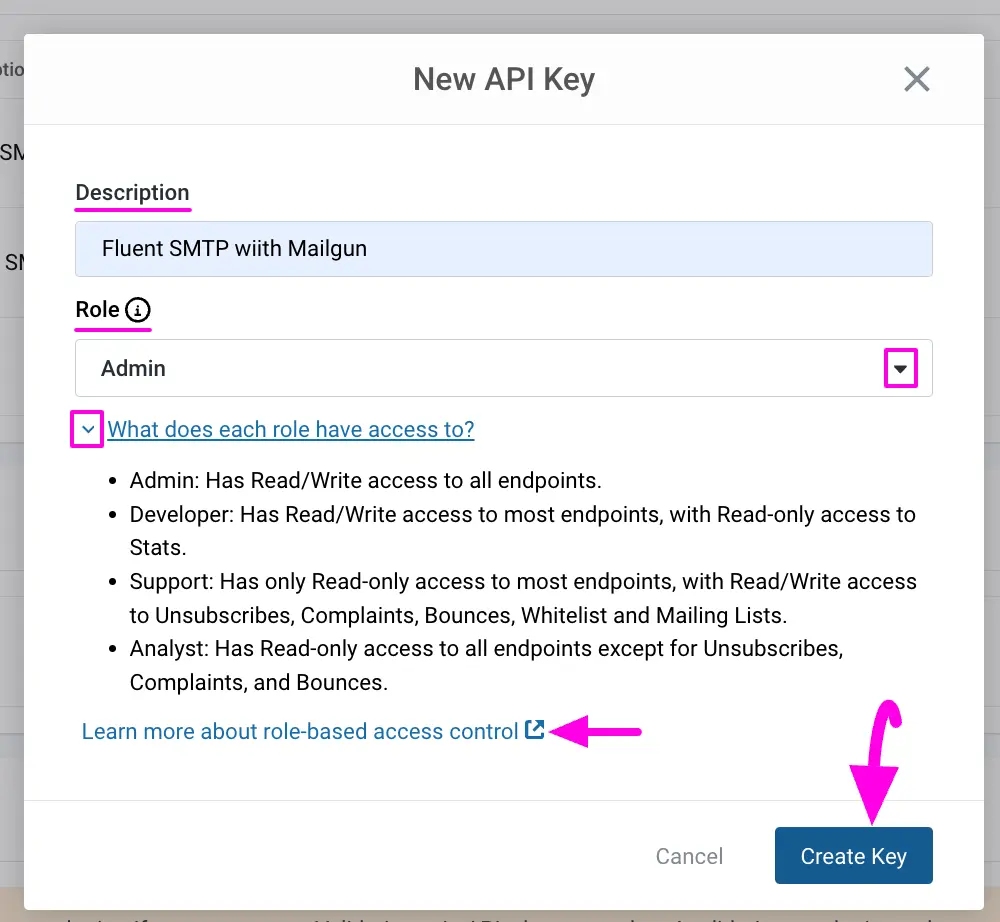
Now add a Name for your API key into the Description box to find it easily later, select the Role from the Dropdown List, and click the Create Key button to get your desired API key.
Plus, by expanding the “What does each role have access to?” option, you can see what permissions each role has. To know more details, visit the Learn more about role-based access control link.
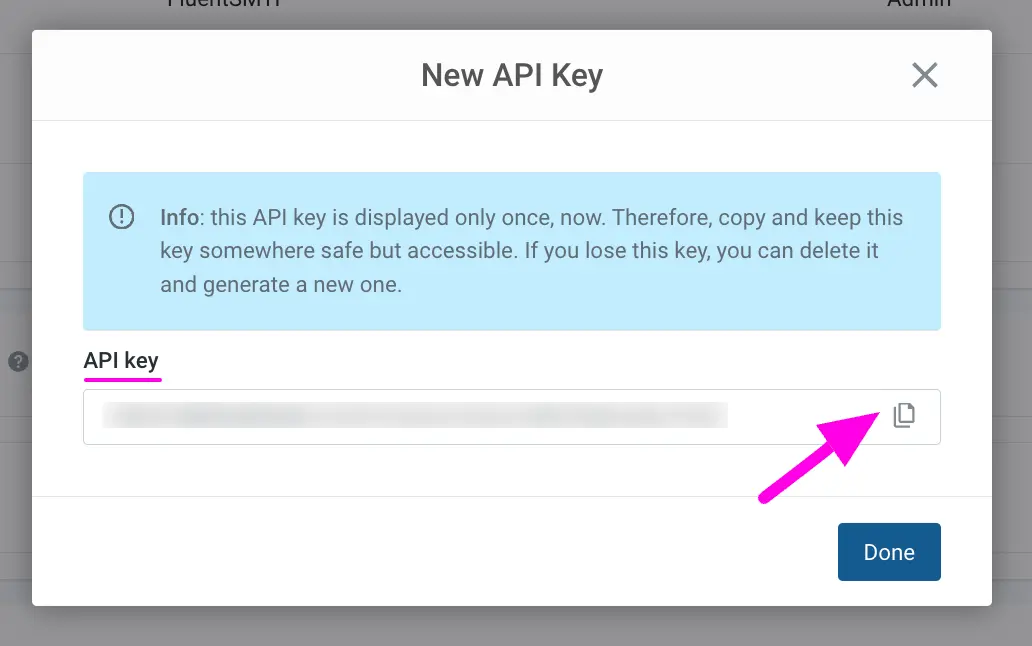
Here is your Mailgun Private API Key, copy it by clicking the Copy icon.
Remember, make sure you copy the key and store it somewhere safe and accessible, as the key is only displayed once. If you lose the key, you’ll need to generate a new one by repeating the previous steps.
Get Domain Name from Mailgun #
Learn how to get the Domain verified from Mailgun by following the steps with the screenshots below –
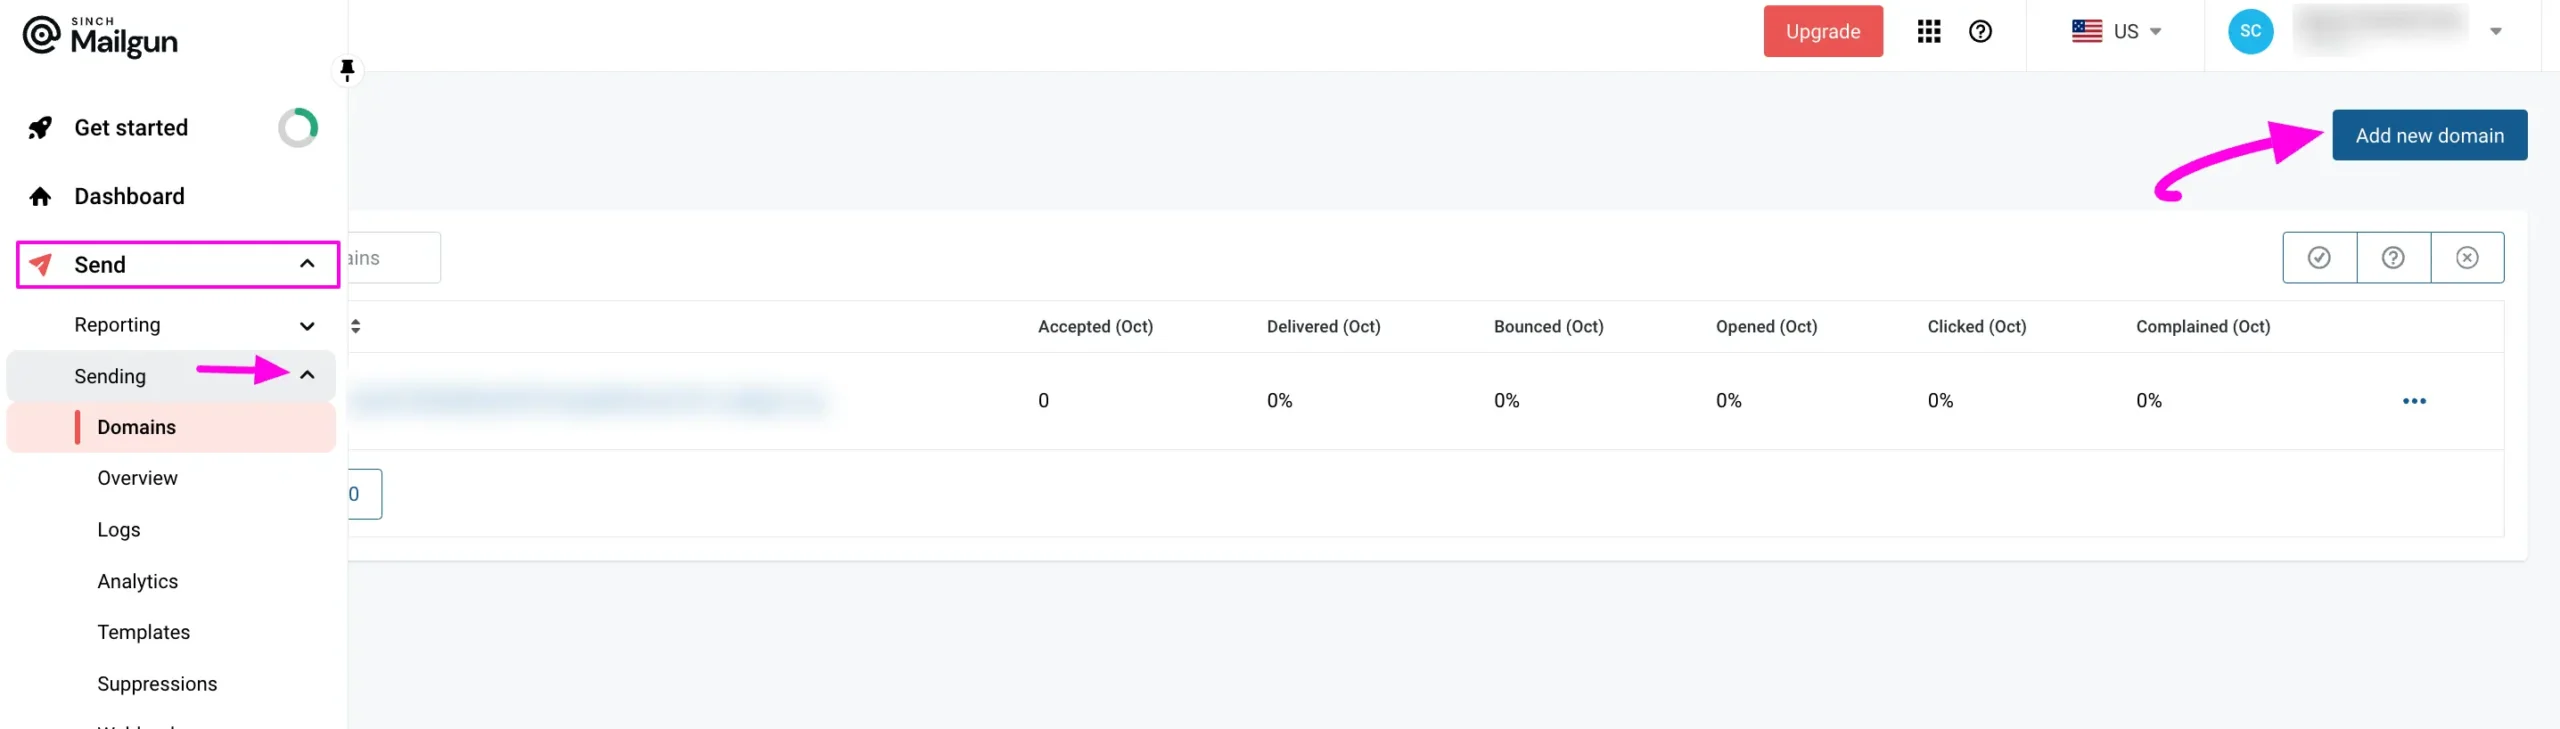
First, log into your Mailgun Account Dashboard, expand the Send dropdown list from the left sidebar, open the Domains tab by clicking the Sending button, and click the Add new domain button.
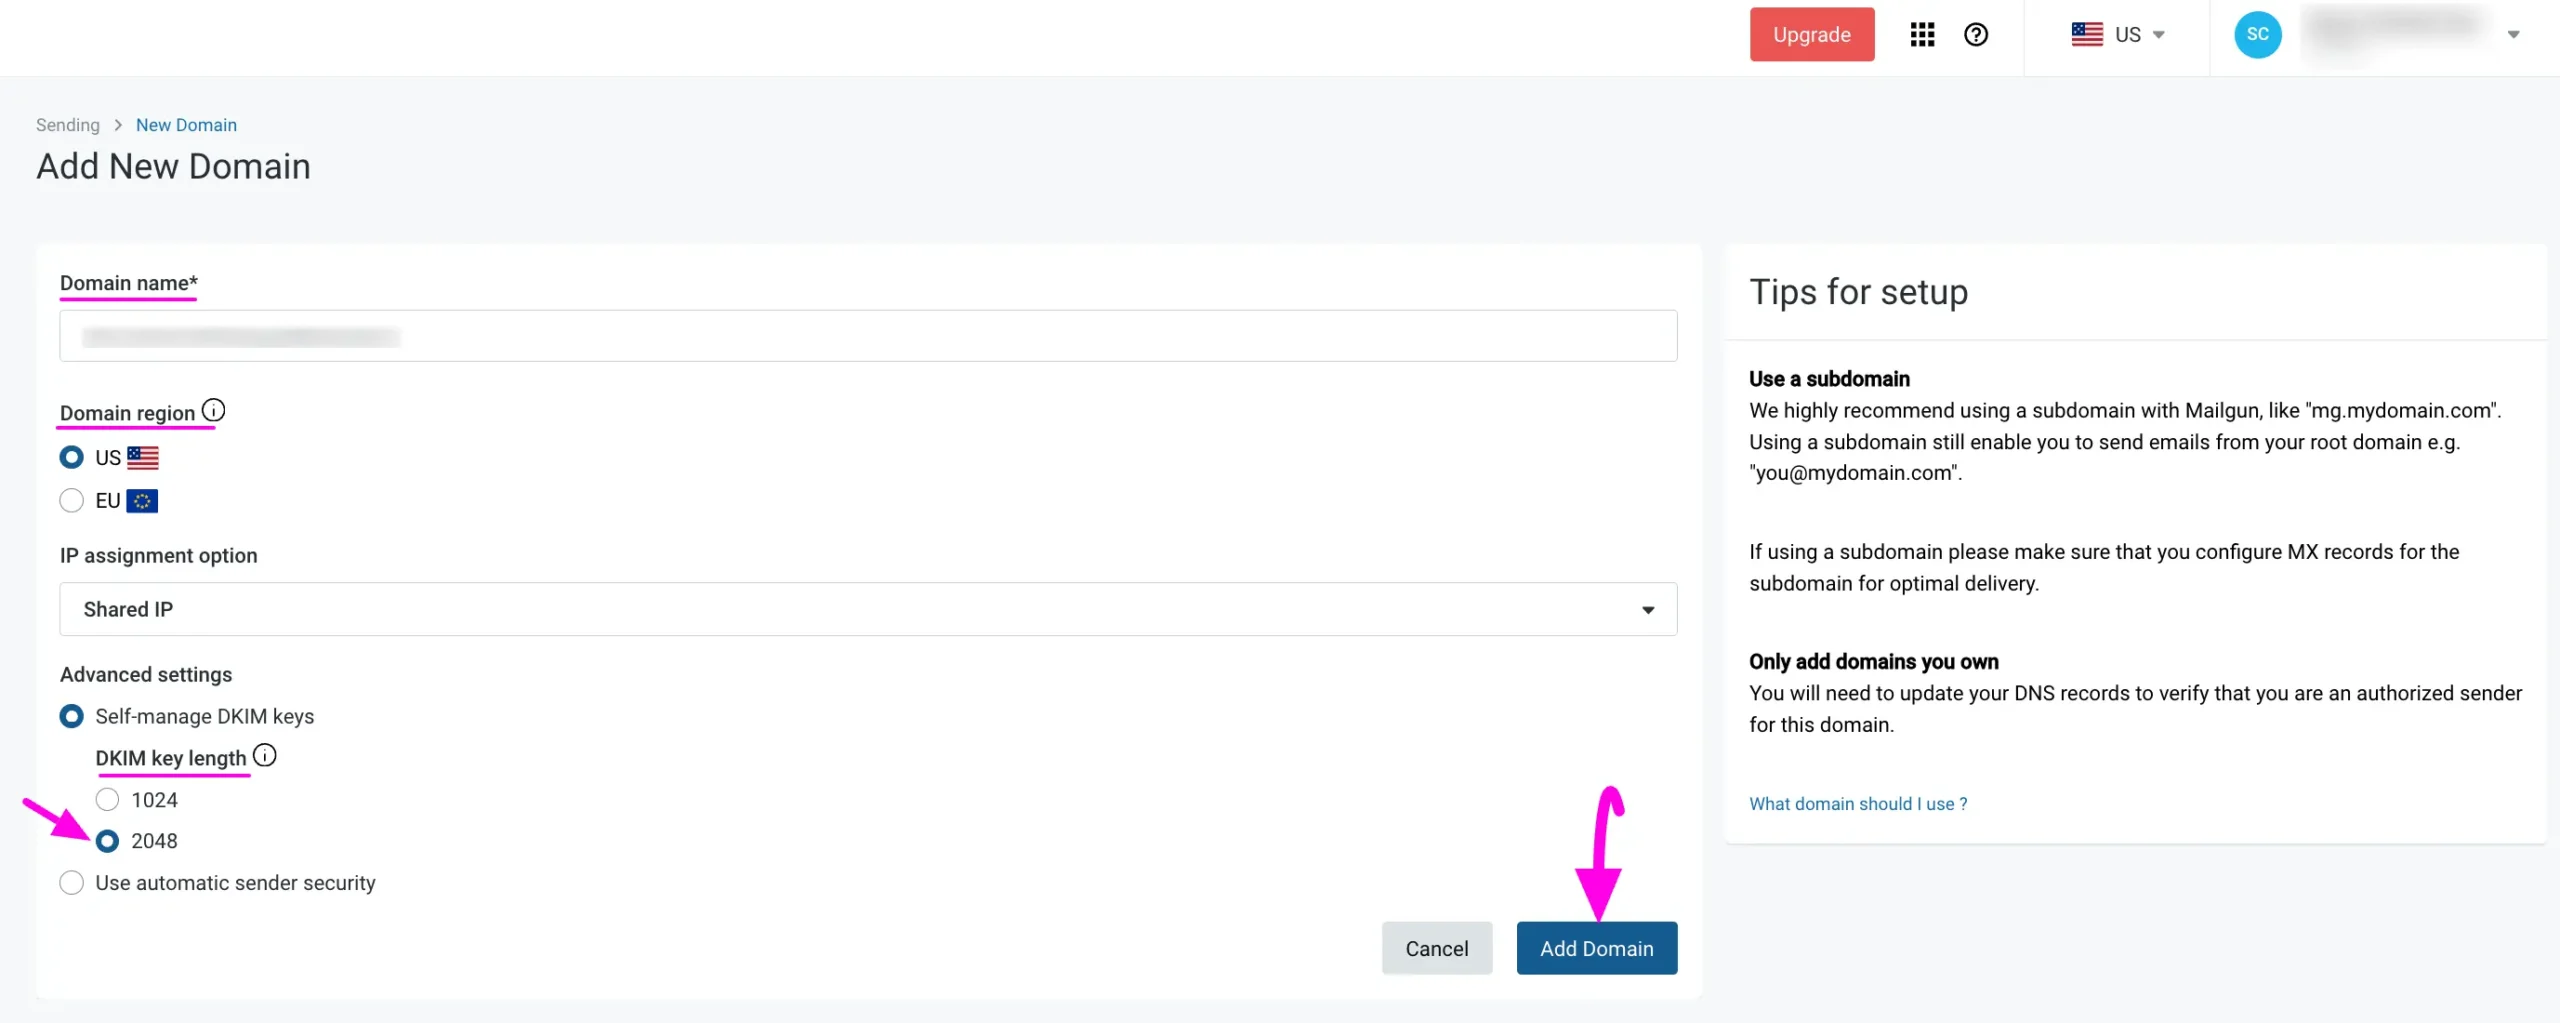
On this page, provide all the necessary information to get your desired Domain Name.
Domain Name: Here, enter the site domain you want to add in the Domain Name field.
We recommend you use a subdomain of your website’s domain name (e.g., subdomain.example.com). Mailgun will use this subdomain exclusively for sending emails and it will not be visible on your site. It doesn’t matter what you name to your subdomain, but you can use “mail” or “mg” in your subdomain as it makes the purpose clear.
Domain Region: Here, you need to select the domain region between US and EU. If your site is hosted in the European Union, please choose the EU. If your site is hosted outside of the European Union, please leave the default option as the US.
DKIM key length: This advanced setting adds an extra security layer for spam protection. We recommend selecting the 2048 option, which creates a longer DKIM key to make spamming more difficult for spammers.
Once you are done, click the Add Domain button, and your desired domain will be added.
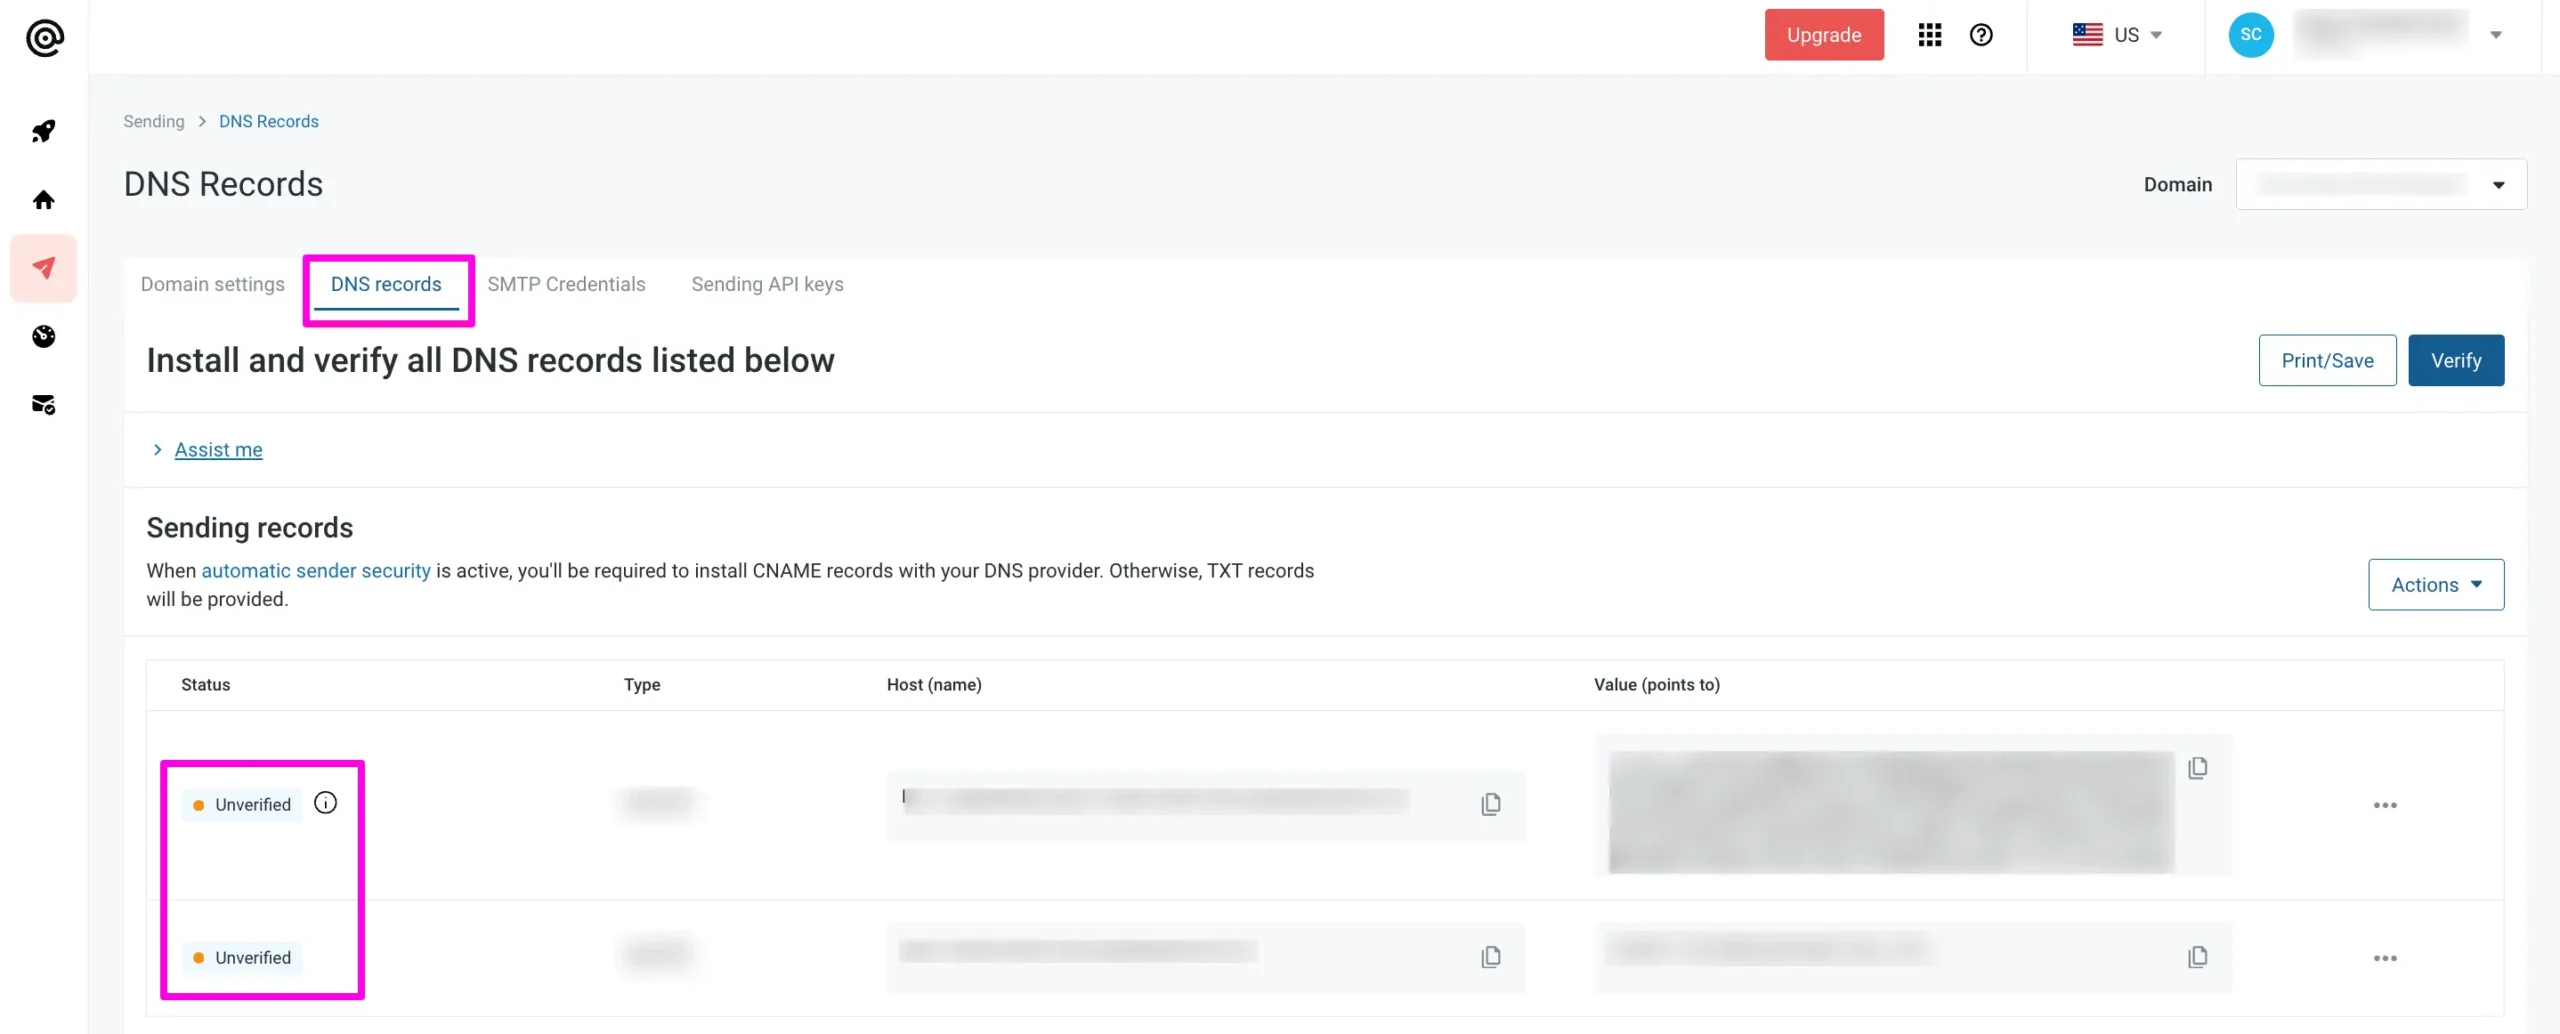
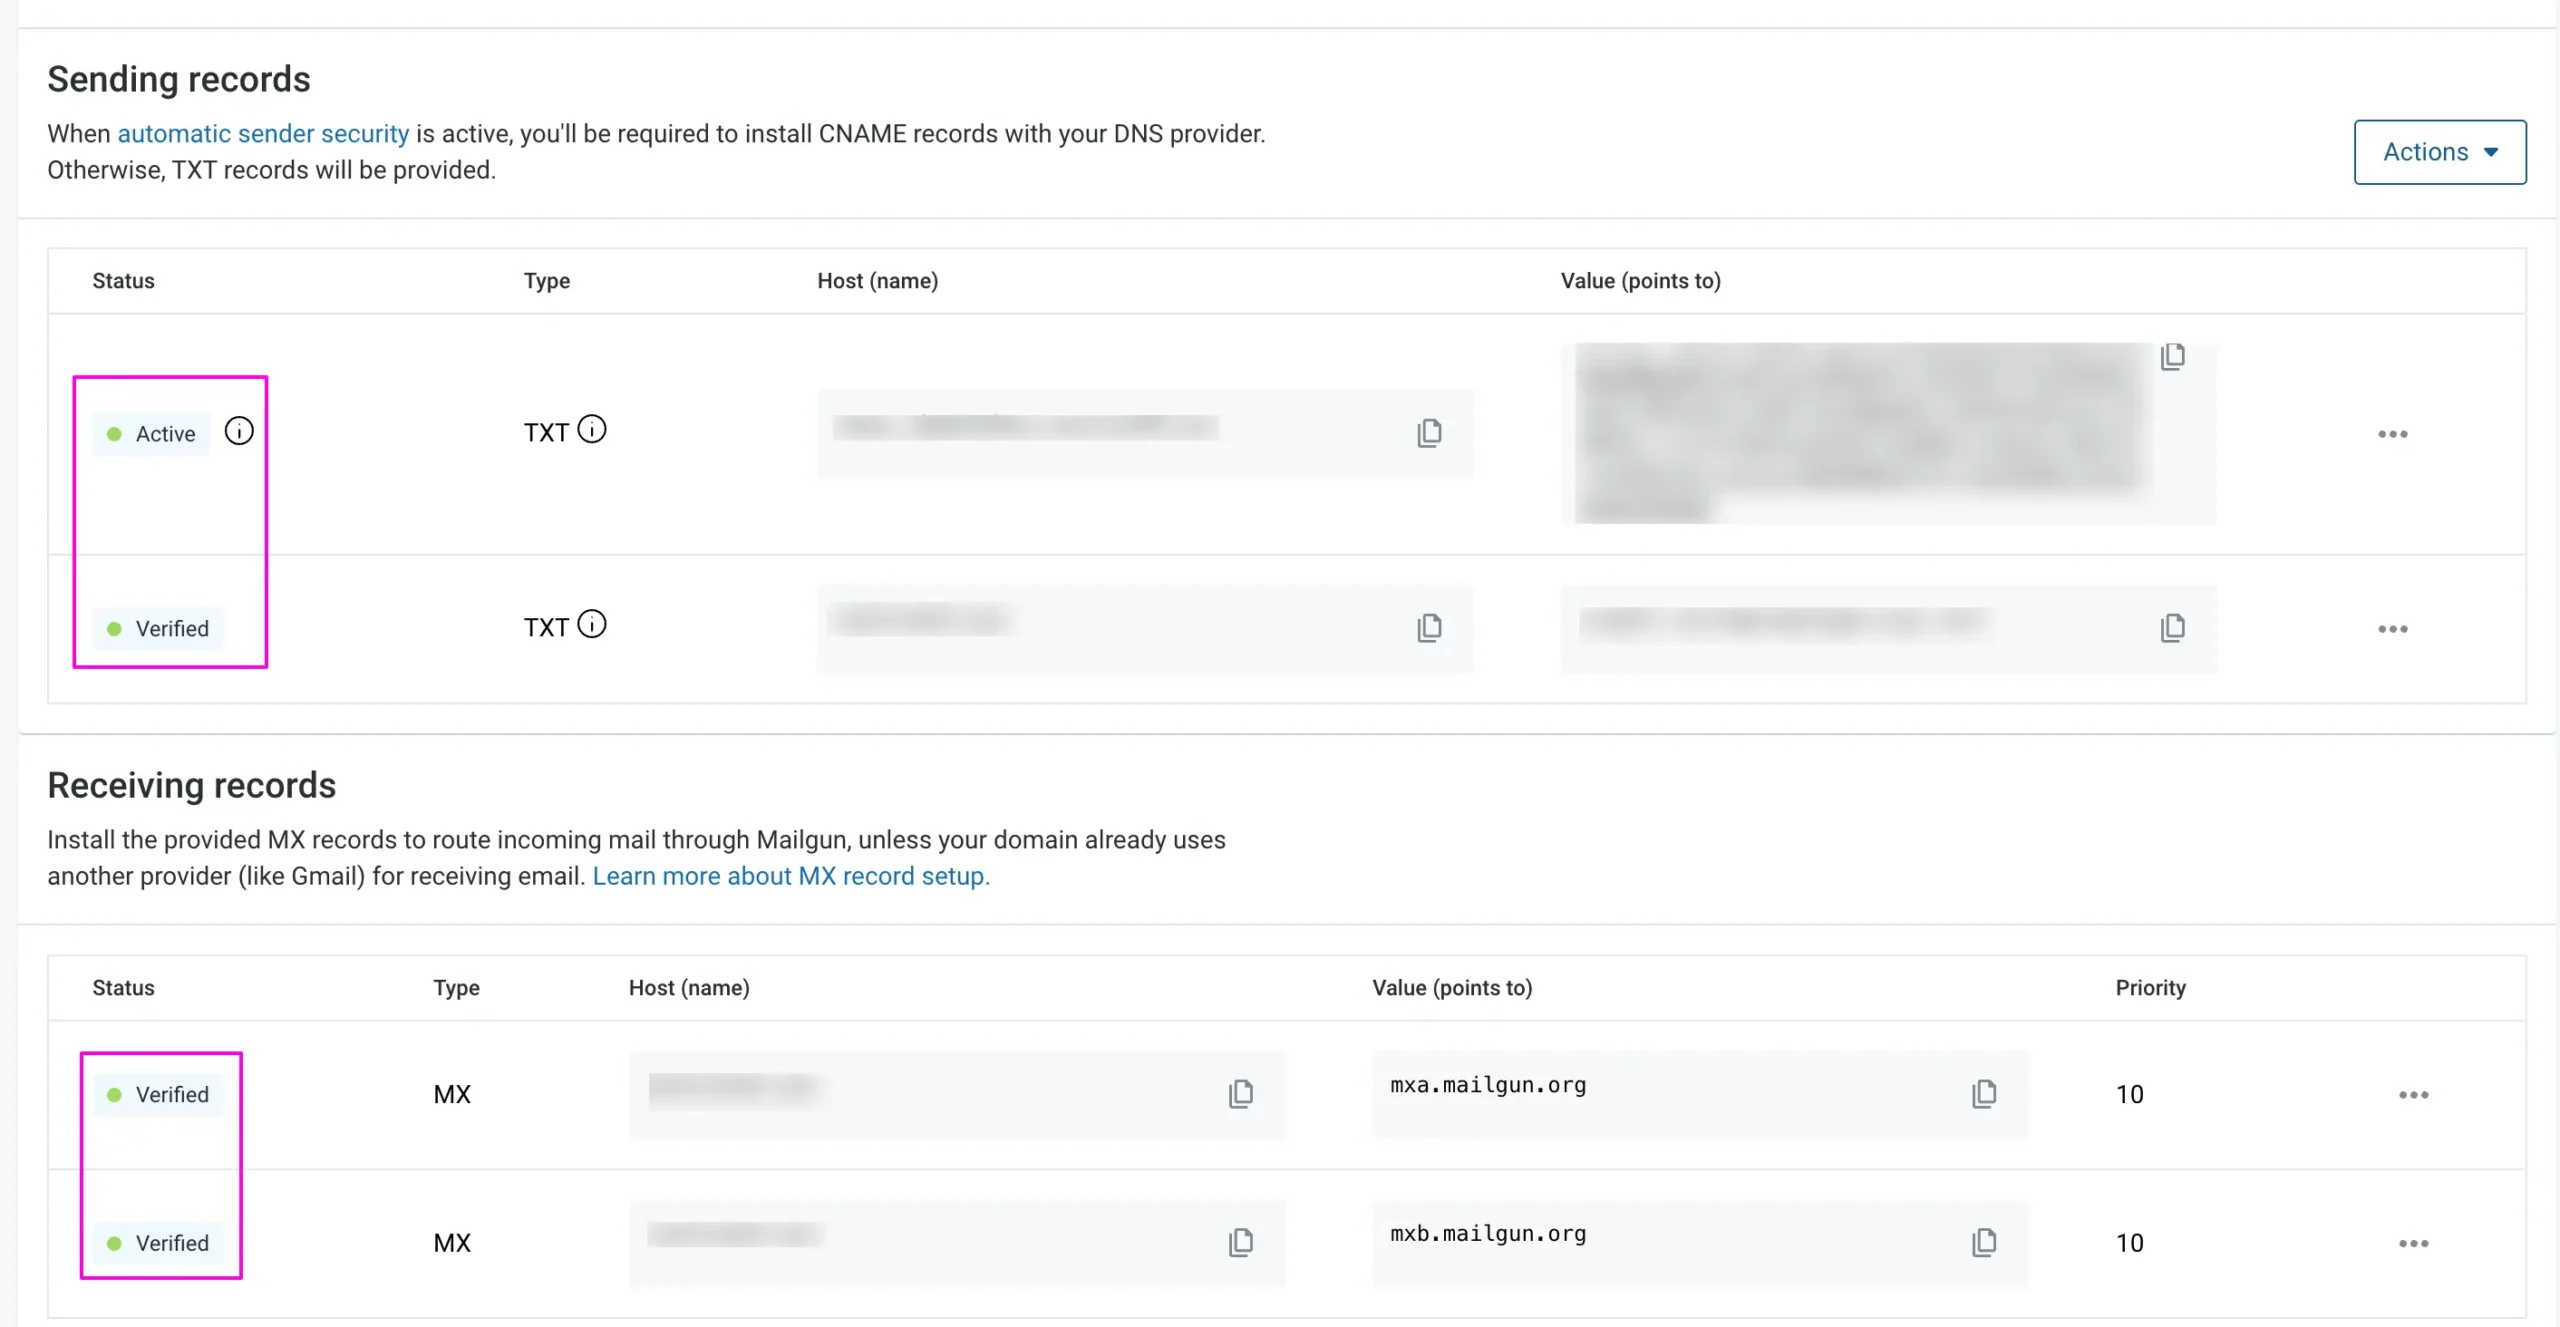
After adding the domain, you will be redirected to the DNS records tab to verify the added domain and activate the configuration. You will see, each record is showing as Unverified.
Verify Your Domain #
Like other SMTP services, Mailgun also requires you to verify your added domain by adding Mailgun-provided Records to your Site’s DNS to protect the site owners and their visitors.
You can find more information on the benefits of verifying your domain in Mailgun’s guide.
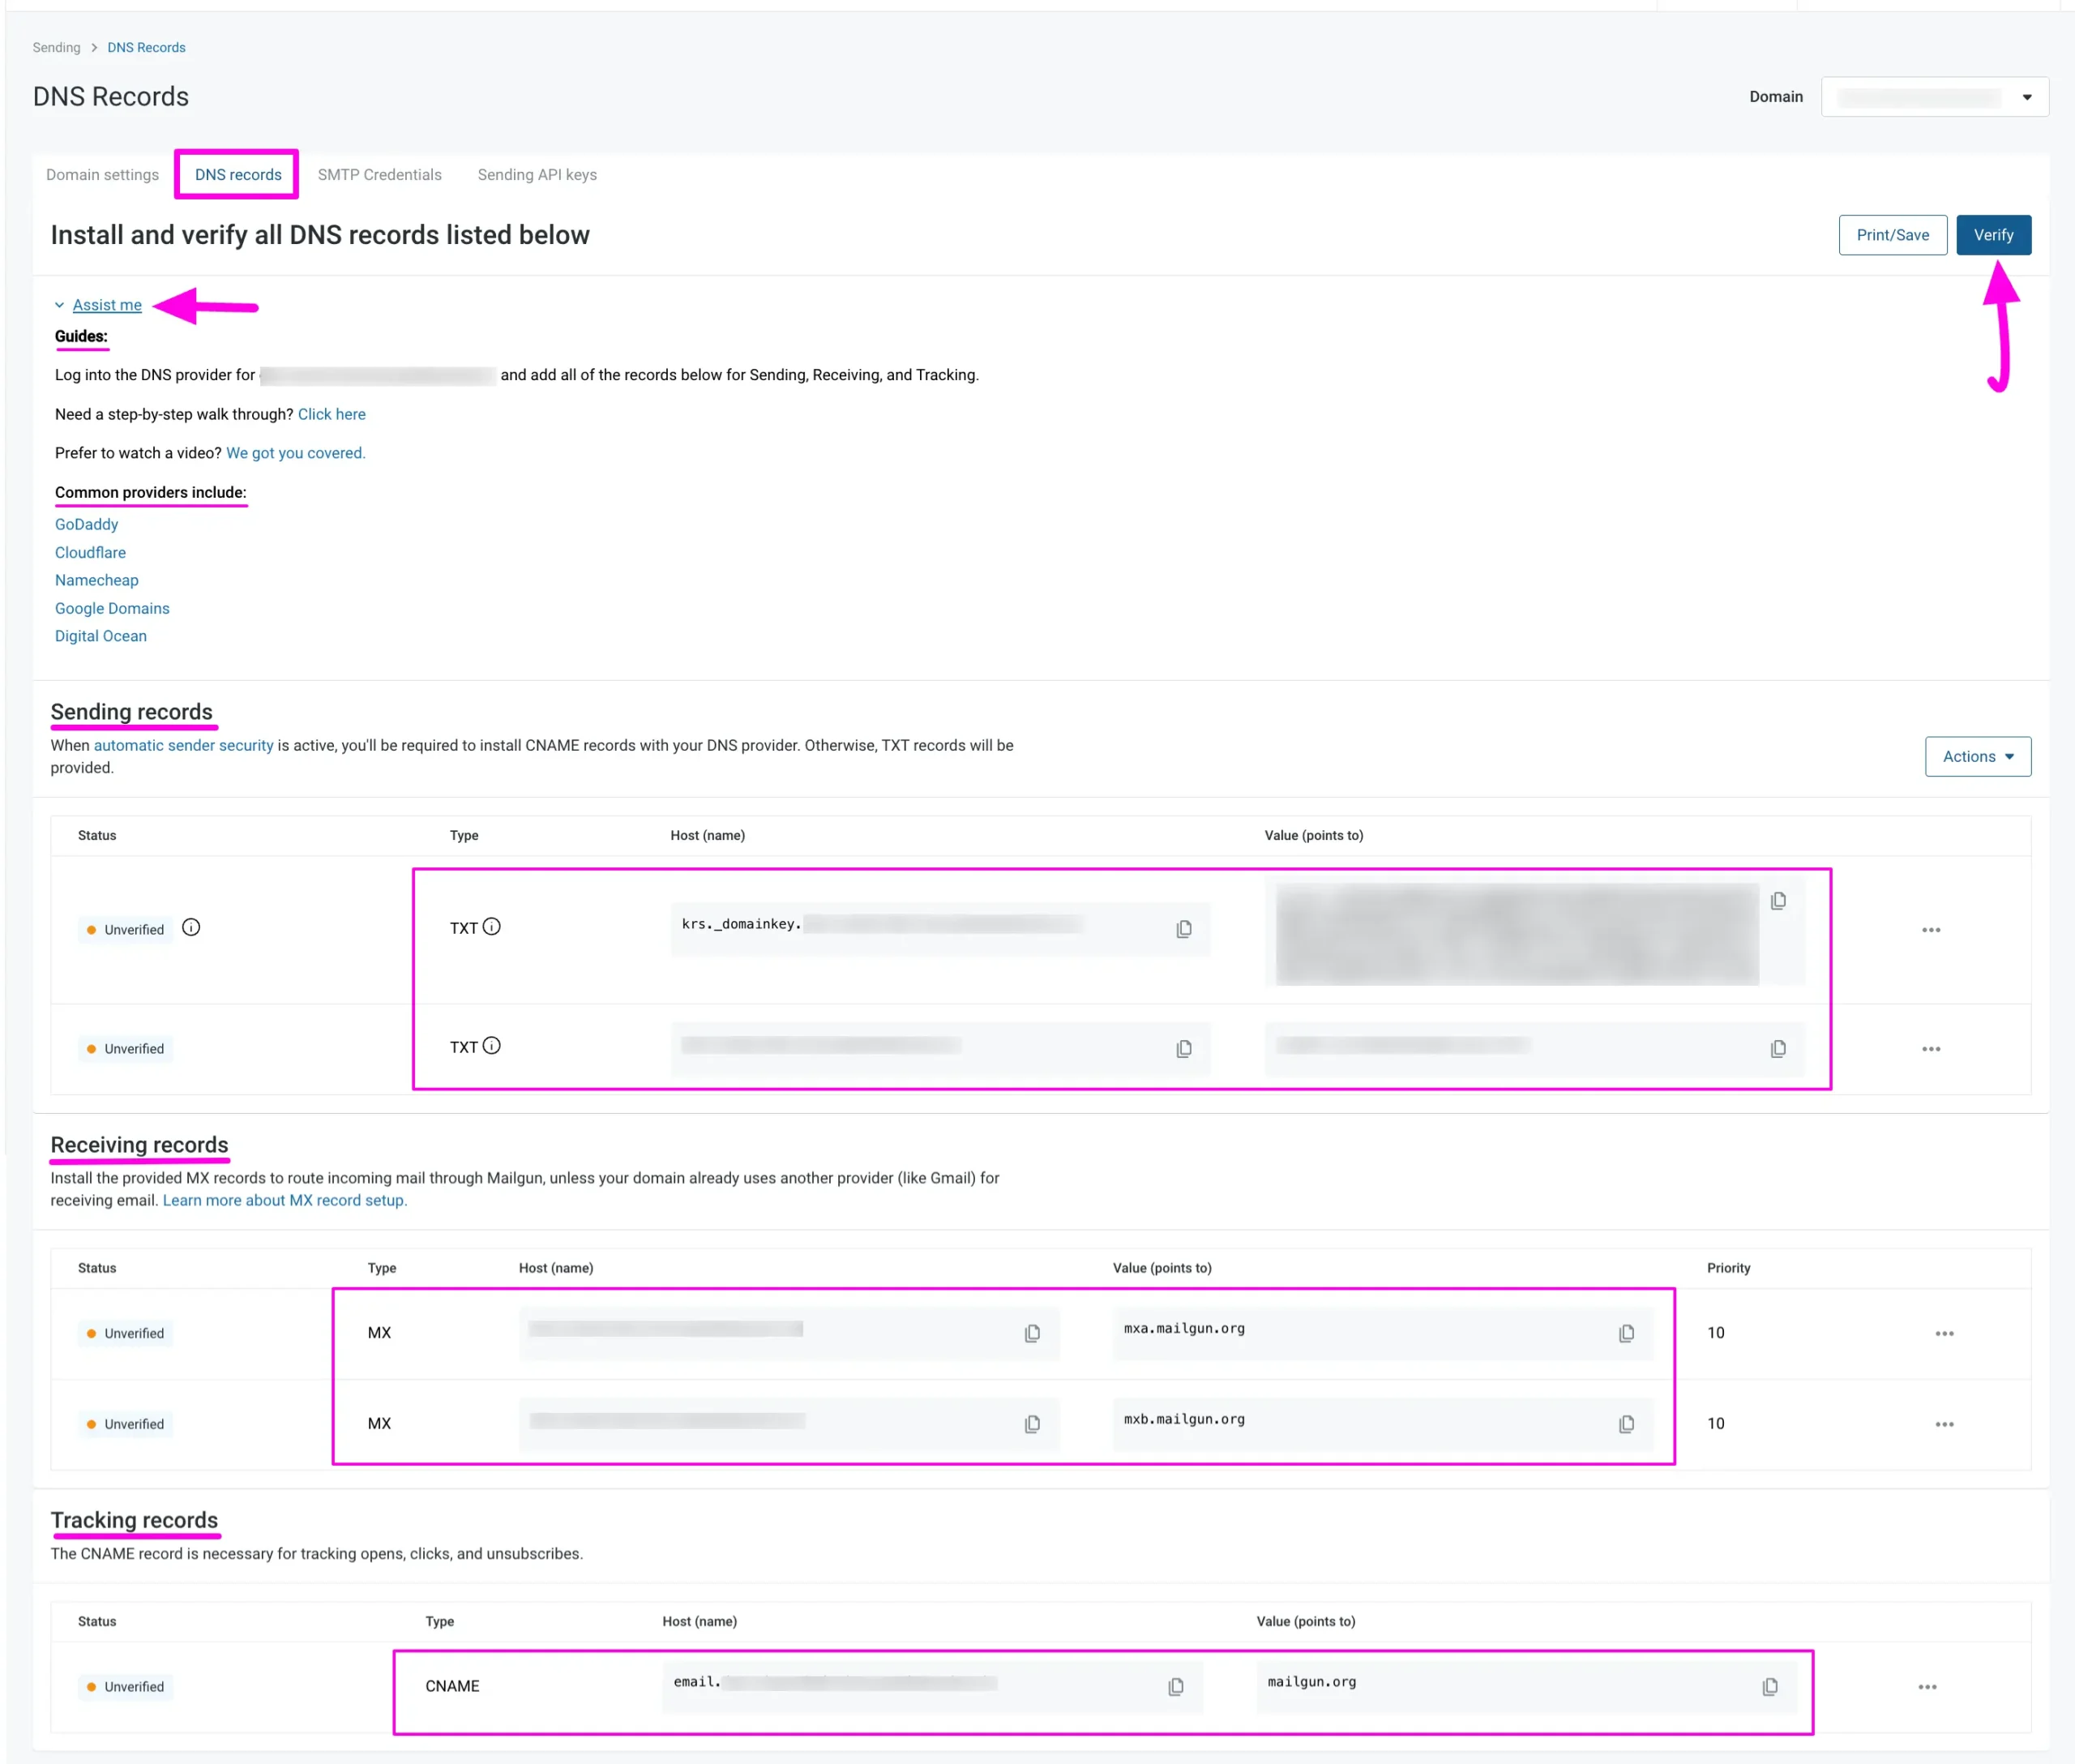
First, go to the Site which domain you added and open the DNS settings. Then, add all of the Mailgun Records for Sending, Receiving, and Tracking shown in the screenshot below into your Site’s DNS Provider.
If you’re not sure how to find your DNS Provider, Mailgun added a detailed Guide with some helpful links under the Assist Me dropdown list. Read these accordingly.
Once you have completed the process on your site, return to this page and click the Verify button.
Once Mailgun verifies the DNS changes you made, you can see each record is shown as Active/Verified.
Now Mailgun will verify whether your domain has proper DNS records. This verification can take a while (sometimes 24-48 hours) because DNS records may take some time to update.
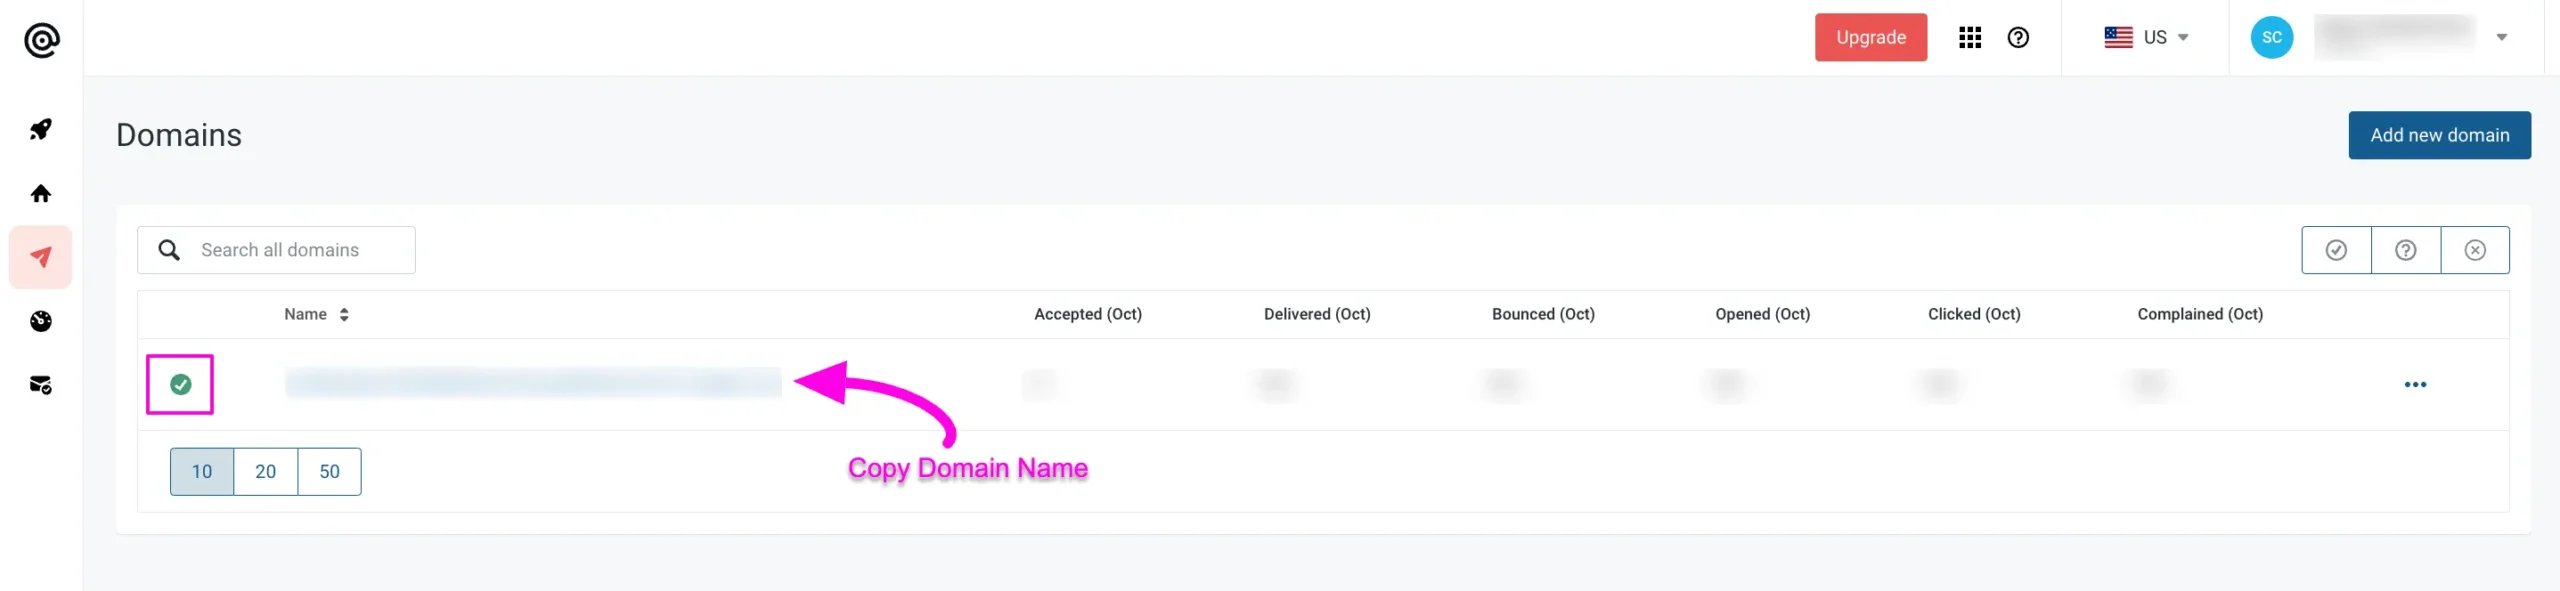
After completing the Domain Verification, it will show a Tick Sign as an active status next to your domain name.
Simply, copy it for later use in the configuration with FluentSMTP.
Finally, go back to the desired Add Connection page under Settings from the Fluent SMTP Navbar, and paste the Private API Key and Domain Name you copied from Mailgun into respective fields.
Once you input all the necessary information, finally, click the Save Connection Settings button.
And, your Mailgun Server will be connected to your Fluent SMTP.
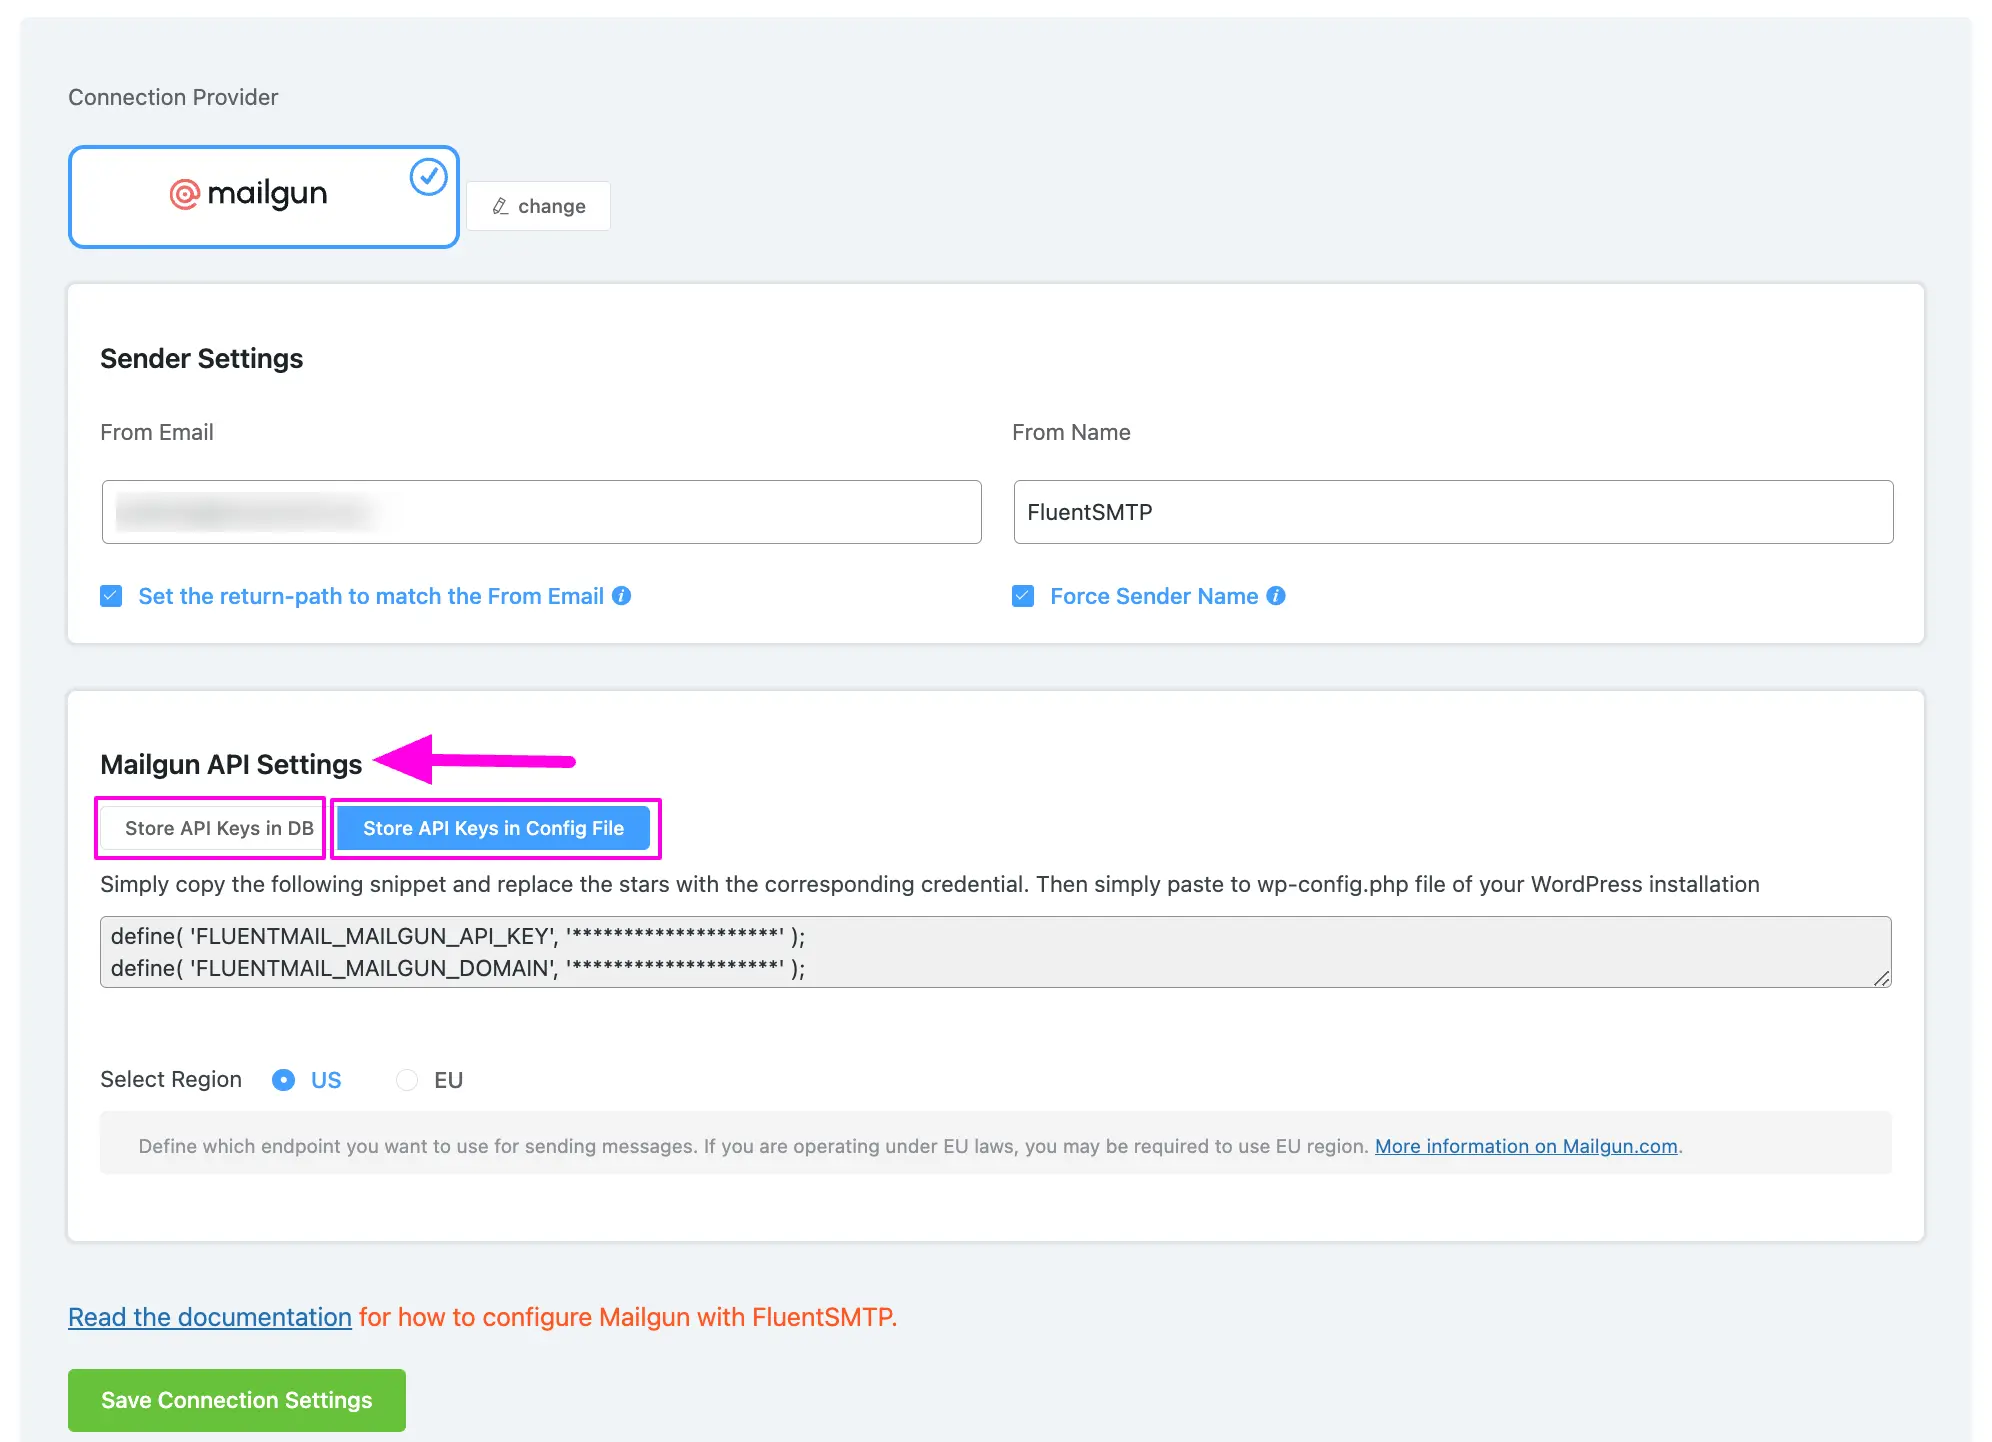
Details of Mailgun API Settings #
- Store API Keys in DB: By default, this is enabled and strongly recommended. This will keep the information in the Databases in Encrypted format.
- Store API Keys in Config File: This allows you to store the access keys in the following section inside the wp-config.php file by the following directives.
Simply copy the following snippets and replace the stars with the corresponding credential. Then simply paste it to the wp-config.php file of your WordPress installation
define( ‘FLUENTMAIL_MAILGUN_API_KEY’, ‘********************’ );
define( ‘FLUENTMAIL_MAILGUN_DOMAIN’, ‘********************’ );
Configured Mailgun #
Here, you can see that your Mailgun is connected and ready to send emails from your WordPress site.
To learn the details about General Settings, read this Documentation.
Additionally, it is recommended to send a test email to check whether the configuration is successful or not, to learn how to send a test email in detail, read this Documentation.
That’s all about Configuring FluentSMTP with Mailgun to send emails from the WordPress website.
If you have any further questions, concerns, or suggestions, please do not hesitate to contact our @support team. Thank you.


Trying to send test email and I’m getting “Mailgun API error”
I’ve entered in the API as explained in the documentation several times and still get the error.
I am getting the following error after setting up with mailgun and submitting a test email:
Oops! PHPMailer is modified by WPMailSMTP\MailCatcher.
I do have the mailgun plugin installed for other functionality on the site, and it was working fine. (I haven’t tested it since setting up fluentSMPT.
Any thoughts?
probably a plugin conflict. Maybe you’re using both WP Mail SMTP and FluentSMTP?