
Configure Cloudflare Email with FluentSMTP
You need a Cloudflare account where the sending domain is added, with Email Sending enabled and SPF / DKIM / DMARC published. Until that is done, the API will refuse mail.
Create an API token
- Open Cloudflare API Tokens. If you have several accounts, pick the one that owns the domain.
- Create Token.
- Permission policies: Custom.
- Add a policy scoped to Entire Account.
- Resource: Email & Messaging → Email Sending. Enable Read and Edit.
- Continue, create, copy the token once.
Copy the Account ID from the Cloudflare dashboard (right sidebar on the account overview, or the URL).
In FluentSMTP
Settings → FluentSMTP → Add Connection (or the wizard). Pick Cloudflare.
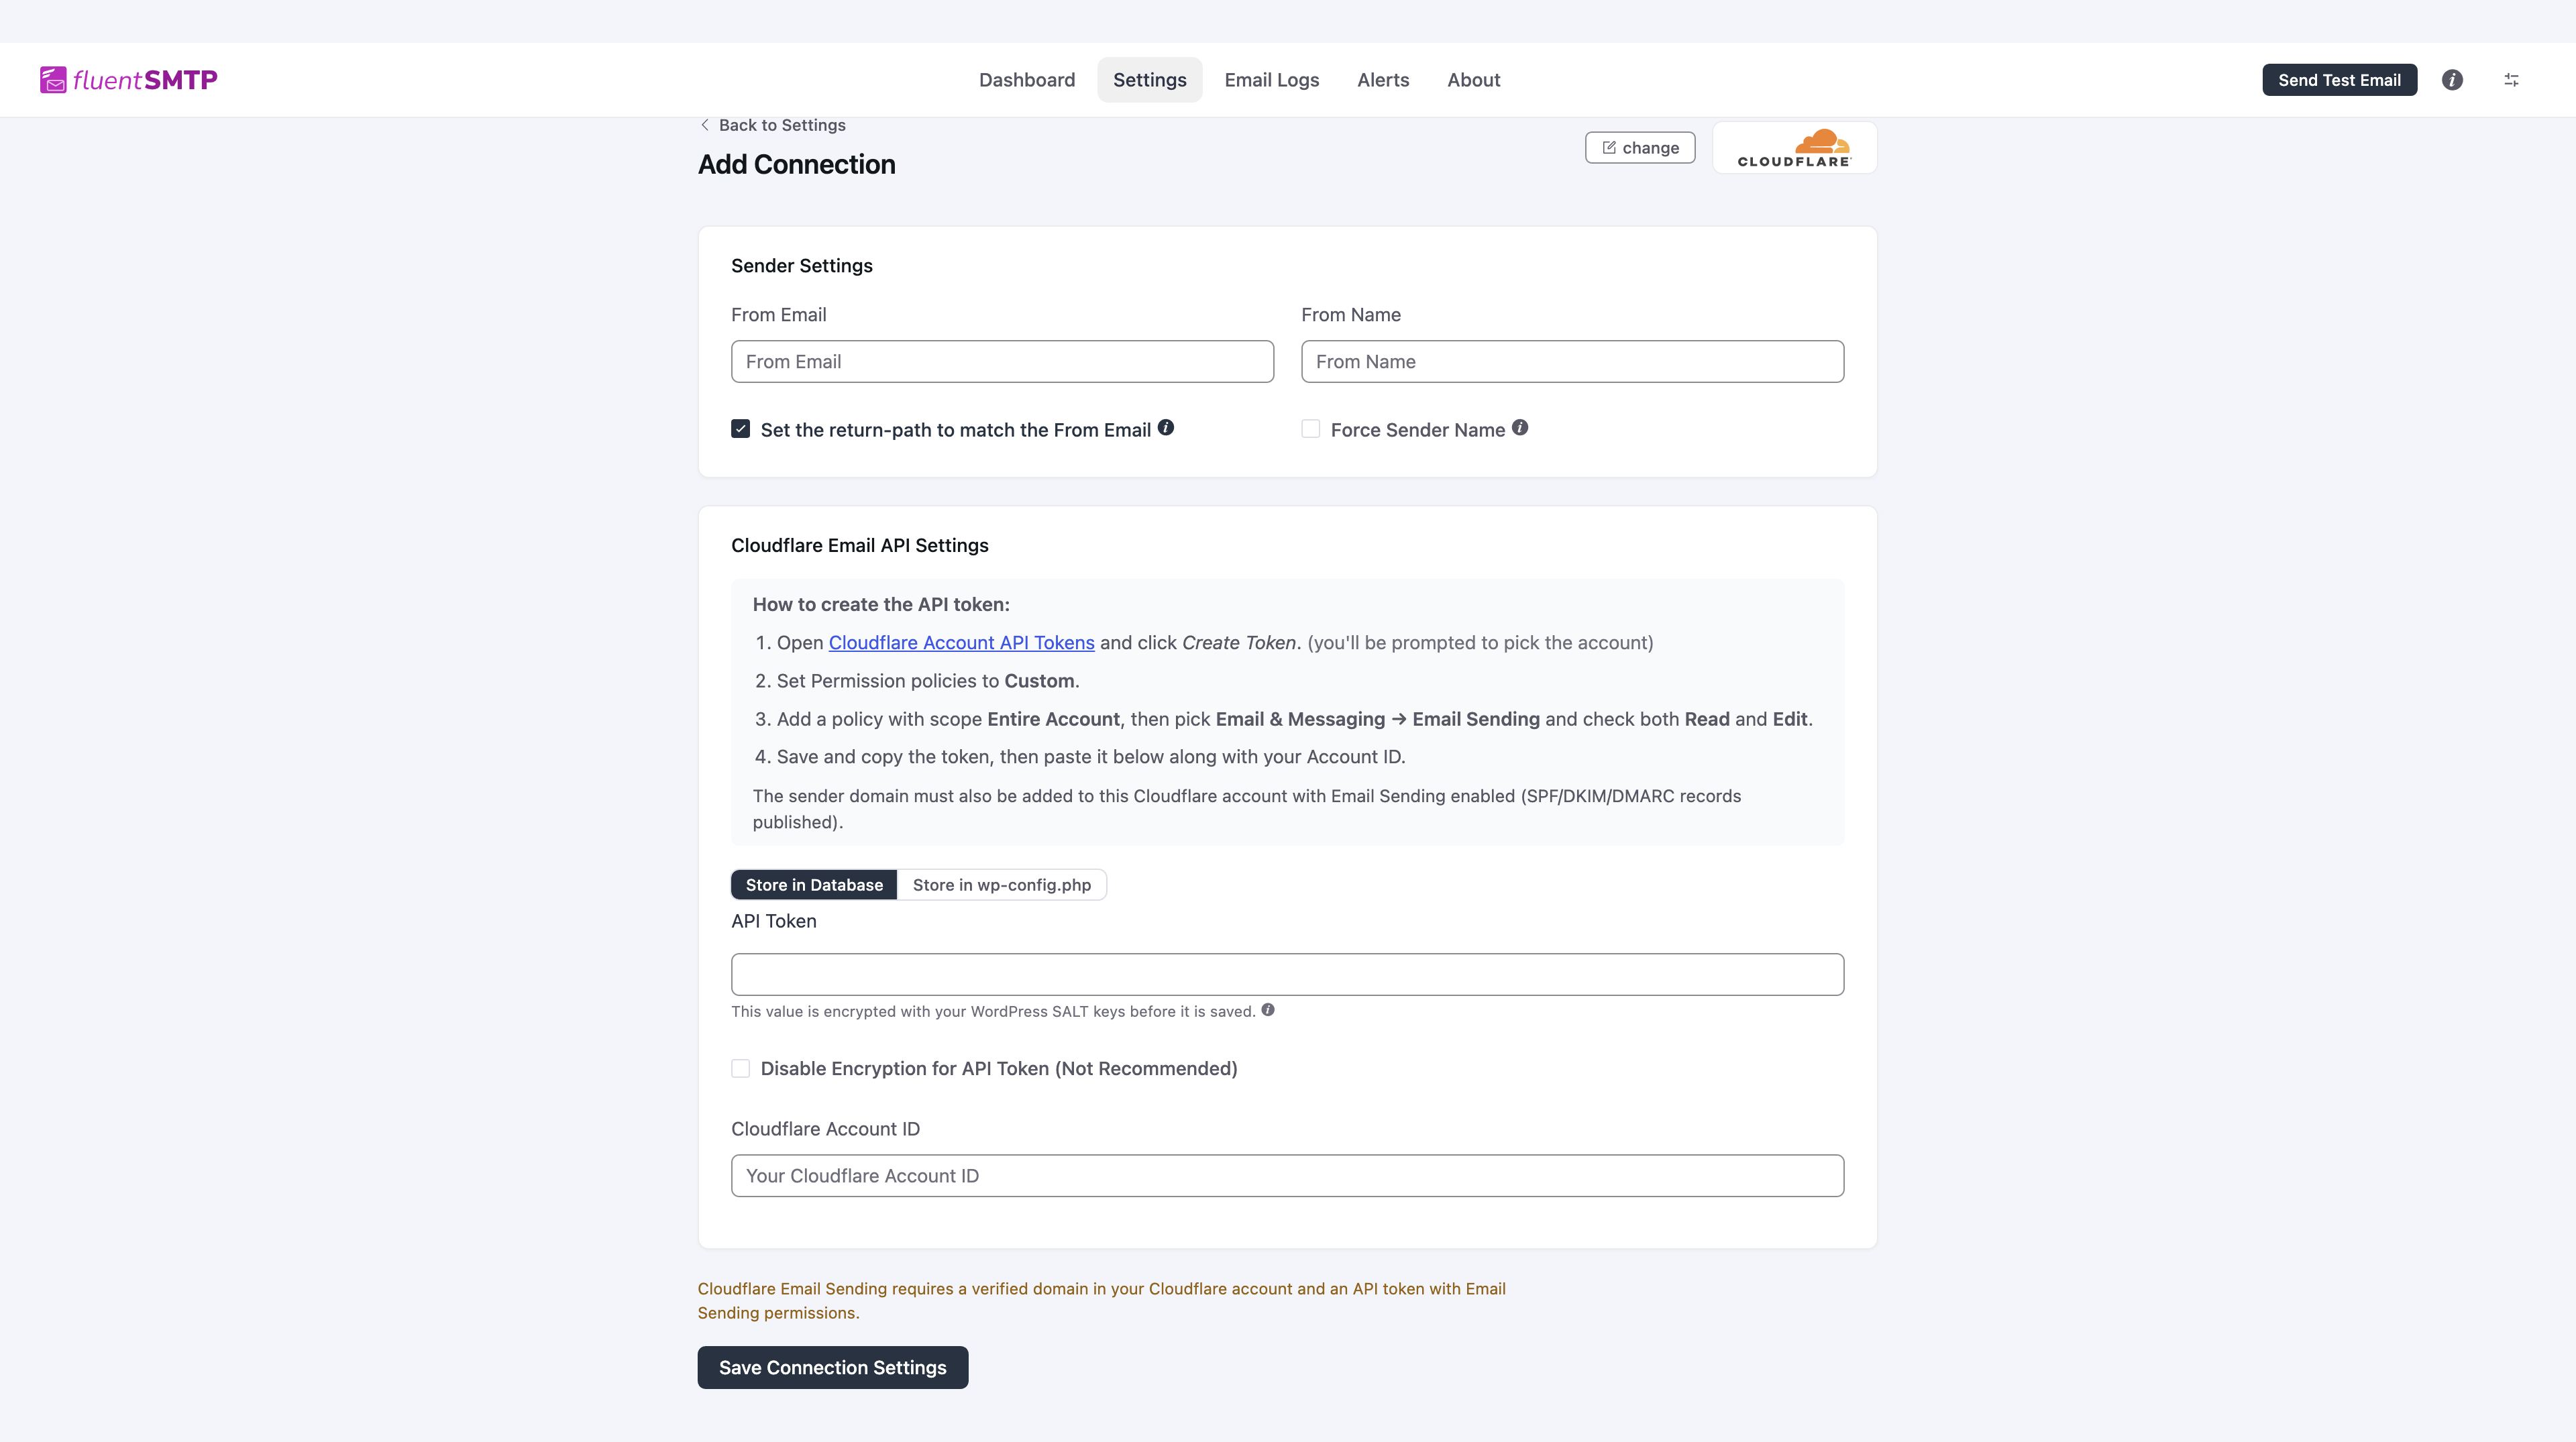
- From Email on the verified sending domain.
- API Token.
- Cloudflare Account ID.
The form repeats the token steps in an info box. Follow those labels if Cloudflare has moved the dashboard.
Leave Store in Database selected. You can tick Disable Encryption, or switch to Store in wp-config.php. Both are optional. See Where secrets are stored.
Save Connection Settings, then send a test.
If save fails, the token is missing Email Sending, or the domain is not enabled for sending on that account.