
This documentation shows the process of Configuring FluentSMTP with Microsoft Outlook from the Microsoft Entra Admin Center.
We also have another documentation that demonstrates Configuring FluentSMTP with Azure Portal. Alternatively, you can watch the video below for a full walkthrough:
Configure Email Service Provider in Fluent SMTP #
To configure Outlook/Office 365 with your Fluent SMTP plugin go to the WordPress Settings and select Fluent SMTP.
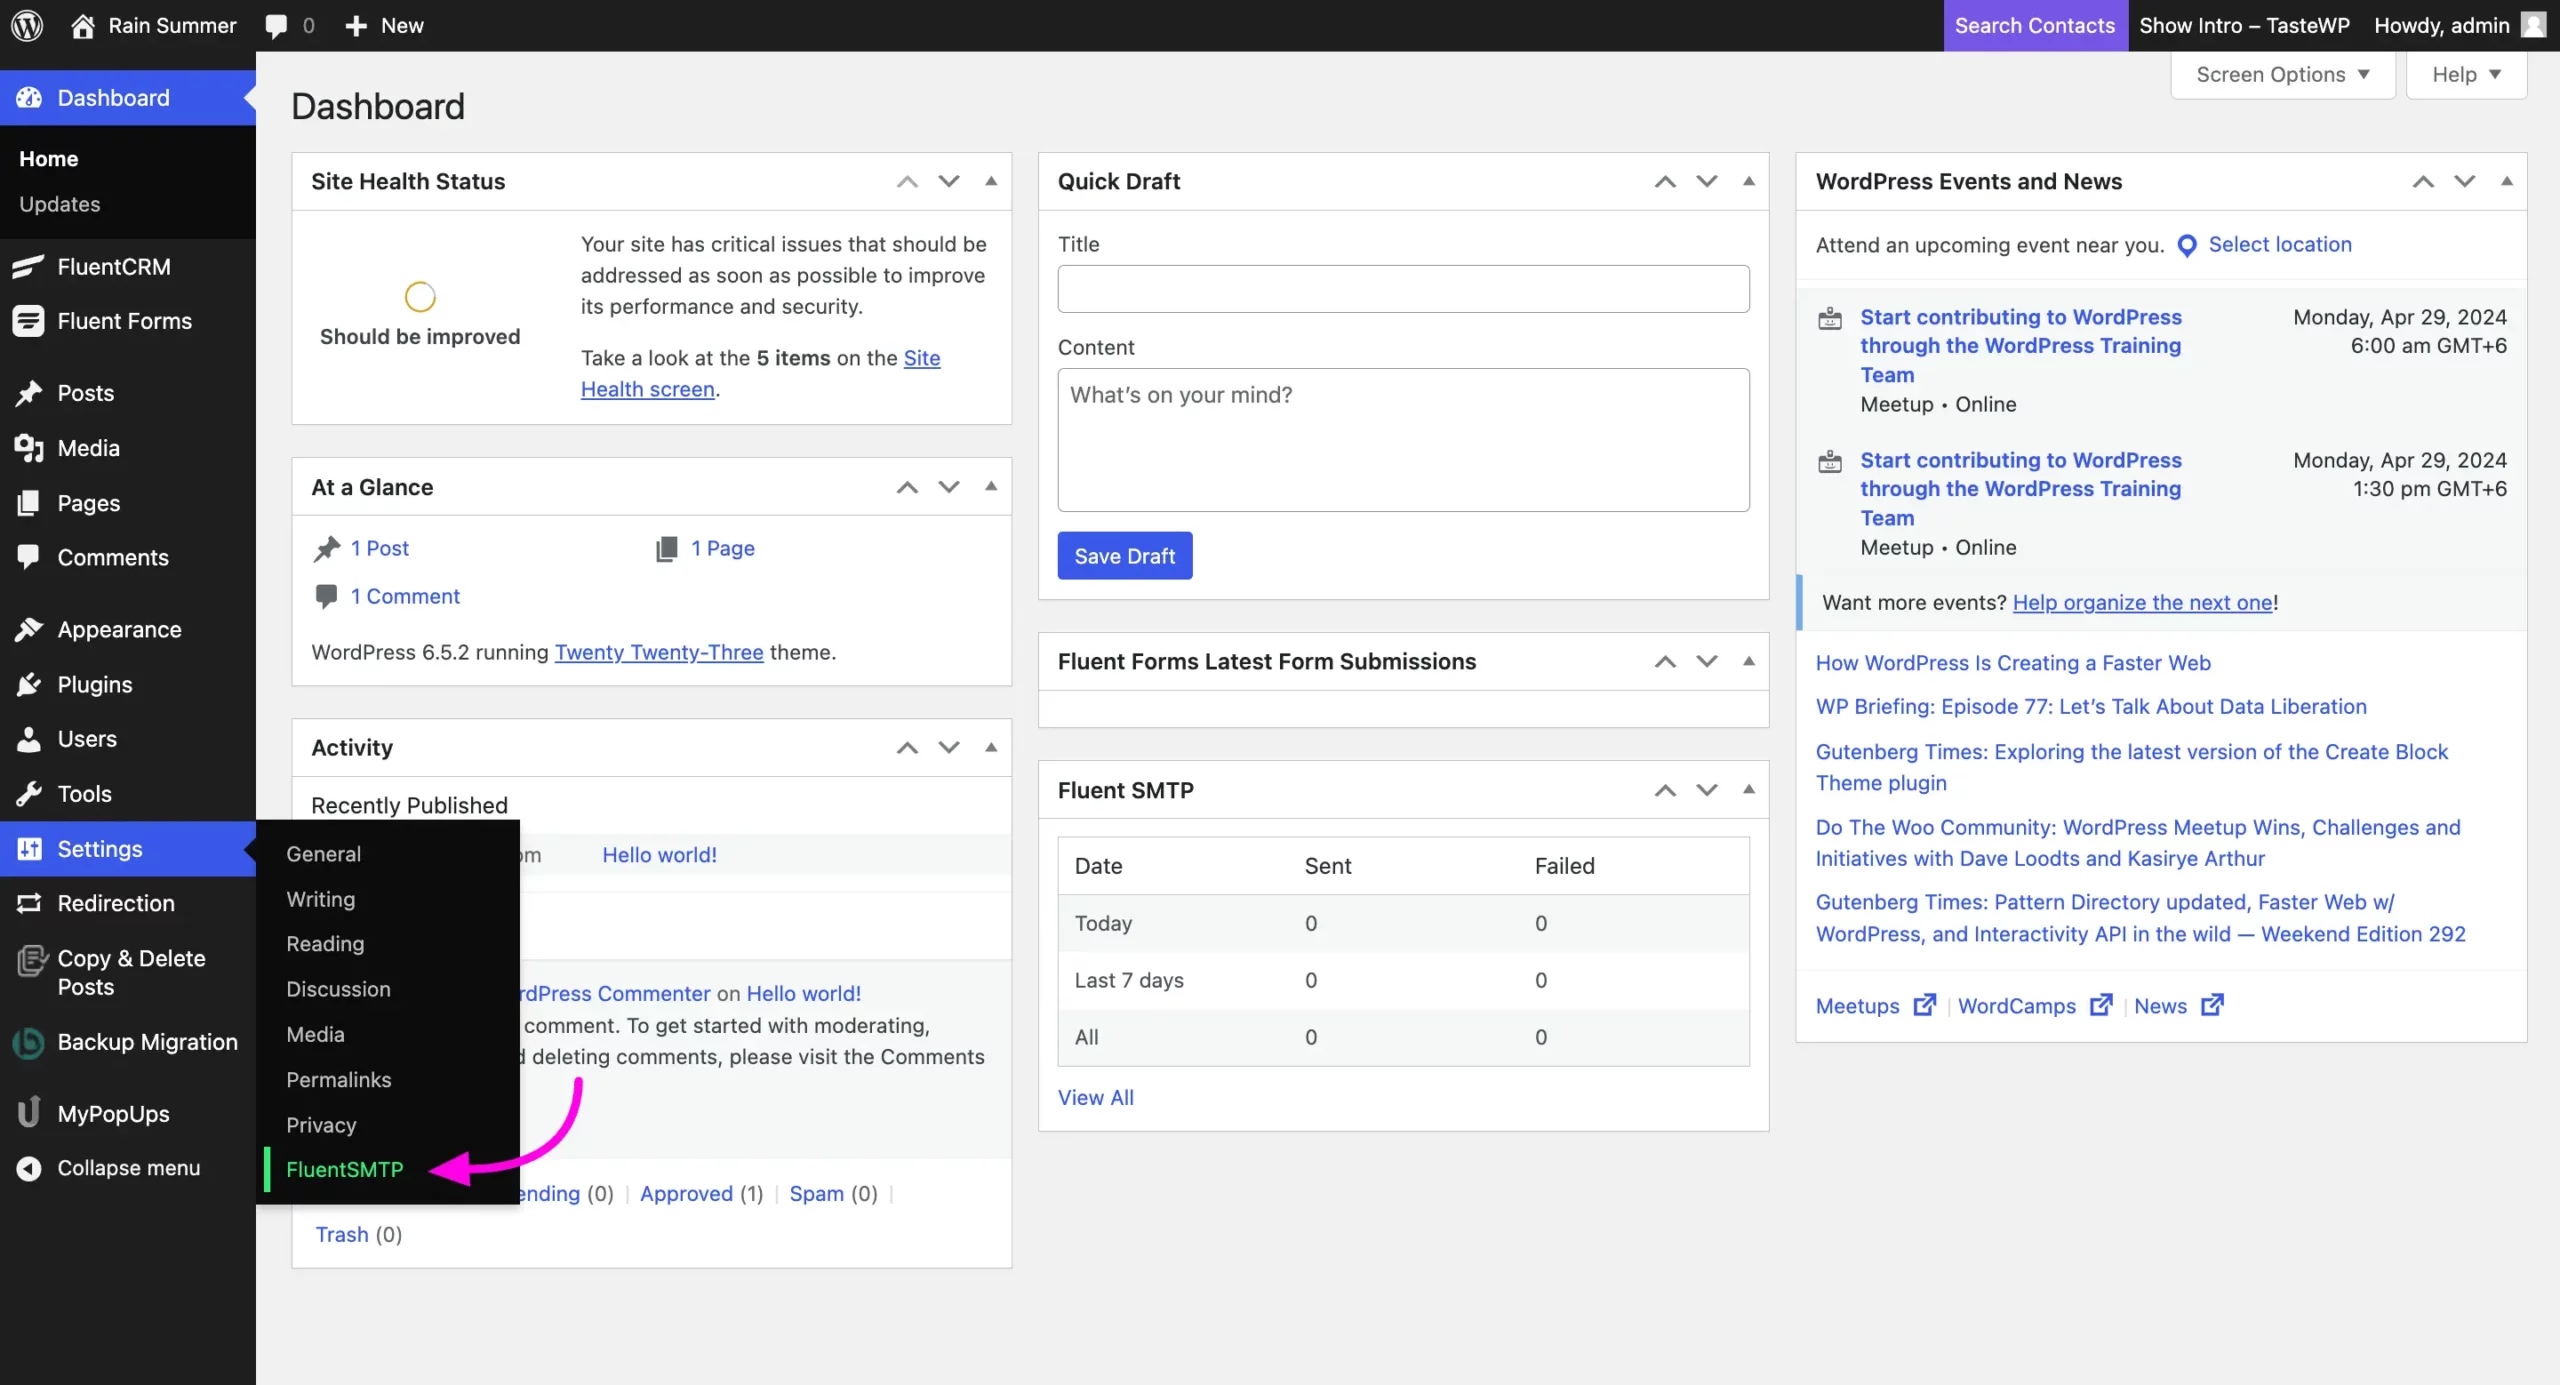
Navigate to WordPress Settings and select Fluent SMTP. If connecting to Fluent SMTP for the first time, select the Microsoft Email Service Provider.
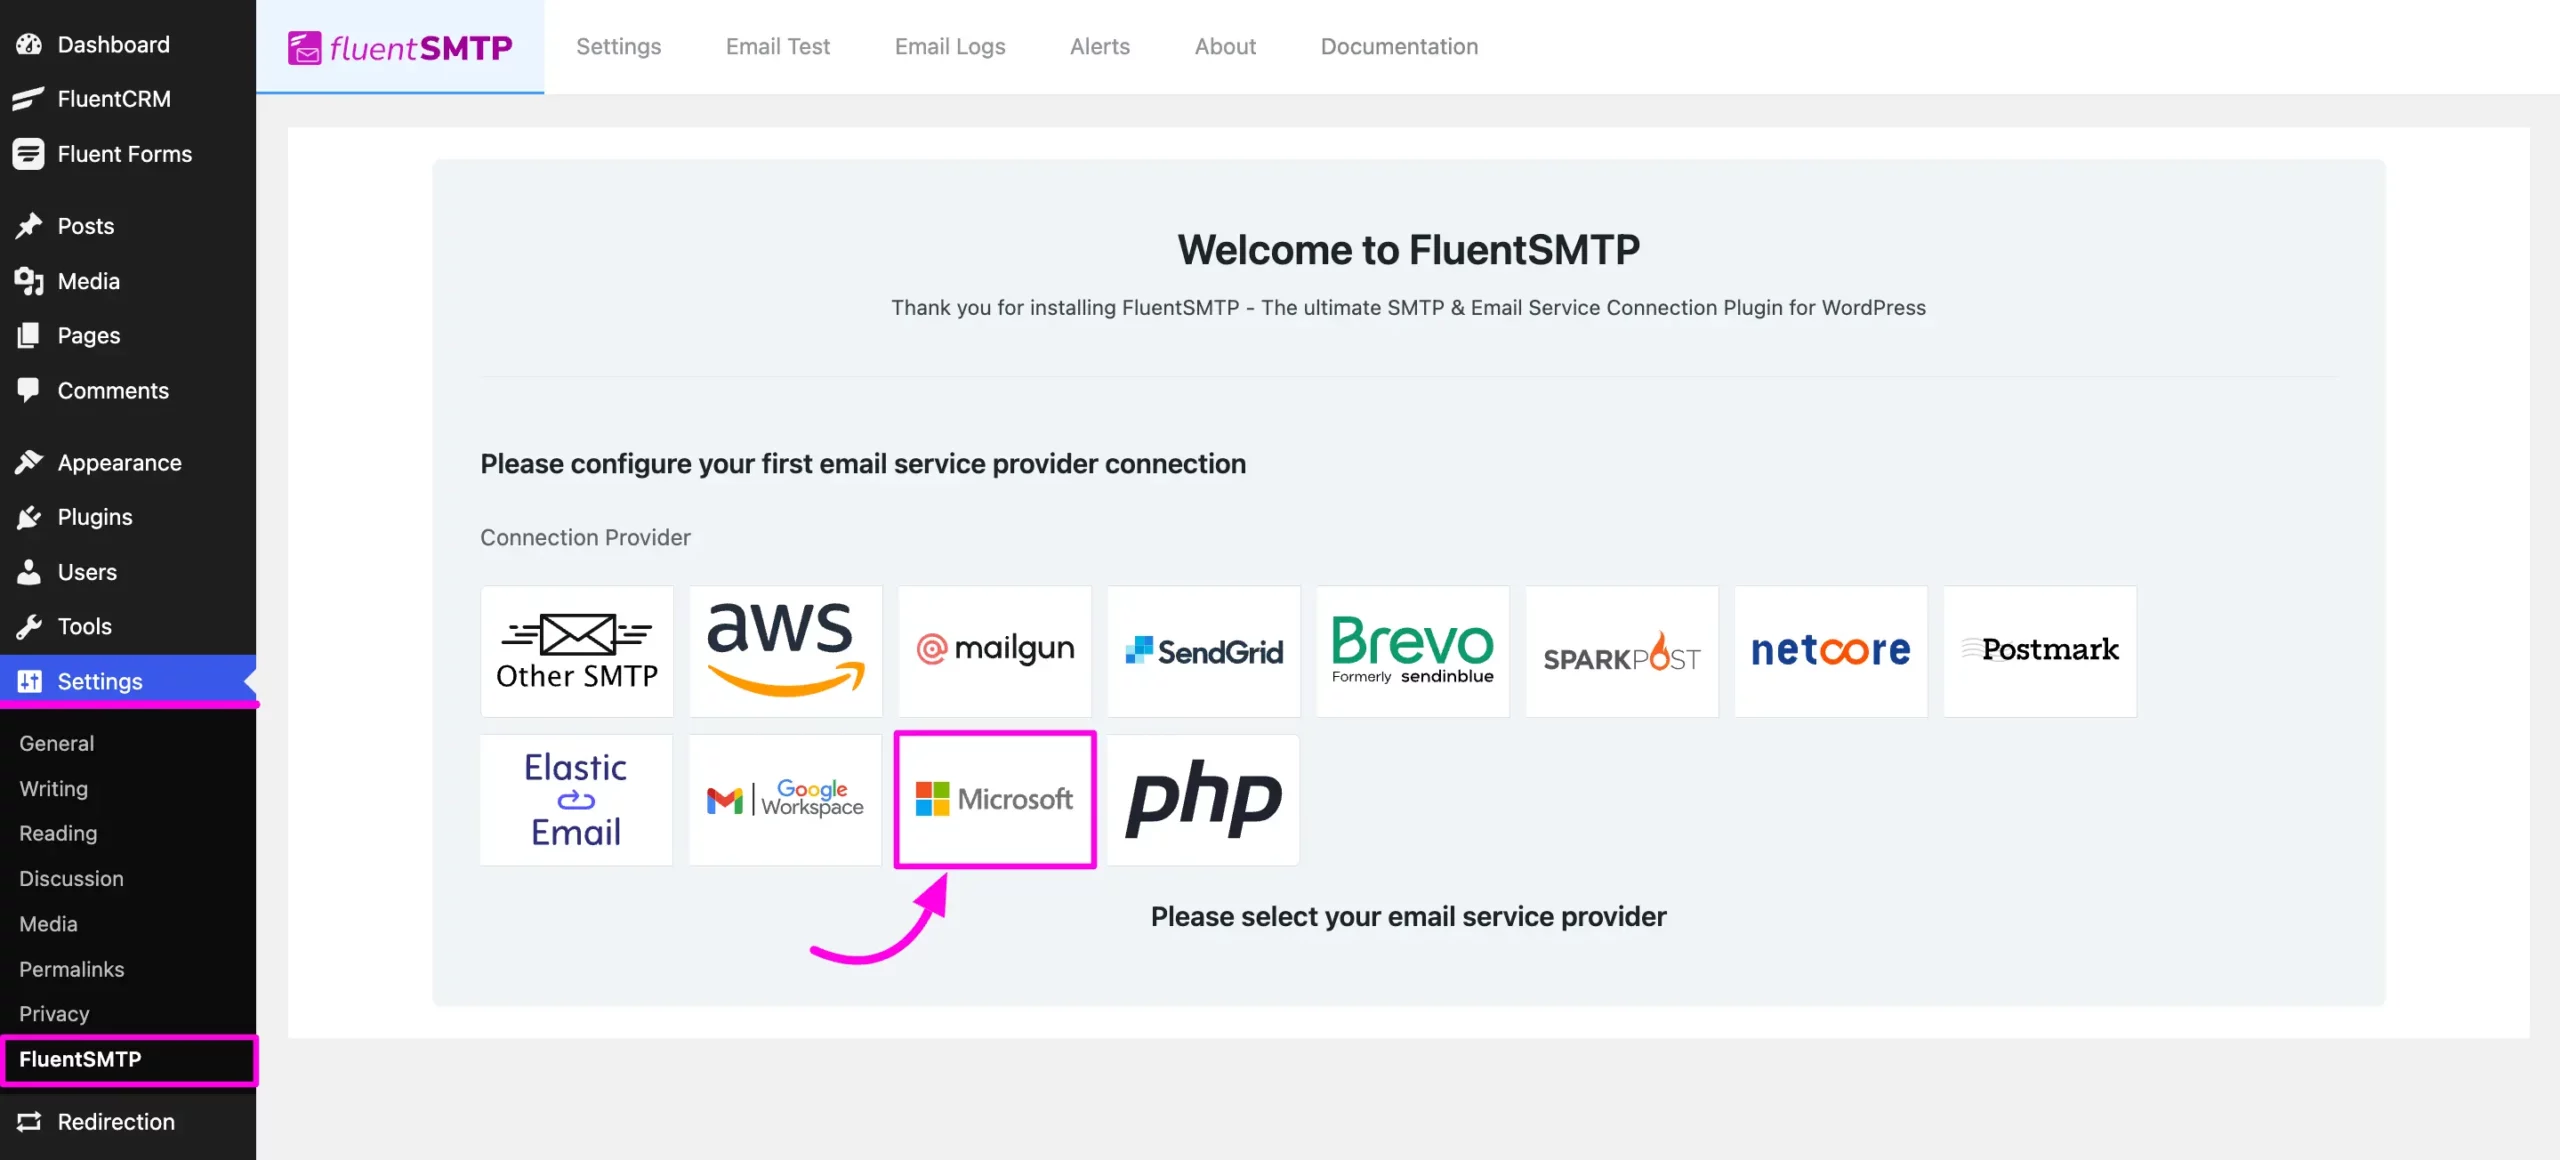
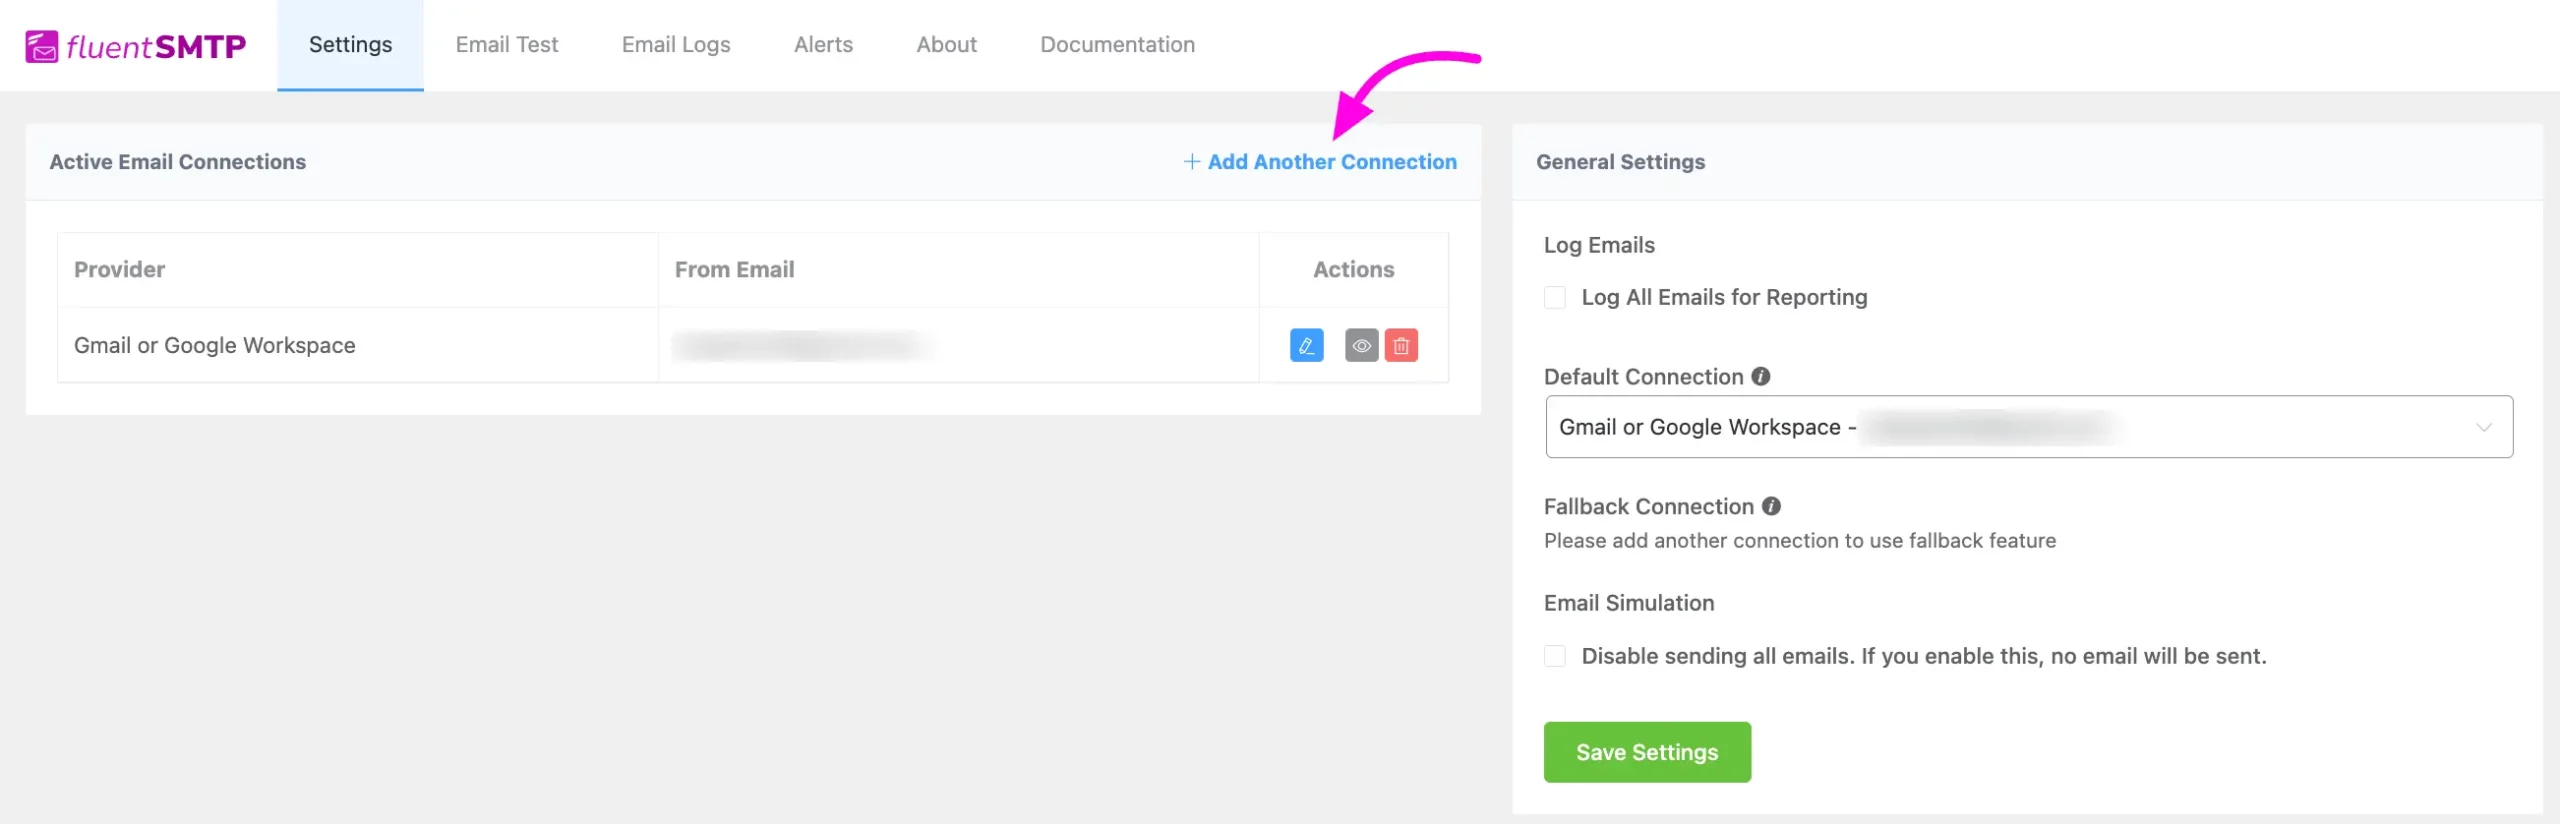
If Fluent SMTP is already connected to another Email Service Provider, click on the “Add Another Connection” button. Then select the Microsoft Email Service Provider to proceed to the Microsoft Outlook/Office 365 configuration page.
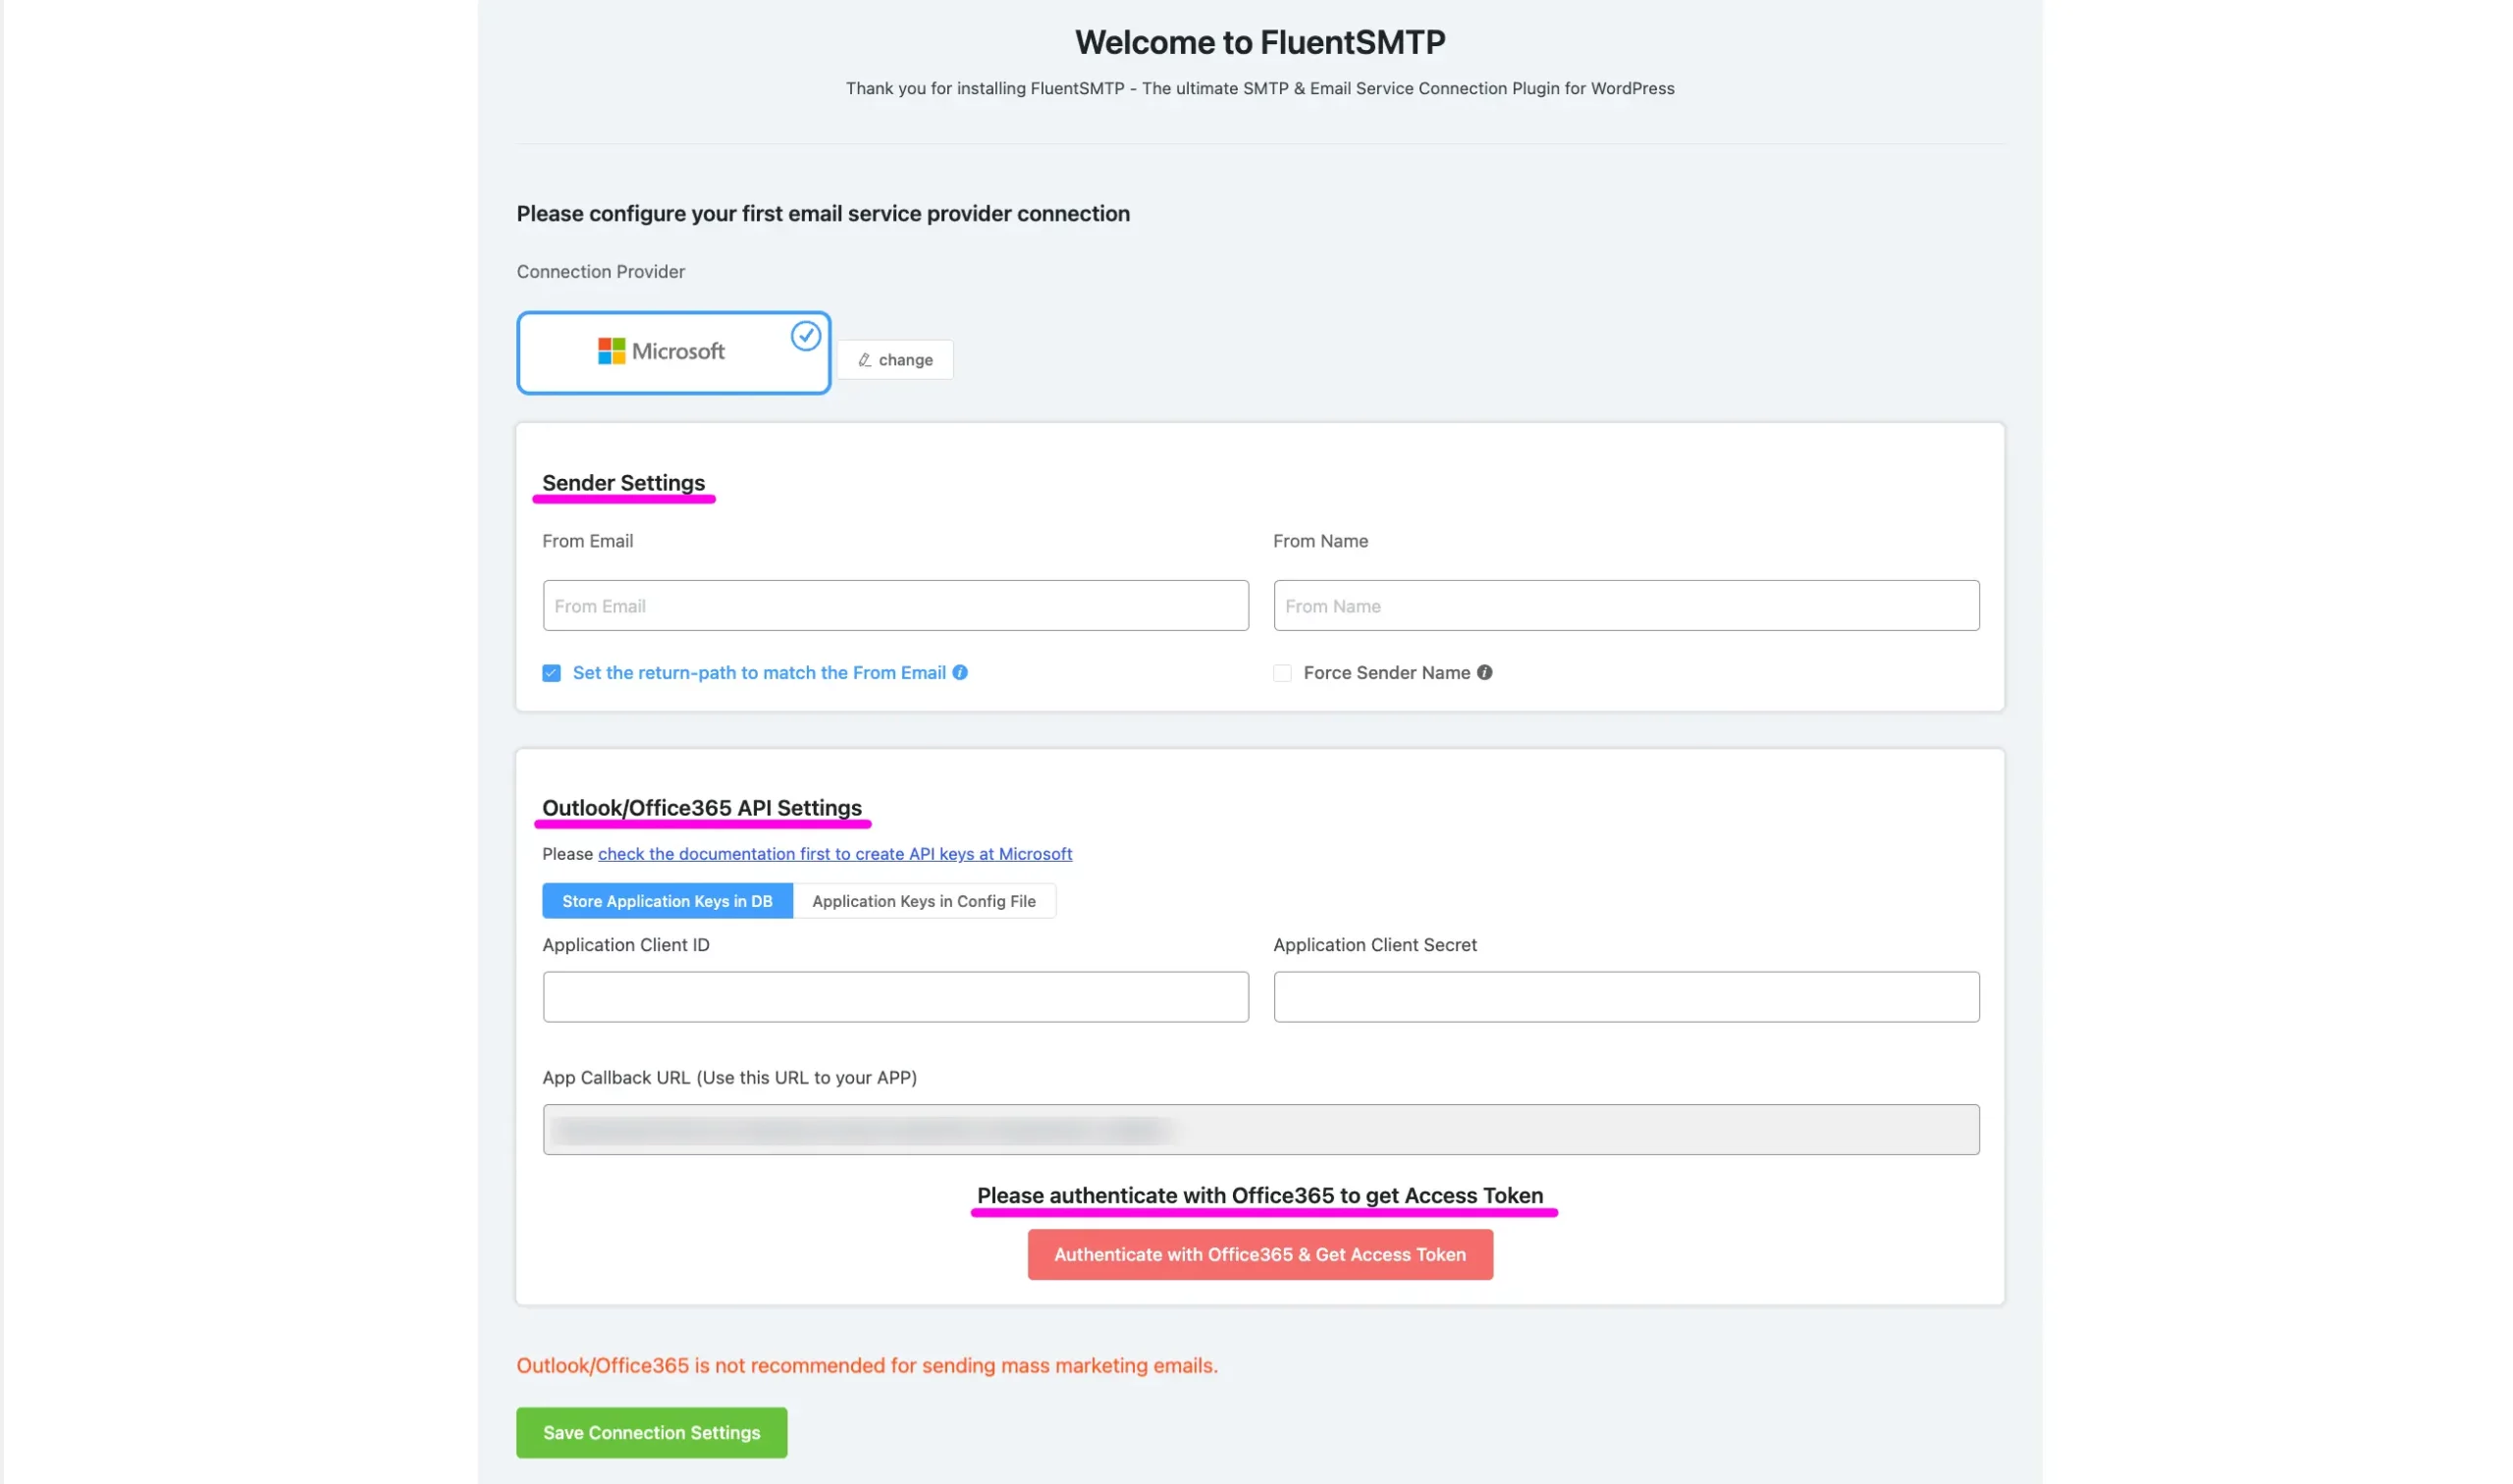
Credential Configuration of Microsoft in Fluent SMTP #
Configure Fluent SMTP with Outlook/Office 365 by providing the necessary credentials:
- Sender Details: Enter sender details in the sender settings option.
- Microsoft Outlook/Office 365 Credentials: Provide credentials from the respective application.
- Authentication: Authenticate your Office 365 account and get the Access Token.
Note: Copy the App Callback URL and keep it in your clipboard. We need this URL for App registration.
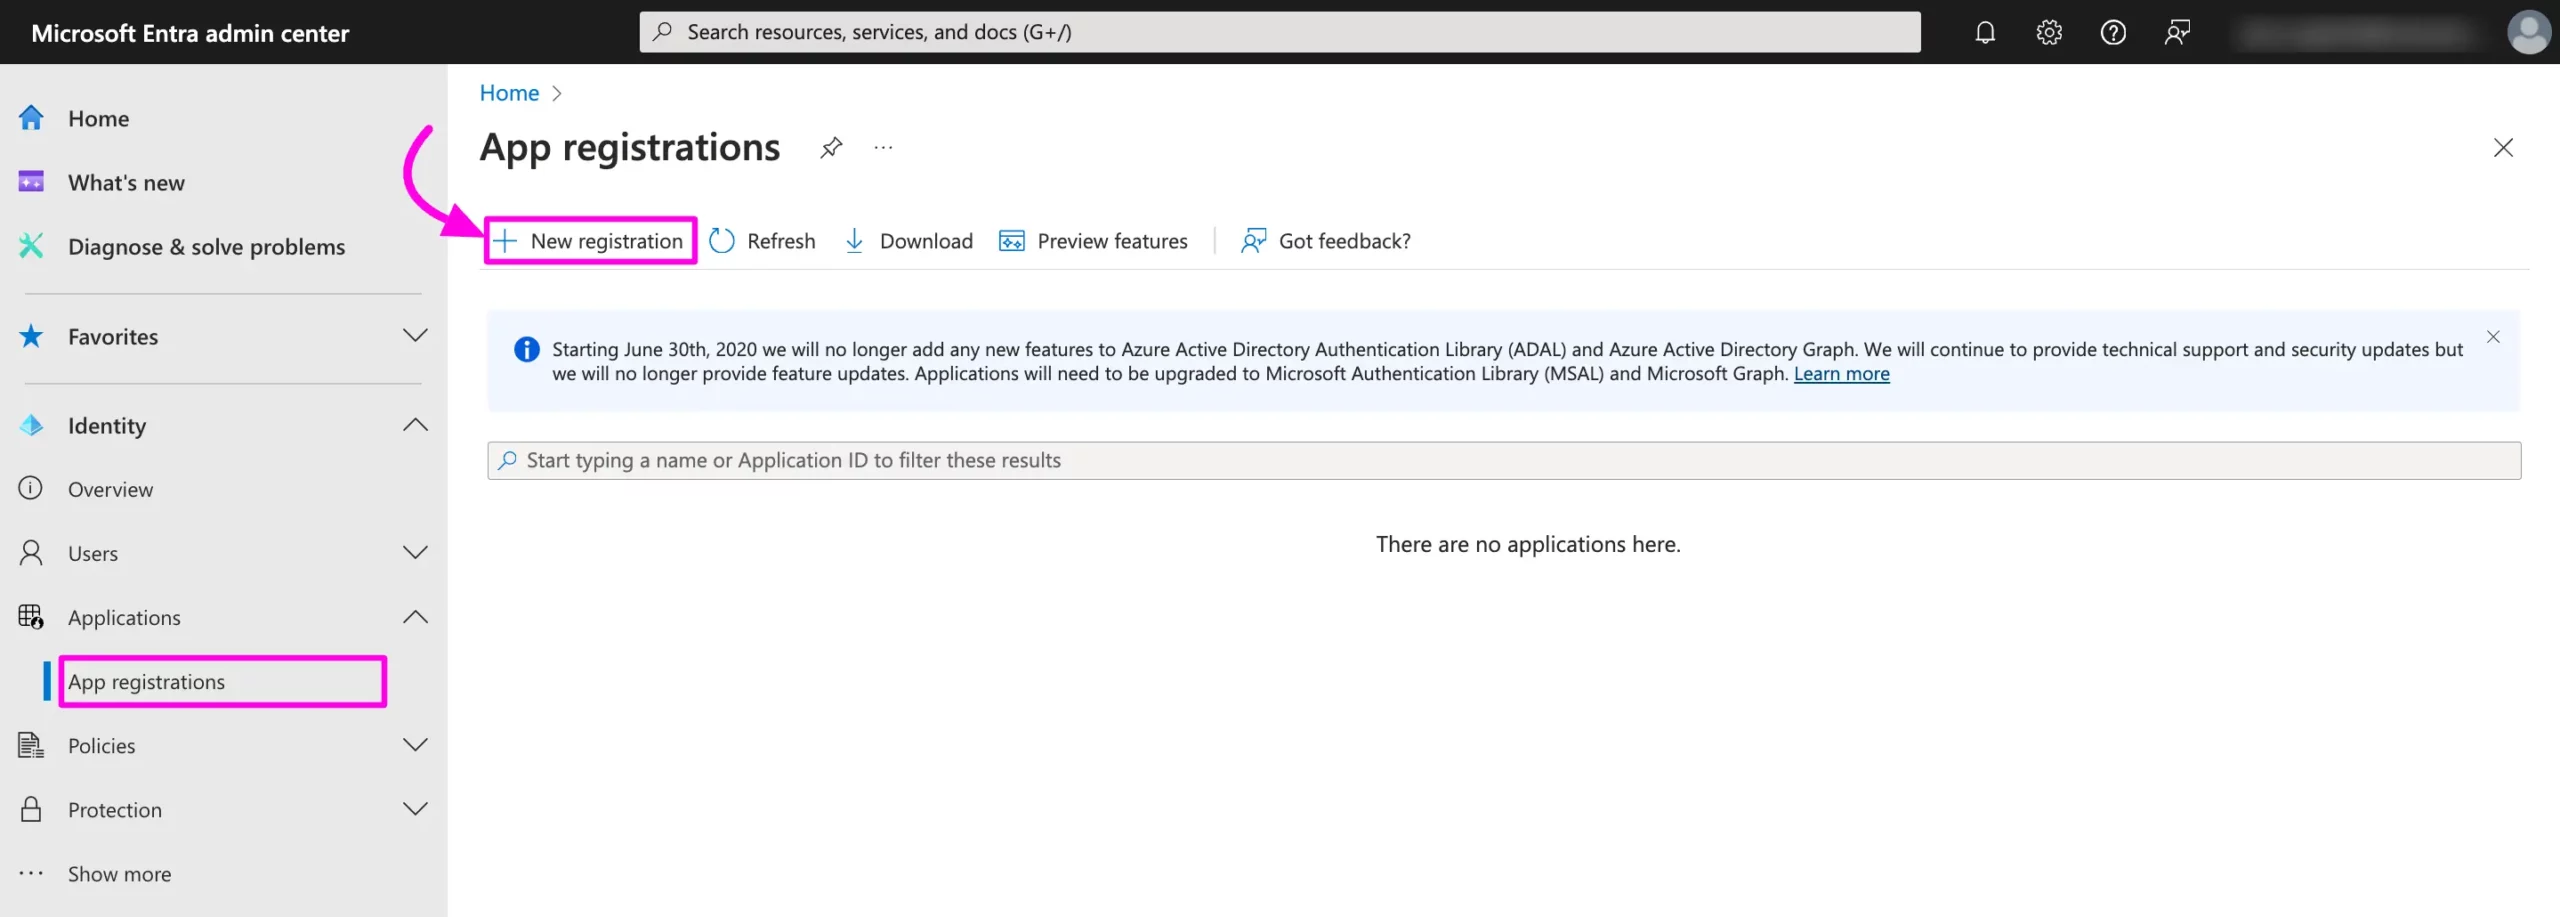
App Registration in Microsoft Azure Admin Center #
To get the App credentials you need to create an App in the Microsoft Azure directory. Now go to your Microsoft Entra account and log in with your Microsoft Account.
Go to the Applications from the left sidebar click on the App registration and select New Registration.
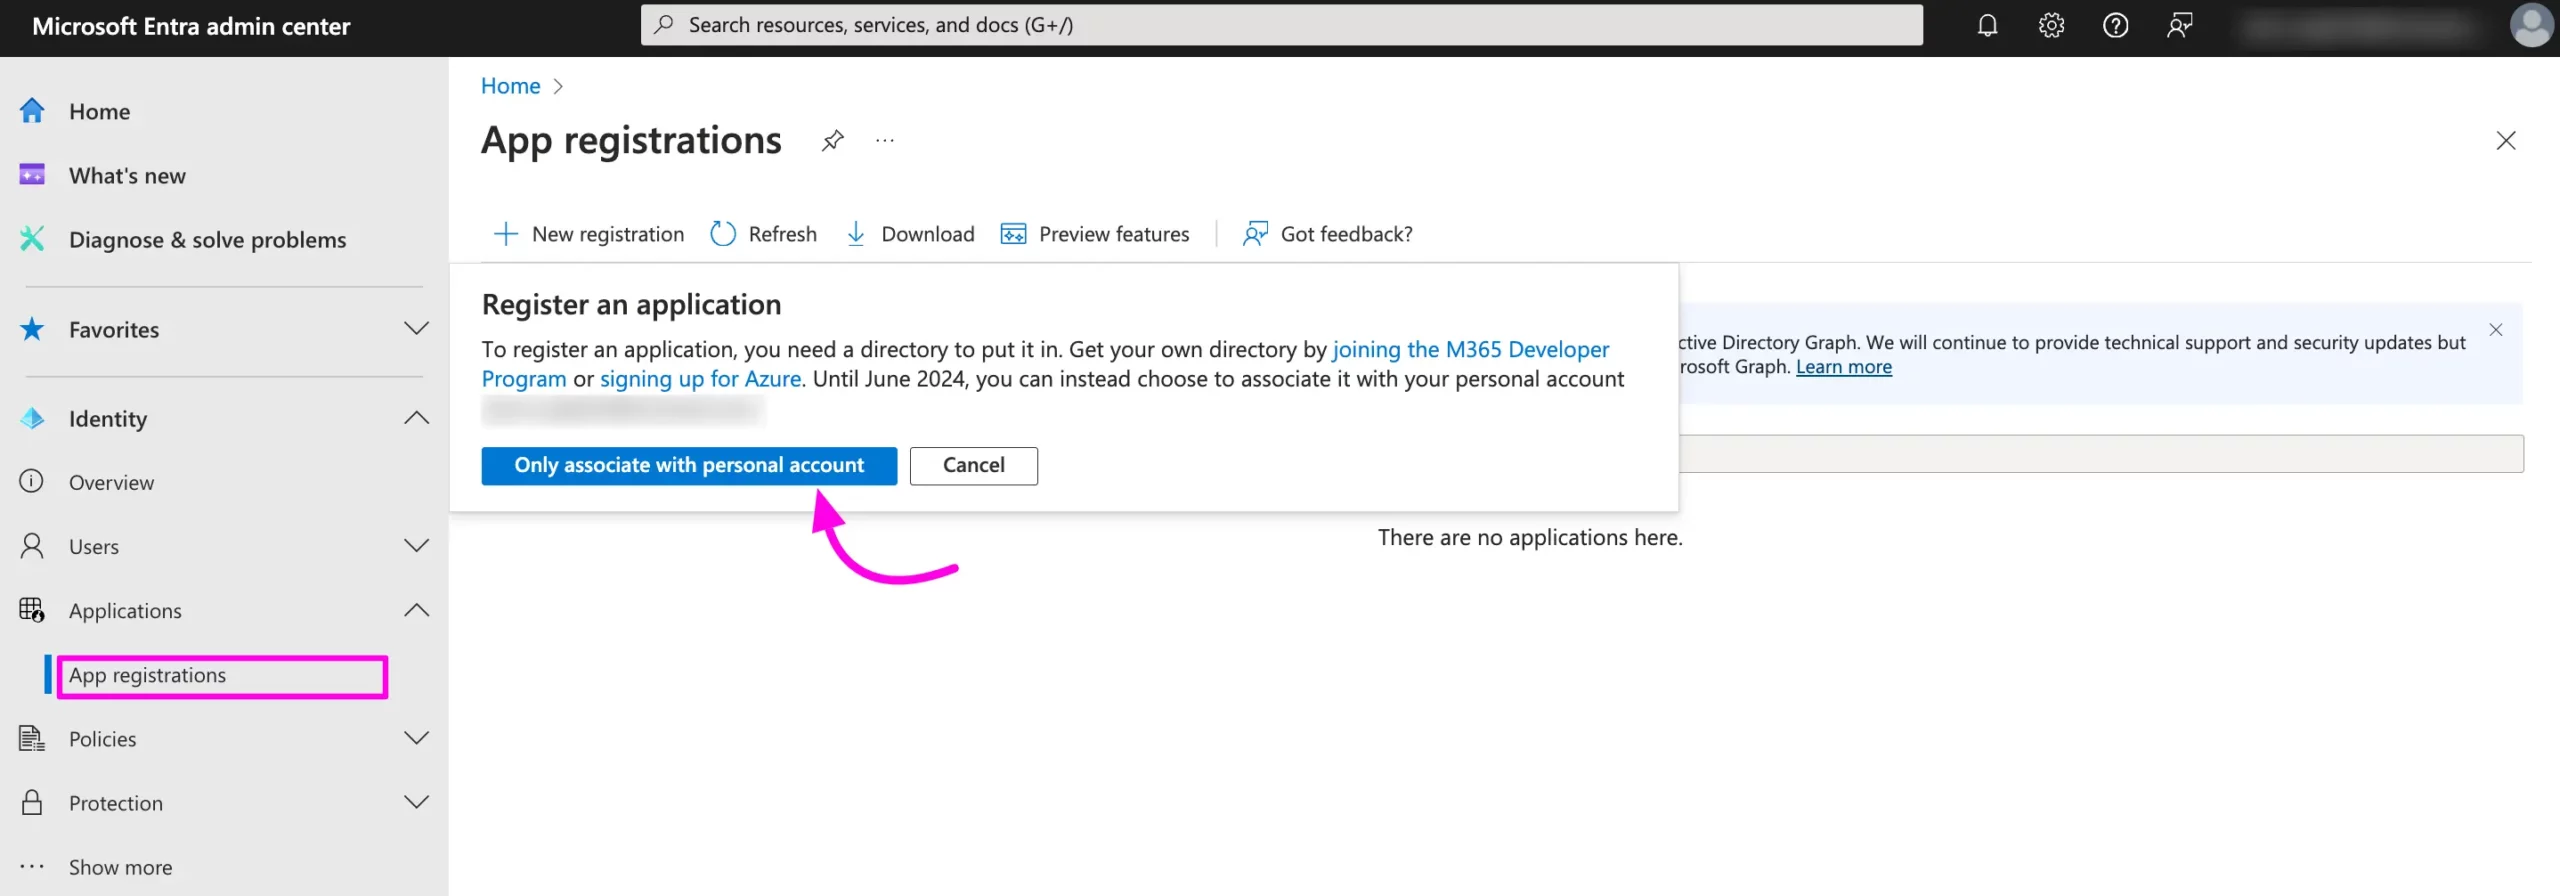
Associate with Personal Account and proceed.
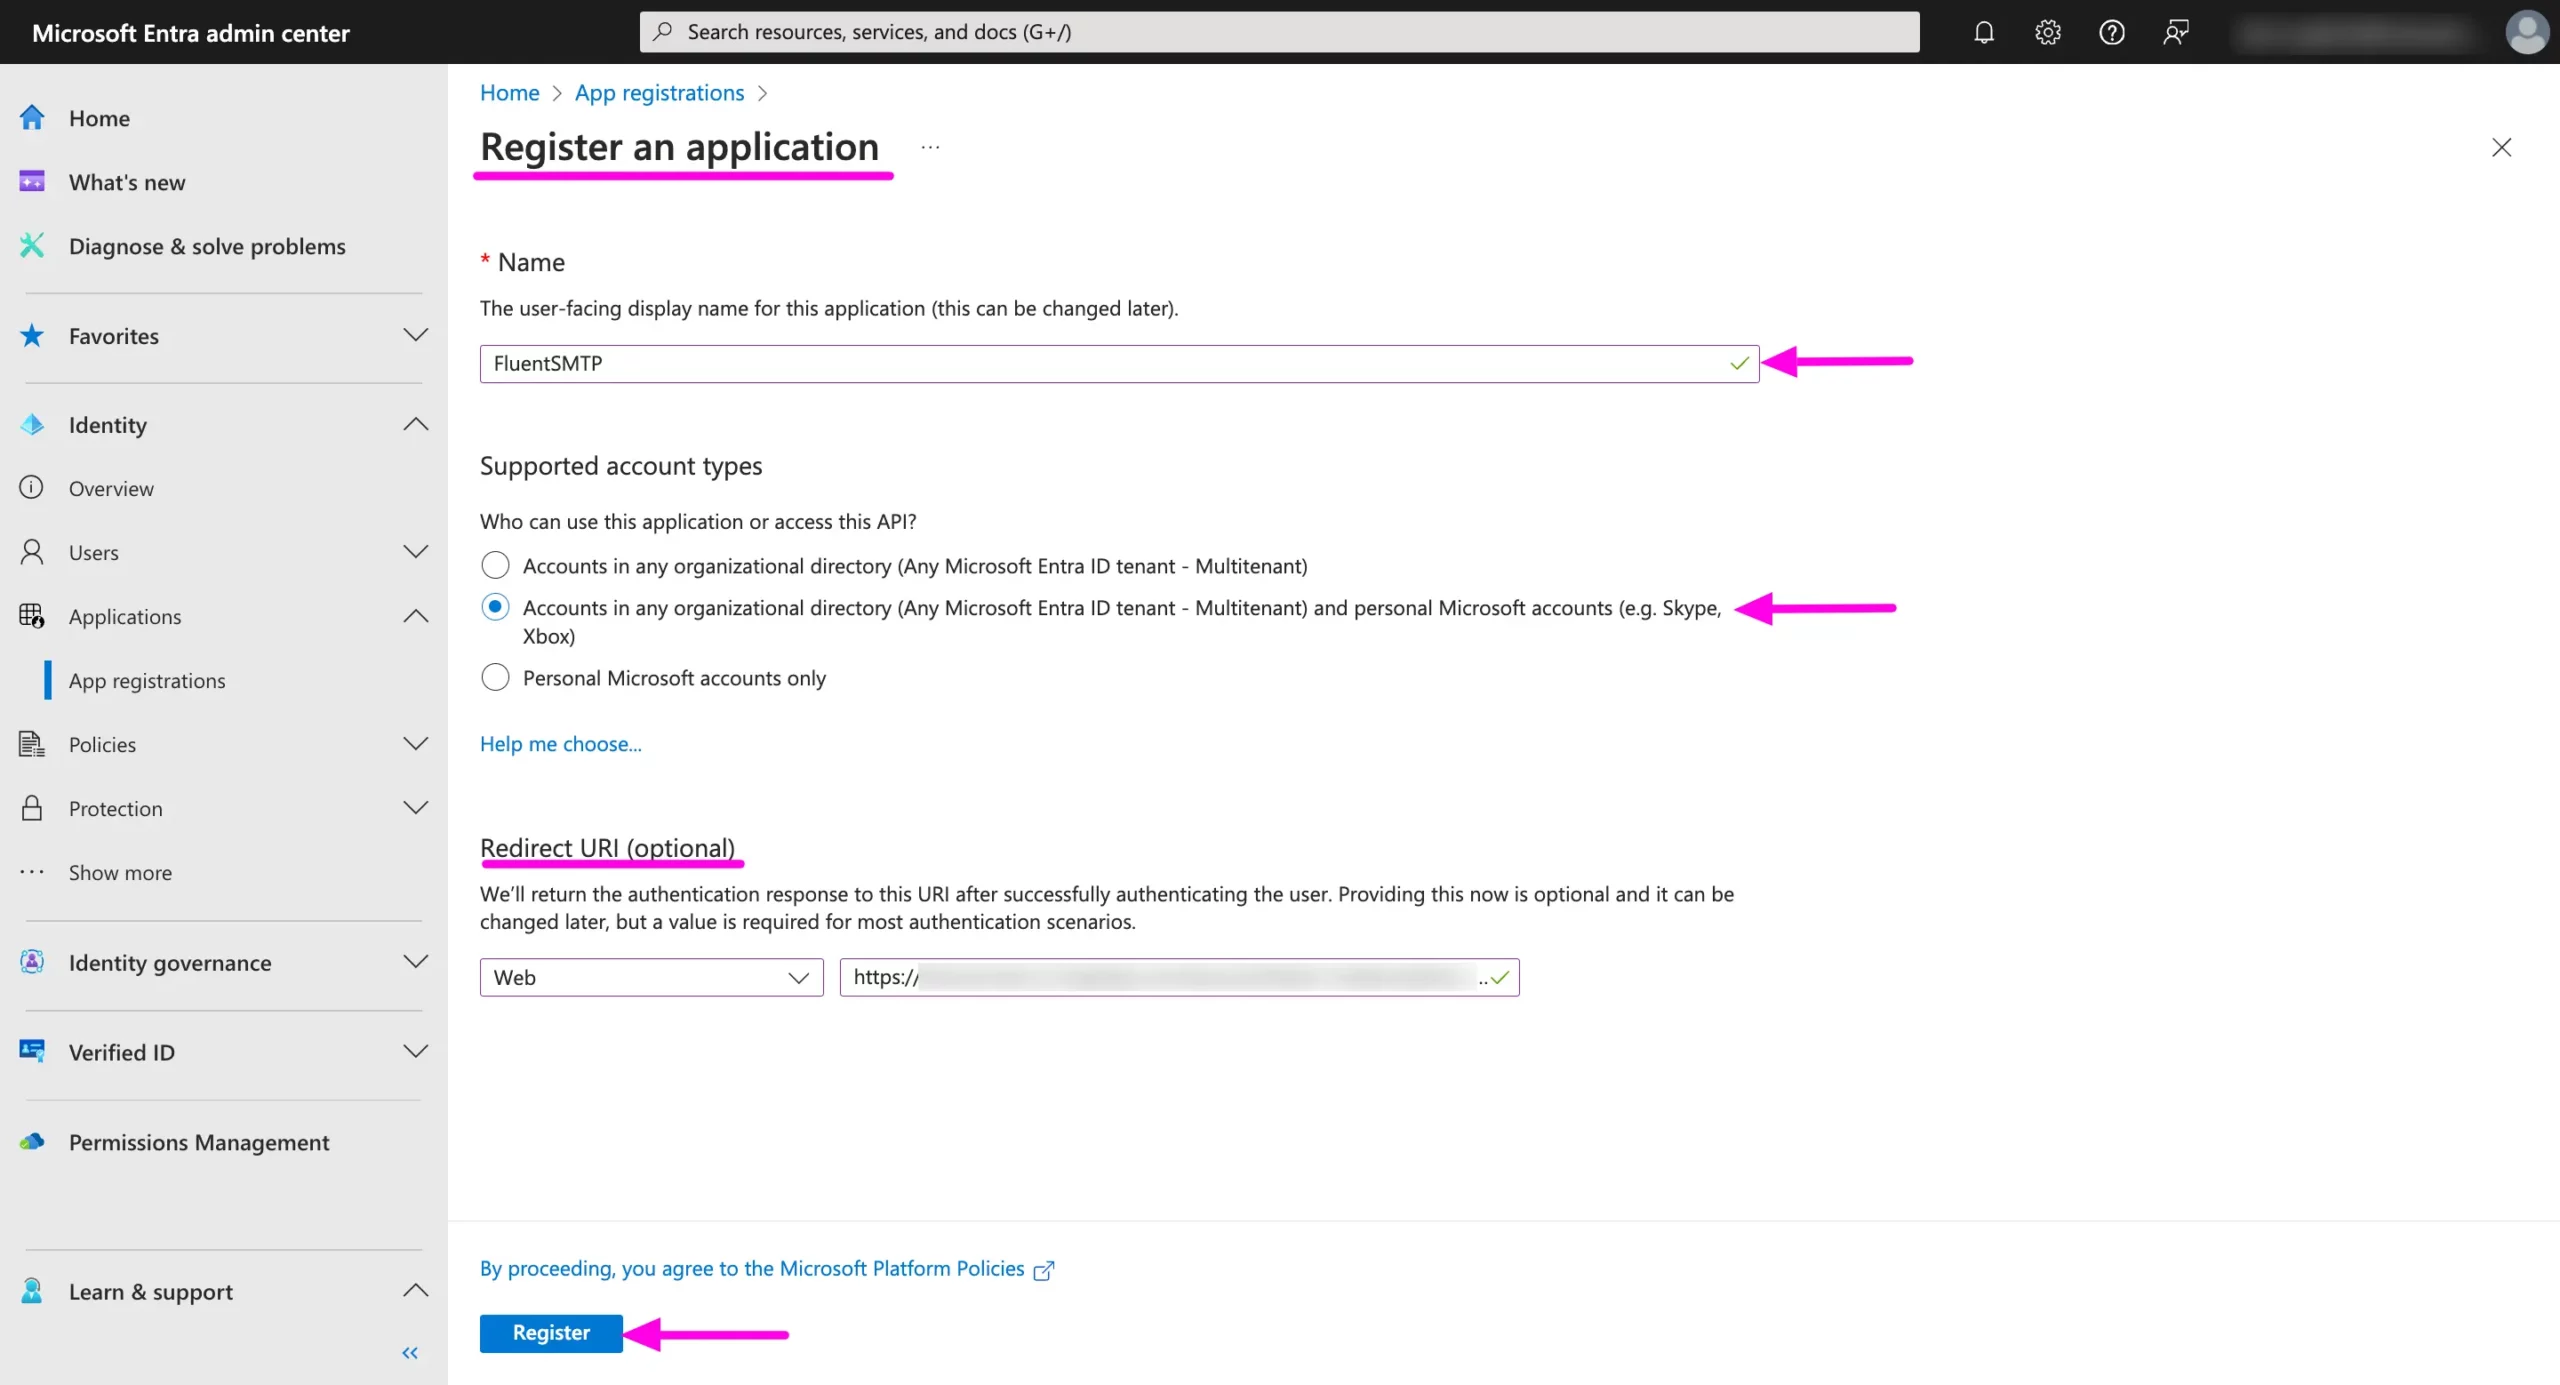
Fill out the Register an Application page with the App Name and other details.
- Give the App Name
- In the Supported account type select ‘Accounts in any organizational directory (Any Microsoft Entra ID tenant – Multitenant) and personal Microsoft accounts (e.g. Skype, Xbox)’ here.
- In Redirect URL settings select Web and then paste the redirect URL you have copied from the FLuent SMTP Microsoft Outlook Configure Page.
- Click the Register button.
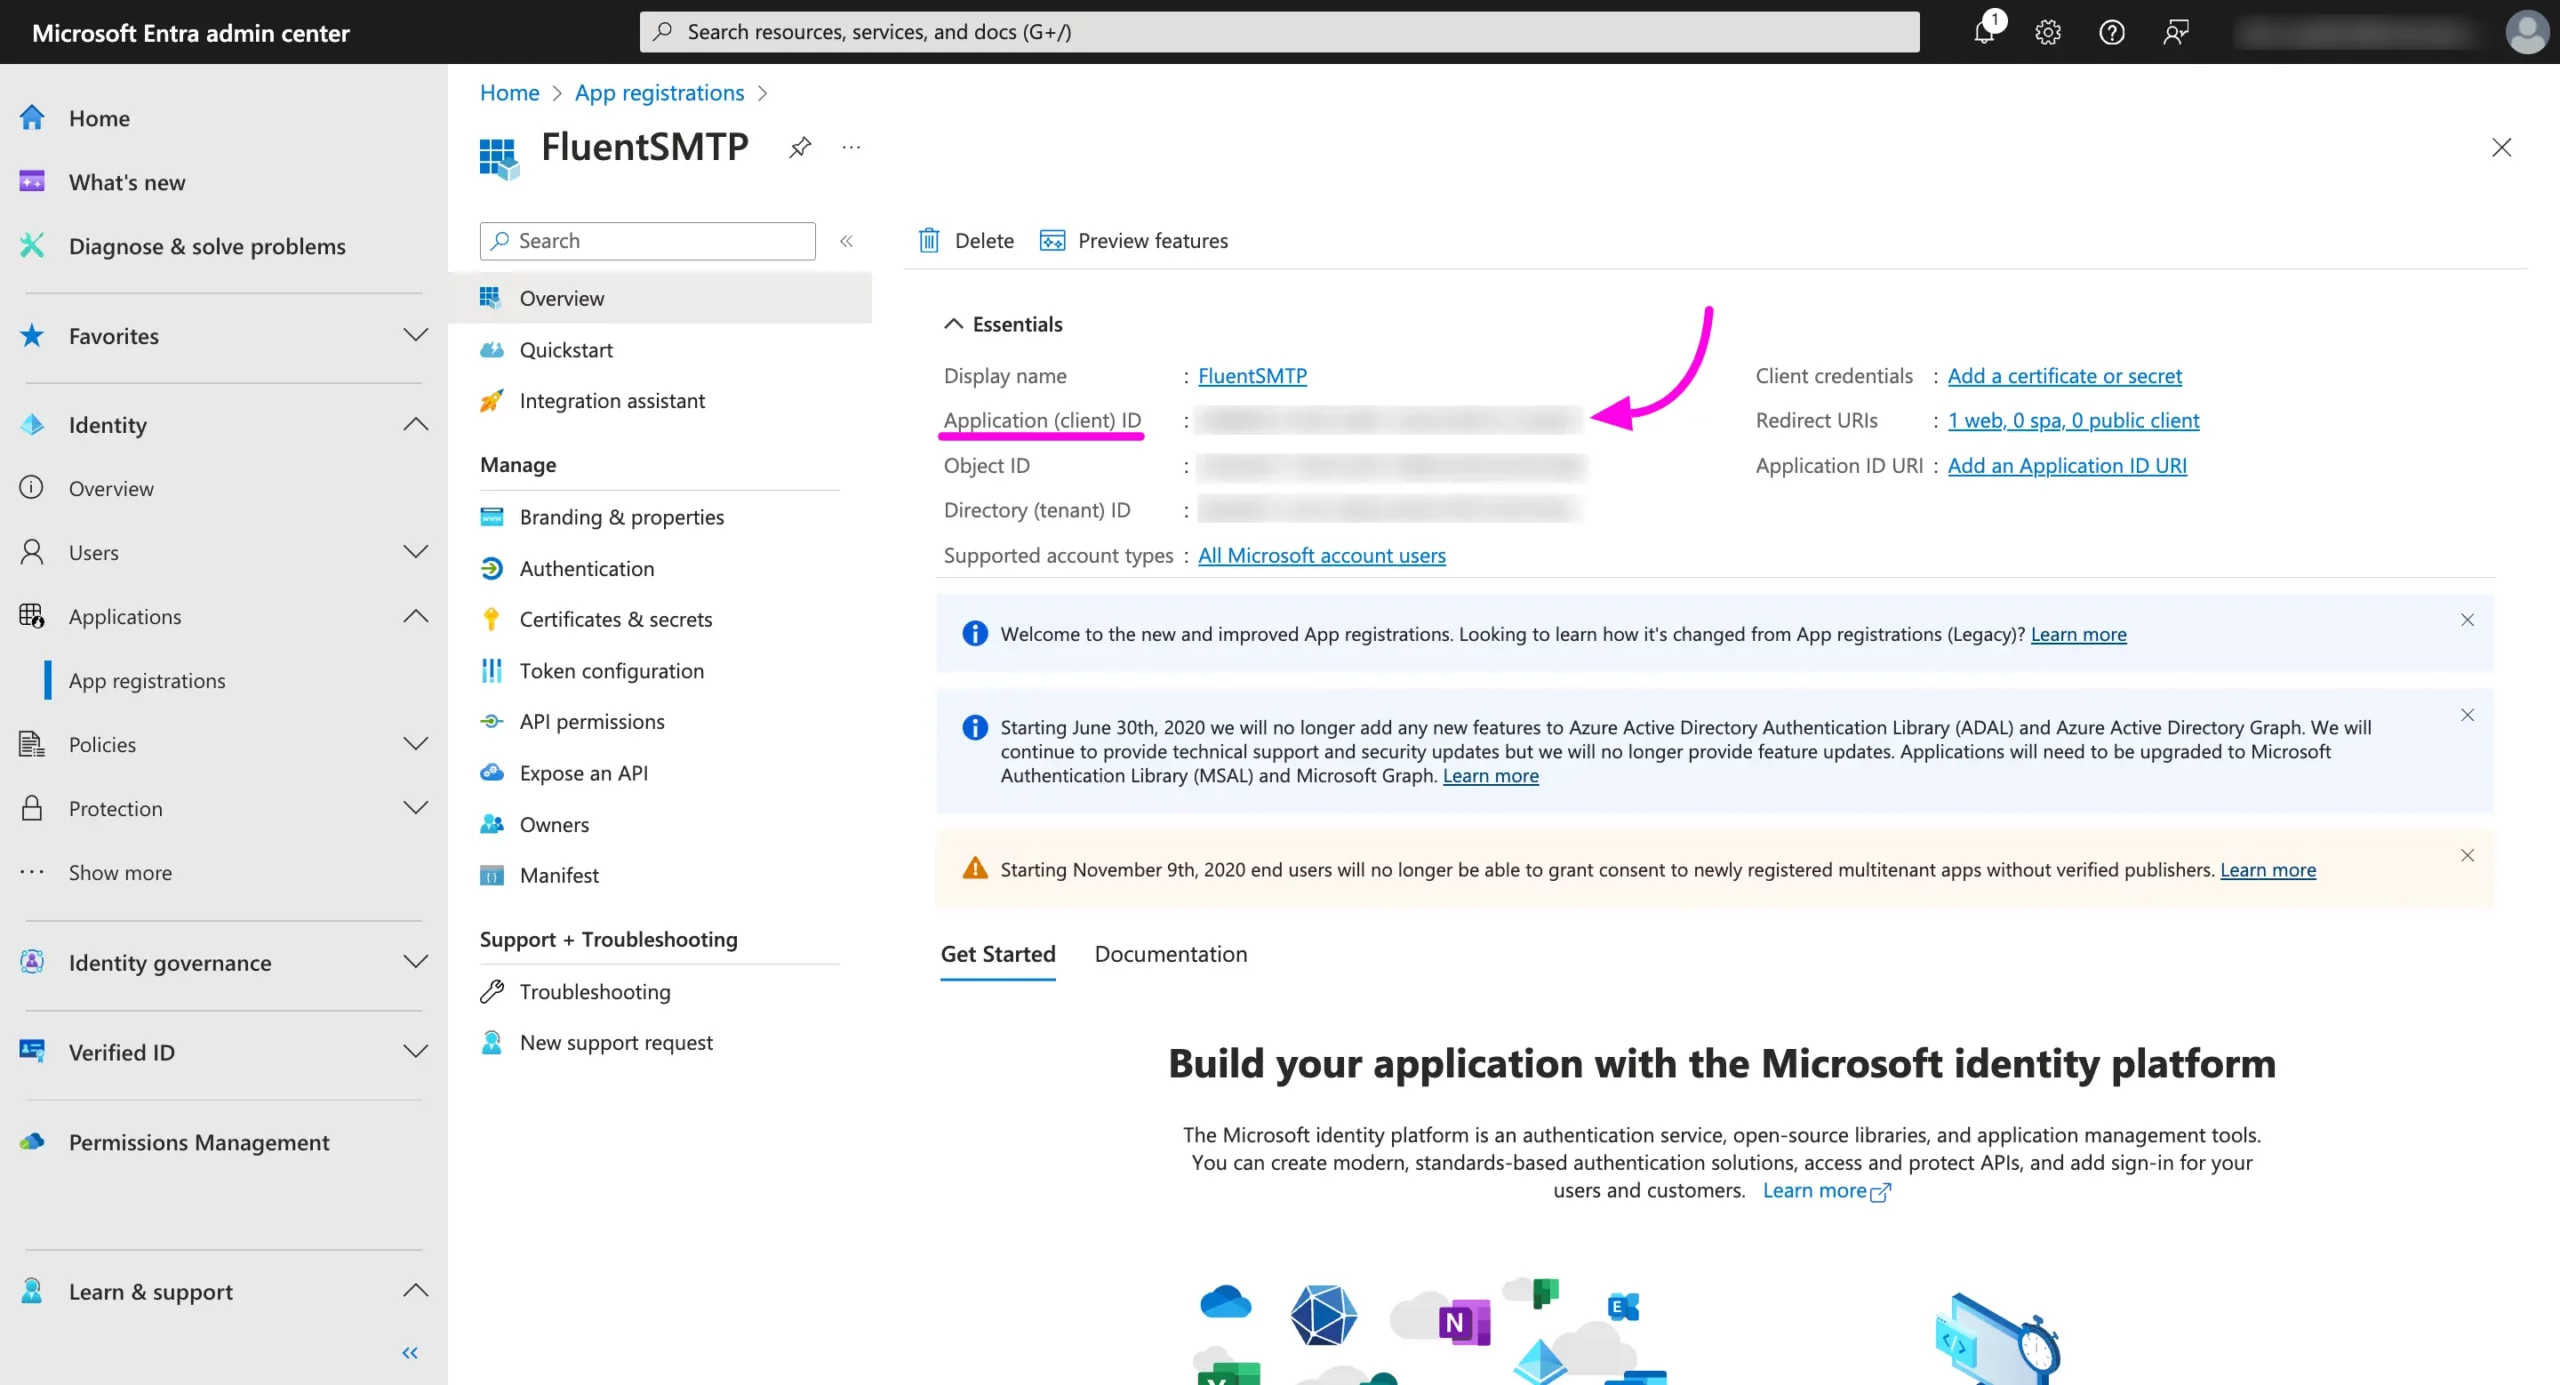
After that, you will be redirected to your App Overview where you can get the Application Client ID. Copy this Application Client ID for later use.
Then Click on the Certificate and Secret > Client Secret > New Client Secret button.
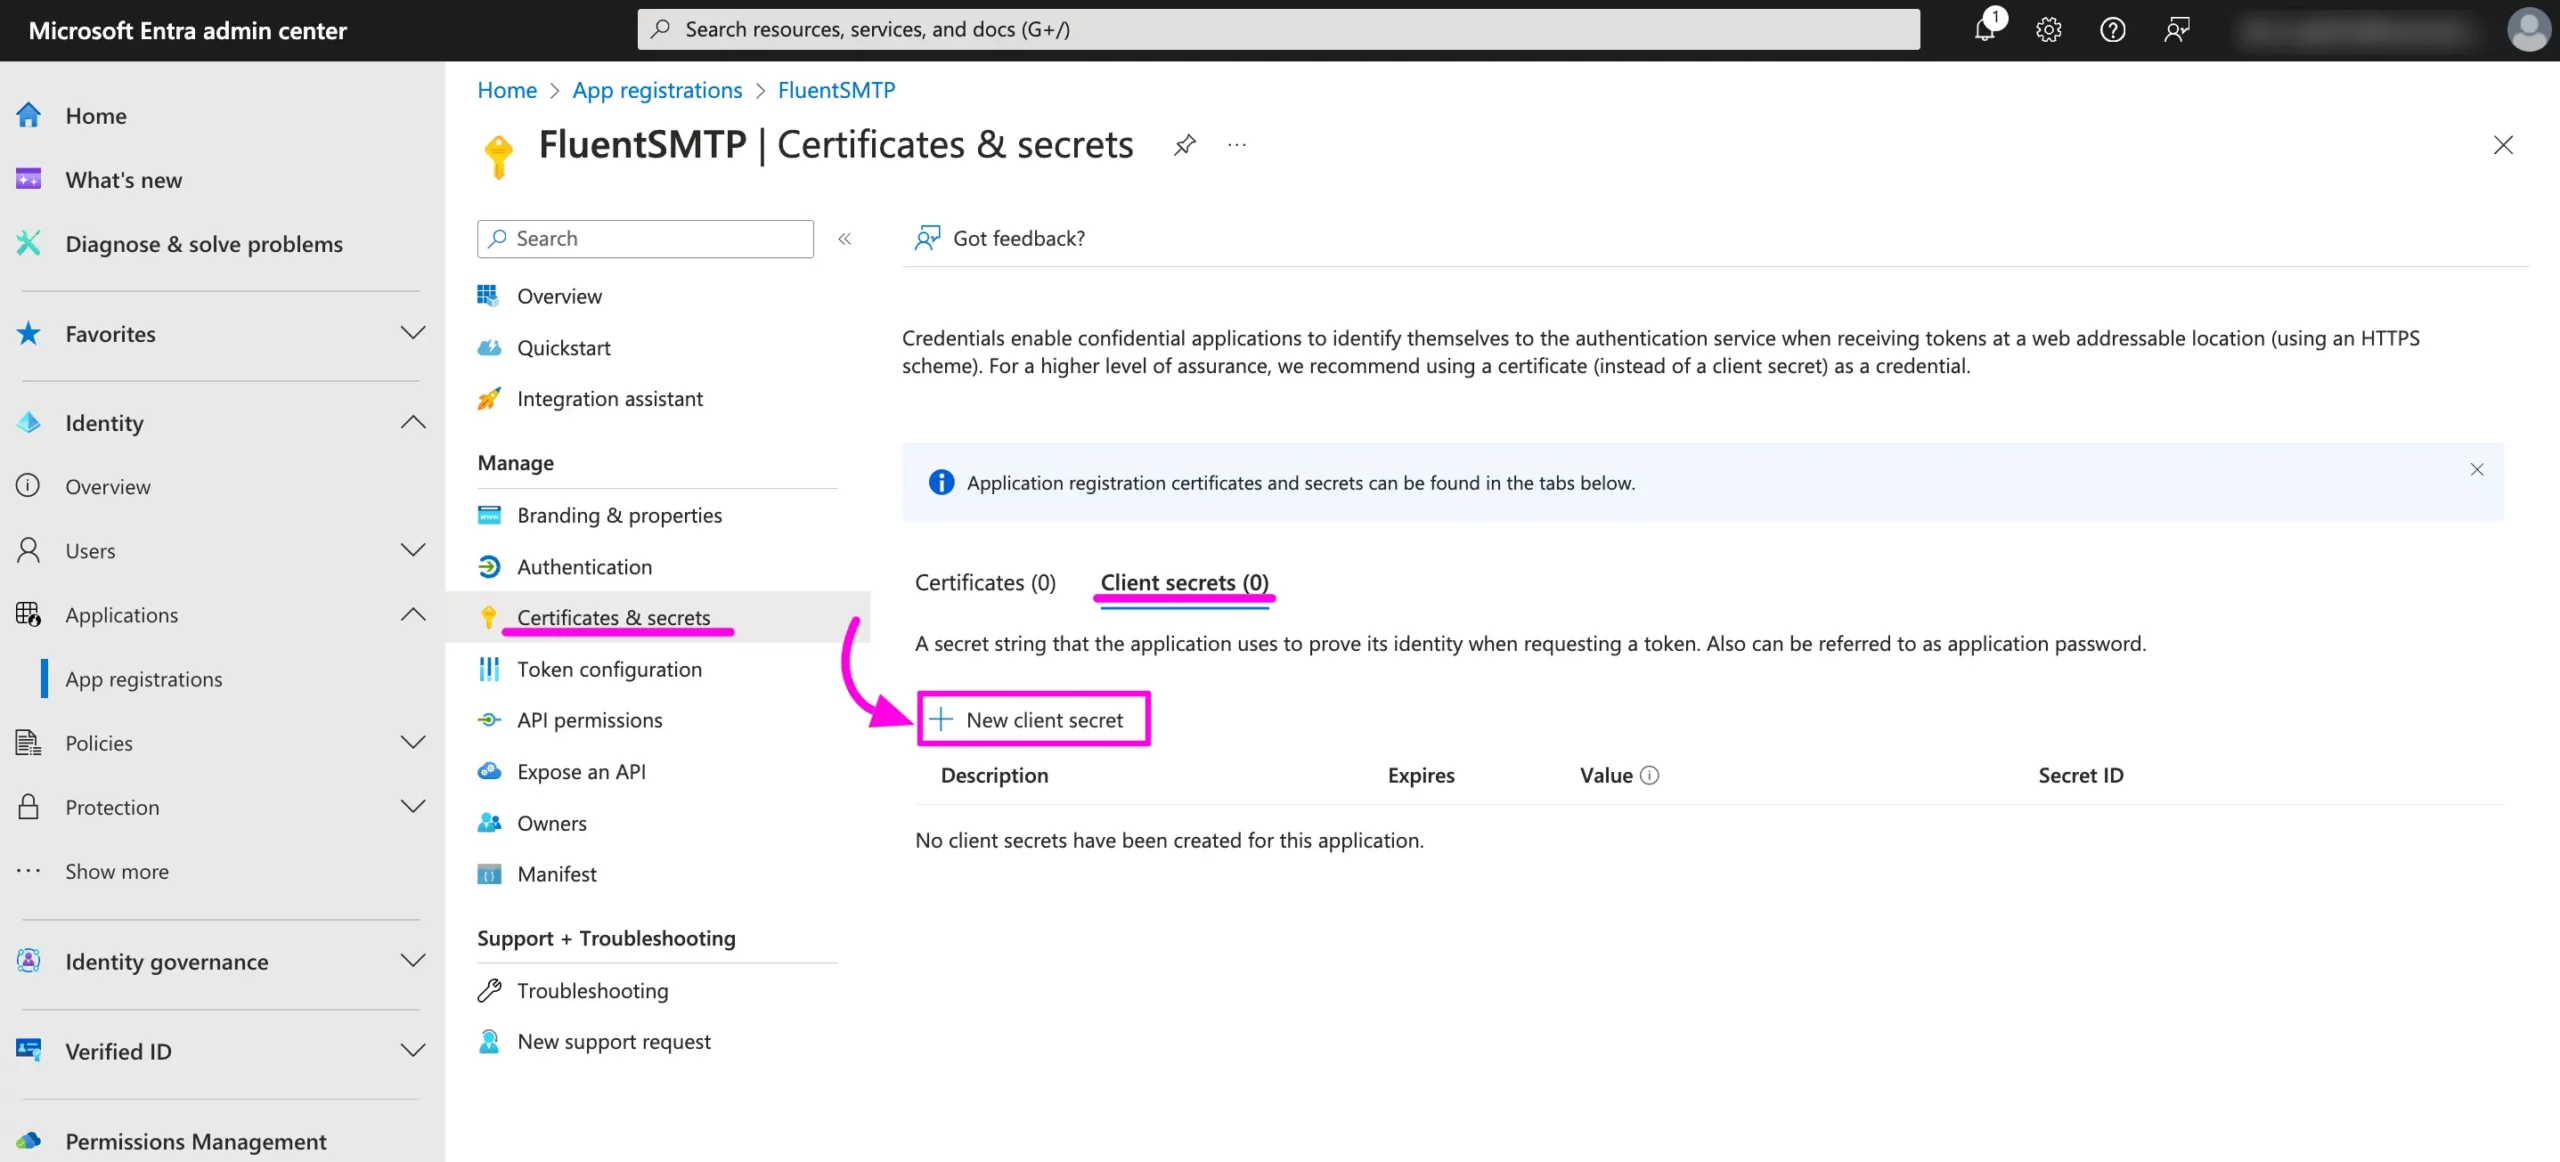
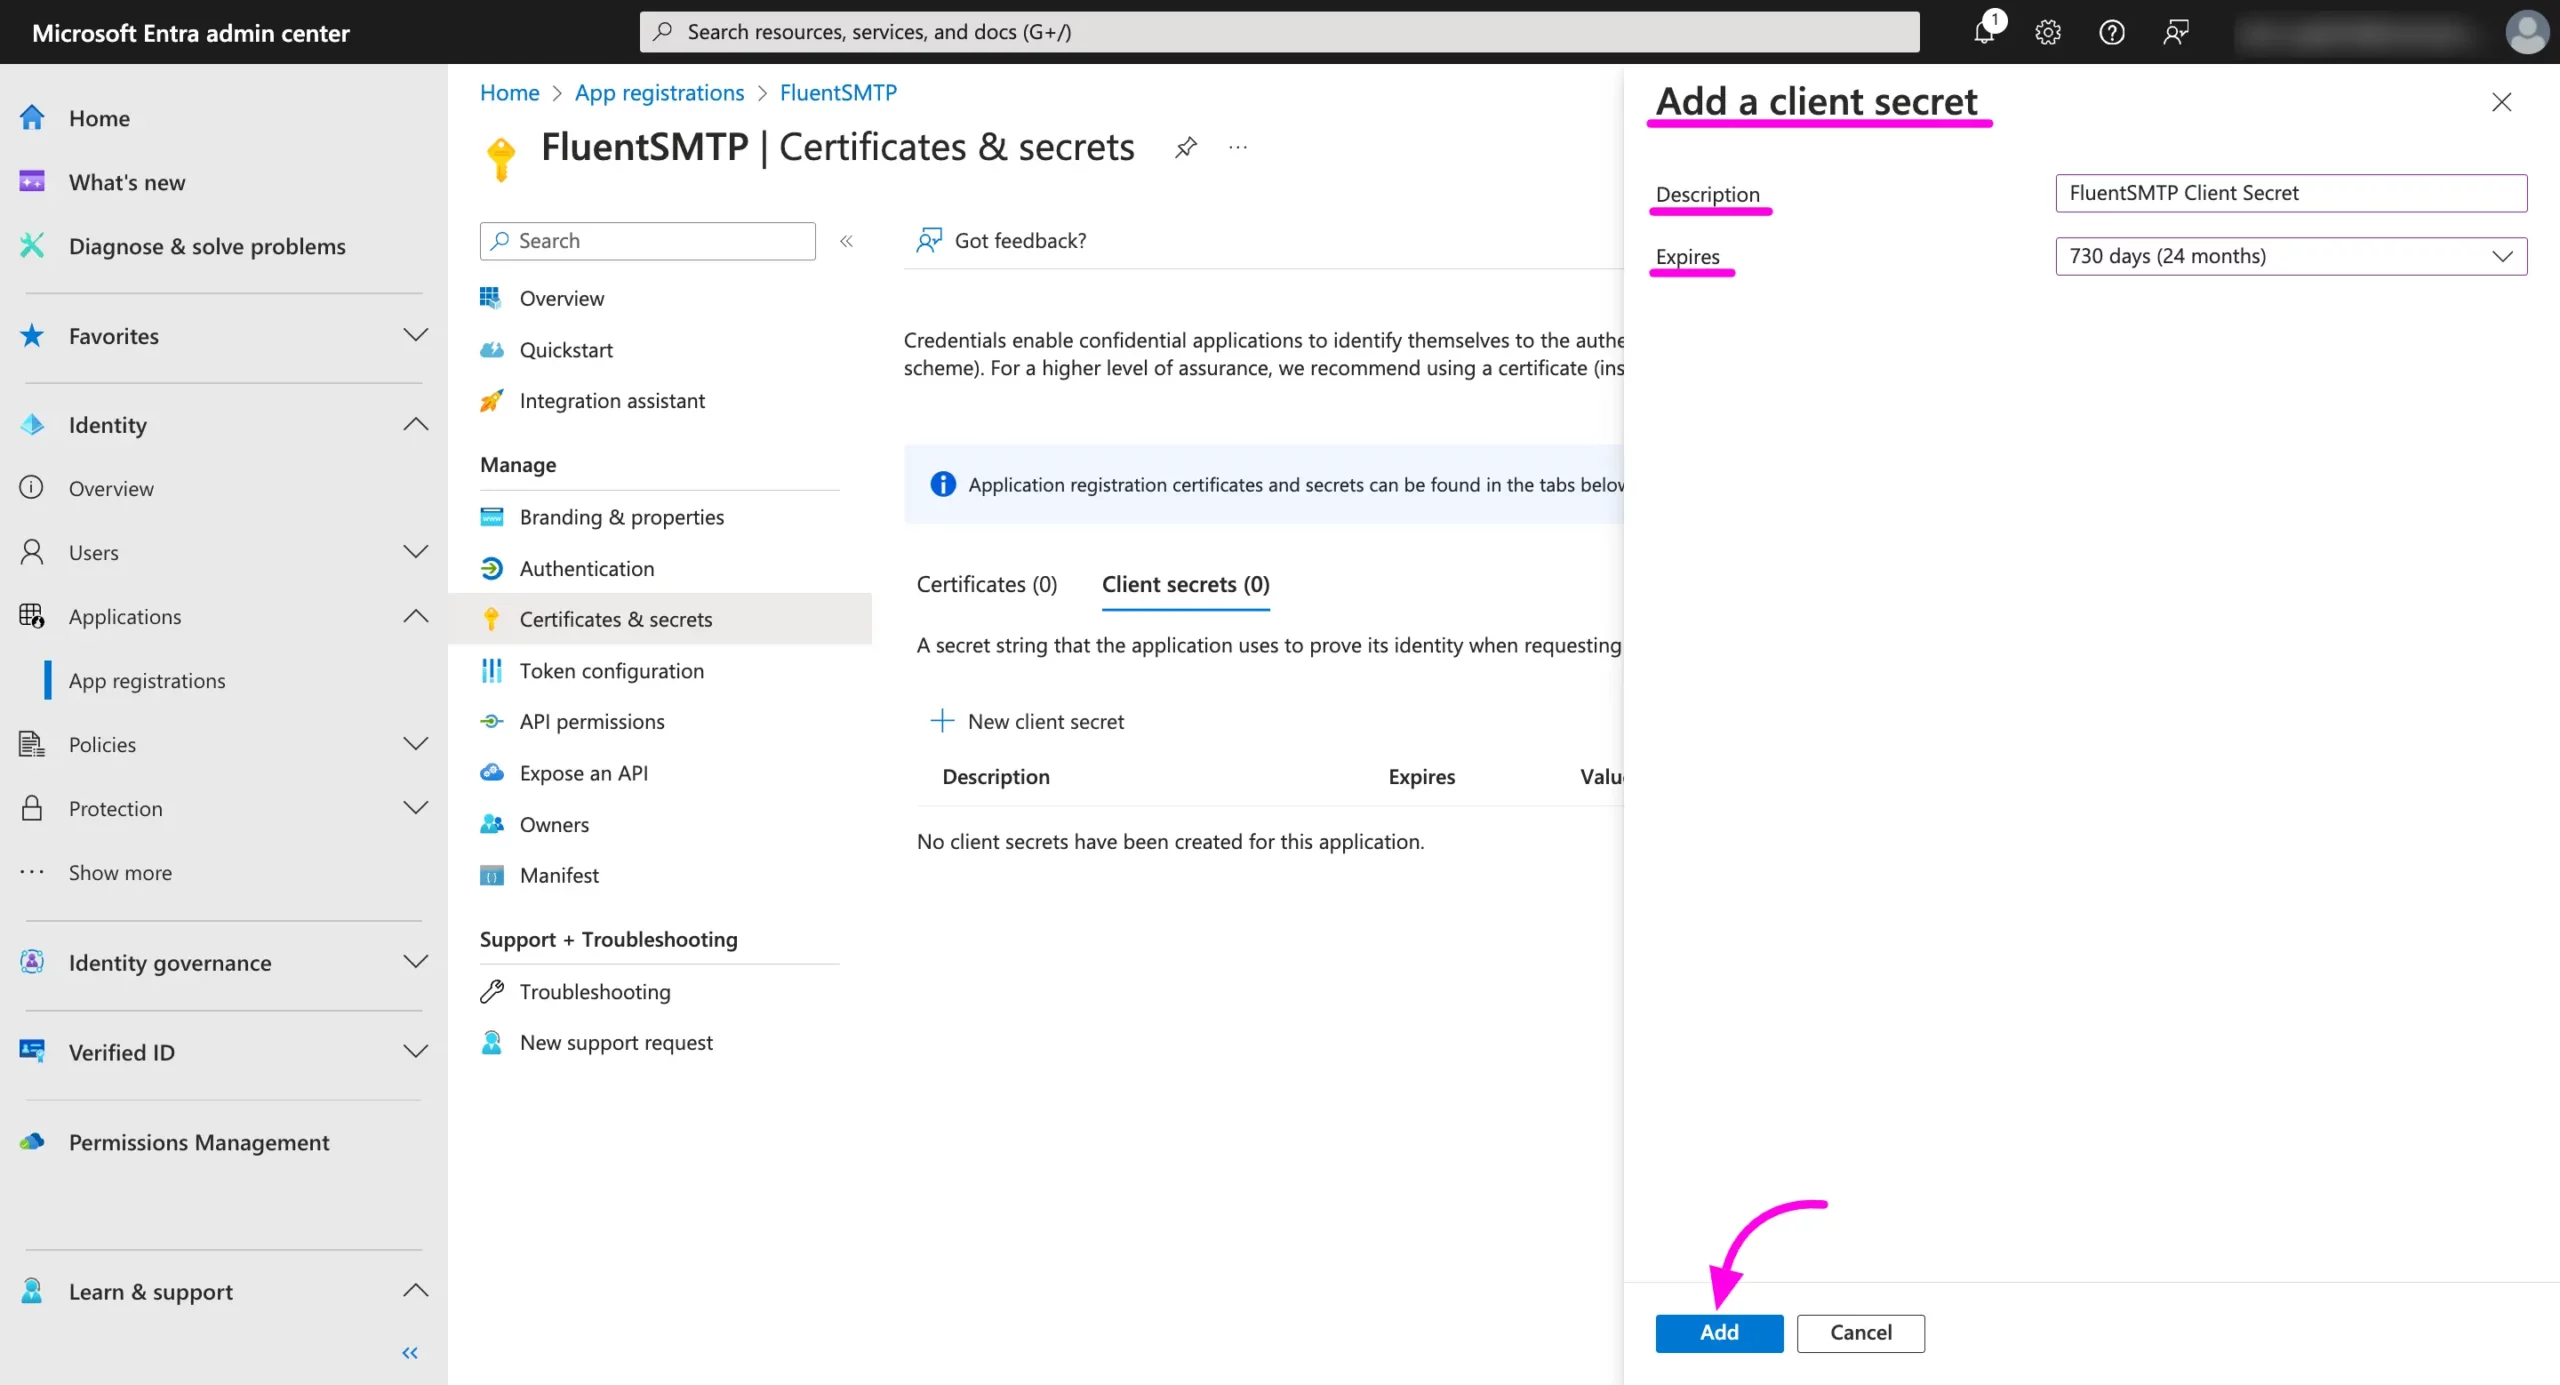
A pop-up will come to add the Client Secret Description and Expires. Give a description here select the expiration date and click on the Add button.
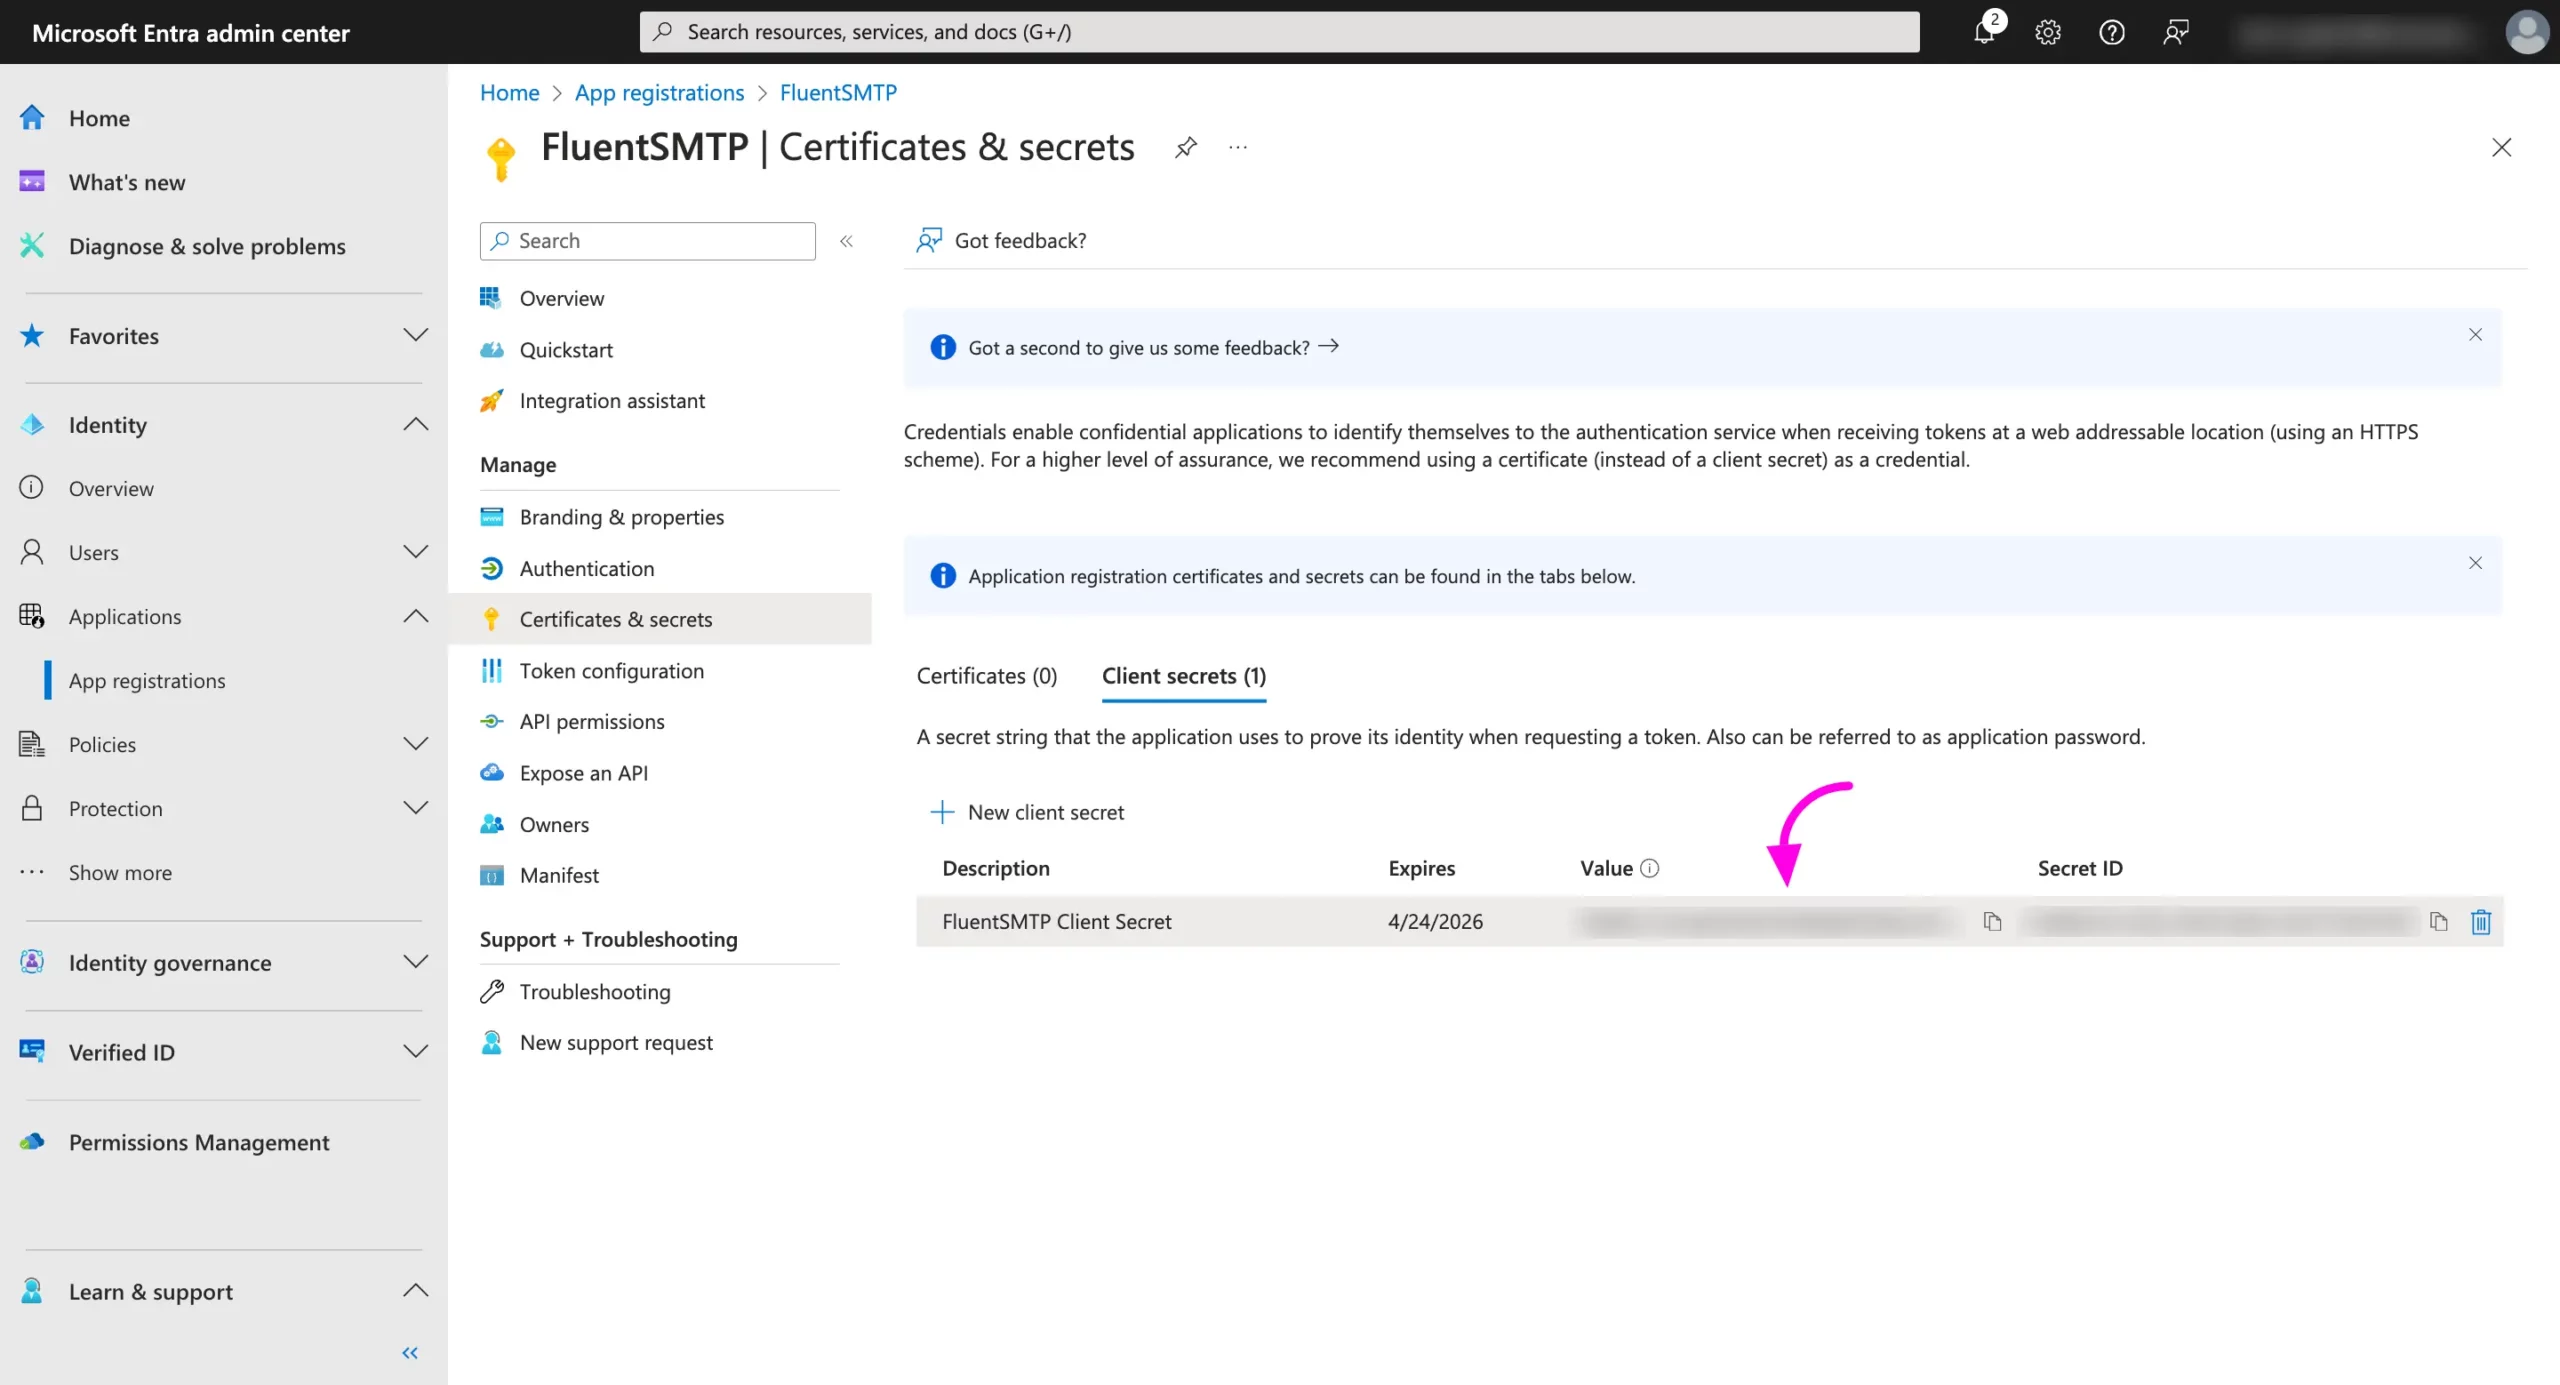
You will get the Client’s Secret now. Copy the Value from here.
Configuration Completion #
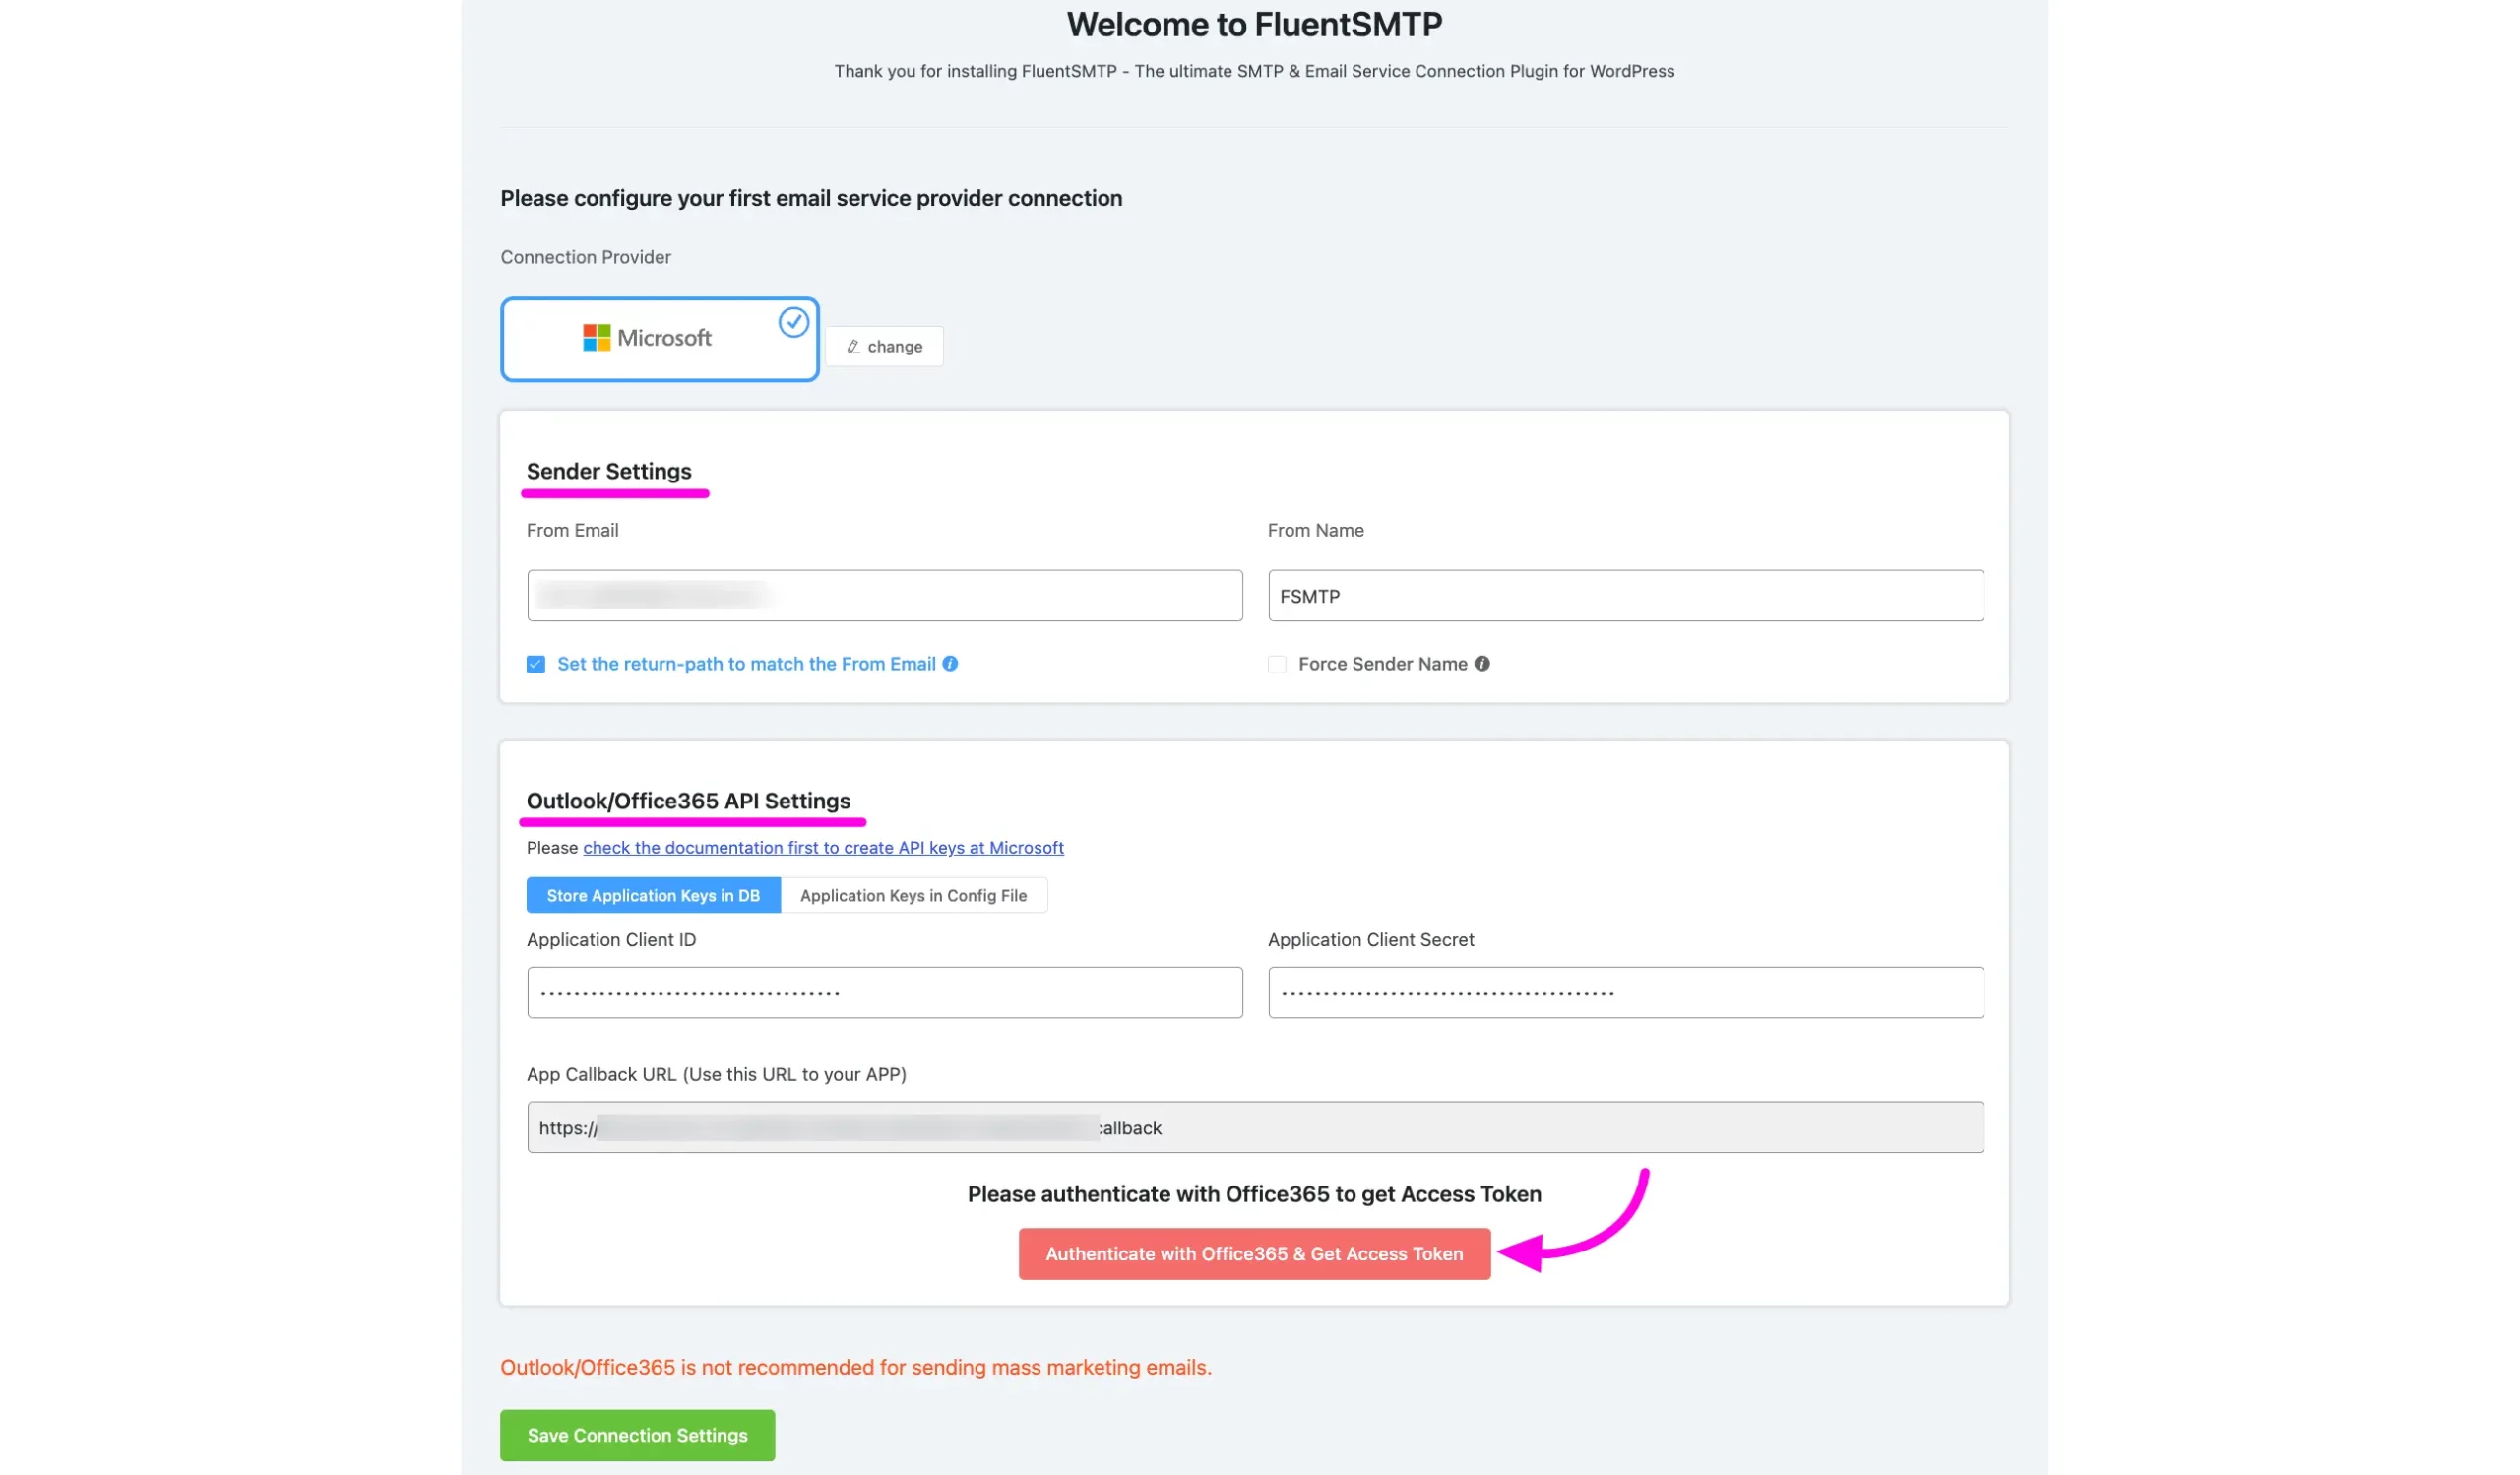
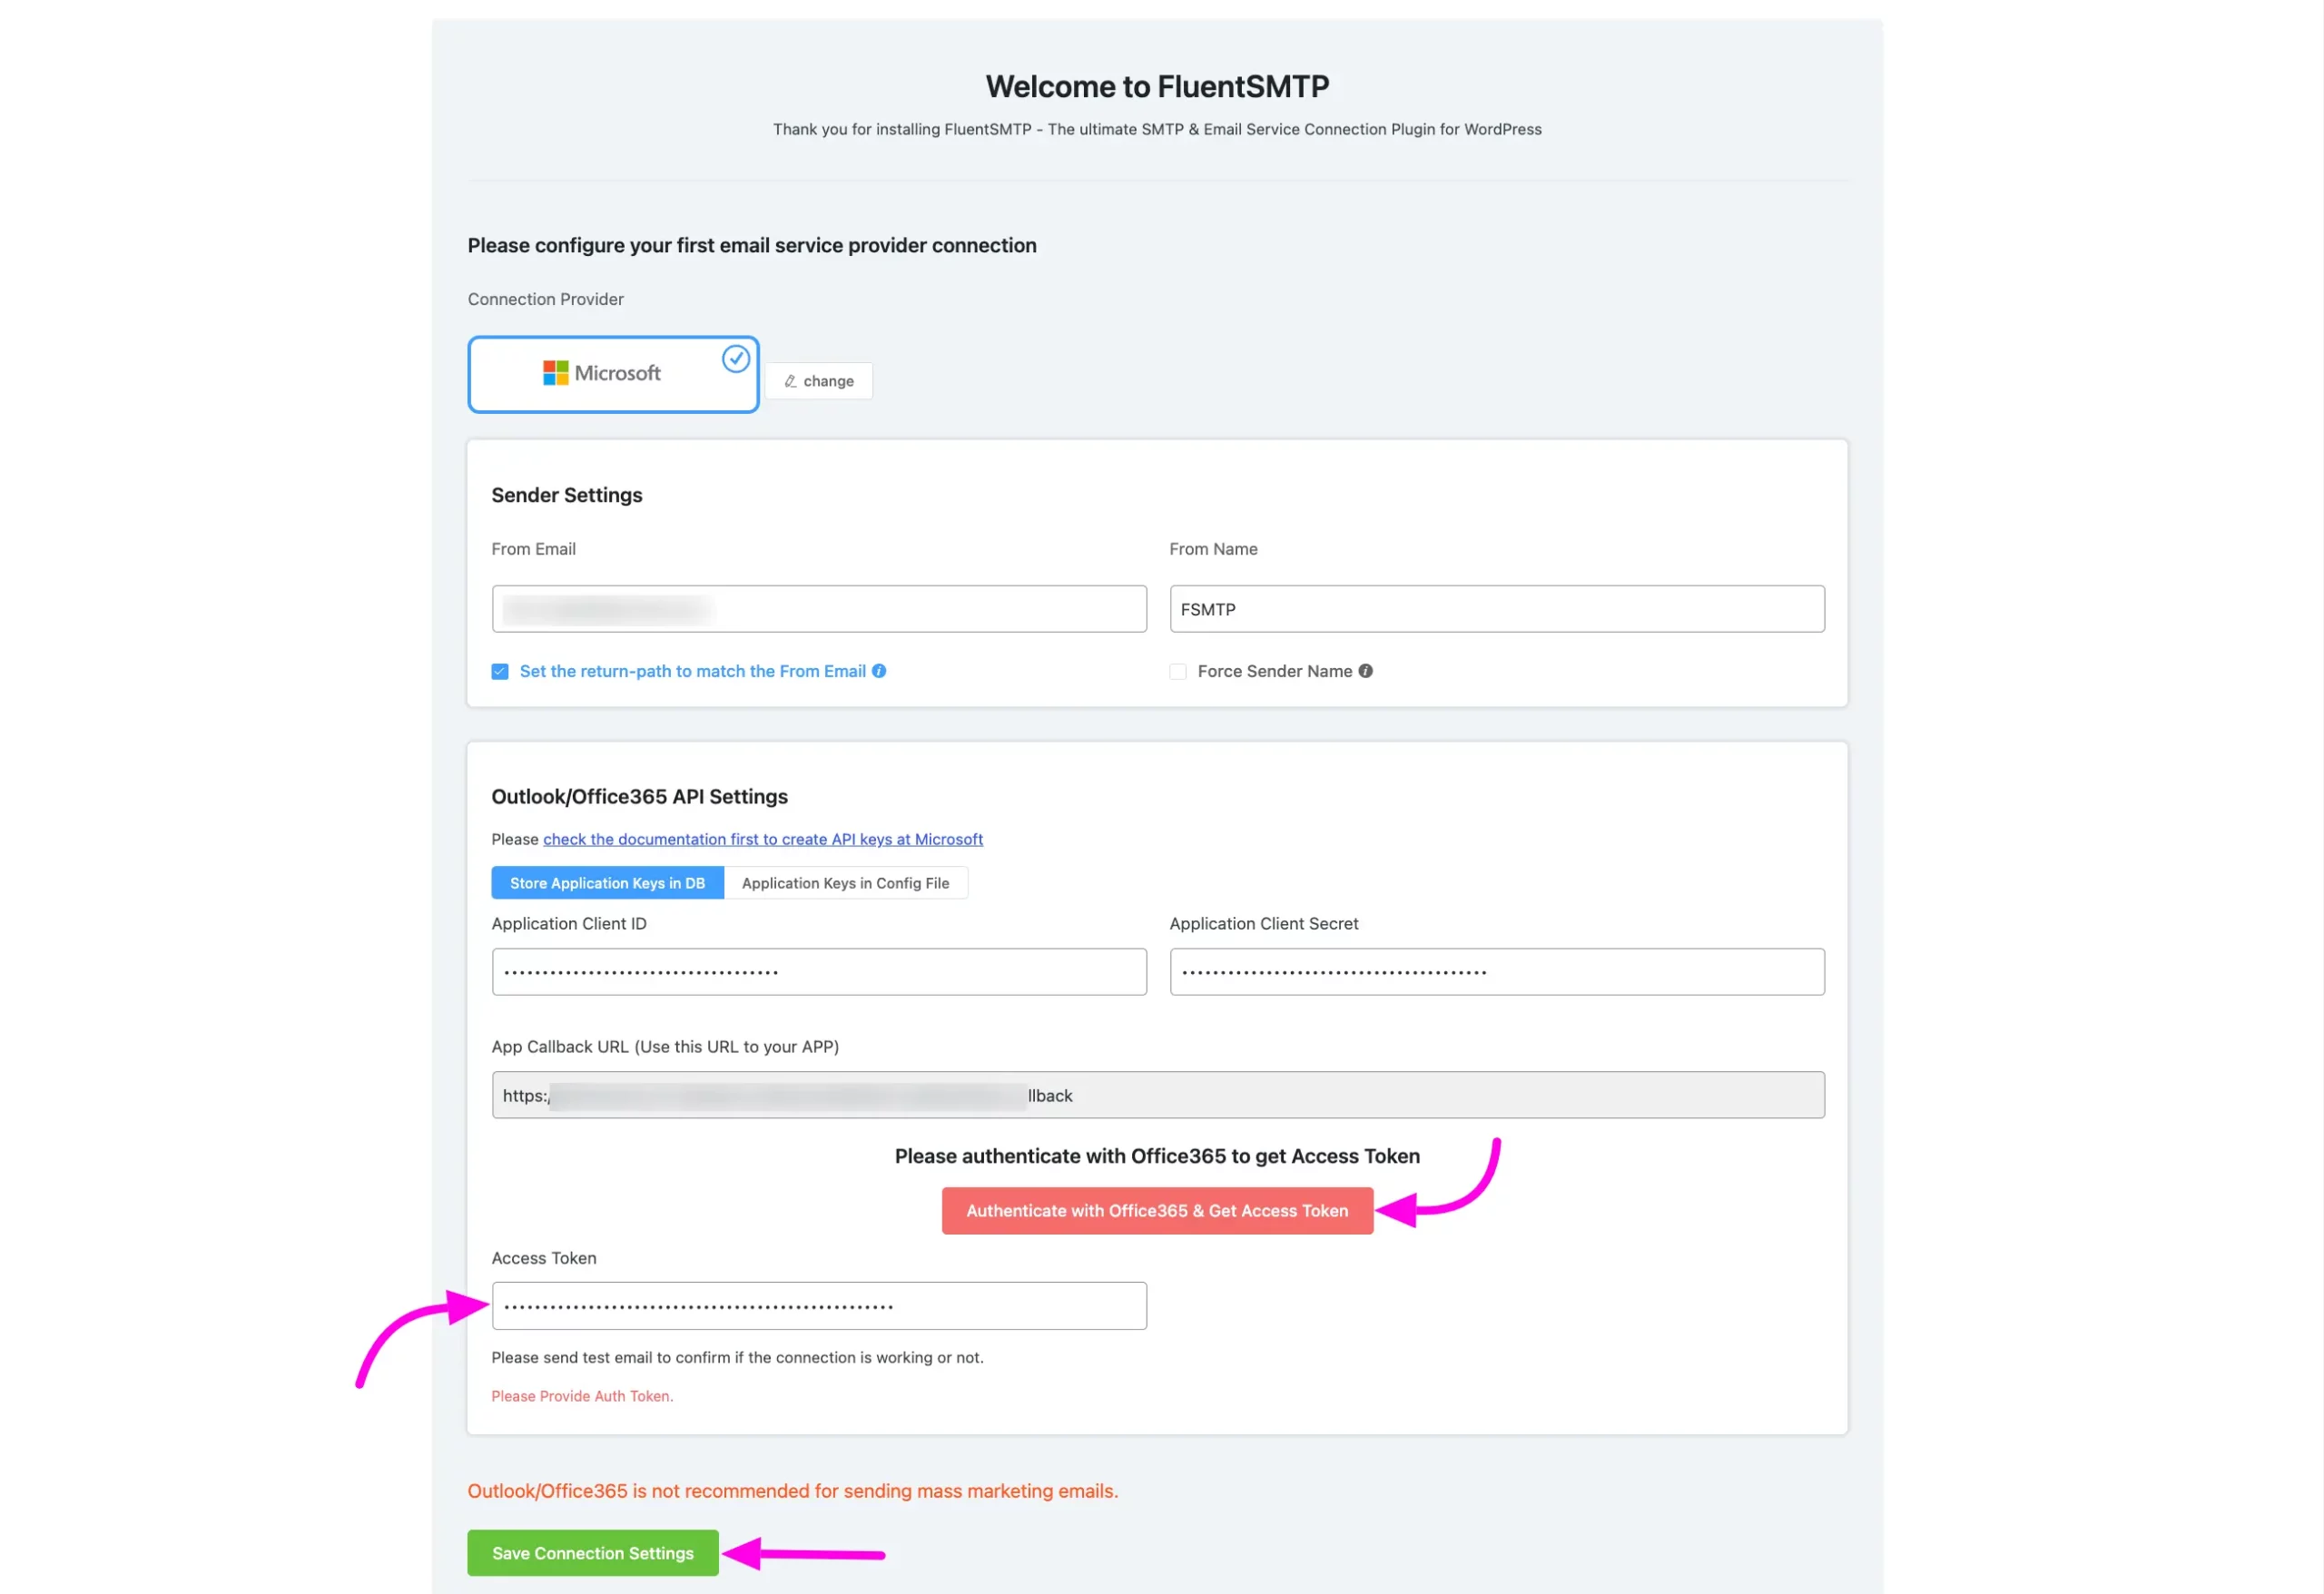
Go back to the Fluent SMTP Microsoft Outlook Configure page. In the sender Settings give your Microsoft Email Account and a Form name.
In the Outlook/Office 365 API Settings section paste the App Client ID and the Client Secret Value you copied earlier.
To authenticate with Office 365 & get an Access Code click on the Authenticate with Office 365 & Get Access Code button.
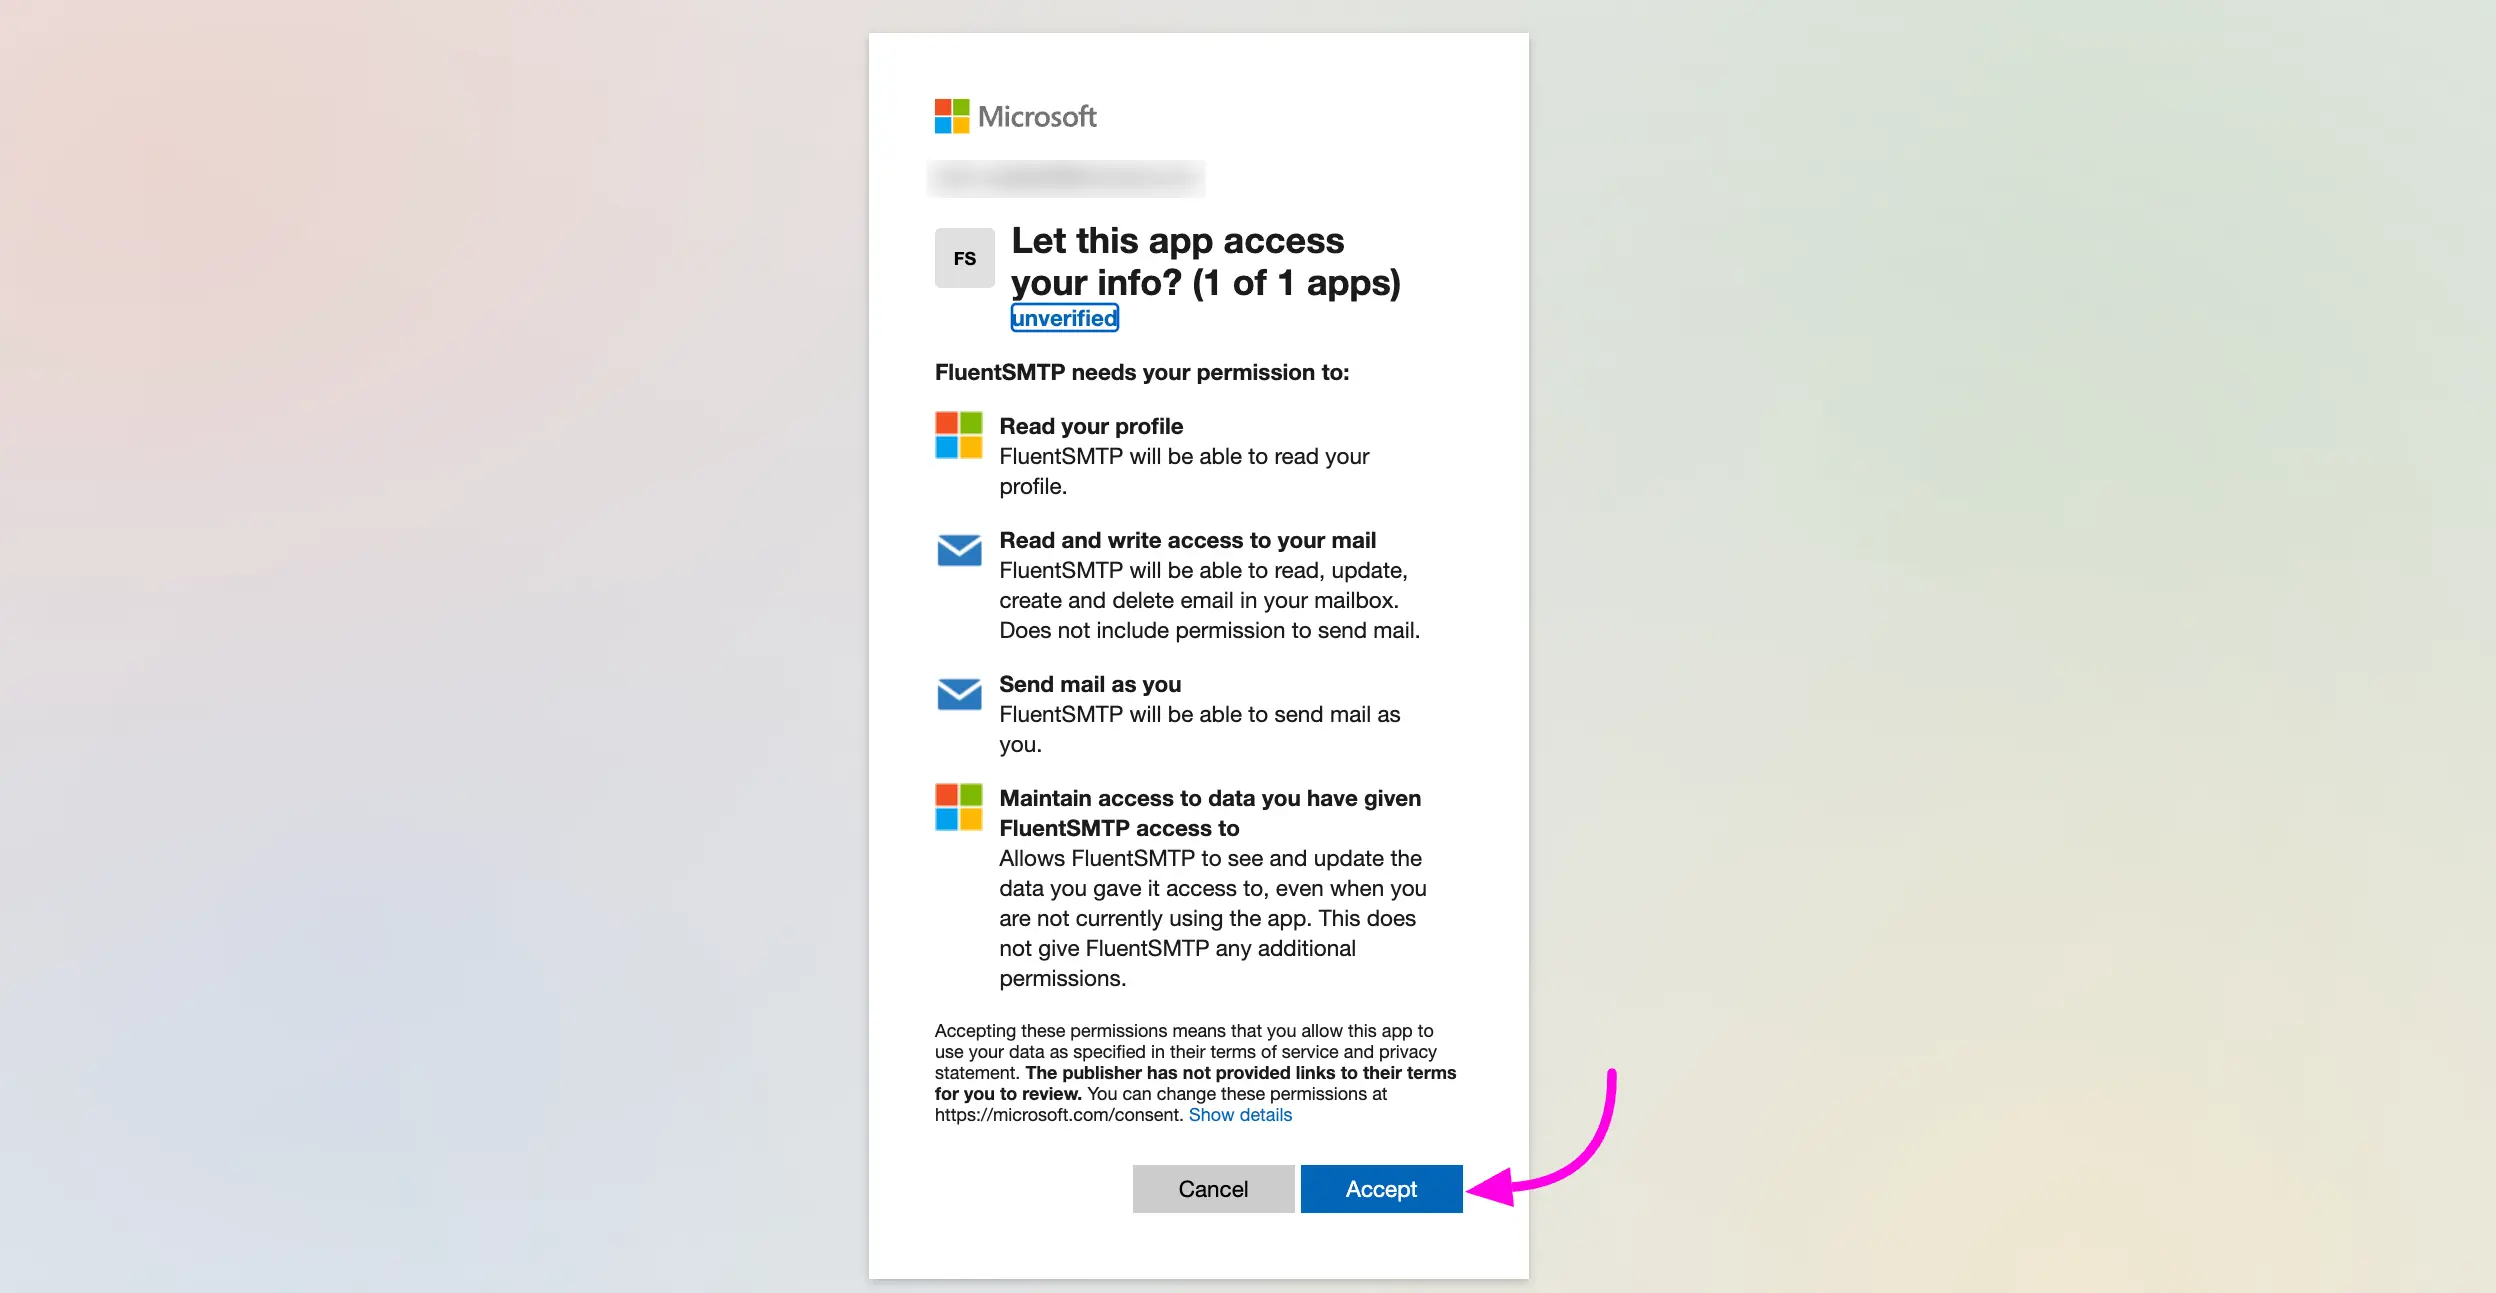
Accept permissions on the Permission Page of your Microsoft Outlook account.
After that, you will get an Access Code copy the code.

Paste your Access Code in the Access Token field and click the Save Connection Settings button.
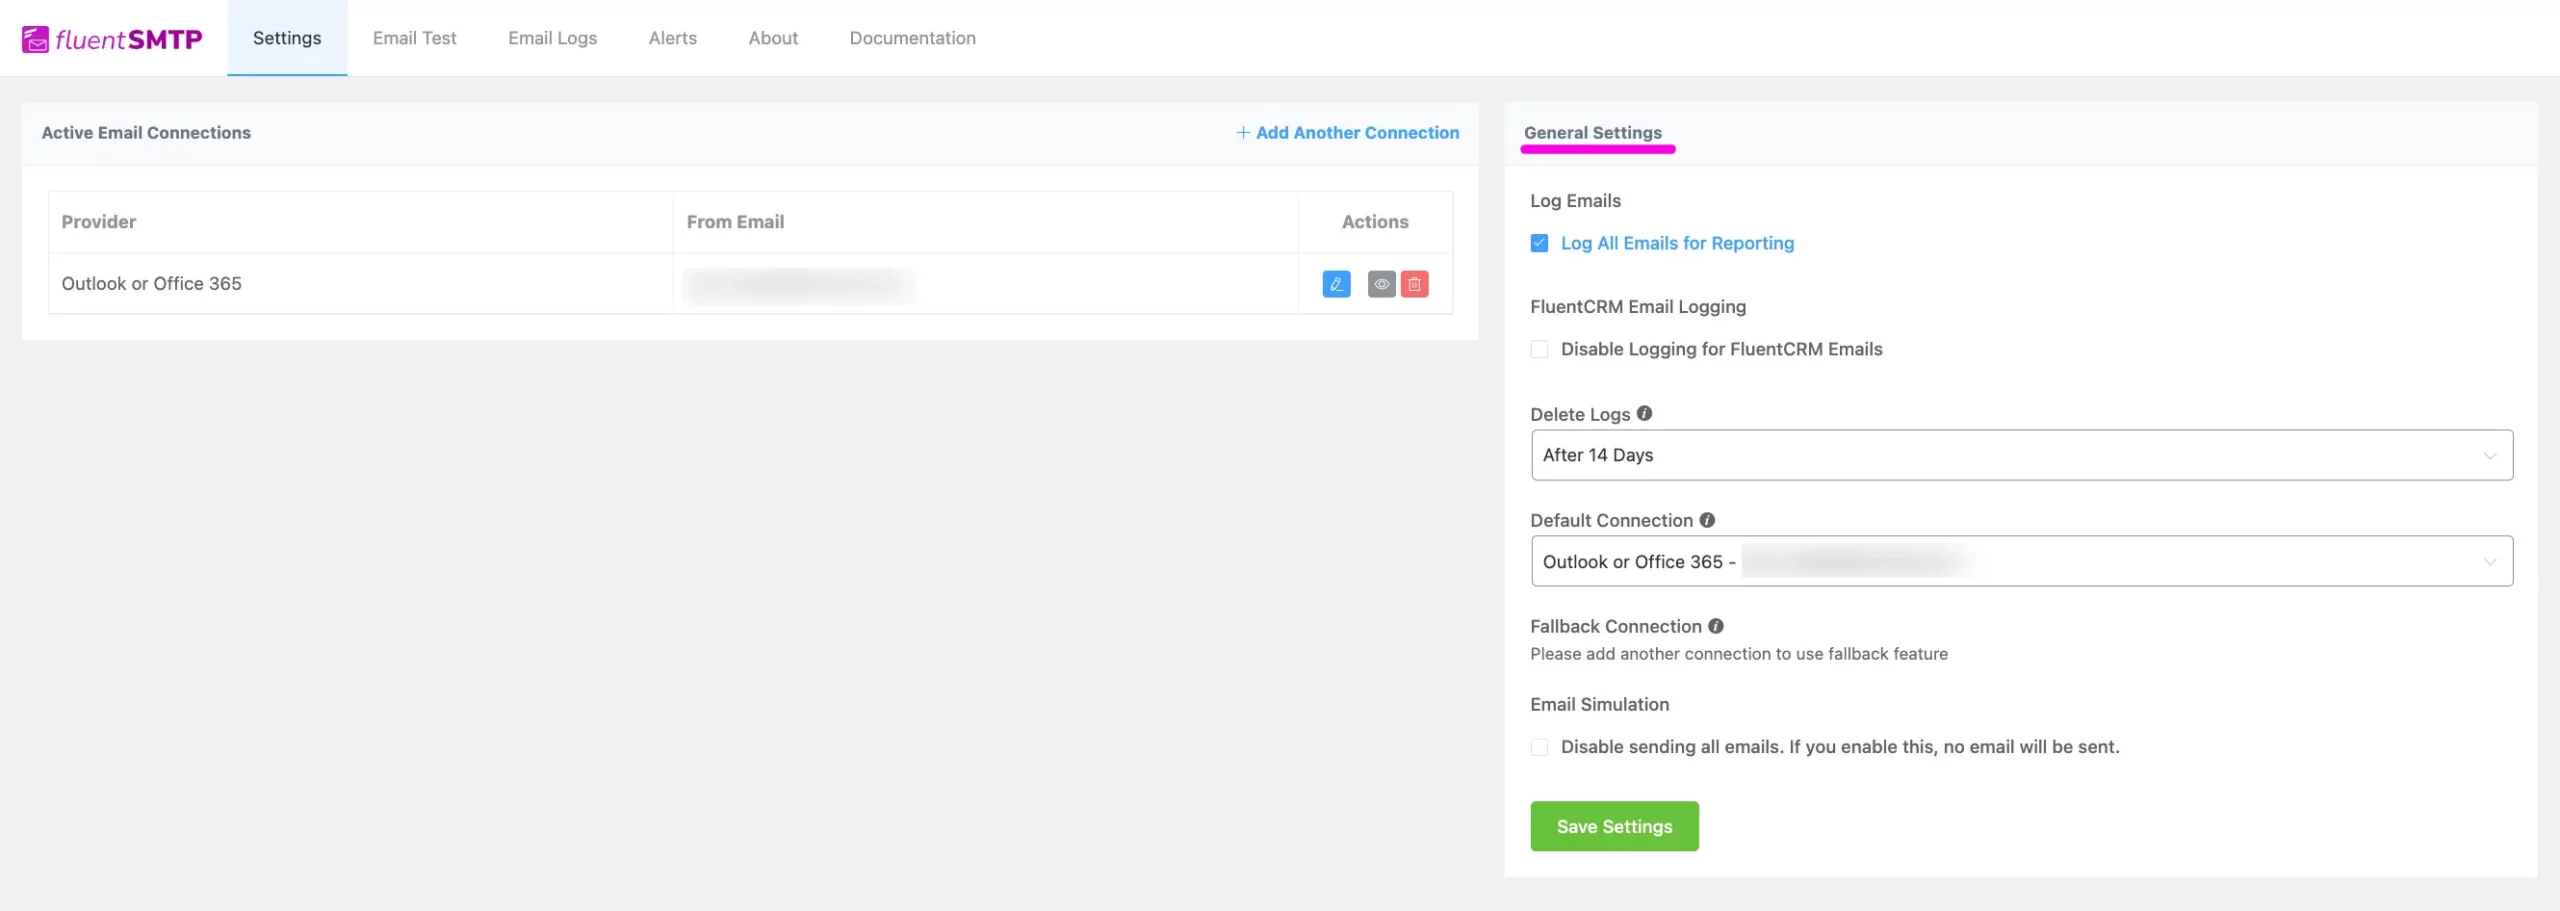
You will see that your Fluent SMTP is now configured with your Microsoft Outlook/Office 365 account. Also, you will get some General Settings here for your Email service provider you can change them if you want.
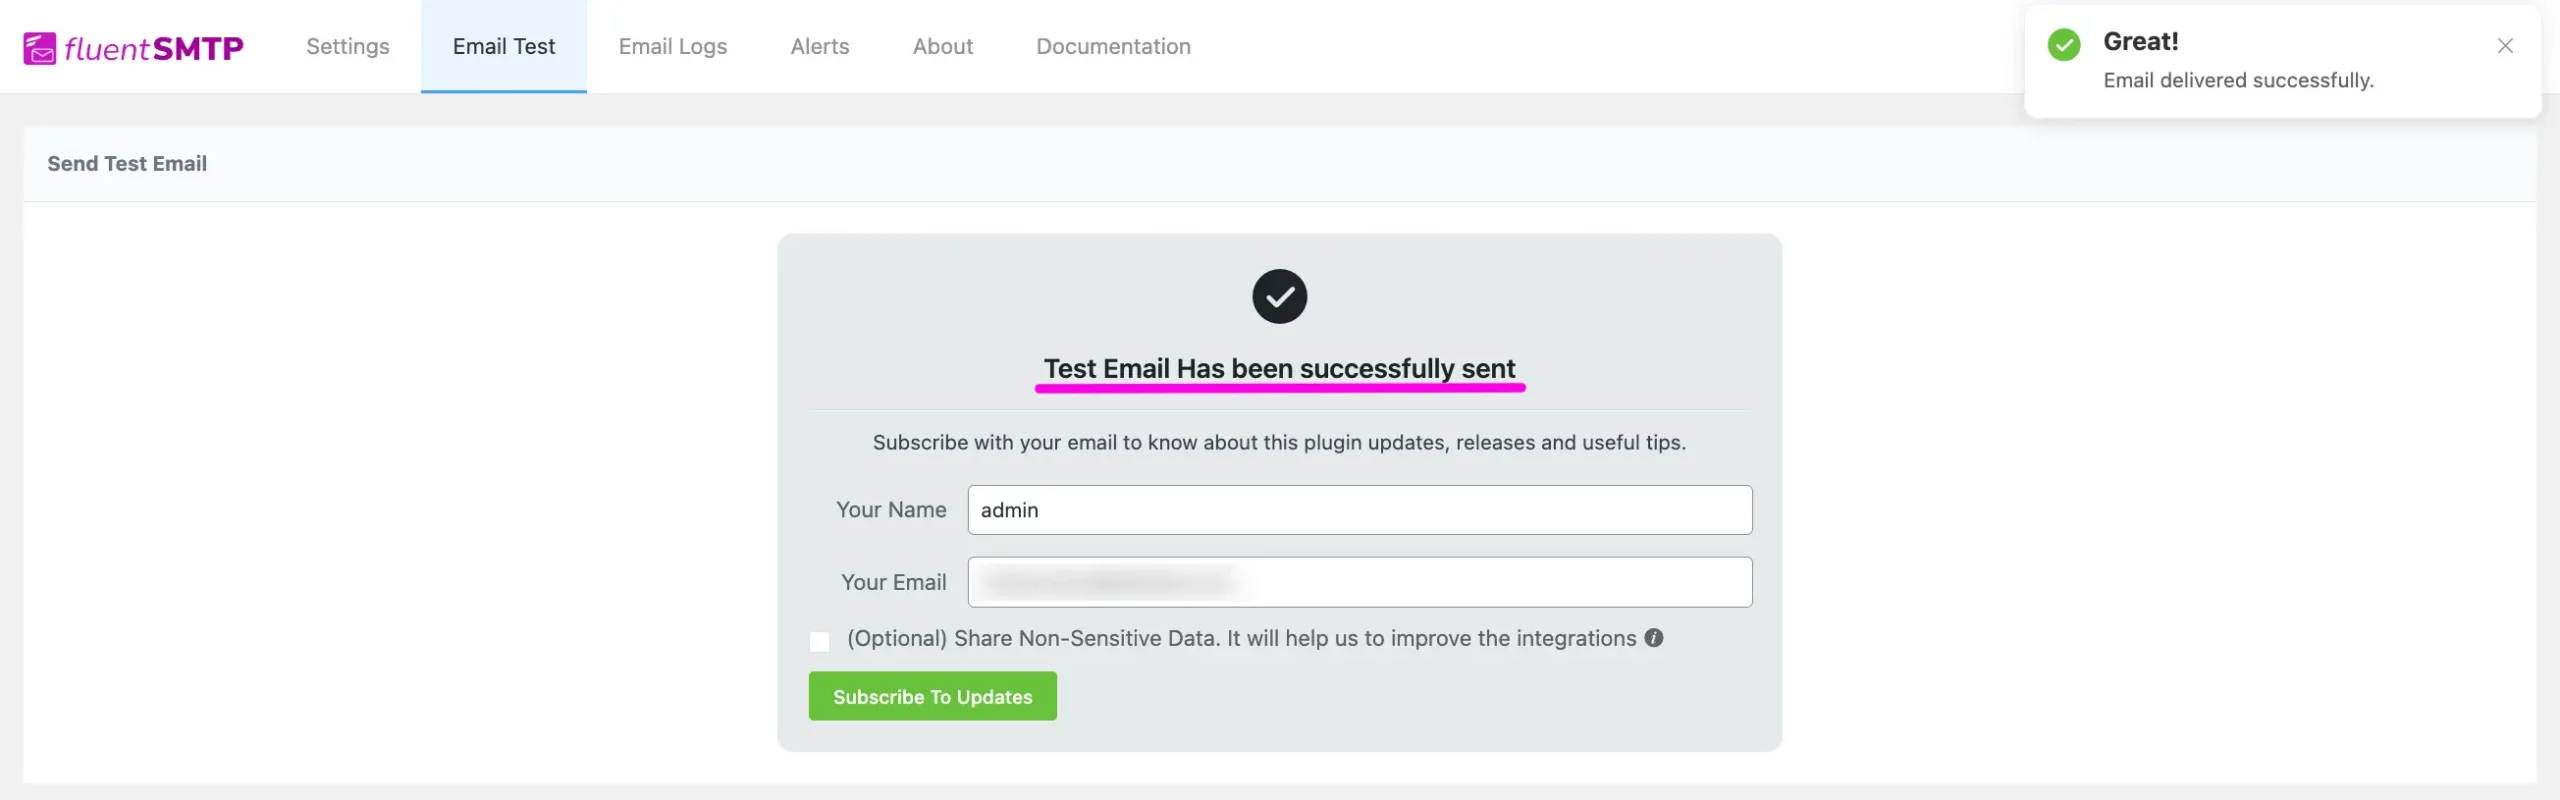
Send Test Email #
To test the functionality of your Email service, navigate to the Email Test section from the Navigation menu. Select your sender Email address, specify the recipient Email address for the Test Email, and click on the Send Test Email button.
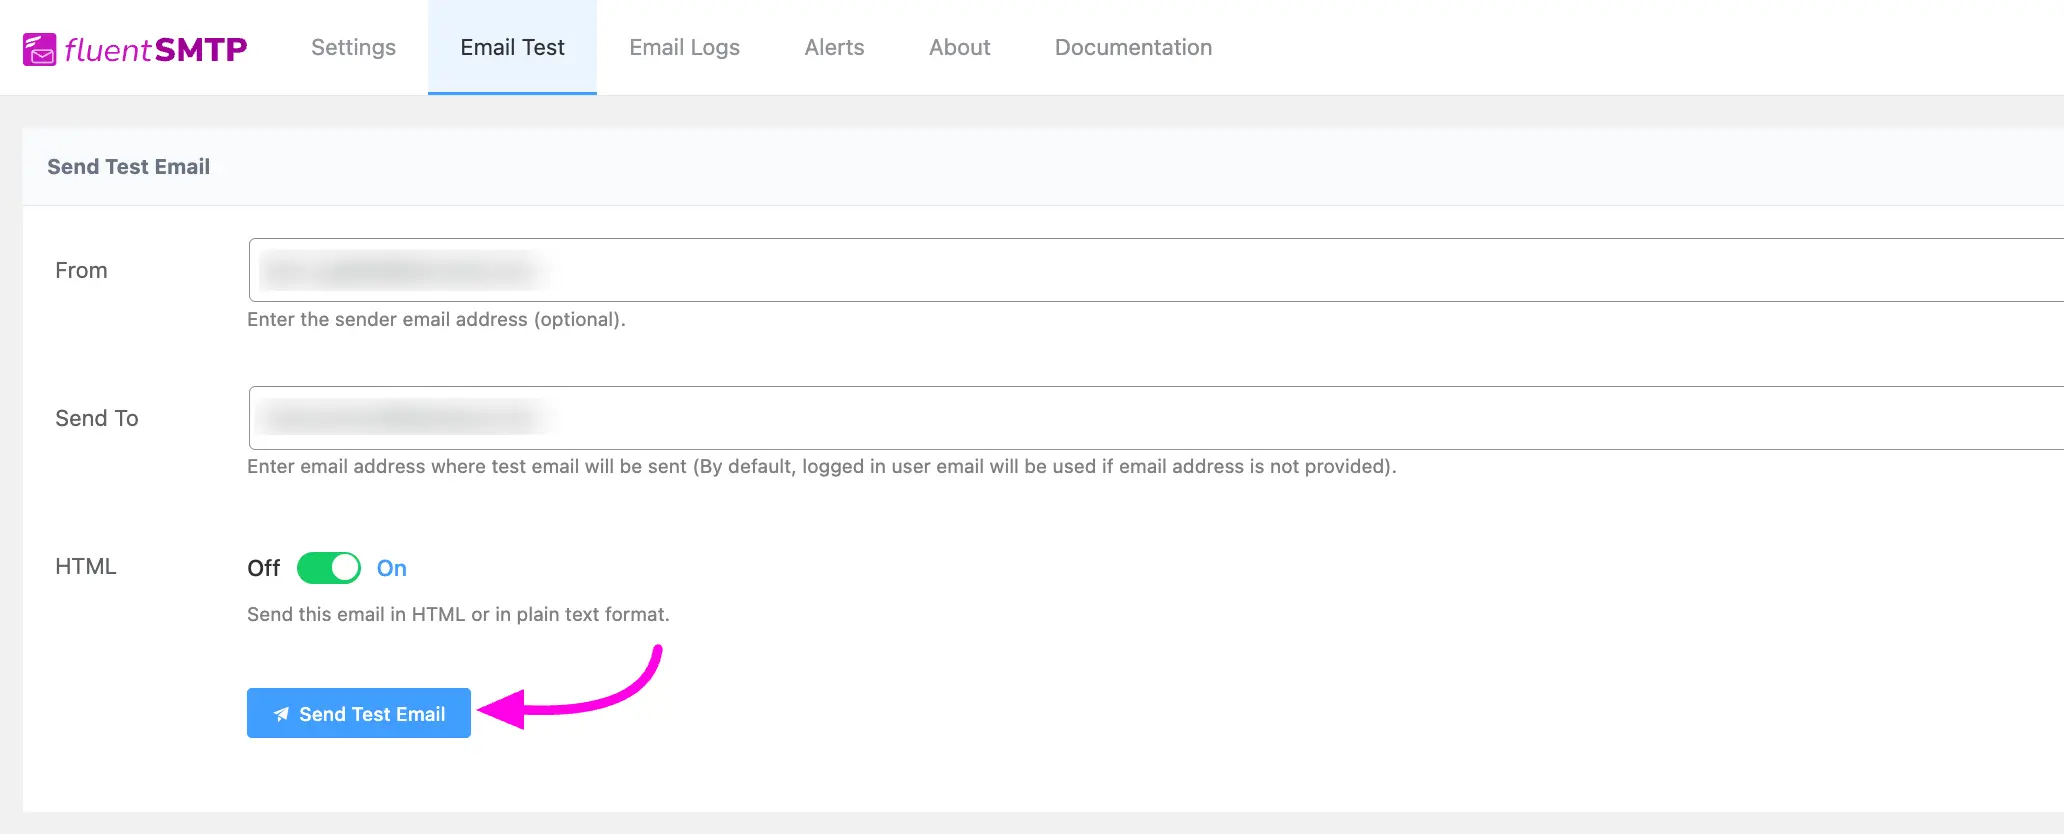
If your Email service is functioning correctly, you will receive a confirmation message indicating that your email has been successfully sent.
By following these steps, FluentSMTP can be configured with Microsoft Outlook successfully.


