

How to Send Emails with Google Workspace SMTP


Google Workspace (formerly Gmail) is one of the world’s most reliable and secure email sending services. Google’s clean interfaces and valuable features also make it one of the most user-friendly email servers.
Since it is a free email service you might want to use your Google Workspace account to send WordPress emails. Today in this article, we will elaborate on sending your WordPress emails with Google Workspace SMTP.
Why you should use Google Workspace to send WordPress emails?
First of all, WordPress doesn’t send emails to users. WordPress is a content management system, not an email server. Many WordPress users often complain that their emails can’t make it to the user’s inboxes. This happens because of how WordPress handles email sending.
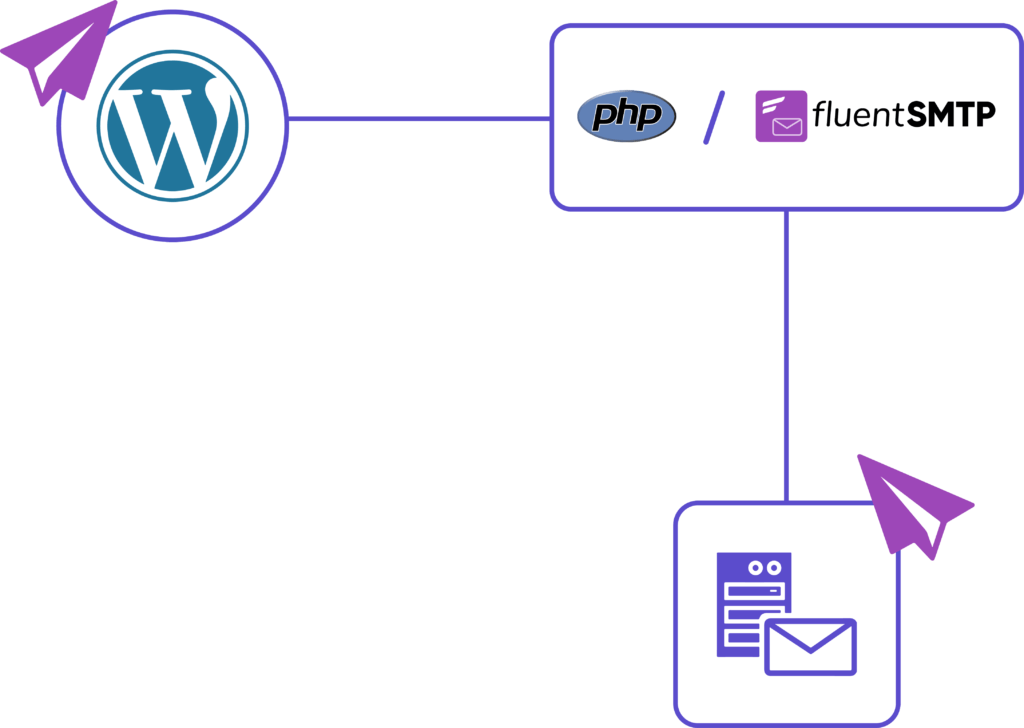
Here’s what happens when an email is sent from WordPress:
- wp_mail() function is a part of the base programs of your WordPress files. Plugins uses the wp_mail() function to send emails to WordPress.
- WordPress sends your hosting provider’s server this email request and processes the request using PHP email.
- PHP finally instructs the mail server at the hosting provider. Finally, your hosts’ email router pushes the emails to their correct recipients.
Many hosting providers do not have an email infrastructure, and many hosting servers block PHP emails by default. This is why you should never use WordPress for sending emails.
This article is for those who are struggling with the problem. Unfortunately, it’s a common yet frustrating issue for WordPress users—but also one that you can also fix quickly. The easiest way to define the solution is by replacing the PHP mailing system with an SMTP plugin.
The Simple Mail Transfer Protocol(SMTP) is the international standard communication protocol used for sending and receiving emails over the internet.
If your web hosting provider doesn’t have a hosting email facility on the server, you can use an SMTP plugin for sending WordPress emails reliably. SMTP plugins are relatively easy to install and use.
We recommend FluentSMTP, a free and open-source SMTP plugin for your WordPress. FluentSMTP can be paired up with Google Workspace for excellent email deliverability.
So let’s get to how you can send WordPress emails using Google Workspace!
Steps to send WordPress emails with Google Workspace SMTP
FluentSMTP can help you send emails using email sending services providers like Google Workspace(Gmail formerly named G-suit), Amazon SES, SendGrid, MailGun, SendInBlue, PepiPost, SparkPost, etc.
Let’s set up FluentSMTP with google workspace in 4 easy steps:
1. Install FluentSMTP
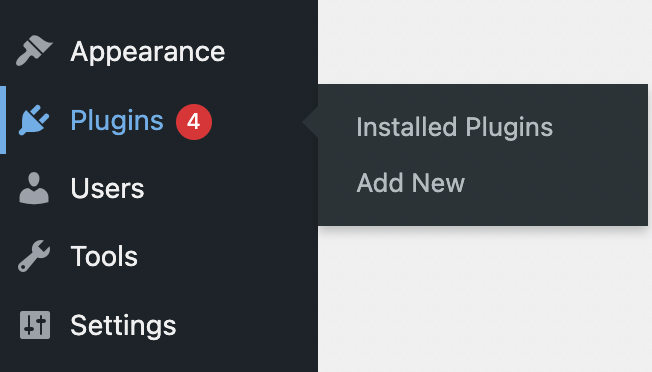
Installing FluentSMTP is pretty easy. To install FluentSMTP on your WordPress site:
- From your WordPress dashboard, hover over Plugins and click Add New.
2. Search for FluentSMTP and click Install
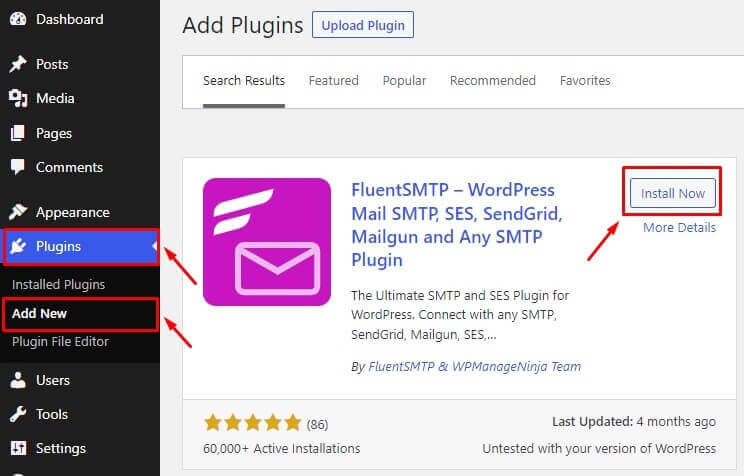
3. Once installed, click activate. The plugin will be installed and activated.
2. Configure FluentSMTP with Google WorkSpace
After installing the plugin, you can configure FluentSMTP with your Gmail or Google Workspace account. Here’s how to do that easily:
- From your WordPress dashboard, hover over Settings and click FluentSMTP.
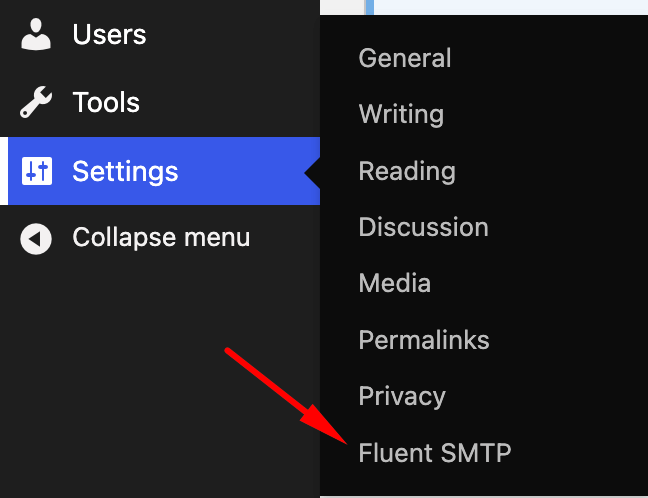
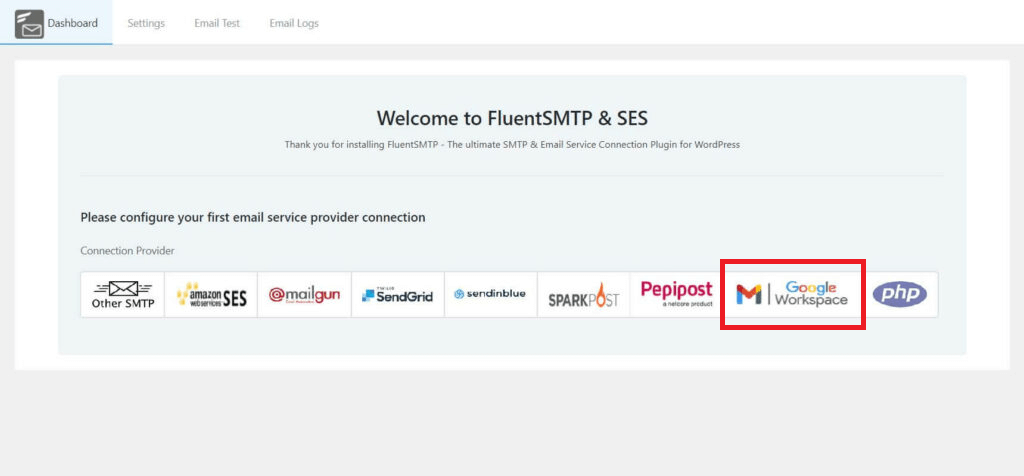
- Here you will be asked to configure your first email service provider connection. Select Google Workspace as your email service provider to configure it with FluentSMTP.
3. At this point, you’ll have to configure the sender details such as From Email and From Name. Input your email address in the From email field and give a From Name of your choice. These will be used for sending emails from WordPress.
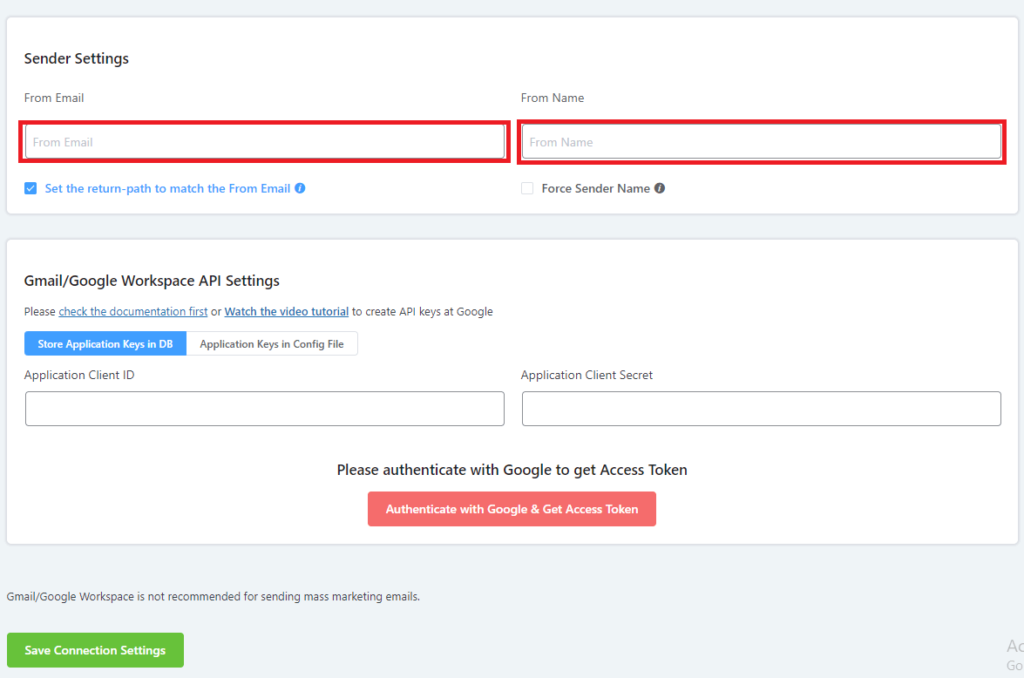
Lastly, you need to submit Application Client ID and Application Client Secret. Now, let’s see how we get this ID and secret from google workspace.
3. Getting Google Workspace API settings
In this part, you have to go through multiple processes; these are shown below:
Create a new API credential project in Google Cloud Platform
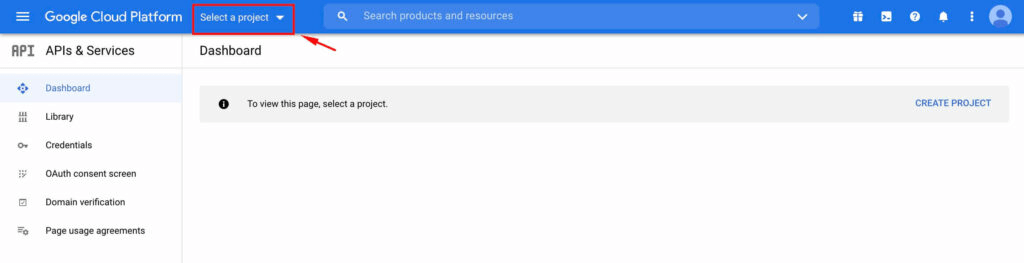
- Go to Google Cloud Platform by clicking on this link – https://console.cloud.google.com. From the dashboard, click on Select a project.
2. A popup will appear; click on the NEW PROJECT button.

3. Give a Project name and hit on the CREATE button.
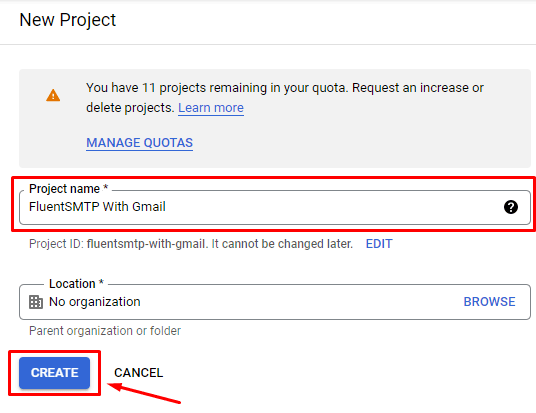
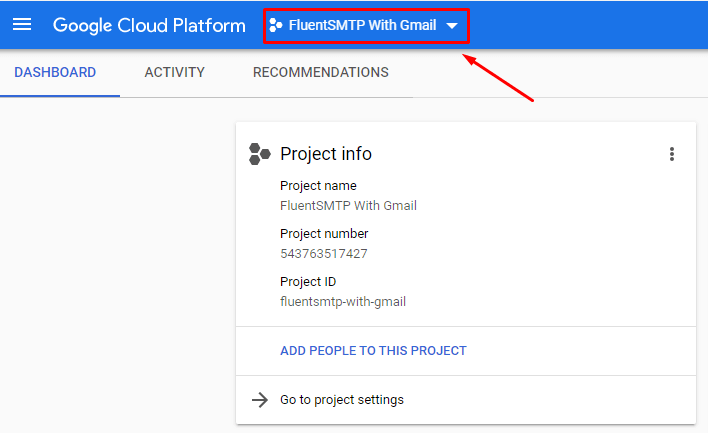
A notification will appear, which will confirm that a project has been created.
Now, if you have existing projects on your Google Cloud Platform, you need to select your newly created projects as default. To do that:
4. Click on the dropdown as shown in the screenshot.
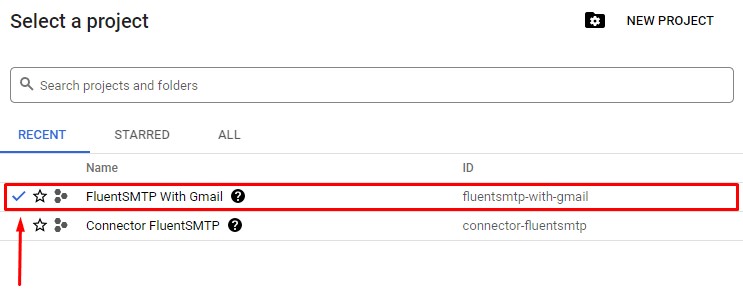
5. Select the newly created project; you can see a checkmark on the left side in the selected project’s name. Now select the project name and click ‘Open.’
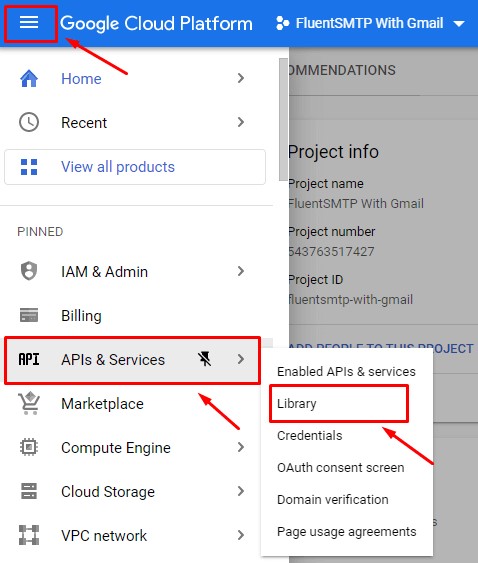
6. Now, click on the hamburger menu and scroll down to API & Services and click Library.
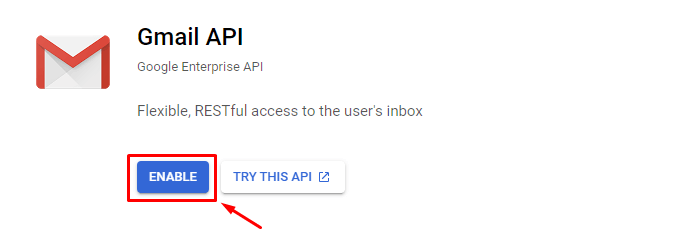
7. From the API library, search for Gmail API and enable it.

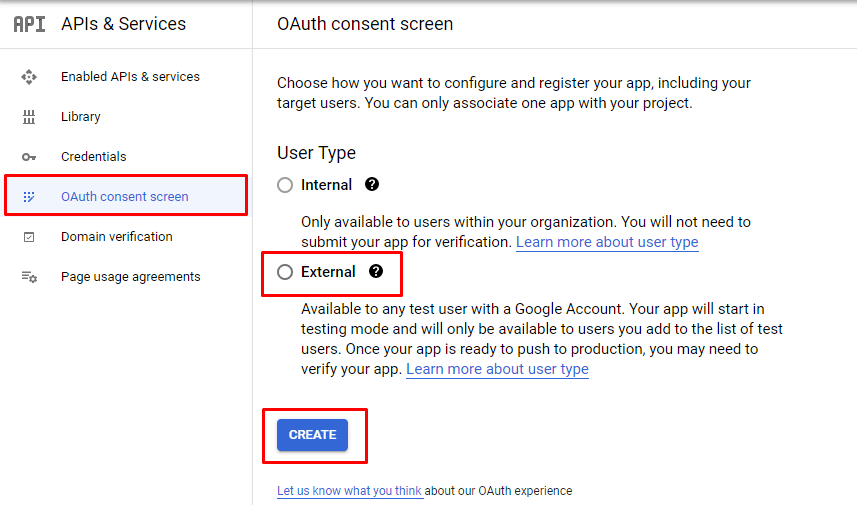
8. After enabling Gmail API, scroll down to the OAuth consent screen on the left side of the window. Click on that, and a new page will show up. There are selection options for user type. Select External user type and click on CREATE.
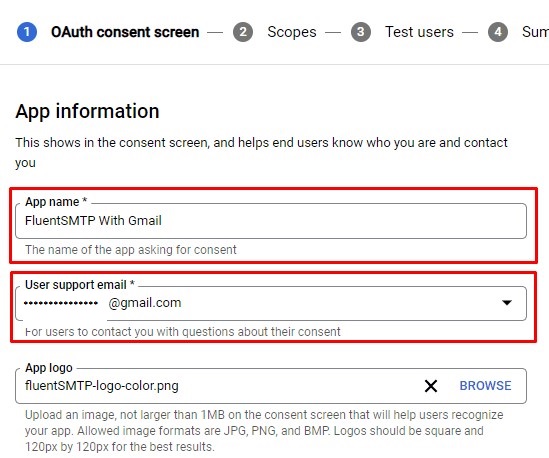
9. This takes you to OAuth consent where you need to provide App information. Provide the App name and User support email in the app information section. You can also provide an app logo.
The user support email is the sender’s email address of your campaign.
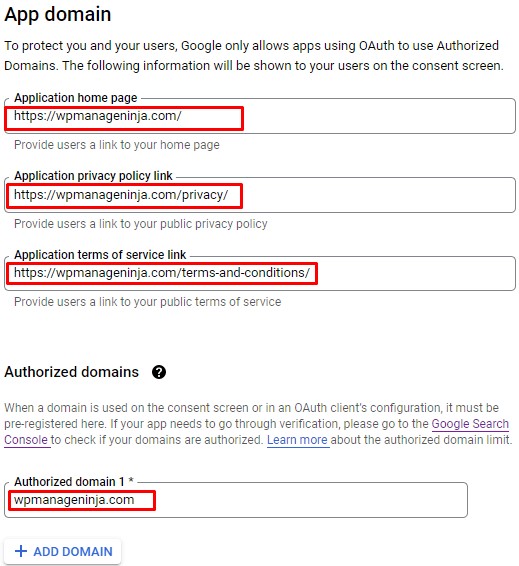
10. Now scroll down to the app domain section. Here you need to provide your application home page, privacy policy, and terms and services page URL. Also, fill out the authorized domain name here.
And then, the final section is developer contact information. Input the developer email and click on SAVE AND CONTINUE button. And that’s it.

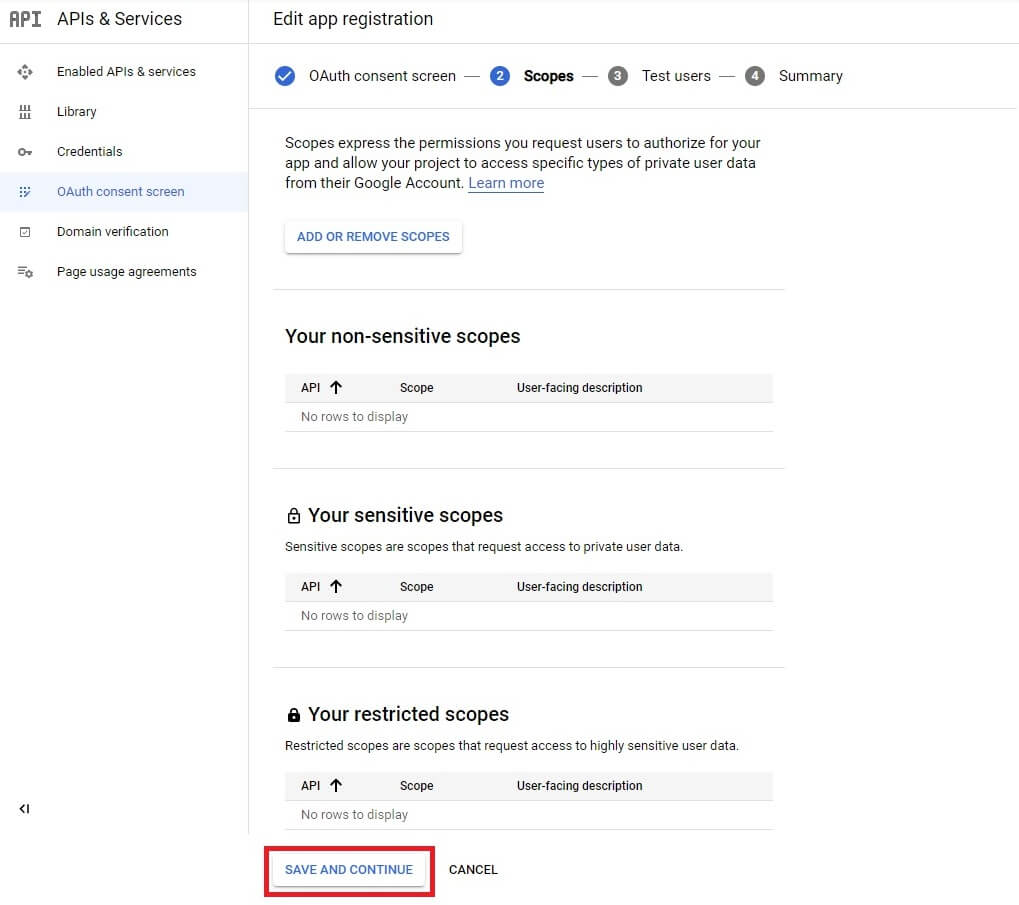
11. For the scope section, you don’t have to add or remove anything. Simply SAVE AND CONTINUE.
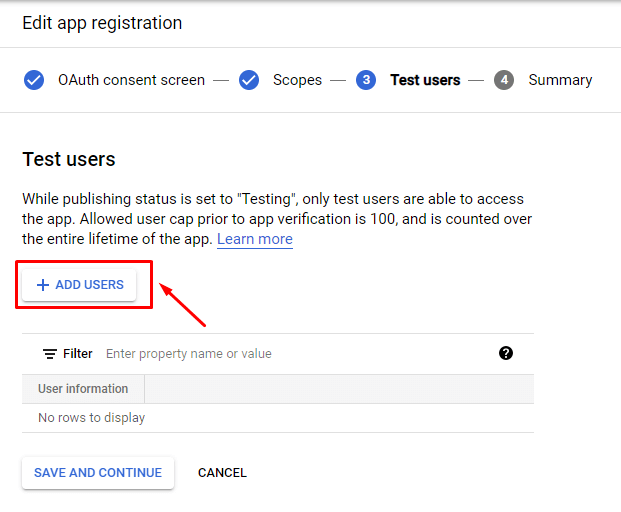
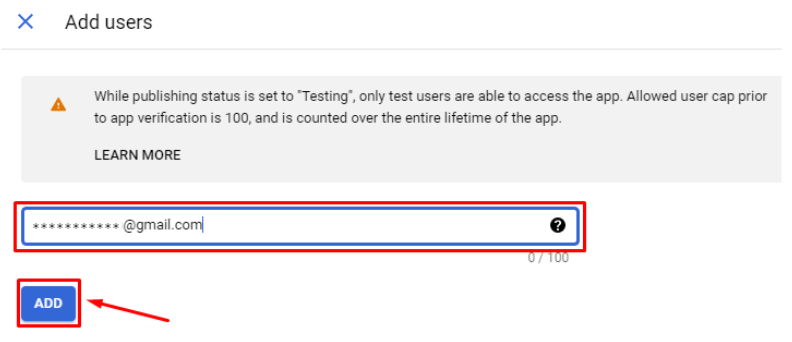
12. In the Test Users section, add the user email. It is the sender’s email for your campaign. You can add one or more email addresses to send emails to your users. Click on ADD USERS and provide your email address. Again, click Save and Continue.
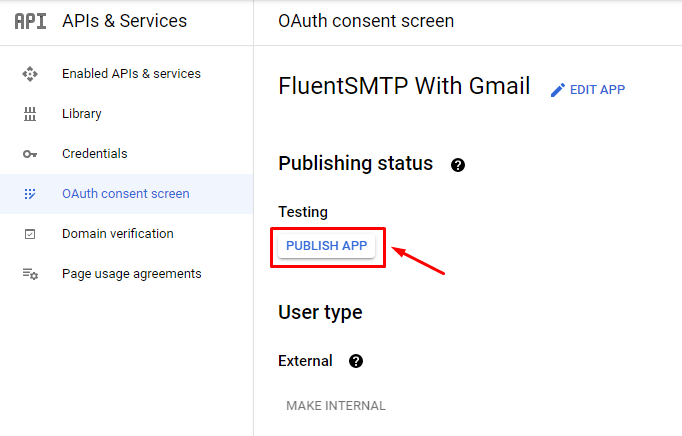
13. In the next step, you’ll get to see the summary. If everything is in order, click on the BACK TO DASHBOARD button. Here you see an OAuth consent screen window like the picture below. You need to publish the app by clicking on the PUBLISH APP button.
Create OAuth client ID credentials
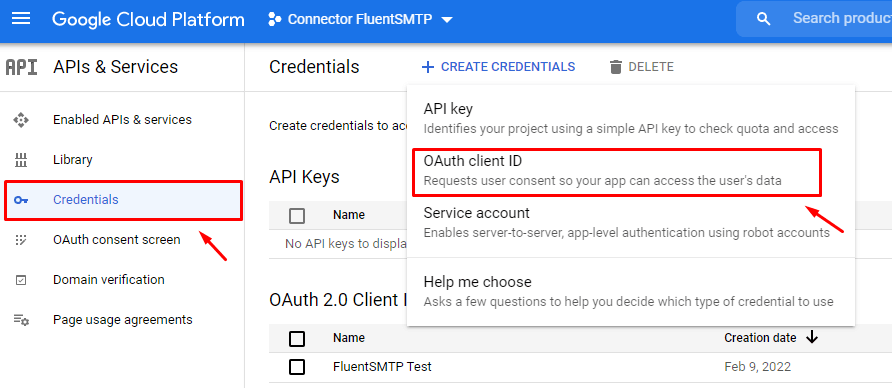
At this stage, you need to create OAuth client ID credentials. For that:
- Go to Credentials from the hamburger menu and click the Create Credentials>OAuth client ID.
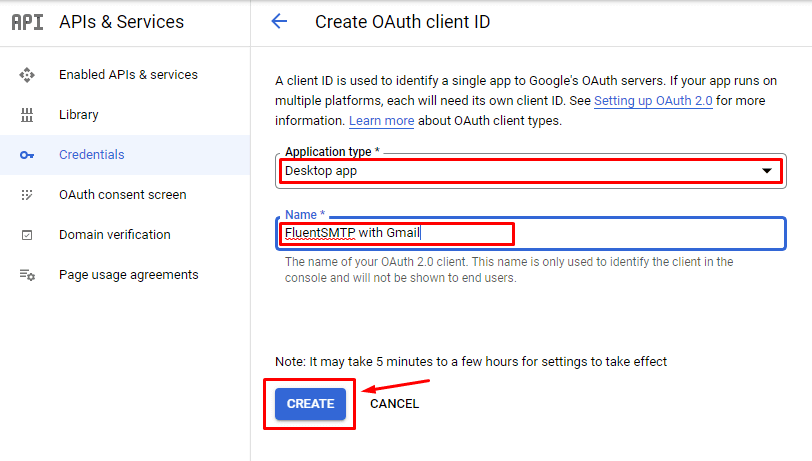
You have to select the application type in the next screen and set a name for the client ID.
2. Select Desktop app as the Application type. Give a name for your OAuth client ID and hit the CREATE button.
3. You will be given a Client ID and a Client Secret on a popup window. Copy them by clicking the copy icon (at the right side).
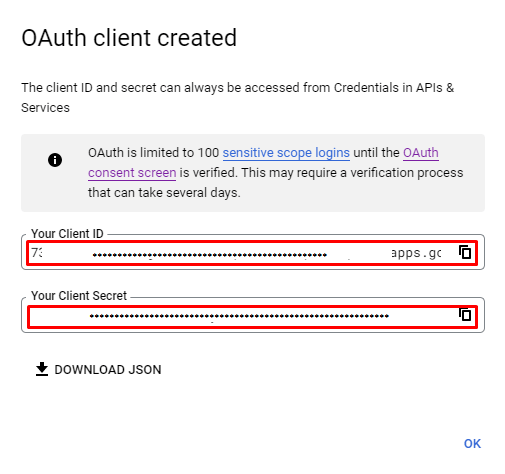
And that’s it! You’ve acquired both the Application Client ID and Application Client Secret.
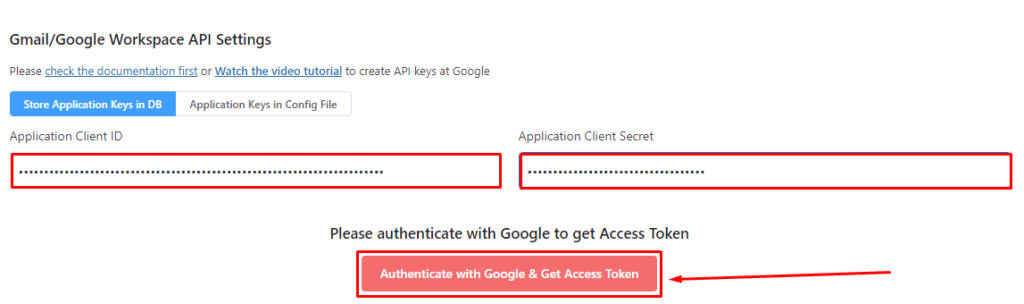
So go back to FluentSMTP and input those on Google Workspace connection settings. then, click the Authenticate button to get access token.
4. Getting Google Workspace SMTP access token
In order to get an access token for setting up Google Workspace SMTP, you need to allow some access. Follow the steps to easily get your access token:
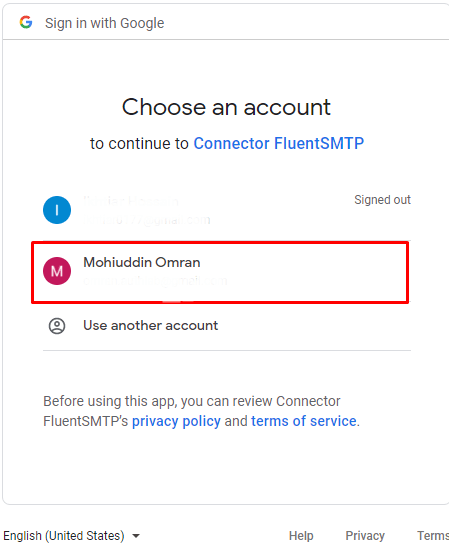
- When you click Authenticate with Google and Get Access Token, you’ll be asked to select your email address. Select the email address you want to proceed with.
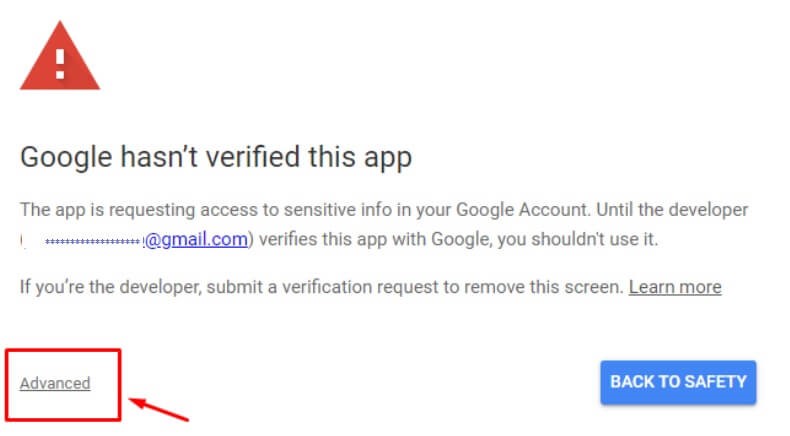
- As your newly created app is a local app, google can’t verify it. Don’t worry about the notice; click on the Advanced option.
- Click Go to connector (unsafe) option.
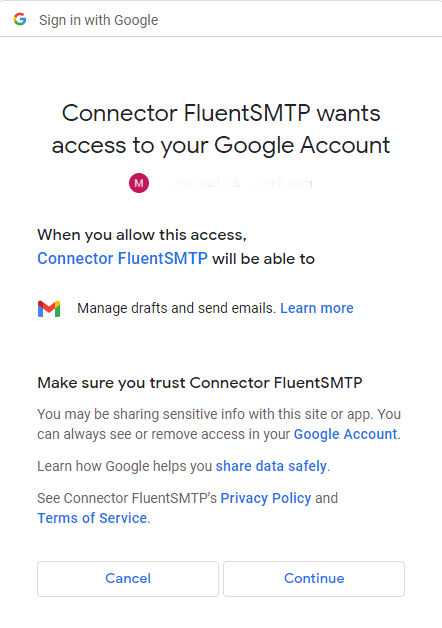
- Check the Manage Drafts and send emails option and confirm your choice by clicking Continue.
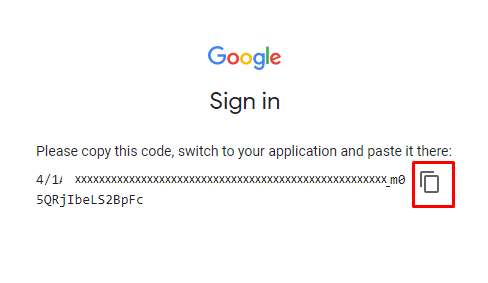
- Copy the code by clicking on the copy button on the right side.
Now paste the code (that you just copied) in the Access Token box. And click on Save Connection Setting.
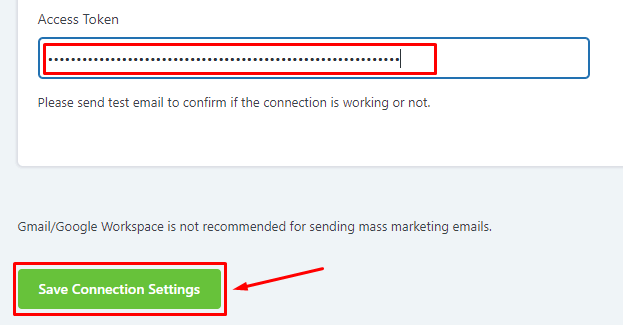
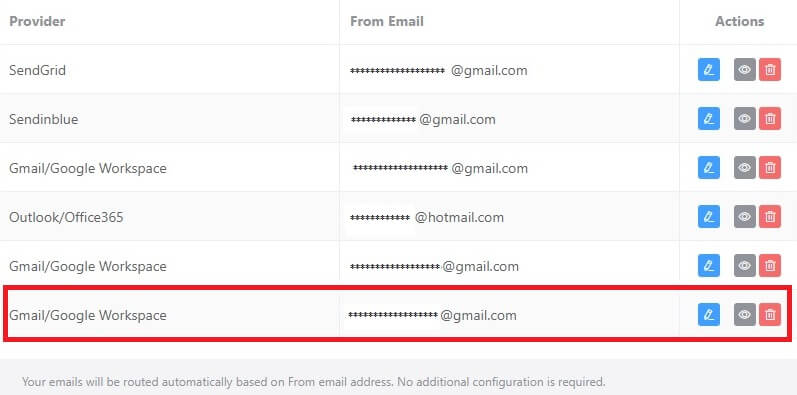
You are all done with setting up Gmail/google workspace with FluentSMTP. You should see it saved as below:
Test email deliverability with Google Workspace SMTP settings
Email deliverability issue is always a top priority for email marketing. One of the common yet frustrating problems is WooCommerce emails not sending. So, now it’s time to check email deliverability from the email service provider you just added. The simplest way to test WordPress email deliverability is by using the FluentSMTP plugin. This tool allows you to quickly log and view all emails sent from WordPress.
To test whether your WordPress emails are working or not:
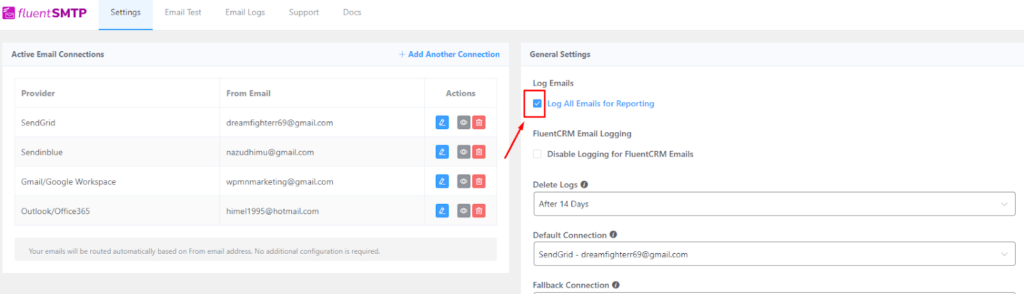
- Go to FluentSMTP and switch to the Settings tab.
- From the sidebar, enable email logging by checking Log all emails from reporting box. This will enable email logging.
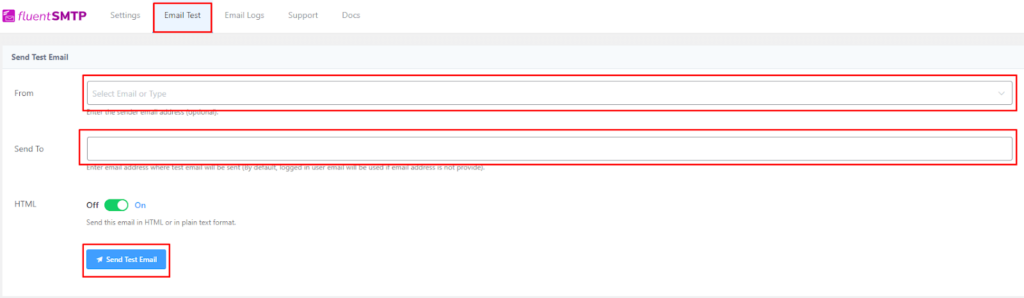
- Now click on the Test Email tab, and select the Google Workspace account you just created as the From email. For the Send To field, you can provide any email address of your choice. and click Send Test Email button to test email deliverability. Finally, click Send Test Email to send a test email.
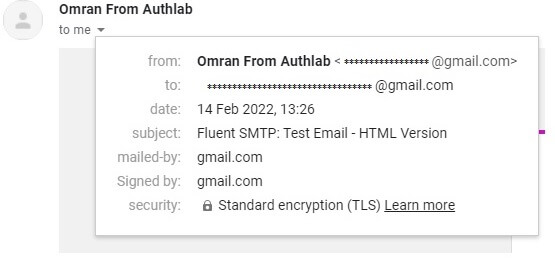
You can check the inbox to see if the test email landed successfully.
5. Finally, click on Email Logs from the upper bar. Here you can see you sent emails with the email addresses. There is also resend, view, and delete button if needed.

That’s how you can check your email deliverability. If you receive an email in your mentioned email inbox and see your sent email in the email logs list, then congratulations, you’ve successfully configured FluentSMTP with Google Workspace!
Subscribe to Our Newsletter
Get our blog articles, tutorials, and information delivered to your inbox!

Ensure reliable email deliverability with Google Workspace SMTP!
FluentSMTP is a feature-rich and lightweight WordPress SMTP Plugin that is free and 100% open source. While Gmail is among the most reliable email client in the world. Combining these two tools, your WordPress emails will be sent reliably and securely.
We hope this article helped you easily configure Google Workspace SMTP on WordPress. If this article helped you, let us know in the comment section. Also, you can check how to send WordPress emails with Microsoft 365(office 365) account. Feel free to ask any questions!

Mohiuddin Omran
WordPress, automation, eCommerce and growth marketing specialist, a WordPress Core Contributor and Media Corps member blending storytelling with technology to craft strategies in SEO, email marketing, and beyond.
Table of Content
Subscribe To Get
WordPress Guides, Tips, and Tutorials
Comments
-
I CANNOT GET THIS TO WORK AND I CAN’T GET ANY HELP AND I’M ANGRY AND FRUSTRATED! I’VE SPENT MULTIPLE DAYS – FULL DAYS – I MEAN FROM THE SUN GOING UP AND THE SUN GOING DOWN THEN THE MOON GOING UP AND IT DOES NOT WORK! WHY IS IT NOT EASIER TO GET HELP AFTER IVE SPENT NEARLY 600 BUCKS AND DAYS AND DAYS AND DAYS OF MY LIFE!!!
-
please follow this doc: https://fluentsmtp.com/docs/connect-gmail-or-google-workspace-emails-with-fluentsmtp/
-

Leave a Reply