

How to Configure SendGrid for WordPress Email Sending


If you have ever tried sending bulk emails from WordPress, maybe you already know how miserably its default mail function fails at delivering a large number of emails. On top of that, your emails sometimes end up in the spam folder too, bringing nothing but a bad reputation for your business.
That’s where SendGrid comes in. It’s a cloud-based email service provider that can:
- Improve email deliverability
- Ensure that your emails are not marked as spam
- Track email opens and clicks
In this blog, we’ll tell you the easiest way of configuring Sendgrid to send emails from WordPress without worrying about ending up in the spam folder.
What is SendGrid
SendGrid is the go-to solution for some of the biggest names in the business world, like Uber, Spotify, Yelp, and Airbnb. SendGrid was first made to be a transactional email SMTP and API service for developers. Now, it also has email marketing features. You can use SendGrid for either one service or both.
SendGrid has a free trial that lasts 30 days and lets you send up to 40,000 emails. After that, you can keep using the free trial for as long as you want, but you will only be able to send 100 emails per day.
You can switch to the Essentials plan, which starts at $14.95 per month and lets you send up to 40,000 emails per month. If you need to send more, each extra email costs $0.001, but if you move up to a higher plan, you can save money.
It can be said that SendGrid is an excellent tool for email marketing if you know how to utilize it. So, let’s show you how to configure SendGrid for sending WordPress emails.
Create a SendGrid account and API key
The procedure of creating both the SendGrid account and API key is pretty easy. Here’s what you need to do.
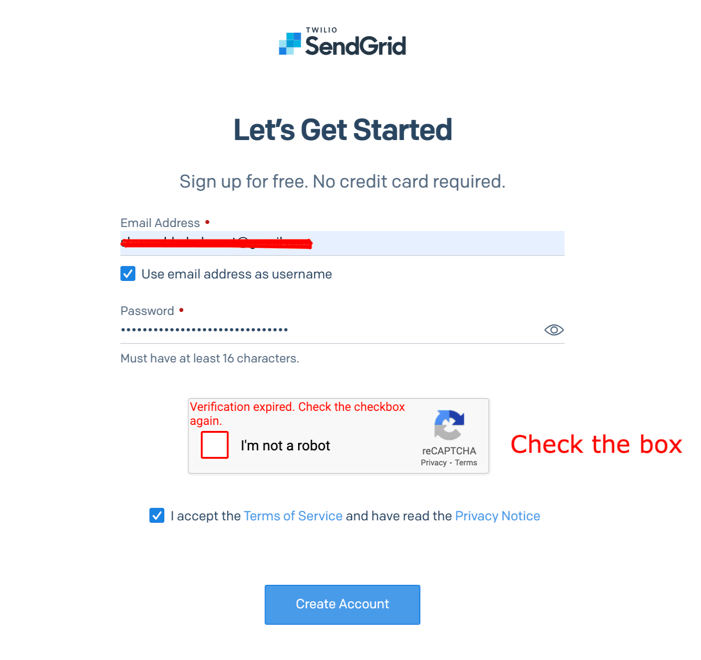
Step 1: Go to the homepage of SendGrid and click on the Start for Free button.

Step 2: Fill up the necessary information and click Create Account.
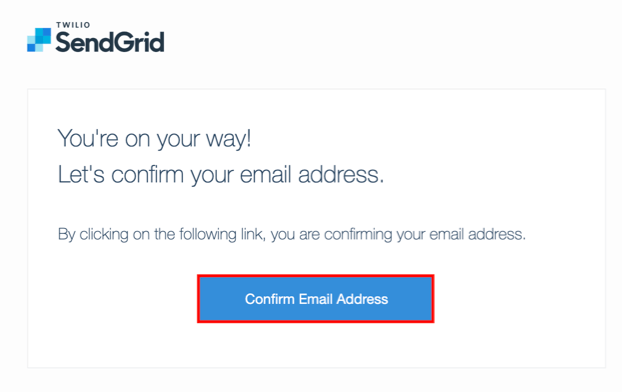
Step 3: Go to your email and confirm the email address.
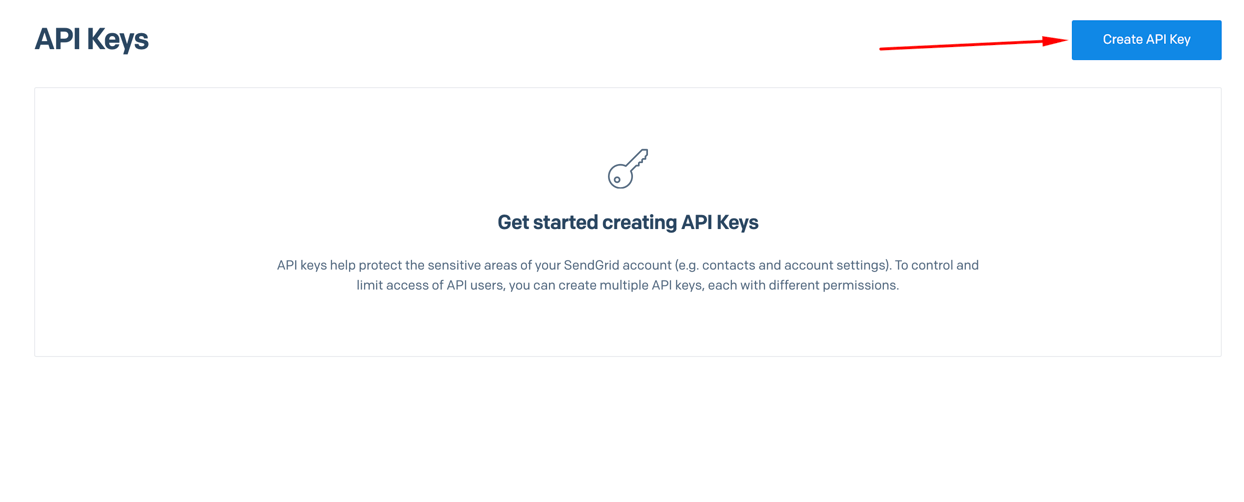
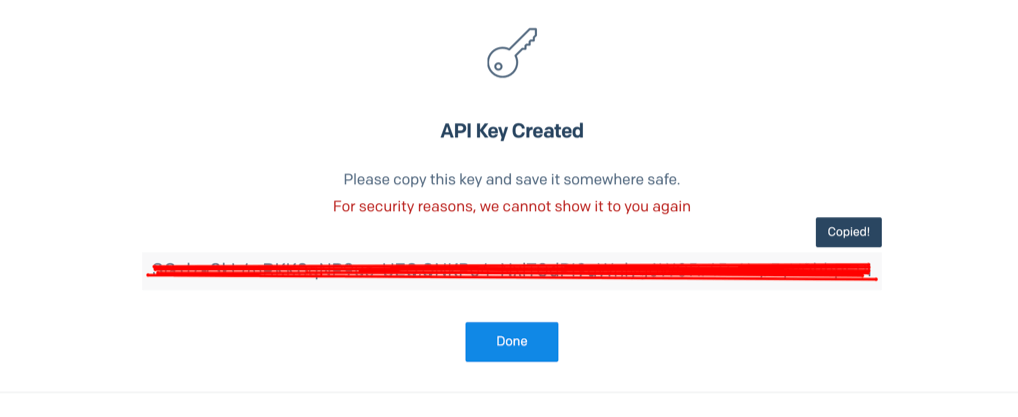
Step 4: Now that your account is ready, you’ll need to set up the API Key. To do that, go to settings and look for API Keys. You can click the link we provided as well. Once you are there, click on the Create API Key button.
On the next screen, give a suitable API key name and select Full Access. Then click Create and View and you are done.
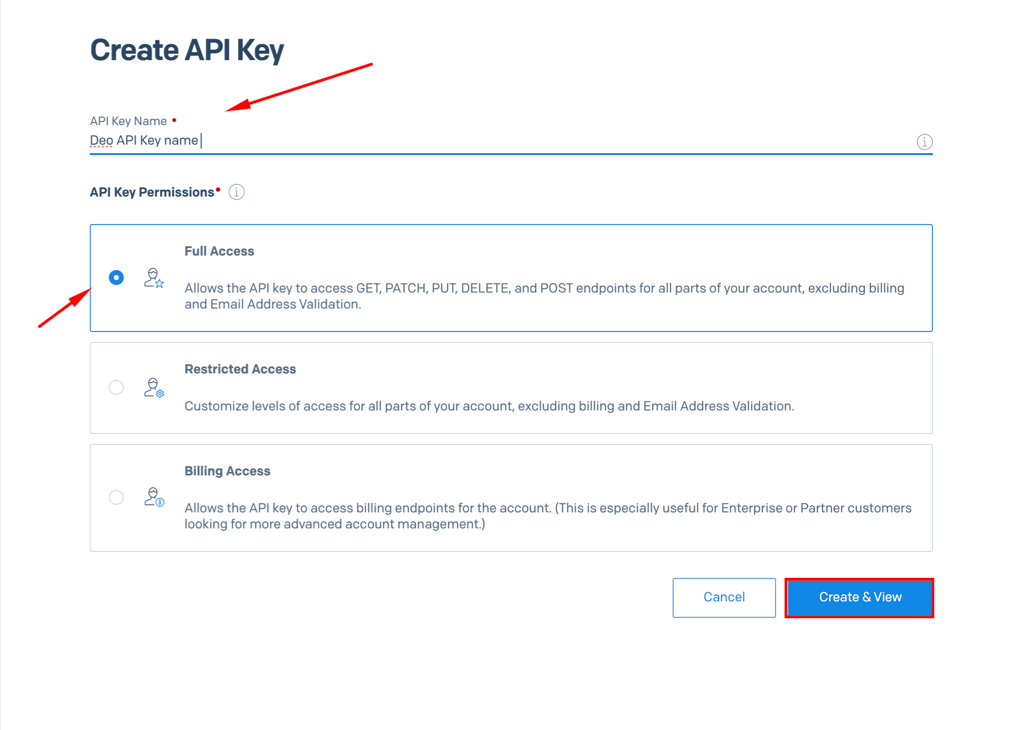
Once your API key is ready, don’t forget to copy it as it’ll be shown only once.
Configuring SendGrid with a WordPress SMTP plugin
To send bulk emails from WordPress, the first thing you’ll need is an SMTP plugin. There are a number of feature-packed SMTP plugins for WordPress. But selecting the right one that’s easy to configure with Sendgrid is your goal here.
Not to mention, the plugin should have the necessary features as well and that’s where FluentSMTP shines. It makes the SendGrid configuration process easy and comes with a long list of features to help with your email marketing. Most importantly, this WordPress SMTP plugin is totally free.
Here’s a step-by-step procedure of what you need to do to configure SendGrid for sending WordPress emails using the FluentSMTP plugin.
1. Download and install FluentSMTP
First thing first, let’s download FluentSMTP. You can either download it from the WordPress repository, or from your WordPress dashboard. Go to your WordPress dashboard and click on Plugins.
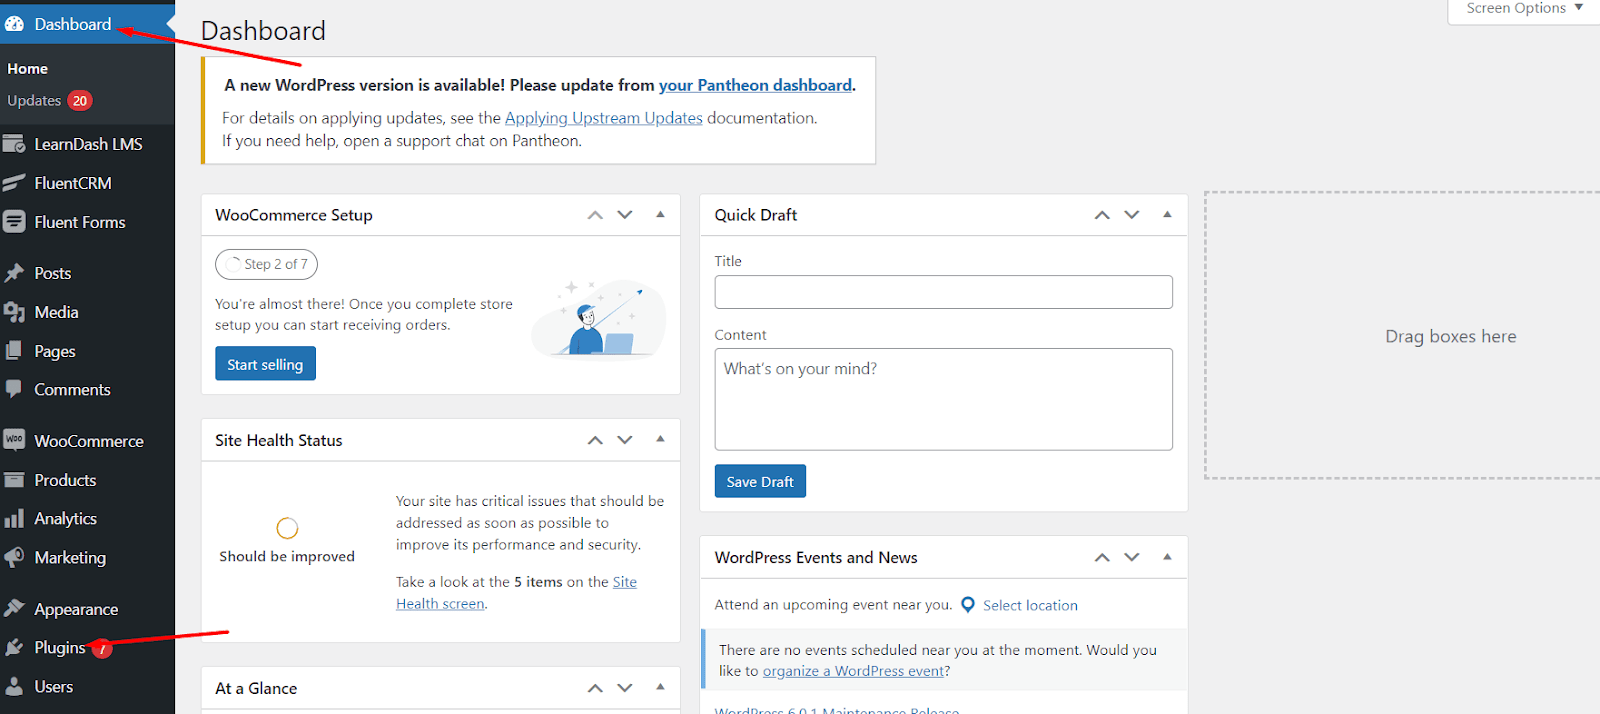
On the next page, click on Add New.
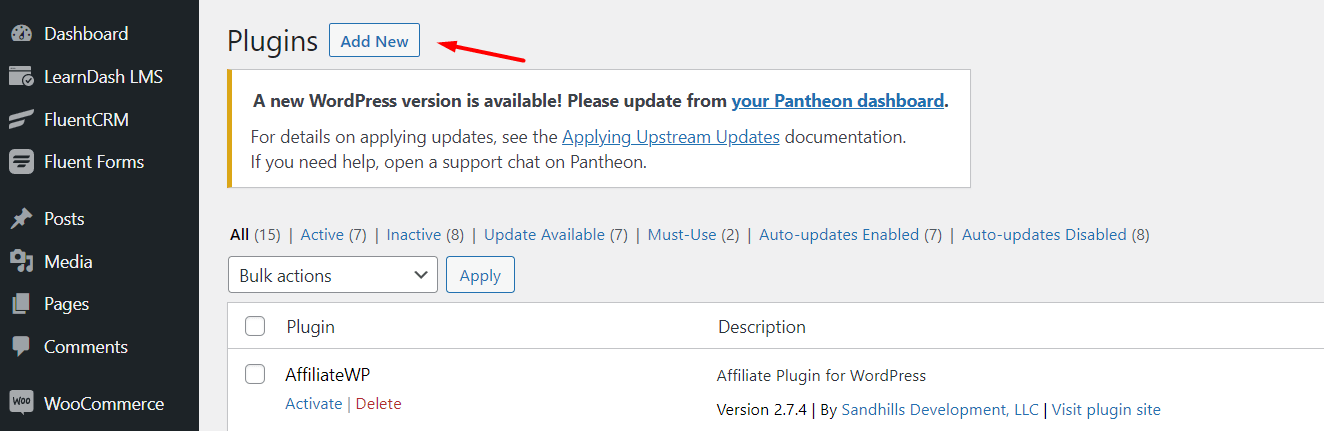
Type FluentSMTP in the search box.
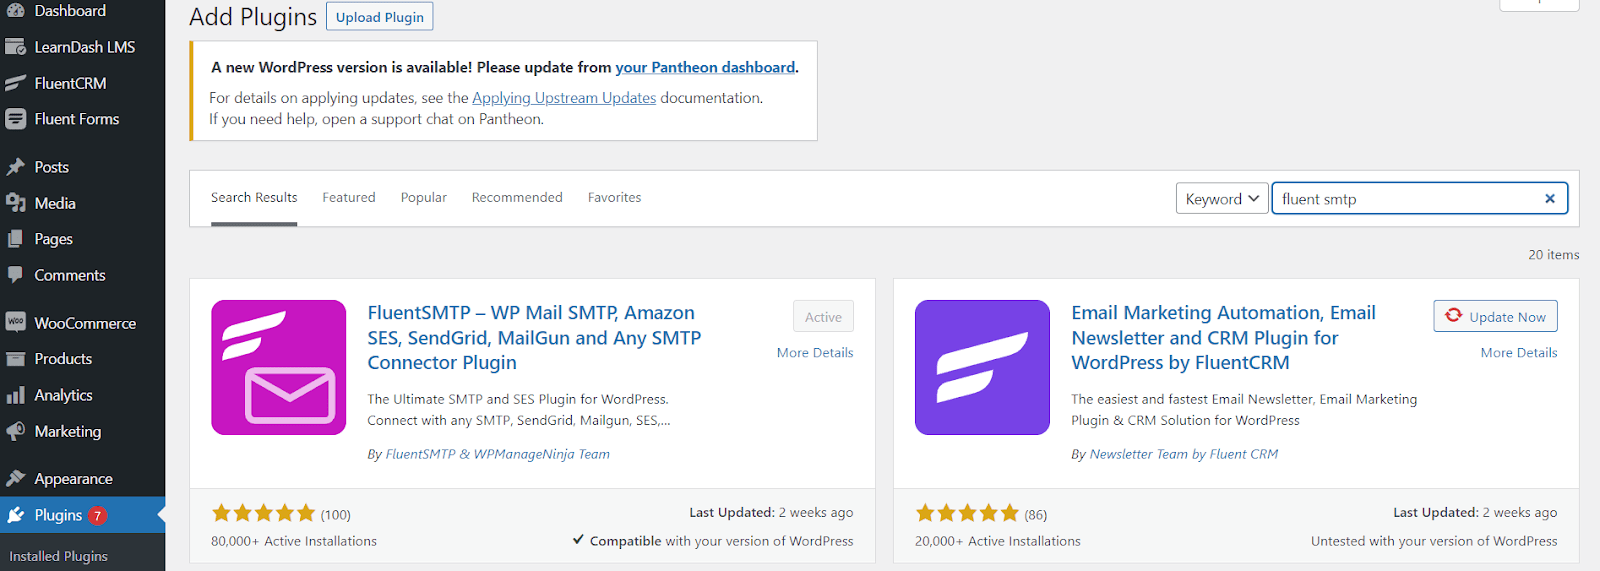
After downloading the plugin, don’t forget to install and activate it.
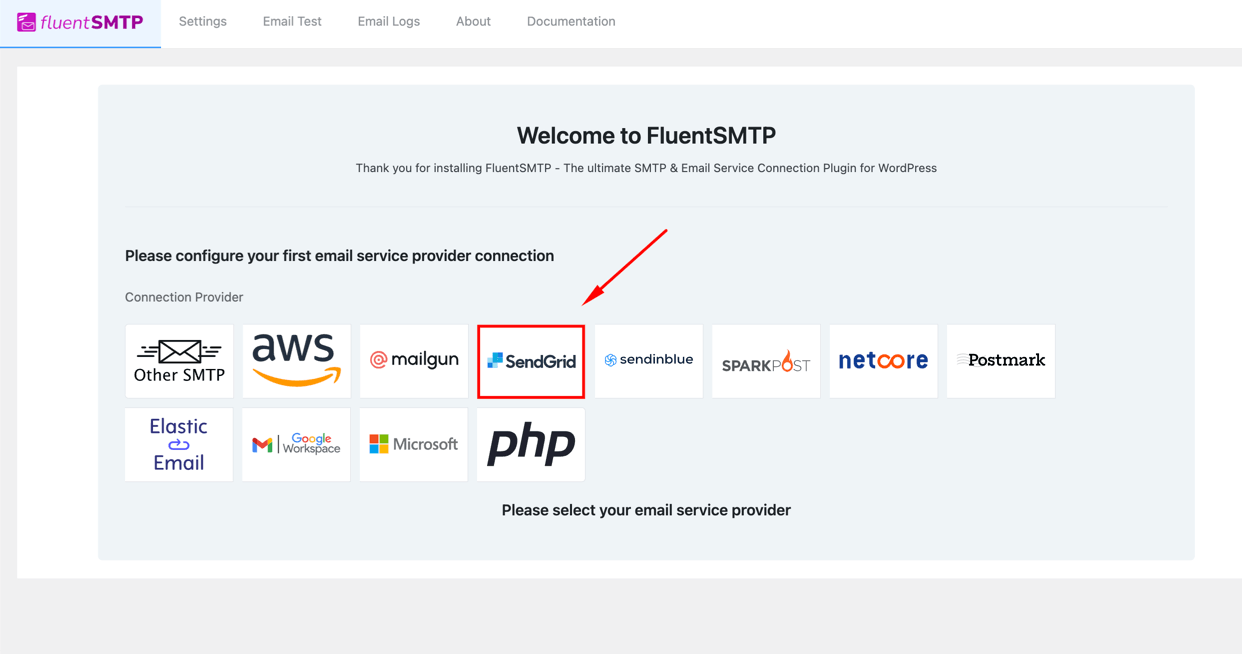
2. Set up the process of SendGrid to send WordPress emails
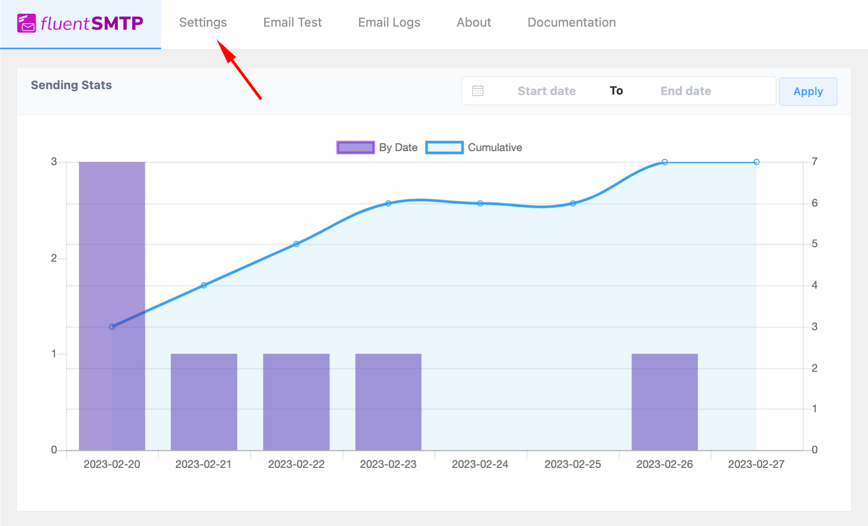
To configure SendGrid with FluentSMTP, you’ll have to go to the dashboard of FluentSMTP. To do that, click on plugins, and then select FluentSMTP. The dashboard will look something like below and you need to click on Settings.
From all the available options of connection providers, select SendGrid.
Fill up all the necessary boxes and click on Save Connections Settings.

3. Send a test email
To check whether the configuration is done correctly, you can send a test email from the FluentSMTP dashboard by clicking on Test email.
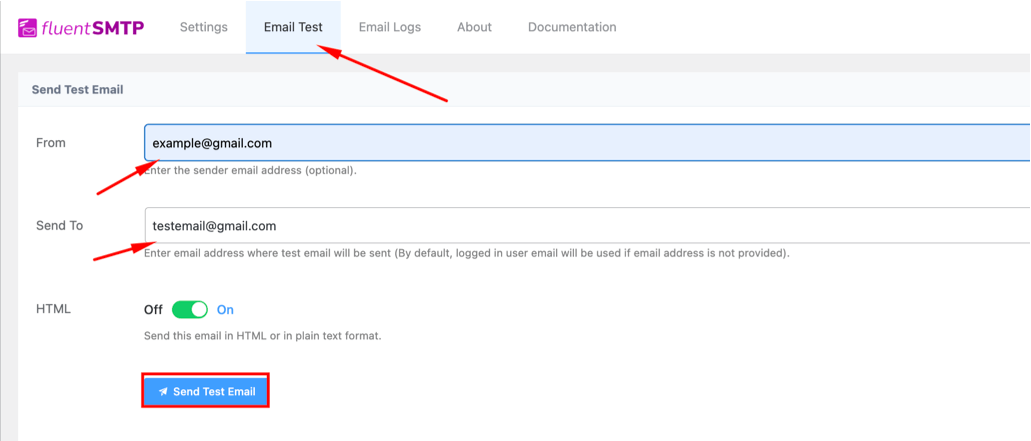
And if you receive the email, SendGrid is configured to send your WordPress emails.
Wrapping Up
We understand the struggle you have probably had to put up with to ensure proper email deliverabitly. But we hope this blog was enlightening enough to solve that problem. Now you can easily send out your WordPress email, no matter how many you want to send at the same time.
Don’t forget to let us know if you face any trouble while setting up SendGrid with FluentSMTP. You can also check out this documentation for more assistance.
Sakhawat Showrabh
Table of Content
Subscribe To Get
WordPress Guides, Tips, and Tutorials


Leave a Reply