

How to Test Your WordPress Emails and Verify Inbox Delivery in 15 Minutes


You’ve just configured a new SMTP plugin, updated your DNS records, and sent a test email. WordPress says it went through. But did it?
WordPress email is usually a one-way window. You can see that the email was “sent”, but you don’t necessarily know if the email actually reached the user’s inbox.
“It sent” is a starting point, not a finish line. And guess what? You only realize that when someone says, “I never got the email.”
If you’ve recently changed your email setup, switched hosting, added a new SMTP plugin, or started using a new sending domain, you need more than a “sent” confirmation on your SMTP.
In this guide, you’ll learn a practical 15-minute workflow to test whether your WordPress emails are actually reaching inboxes and identify what’s breaking deliverability.
But before that, let’s see why “Sent” doesn’t mean your email was delivered.
Why “Sent” Doesn’t Mean “Delivered”
When WordPress says an email was sent, it usually means one thing: your website successfully handed the message off to a mail server.
That’s it. What happens after that is outside WordPress’s visibility.
The email still has to pass spam filters, authentication checks, email sender reputation checks, and mailbox provider rules before it reaches the inbox. The receiving mail server runs its own checks:
- Checking your DNS records to verify your sending identity
- Scoring the message for spam signals
- Cross-referencing your sending IP against known email blacklist databases
Any one of these checks can quietly fail. And if any of those signals look suspicious, most providers like Gmail or Outlook route the message to spam, promotions, or reject it entirely.
For example, you might submit a contact form and see a successful confirmation message. Your SMTP plugin logs the email as “Sent”. No errors appear anywhere inside WordPress. But the actual email will land in spam because DKIM wasn’t configured correctly after a DNS update.
From WordPress’s perspective, everything worked. From the user’s perspective, the email never arrived.
That gap is what makes email deliverability tricky. A successful send only confirms that the sending process started. It does not confirm inbox placement.
Understanding how WordPress email delivery actually works makes these failure points easier to diagnose. The five tests below are designed to surface each one.
What This 15-Minute WordPress Email Test Covers
Most WordPress email deliverability problems don’t announce themselves with obvious errors. Your forms work, WooCommerce creates orders, and user registrations go through…
From the admin side, everything looks normal.
The first warning signs usually come from user behavior.
For example:
- A customer asks why they never received an order confirmation
- A member can’t find their password reset email.
- Contact form submissions suddenly stop getting replies.
In many cases, the emails were technically sent, but mailbox providers filter them before they ever reach the inbox.
Also note that the cases may vary:
This May Only Affect Certain Providers or Types of Emails
One important thing to note is that sometimes this kind of issues only affects certain providers and certain types of emails. Your emails may arrive normally in Outlook but consistently land in Gmail spam. Or, transactional emails (Such as order confirmations work while marketing emails quietly fail.
Inconsistent Delivery
Another common sign is inconsistent delivery. You send three test emails:
- One arrives in the inbox
- One lands in Promotions
- One disappears entirely
That usually points to authentication, reputation, or SMTP configuration issues rather than a complete sending failure.
Suspicious Patterns
You may also notice suspicious patterns after infrastructure changes. For example:
- Emails stop arriving after switching hosting providers
- Deliverability drops after changing domains
- Spam placement increases after moving to a new SMTP service
- WooCommerce emails fail after DNS updates
Mailbox providers constantly evaluate trust signals behind the scenes, so these problems often appear gradually.
One of the clearest indicators is when your SMTP logs show successful sends, but engagement suddenly drops. Password reset requests increase. Customers ask for invoices manually. Leads stop replying to follow-up emails.
At that point, the issue usually isn’t sending, it’s inbox placement.
What This 15-Minute WordPress Email Test Covers
You don’t need advanced server knowledge to test WordPress email delivery. Most email deliverability problems leave clues. You just need a structured way to test them.
The process we’ll walk through focuses on the same areas mailbox providers evaluate before deciding whether an email belongs in the inbox, Promotions tab, spam folder, or nowhere at all.
- Test 1 – Real Inbox Placement: Send actual WordPress emails and check where they land
- Test 2 – Email Logs and Delivery Reports: Review what happened after WordPress tried to send the email
- Test 3 – Spam Score Testing: Analyze your email against common spam filters
- Test 4 – SPF, DKIM, and DMARC Authentication: Verify your domain’s authentication records
- Test 5 – Blacklist Checks: Check whether your sending IP or domain has been flagged
By the end of the process, you’ll know:
- Whether your emails are reaching inboxes
- Where delivery is breaking down
- What needs to be fixed first
- Whether the problem is related to authentication, reputation, filtering, or SMTP configuration
The 15-Minute WordPress Email Testing Process
Now that you know what the testing process covers, the next step is actually running those checks in the right order.
We’ll start with the simplest and most important one first: sending a real test email and verifying where it actually lands. Because before checking authentication records, spam scores, or blacklist status, you first need to answer one basic question:
Are your WordPress emails reaching the inbox at all?
Step 1: Send a Real WordPress Test Email
The first step is testing your emails the same way your users experience them. Instead of relying on a generic SMTP test button, trigger real WordPress email events and check where those emails land.
Start by testing:
- A contact form notification
- A WooCommerce order email
- A password reset email
Try sending these emails to multiple providers like Gmail, Outlook, and Yahoo, as deliverability behavior may also vary between providers.
Then check your primary inbox, promotions tab, and spam folder.
This quickly tells you whether the issue is widespread, provider-specific, or limited to certain email types.
Sometimes password reset emails fail while contact form notifications work perfectly. Other times, transactional emails arrive normally, but automated emails disappear. Those patterns usually point to authentication, routing, or sender reputation problems rather than a complete SMTP failure.
Step 2: Review WordPress Email Logs and Delivery Reports
The next step is checking what happened after WordPress tried to send the email.
This is where WordPress email logs become useful. They help uncover issues that are easy to miss during normal testing, especially when emails fail silently in the background.
A look at the logs might reveal that:
- The SMTP provider rejected the message
- Authentication failed during delivery
- The receiving server temporarily blocked the email
- The email bounced because of DNS problems

This is also where you can identify patterns.
Maybe Gmail rejects messages that Outlook normally accepts. Maybe password reset emails fail consistently while WooCommerce notifications work fine. Those differences usually point to deliverability issues rather than a broken WordPress setup.
If you’re using FluentSMTP, logs can also show:
- Whether the email was triggered correctly
- Which provider handled the send
- When the email failed
- What error response was returned
That visibility becomes especially important after changing SMTP providers, updating DNS records, or migrating hosting environments.
One important thing to remember, though: Logs confirm sending activity. They do not confirm inbox placement.
An email can leave your website successfully and still land in spam because mailbox providers distrust the sending source. That’s why logs work best alongside inbox testing, spam checks, and authentication validation.
Step 3: Run a WordPress Email Spam Test
At this stage, you already know whether emails are arriving. The next step is figuring out why mailbox providers are filtering, trusting, or rejecting them.
It doesn’t confirm inbox placement, though. That distinction matters because many deliverability issues happen after the email leaves WordPress.
Once you know where your emails are landing, the next step is understanding why.
Email testing tools like Mail-Tester, GlockApps, and MXToolbox analyze your email using many of the same checks mailbox providers use.
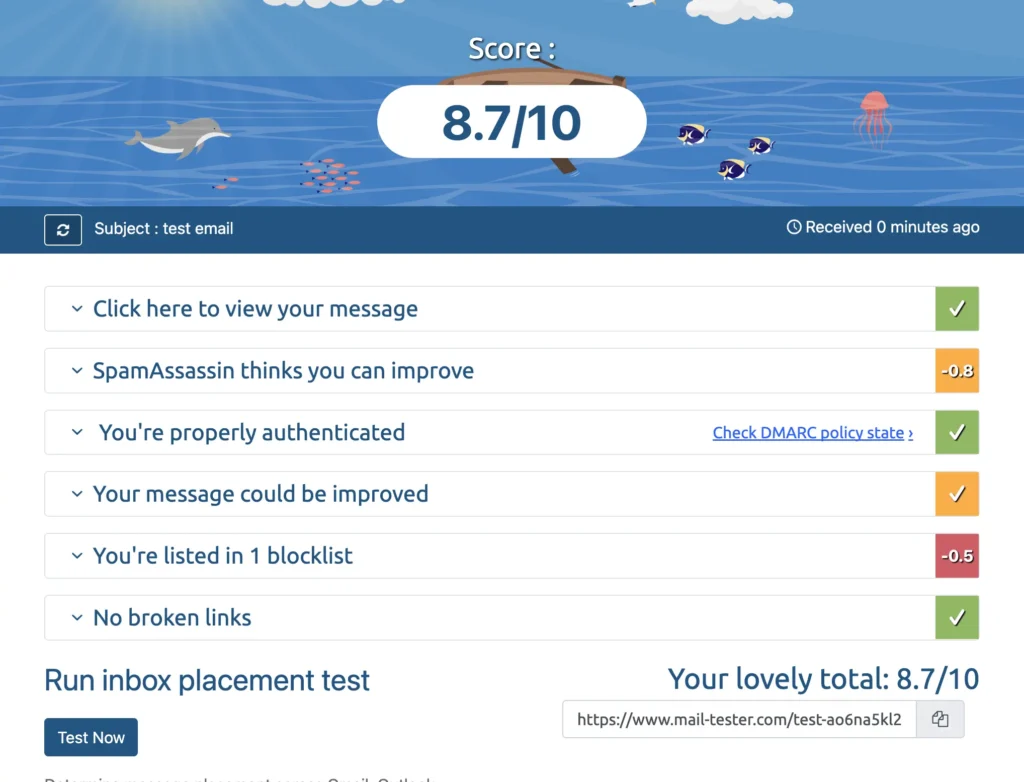
They look for common trust issues such as broken authentication, suspicious sending behavior, DNS problems, blacklist status, and spam-triggering content patterns.
That’s usually how you figure out the technical WordPress email issues.
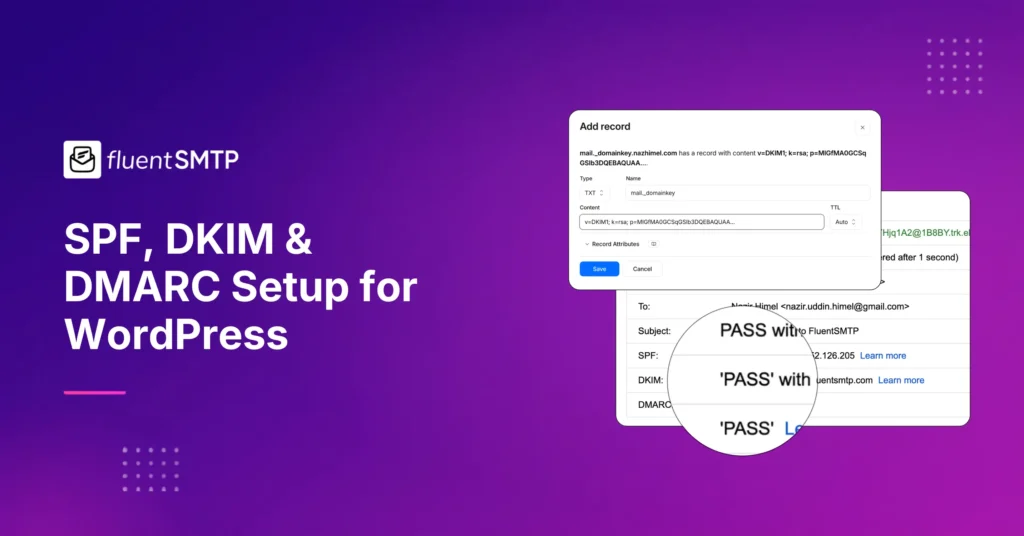
Step 4: Verify SPF, DKIM, and DMARC Records
If the spam score test flags authentication issues, the next step is checking your SPF, DKIM, and DMARC records.
Not sure what these are?
In simple terms, they help mailbox providers verify that your emails are legitimate and actually sent from trusted sources connected to your domain.
- SPF verifies which servers are allowed to send emails from your domain
- DKIM confirms the message hasn’t been modified during delivery
- DMARC tells mailbox providers how to handle emails that fail those checks
A small mistake here can quietly damage deliverability. However, you don’t need to understand every technical detail. What matters is what they do operationally.
For this, you can do a simple authentication check using MXToolbox or the Google Admin Toolbox.
These tools can help you:
- Run an SPF lookup for your domain and confirm the record exists and that it includes the server or service you’re actually sending from.
- Verify your SMTP provider’s SPF include statement is present in the record. If you’re using FluentSMTP with providers like SendGrid, Mailgun, Amazon SES, or Brevo, missing include statements can cause SPF failures.
- Run a DKIM lookup to confirm your domain is signing outgoing emails correctly. This helps mailbox providers verify the email actually came from your domain and wasn’t modified in transit.
- Check whether your DKIM selector returns a valid key. If the selector is missing or invalid, mailbox providers may distrust the email even if sending works normally.
If any records are missing or failing, fix those issues first before continuing with deeper deliverability testing. DNS changes can take time to propagate, so it’s normal for authentication results to update gradually after changes are made.
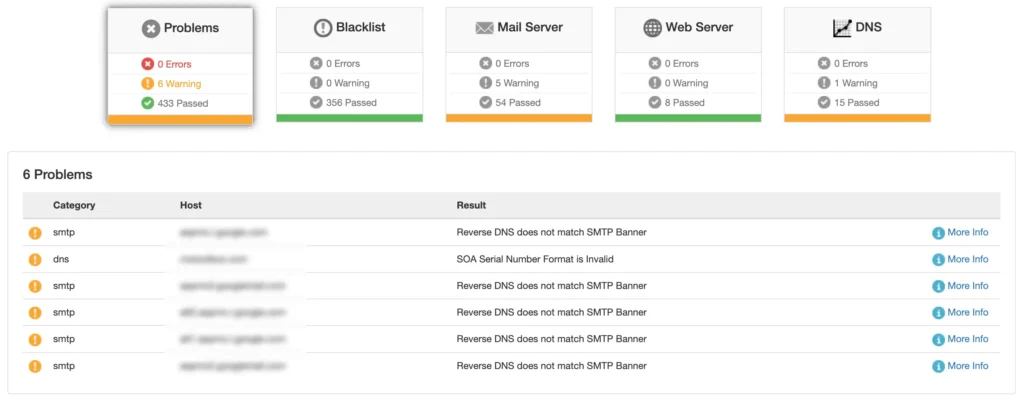
Step 5: Check Your Sending IP Against Email Blacklists
A blacklisted sending IP will cause delivery failures regardless of how well everything else is configured. This is a common problem on shared hosting, where your site shares an outgoing IP with dozens of other sites.
Since your website shares server resources with many other websites, your IP gets penalized if any of them trigger spam complaints. That’s why it’s important to check blacklists after testing authentication and SMTP configuration.
You can start this process by identifying the IP address your WordPress emails are being sent from.
If you’re using an SMTP plugin, you can usually find this in the provider connection details or your hosting mail settings. If your site still relies on PHP mail, the sending IP is typically your hosting server’s outgoing IP.
To run the test:
- Enter the IP address at MXToolbox Blacklist Check and run the lookup.
- Review the results. Listings on major databases such as Spamhaus, Barracuda, SORBS will have a significant effect on delivery.
- If the IP is listed, also run a domain-level blacklist check. Domain and IP listings are separate, and both can affect delivery.
In many cases, blacklist issues are a strong sign that your site has outgrown default hosting-based email delivery.
For example, you might configure everything correctly inside WordPress, pass SPF and DKIM checks, and still struggle with spam placement because your hosting server shares a poor reputation with unrelated websites.
We recommend moving your WordPress email sending to a dedicated SMTP provider like toSend. It’s built on one of the best infrastructures and is one of the cheapest at 1000 emails for just $0.3!

Final Thoughts
Most WordPress email problems don’t start with obvious errors. Emails appear to send normally, but inbox placement quietly breaks in the background.
This usually happens because of authentication issues, server reputation, SMTP configuration, or spam filtering; however, running a structured testing workflow helps you catch them before your users start missing important emails.
If you want to improve your setup further, our guide on WordPress email issues and fixes is a good next step for diagnosing deeper deliverability issues.
Frequently Asked Questions

Nazir Himel
“Produce value through quality content” – is the motto I live by. Content Marketing, SEO, and Email Marketing are my primary interests and if I’m not busy with any of them, you’ll probably find me roaming around the city.
Table of Content
Subscribe To Get
WordPress Guides, Tips, and Tutorials


Leave a Reply