

How to Test Email Deliverability Before It Costs You Subscribers


Email marketing has changed.
A few years ago, if you had a decent email list and a good subject line, reaching the inbox was much easier.
Today, mailbox providers aggressively evaluate sender reputation, engagement, authentication records, and more.
That means your legitimate businesses can struggle with inbox placement.
And the scary part: Mailbox providers may filter your emails out of the primary inbox without notifying you.
That is why learning how to test email deliverability is essential. Because if deliverability fails, your:
- Engagement drops
- Conversions slow down
- Sender reputation gets damaged
- Future campaigns become harder to inbox
The good news is that most email deliverability issues can be detected early.
Once you know how to check email deliverability properly, you can identify a pattern before the issue starts doing it works.
This guide will teach you exactly what needs to be done to save your emails.
What Email Deliverability Testing Actually Means
Email deliverability testing is the process of proactively checking all the technical and content-based factors that determine whether your emails reach the inbox. It involves both pre-send and post-send deliverability testing.
Before we move into how to test email deliverability, it is important to understand what email deliverability actually means.
Delivery Rate vs Deliverability Rate vs Inbox Placement Rate
These three terms get used interchangeably, and they mean very different things.
| Metric | Definition | Example |
|---|---|---|
| Delivery Rate | The percentage of emails accepted by the recipient’s mail server without bouncing. | You send 1,000 emails, 980 reach the server, 20 hard bounce; your delivery rate is 98%. |
| Deliverability Rate | The percentage of sent emails that successfully avoid spam filters and reach the recipient. | Of 1,000 emails sent, 850 bypass spam filters and reach subscribers; your deliverability rate is 85% |
| Inbox Placement Rate | The percentage of delivered emails that land specifically in the primary inbox, not spam or promotions. | Of 980 delivered emails, 780 land in the inbox and 200 go to spam; your inbox placement rate is 79% |
Why You Should Test Email Deliverability?
Most deliverability problems start quietly.
You usually do not wake up one morning to find all your emails blocked. Instead, the warning signs appear gradually:
- Open rates slowly decline
- Subscribers stop engaging
- Complaint rates increase
- More emails reach spam or promotion
- Inbox placement becomes inconsistent
If you ignore these signs and keep sending emails without identifying the issues. Sooner or later, the damage will start affecting your revenue.
That is why proactive email deliverability testing matters.
Metrics that Matter Most in Email Deliverability Testing
To test email deliverability effectively, you need to know where you need to focus. Here are some of the metrics that can give you the most complete picture:
Inbox Placement Rate (IPR)
Most senders never track this metric because their ESP simply doesn’t surface it. You see delivery rate, open rate, and click rate, but not where the email actually landed. That gap is exactly where deliverability problems hide.
When IPR drops below 85%, it means roughly 1 in 6 subscribers on your list is not seeing your emails!
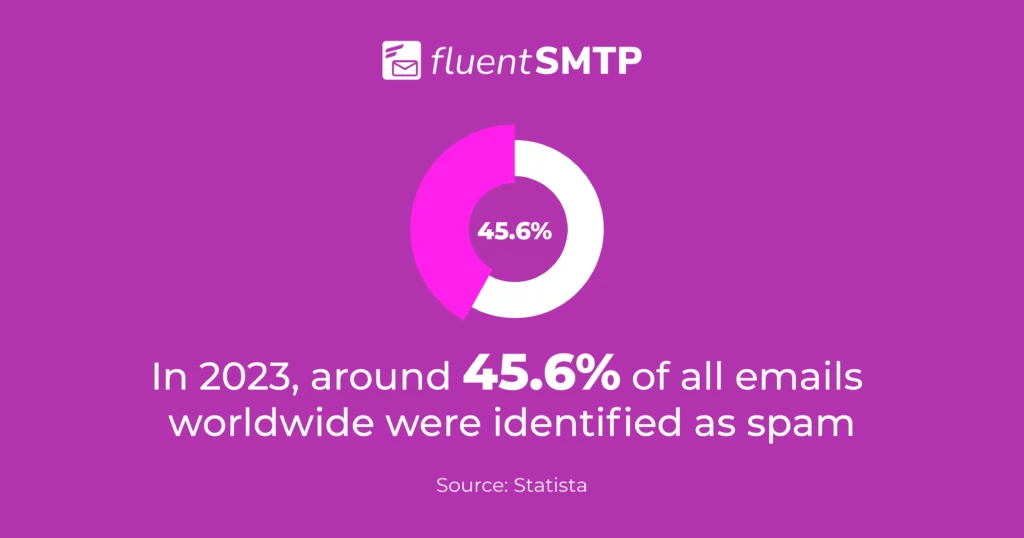
Spam Complaint Rate
When a recipient clicks “Report spam,” that action is recorded by their mailbox provider. Gmail and Yahoo’s 2024 bulk sender requirements set a clear threshold: your spam complaint rate must stay below 0.3%, and ideally below 0.1%.
Bounce Rate (Hard vs Soft)
Not all bounces carry the same weight, and treating them the same is a mistake.
A hard bounce is permanent; the email address doesn’t exist, or the domain is inactive. A soft bounce is temporary; the inbox is full, the server is down, or the message was too large. So, hard bounces above 2% are a serious reputation signal!
Email Engagement Rate
Mailbox providers watch how recipients respond to your emails. Opens, clicks, replies, and even moving an email out of spam are all positive engagement signals that tell Gmail, Outlook, and Yahoo that your emails are wanted.
Low engagement across your list does the opposite; it signals that your emails aren’t relevant!
Unsubscribe Rate
An unsubscribe is not a failure; it’s feedback. An unsubscribe rate above 0.5% per campaign is worth investigating from a deliverability angle.
Unsubscribing often indicates a list management issue. You might be emailing people who don’t remember opting in, or you’re sending marketing emails too frequently.
How to Test Email Deliverability: A Step-by-Step Process
Testing email deliverability is not about running tests through one random tool and hoping everything looks fine.
A proper email deliverability testing involves reviewing multiple factors that mailbox providers evaluate before deciding whether your email deserves inbox placement.
Let’s go step by step and see how to test email deliverability properly before launching important campaigns.
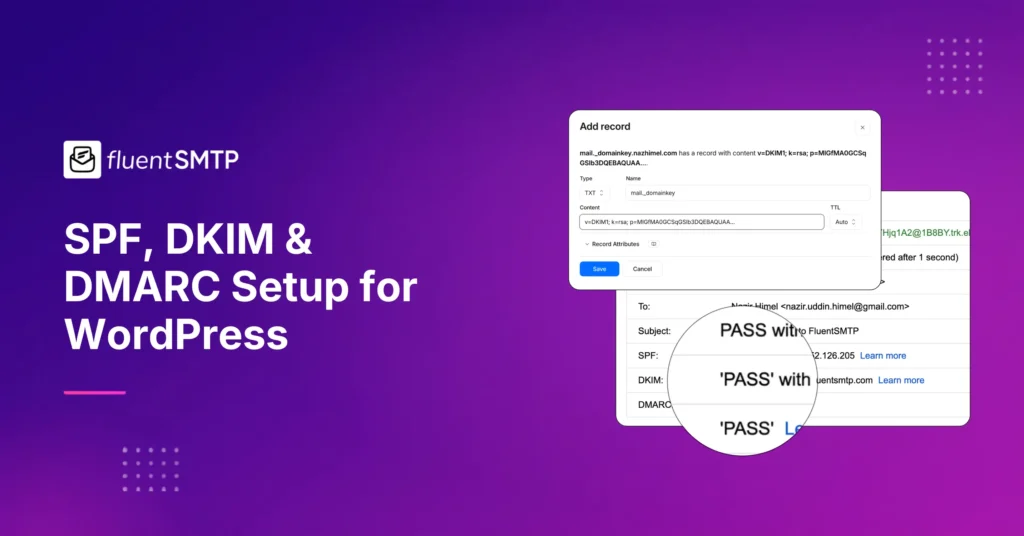
Step 1: Verify Your Email Authentication Records
Email Authentication is the foundation of deliverability. Without it, mailbox providers have no way to confirm that your emails are actually coming from you, and they’ll treat your messages with deep suspicion.
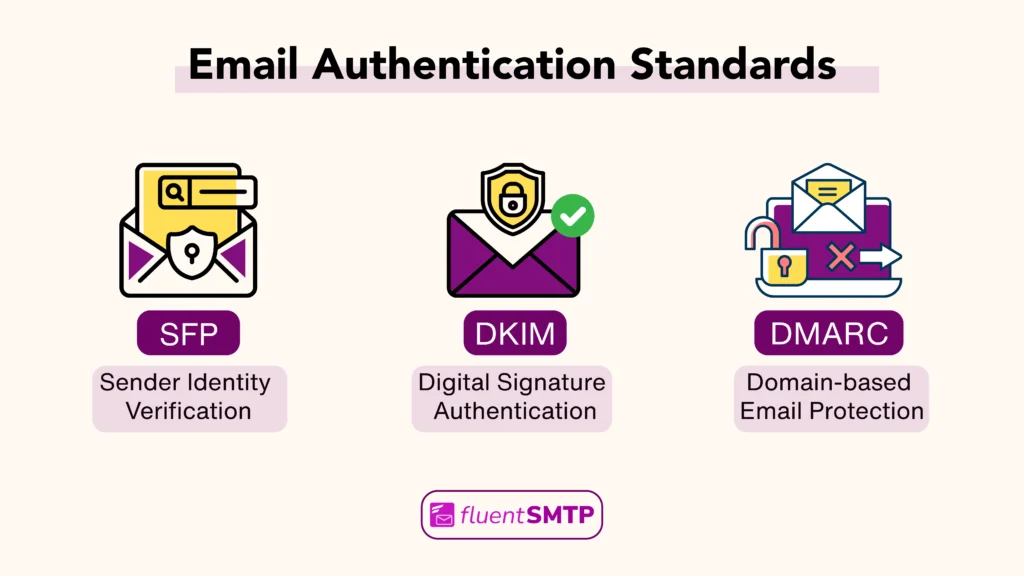
The three core authentication records you need in place are:
SPF: Sender Policy Framework tells mailbox providers which servers are allowed to send emails on behalf of your domain.
Without SPF, receiving servers may reject or spam-filter your emails outright.
DKIM: DomainKeys Identified Mail adds a digital signature attached to your outgoing emails that lets receiving servers verify the message hasn’t been tampered with in transit. It also builds domain reputation over time.
DMARC: DMARC builds on SPF and DKIM. It tells receiving servers what to do when authentication fails (nothing, quarantine, or reject) and sends you reports on who is sending email from your domain.
How to verify: Use MXToolbox to check your SPF, DKIM, and DMARC records for free. Enter your domain and run the diagnostic. You’re looking for passing results on all three, with no syntax errors or missing selectors.
Step 2: Check Your Sender Reputation and Blacklists
Your domain and sender reputation tell you how much mailbox providers trust you. Your sender score is built over time based on:
- How recipients interact with your emails
- How clean is your list
- How consistently you follow good sending practices.
Mailbox providers use it to decide whether your emails deserve the inbox or the spam folder.
How to check: There are two things to check here: your reputation score and whether your domain or IP has been blacklisted.
- Google Postmaster Tools: If any of your subscribers use Gmail, this is non-negotiable. It shows your domain reputation, IP reputation, and spam rate trends directly from Google. Set it up once and check it before every major send.
- Sender Score by Validity: Gives your sending IP a score from 0 to 100. Above 80 is healthy. Below 70 needs attention.
- MXToolbox: MXToolbox’s Blacklist Check queries 100+ blacklists simultaneously. Run it; if you find a listing, most blacklists have a removal request process; follow it, and also diagnose why you were listed before submitting.
Step 3: Run a Spam Score Test
With perfect authentication and a clean reputation, your email content can still trigger spam filters.
Common issues that can trigger spam:
- Excessive use of capitals or exclamation marks in subject lines
- A very high image-to-text ratio with little readable text
- Broken or redirecting links
- Missing or poorly formatted unsubscribe link
- Using link shorteners that mask the destination
- Having excessive spam-triggering words
How to test: Send your email to Mail-Tester, which gives you a spam score out of 10 and breaks down exactly what’s hurting your score.
Step 4: Test Inbox Placement Across Email Providers
Inbox placement testing tells you where your email actually lands: primary inbox, promotions tab, or spam across different mailbox providers.
How to test: It can be done through seed list testing. You send your email to a set of real test accounts across multiple providers, and the tool reports back exactly where each copy landed.
- GlockApps: Offers 3 free tests. Shows inbox vs. spam placement across 50+ providers with detailed filtering reports.
- FluentSMTP X FluentCRM: Always test with a real email from your actual campaign; your actual subject line, sender name, from address, and content.
Step 5: Review Email Content & Formatting
Beyond every technical detail, one common issue with email deliverability is structural issues within the email that affect deliverability.
Mostly, you need to check them manually. Things to check:
- Text-to-HTML ratio: Your email should contain enough readable text, not just images. An email that is mostly images with very little text looks like spam to filters.
- From name and from address: Use a real, recognizable sender name like “Sarah from FluentSMTP” instead of [email protected].
- Links: Every link in your email should point to a real, secure (https) page that you own, and avoid link shorteners.
- Unsubscribe mechanism: Gmail and Yahoo now require a one-click unsubscribe header (List-Unsubscribe) in all bulk emails, so abide by the rule.
Step 6: Monitor Bounce & Clean Your Email List
Sending to invalid or inactive recipients is one of the fastest ways to damage your reputation. It hampers massively by piling up hard bounces.
Here’s what you need to do:
- Invalid or non-existent addresses: Remove them immediately. These are guaranteed hard bounces and serve no purpose on your list.
- Remove old contacts: These contacts typically do not engage, and work as a spam trap, telling blacklist providers you’re not maintaining your list, so remove them.
Note: If you’re using FluentCRM, it allows you to identify and filter out your old, inactive, or non-exsitent contact using advance filter.
Moreover, with lists and tags, you can segment email contacts based on their activity, so you can send targeted campaigns, which decreases the chances of a high bounce rate.
Quick Checklist: Pre-Send vs Post-Send Email Deliverability Testing
Many businesses only focus on pre-send testing. But true deliverability management requires both pre-send and post-send monitoring.
Here’s a quick checklist of what you should be testing before and after you send your campaigns:
| Pre-Send Testing | Post-Send Monitoring |
|---|---|
| SPF, DKIM, and DMARC Authentication | Domain & Sender Reputation Monitoring |
| Spam Score Testing | Bounce Rate Monitoring |
| Inbox Placement Testing | Spam Complaint Tracking |
| Email Content & Formatting | Engagement Monitoring |
| Email Seed Testing | Blacklist Monitoring |
| Link & Tracking Validation | Unsubscribe & Opt-Out Monitoring |
| Mobile & Device Testing |
Best Practices to Improve Email Deliverability Metrics
Knowing which email deliverability metrics are important is only half the battle; the other half is actively working to keep them in a healthy range.
The good news is that most deliverability improvements don’t require technical expertise. A few consistent habits go a long way in making your emails land in people’s inboxes.
Here are a few things you can do to keep email deliverability matrices within the healthy range:
- Clean Your Email List: Remove hard bounces immediately, long-term inactive contacts, and never use purchased lists.
- Send Emails to Targeted Segments: Send relevant content to the right people at the right frequency based on their behavior and activity.
- Set Up Proper Email Authentication: SPF, DKIM, and DMARC are non-negotiable; without them, mailbox providers have no reason to trust your emails.
- Warm Up New Domains and IPs: Always start small and increase sending volume gradually to build trust with inbox providers over time.
- Keep an Eye on Metrics: Track your inbox placement rate, complaint rate, bounce rate, delivery rate, and other engagement metrics weekly.
- Make Unsubscribing Easy: A simple one-click unsubscribe option reduces spam complaints and protects your sender reputation.
How FluentSMTP X FluentCRM Helps You Test Email Deliverability Metrics?
If you’re sending emails from WordPress via FluentCRM and FluentSMTP, you can test some of the deliverability metrics from both FluentCRM and FluentSMTP.
Checking Email Deliverability Metrics in FluentCRM
FluentCRM provides campaign-level reporting that gives you real deliverability signals for your marketing emails:
- Engagement Metrics: Check engagement metrics such as open rate, click rate, and more. A sudden drop in engagement can indicate an underlying issue.
- Bounce Logs: FluentCRM tracks hard and soft bounces. If a campaign shows a bounce rate above 2%, review the source segments of those addresses; they may have come from an old import, a cold list, or a broken signup form.
- Unsubscribe Rate: View who has unsubscribed from your email list and remove them so they do not receive any further emails.
- List Cleaning: Identify old contacts or inactive contacts, and clean them so that the hard bounce rate stays under the threshold limit.

How FluentSMTP Improves Deliverability
WordPress’s default wp_mail() function sends email through the server’s built-in mail function. It has no DKIM signing, minimal authentication, and a reputation that’s often poor because shared hosting IPs are frequently listed on blacklists.
FluentSMTP solves this by routing all WordPress emails through a dedicated, authenticated SMTP provider of your choice. This means:
- Your emails are sent from a provider with an established IP reputation
- DKIM signing is handled automatically by the provider
- You get delivery logs and failure alerts inside WordPress
How to test: After setting up FluentSMTP, use the built-in “Send Test Email” feature in the plugin settings. Also, with the “Email Logs,” you can identify the successful and failed emails.

How Often Should You Test Email Deliverability Metrics?
This is the question most articles skip. Here’s a practical cadence:
- Before New Campaign: Run a spam score test and a quick authentication check if you’ve made any DNS changes recently.
- Monthly: Check all email deliverability metrics thoroughly every month, so nothing stays unnoticed.
- After Major List Growth: If you’ve added a large number of addresses through a new lead magnet, import, or integration, validate those addresses before sending to the full batch.
- After Deliverability Incidents: If you notice an unusual drop in engagement, a spike in bounces, or receive a direct complaint, run the full 6-step audit before sending again.
- When Switching SMTP Providers or Domains: A new sending domain or IP has no reputation history. Test authentication thoroughly, start with smaller send volumes, and monitor engagement closely for the first 2–4 weeks.
Start Testing Email Deliverability Before You Send
Deliverability problems don’t announce themselves; they accumulate quietly, costing you subscribers, revenue, and sender reputation before you ever notice.
The senders who catch issues early are the ones who build a simple pre-send habit: check authentication, score the content, confirm inbox placement, and trust the data.
If you’re on WordPress, FluentSMTP takes care of the infrastructure layer, replacing the unreliable default mail function with a properly authenticated, SMTP-routed setup.
FluentCRM gives you the campaign-level data to spot patterns over time. Together, they give you the foundation that makes email deliverability tests more reliable.
Run your next send through the steps above. It takes less than 30 minutes, and it’s the best 30 minutes you can spend before hitting send.
Tanzil Ebad Efti
Words are my favorite playground. As a Creative Writer at WPManageNinja, I don’t just produce content; I tell stories. By mixing fiction and metaphors with real-life examples, I turn my writing into a creative journey that’s easy for readers to digest and relate to.
Table of Content
Subscribe To Get
WordPress Guides, Tips, and Tutorials


Leave a Reply