
How to Send WordPress Emails with Brevo (formerly Sendinblue) SMTP


We all know how WordPress’ default PHP mailer is; unreliable and dated. The reason why you should never use WordPress to send emails is that they’ll either get blocked by your hosting or end up in spam.
If you want your emails to be delivered in time and not end up in the spam, you need to integrate an SMTP server into your WordPress site for sending emails.
A reliable SMTP server like Brevo(formerly Sendinblue) overrides WordPress’ default wp_mail() function to send your emails. On the other hand, an SMTP plugin helps you connect to said SMTP server.
And today, we’ll show you how to integrate Brevo with FluentSMTP, one of the most reliable SMTP services for WordPress.
So, let’s get into it!
What is Brevo?
Brevo is regarded as one of the leading transactional email services for WordPress. They offer reliable email deliverability and can be easily integrated to be used as your WordPress site’s default mailer.
To use Brevo as a mailer, you need to integrate it with a reliable SMTP plugin that is easy to set up and offers most of the features for free.
That’s the very reason we’re showing you how to set up Brevo and integrate with FluentSMTP for sending WordPress emails.
In addition, it is strongly recommended by them to use a domain-specific custom email address because it improves reliability, hence, also improving deliverability.
How to Set up the Brevo Mailer with FluentSMTP?
Brevo is an effective and reliable WordPress mailer. To use its mailing service and ensure the deliverability of your WordPress site’s emails, you need yet another reliable SMTP plugin such as FluentSMTP.
Don’t worry. FluentSMTP is a free plugin with some excellent free features. So there’s no cost involved!
An SMTP plugin like FluentSMTP essentially reconfigures WordPress’ wp_mail() function and sends the emails using SMTP instead of PHP mail. Let’s jump into integrating FluentSMTP with the Brevo mailer!
Create and Activate Your Brevo Account
To use its service, first, you need a Brevo account. If you don’t have one, you can create an account for free, without providing your card information.
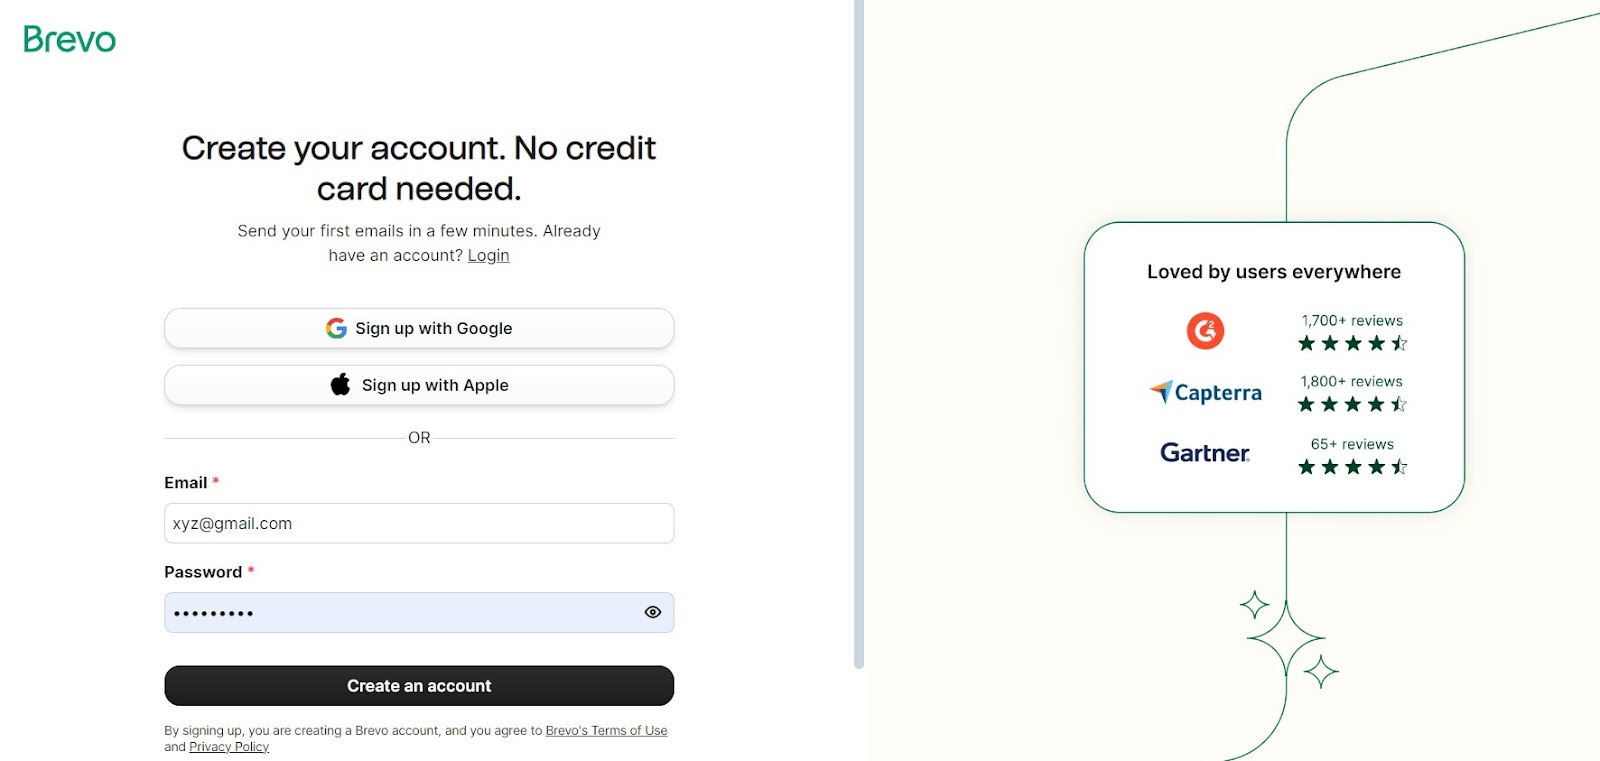
Upon providing your email and generating a password, you’ll get a confirmation email that’ll take you back to your account to fill in user information such as your First Name, Last Name, and Cell Number.
After you provide that info, Brevo will ask for your company details such as— company name and address, team size, how many contacts you have, and whether you plan to sell online or not.
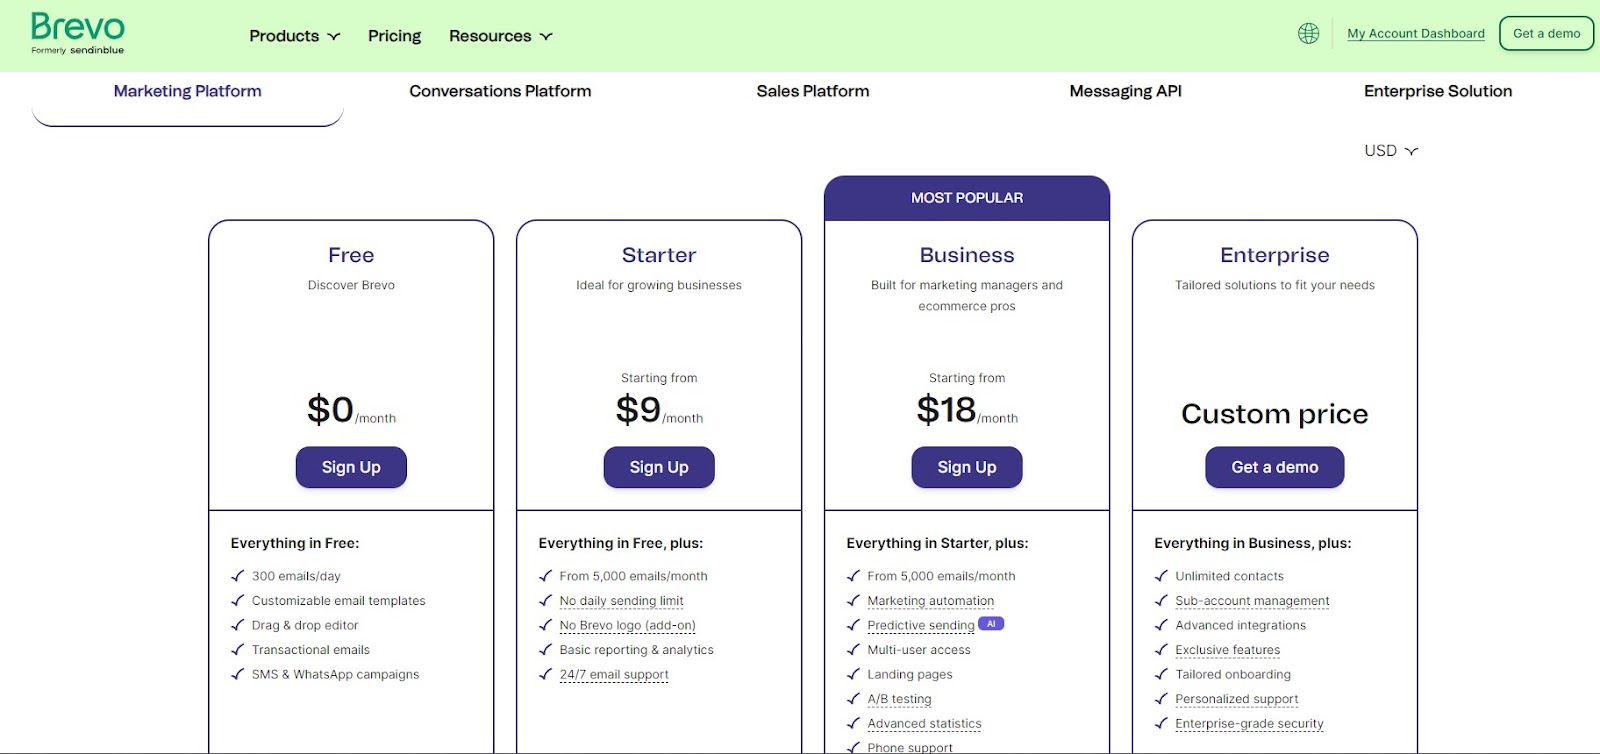
Then, to finish the signing-up process, you’d have to select a plan based on your business requirements. The free version lets you send 300 emails per day. If you need more emails to send you’ll need to choose a paid plan that works for you.
Once you’re done with creating your Brevo account, you can proceed to the next phase.
Verify Your Domain on Brevo
As the next step, we strongly recommend verifying your domain on Brevo. This will electronically sign emails with your domain name. This is what we call the DKIM signature.
Read: What are DMARC, SPF, and DKIM?
DKIM(DomainKeys Identified Mail) is an email security protocol that tells your ISPs that you’re a trusted sender. Authenticating your parent domain with Brevo will help prevent your emails from ending up in the spam folder.
To verify your domain, open the settings menu from the upper right corner click on ‘Senders, Domains & Dedicated IPs’, and go to Domains.

Then add your domain.
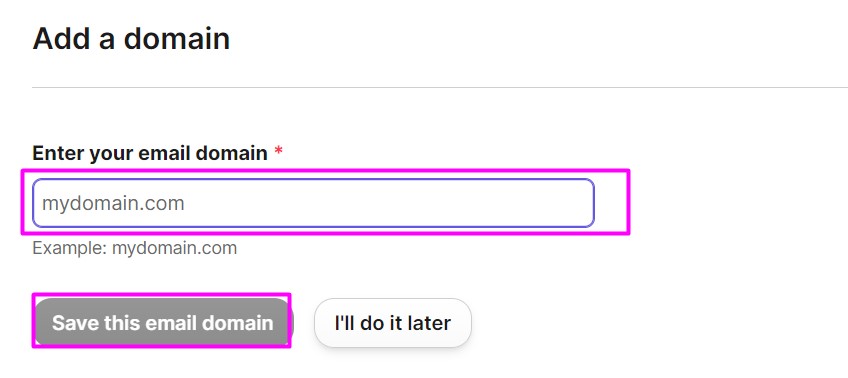
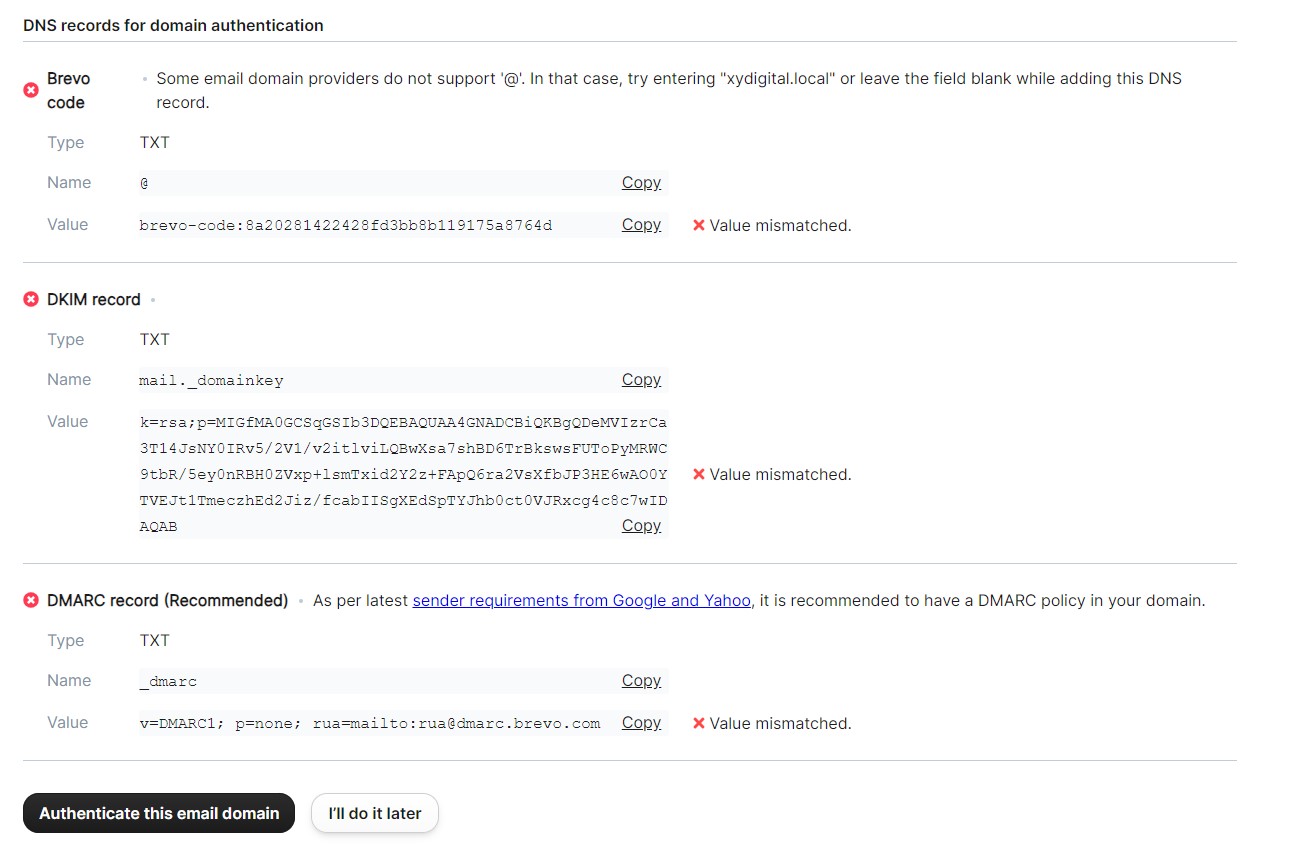
Once you add your domain name, a new window will appear containing several TXT files. You’ll need to add these TXT files to the DNS records on the cPanel of your web hosting account.
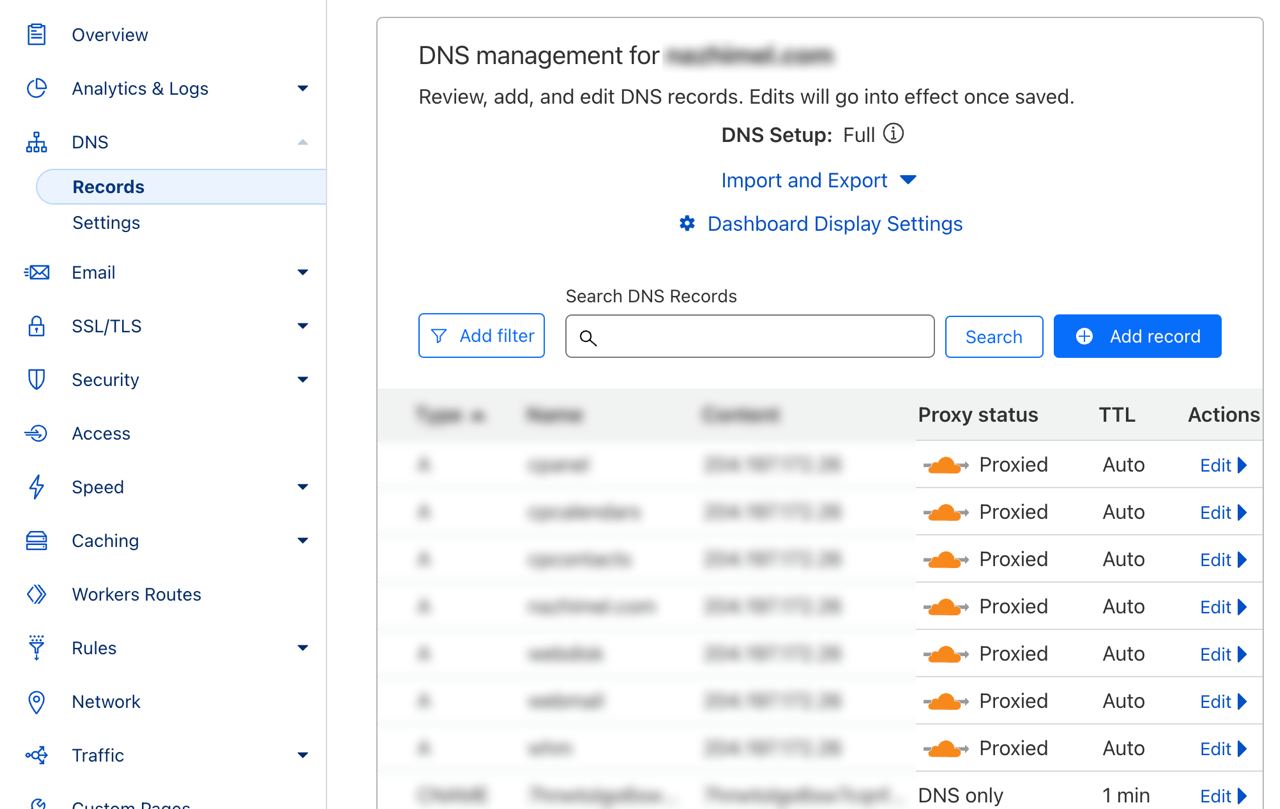
Open up a new window in your browser then log in to your web hosting account and add the TXT records in the designated field.
For example, if you use CloudFlare as your website hosting account the the interface will look the the image below.
After you’ve uploaded the TXT records to the DNS, go back to Brevo and click “Verify & Authenticate” to check if they’ve been configured correctly.
A verified TXT record will display the text ✅ Value matched instead of ❌ Value mismatched shown in the picture above. Note that DNS changes can take 24-48 hours to get verified and authenticated, so be patient if it doesn’t change its value immediately. You can learn more about email DNS settings here.
Download and Install FluentSMTP from the WordPress Repository
Now that you’ve set up your Brevo account, it’s time for the next phase which is setting up your SMTP plugin, in this case, FluentSMTP.
To that, first, go to the Plugins menu in your WordPress dashboard. Then click Add New.
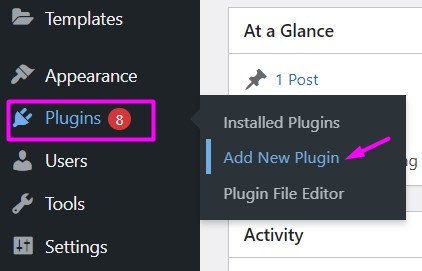
This will take you to the WordPress plugin directory. In the search bar of the directory, type FluentSMTP and click Install Now(FluentSMTP is already installed and activated in the below image).
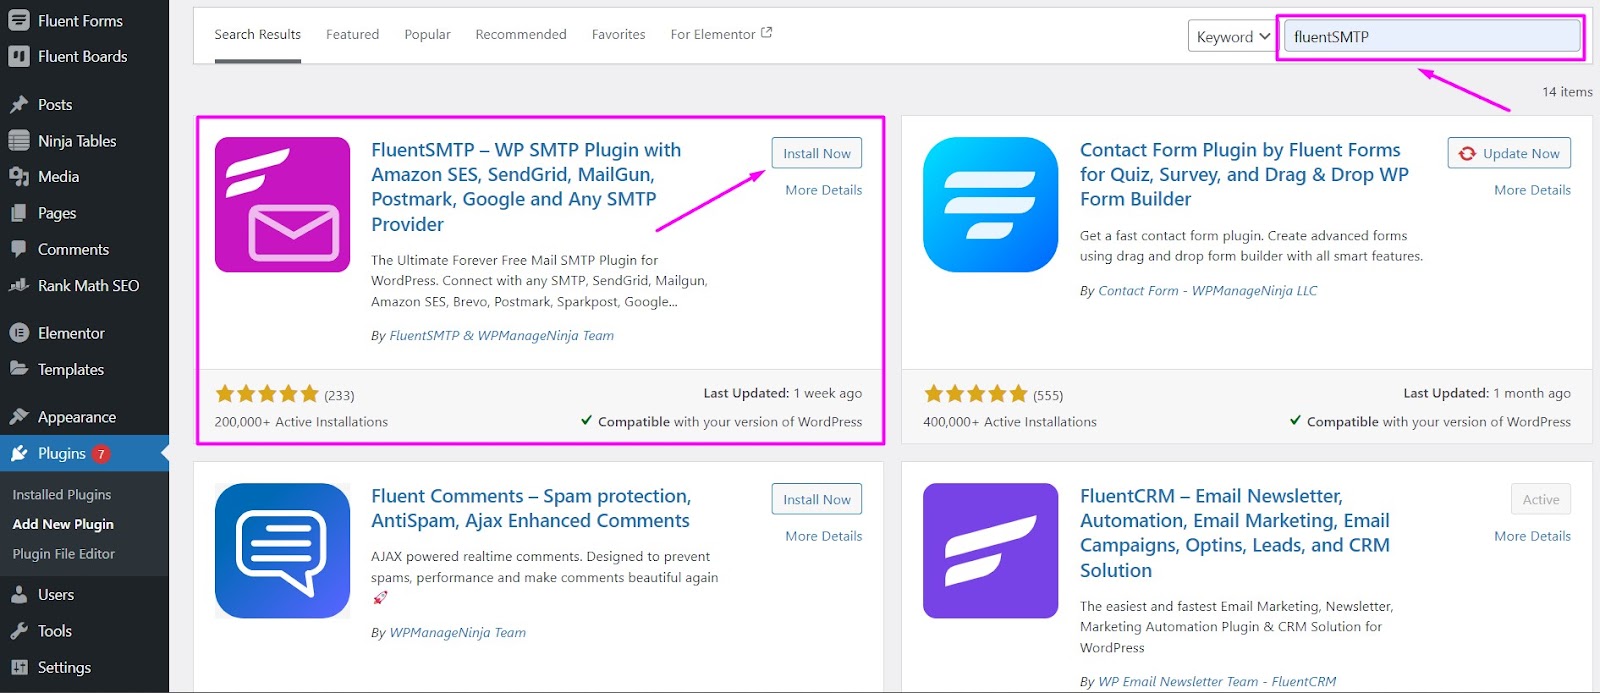
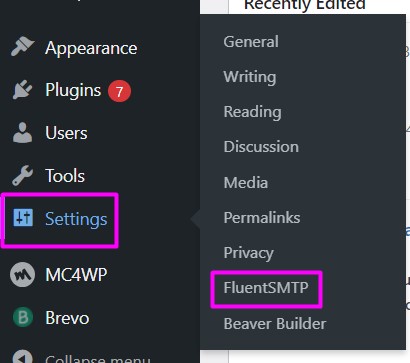
Once installed, you need to activate it from the same window. Activating it will place FluentSMTP in the ‘Settings’ menu and you can access the plugin from there.
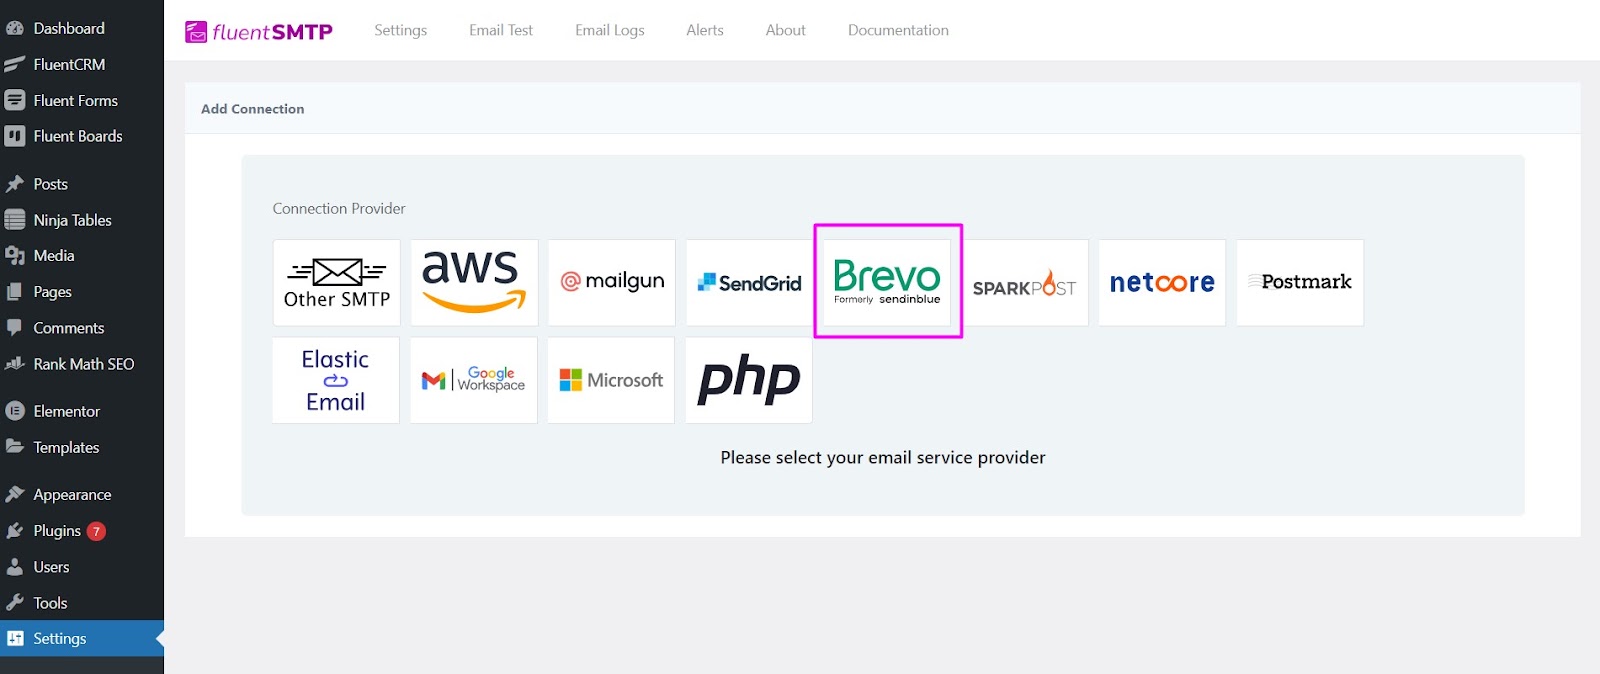
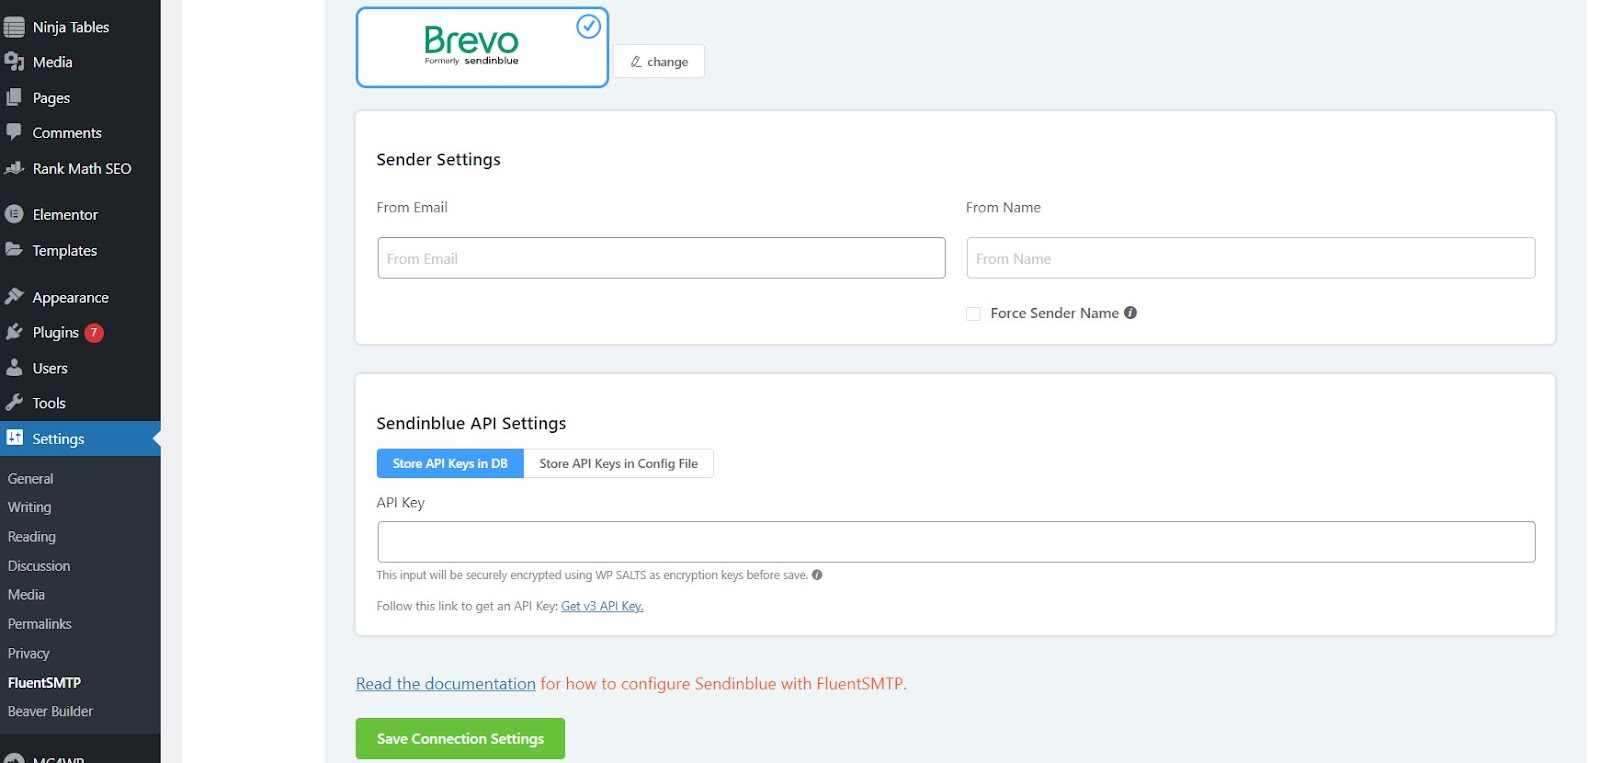
Now you’ll need to choose an email service. Select Brevo from the list of available mailers. The following window will require inputting the From Email from which, all your emails will be sent and the From Name which will be displayed as the sender name.
There’s also an option called Force Sender Name which will force the From Name to be used for all emails, ignoring values set by other plugins.
Retrieve the API Key from Your Brevo Account
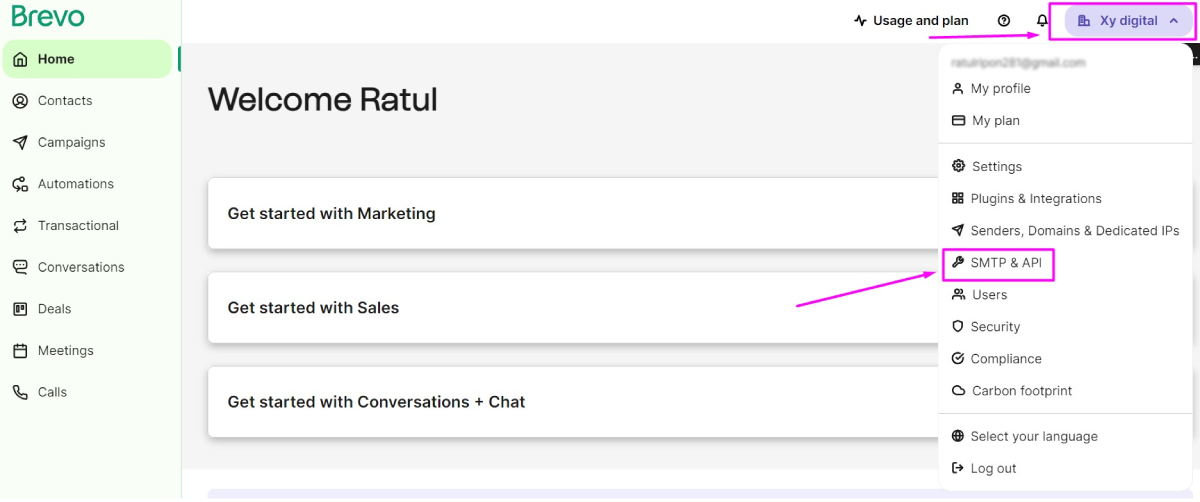
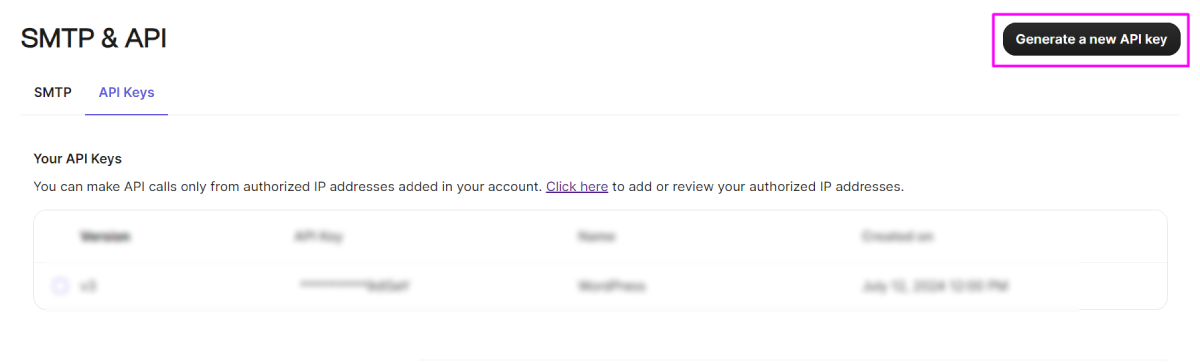
The next step in the integration process is getting the API key from your Brevo account. To get the API key, go to your Brevo account settings menu and then to the SMTP & API option.
Go to the API Keys section and click Generate a new API key.
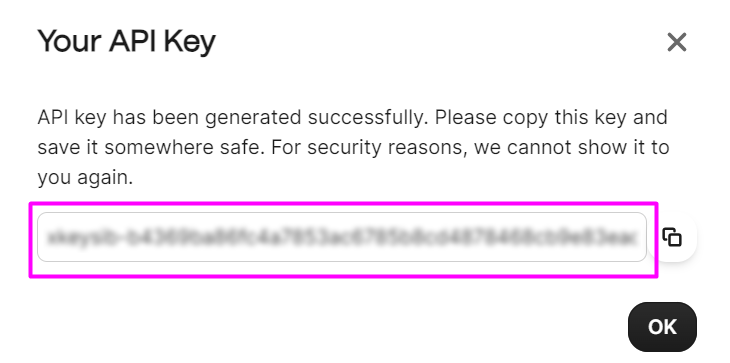
A new information box will appear where you have to assign a name for the API key. Once created, copy your API key and go back to FluentSMTP.
Your new API key is ready to input in the API Key tab now. After doing so, click Save Connection Setting.
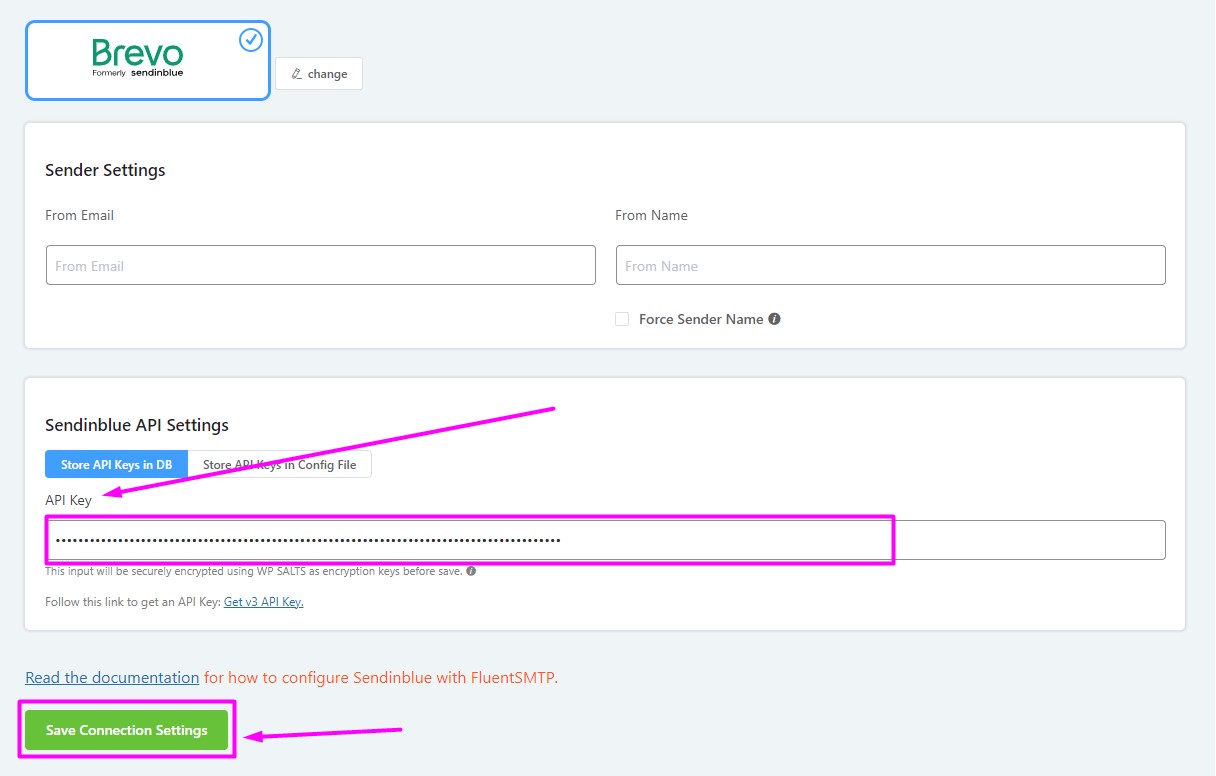
You can choose to store your API key in the database or the config file. Either way, by saving the connection setting, the integration between Brevo and FluentSMTP is finally done!
Test Your Email Deliverability

Enter a ‘From Email’ on the ‘Email Test’ tab. The ‘From Email’ should be the same as the one Brevo set up for you. You can leave it blank as well, but in that case, the default SMTP Driver will be applied.
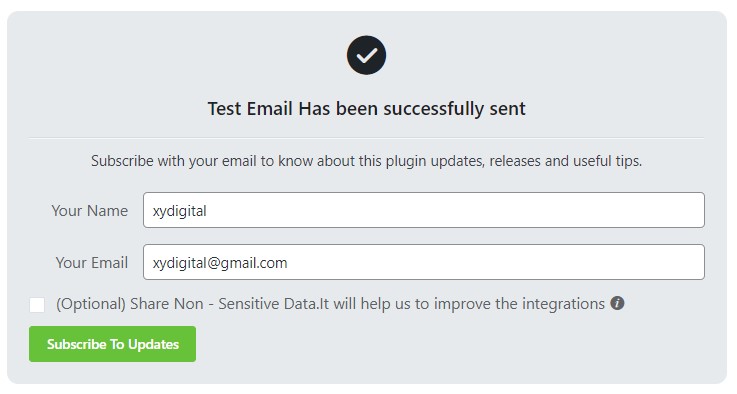
Your SMTP configuration is active when you see the success message.
Start Sending WordPress Emails with Brevo
There are many steps to be taken to ensure proper email deliverability from WordPress. We tried to make this process linear for you through this blog.
We hope this blog helps you send out your emails from WordPress swiftly and without hassle using the Brevo mailer. If you still face any issues setting up Brevo with FluentSMTP, let us know in the comments below!
Also Read:
Tanvir Ahmed
Table of Content
Subscribe To Get
WordPress Guides, Tips, and Tutorials


Leave a Reply