

How to Read an Email Header (What SMTP Leaves Behind)

Every email carries a paper trail most people never see.
Look beyond the subject line and sender name, and you will find a block of text that records every server your message passed through, in order, with timestamps.
That block of text is the email header.
And when a message should have arrived but did not, the header can help you trace exactly what happened along the way.
In this post, we will go through how email headers work, what they contain, and how to read them when something goes wrong.
What Is an Email Header?
An email header is the hidden block of technical data attached to every email, recording the servers it passed through, the authentication checks it ran, and the exact timestamps of each step along the way.
You do not normally see it. Your inbox keeps it out of view and shows you a clean sender name, subject line, and message body instead.
But the header is still there. And in many ways, it is the closest thing email has to a black box recorder.
If you have read our breakdown of how SMTP works, you already know the basic journey: a message moves from server to server before it reaches an inbox. The email header is the written record of that journey, generated automatically as each server handles the message.
How to Find Your Email Header
Every major email client hides the header by default, but none of them delete it. You just need to know where to look.
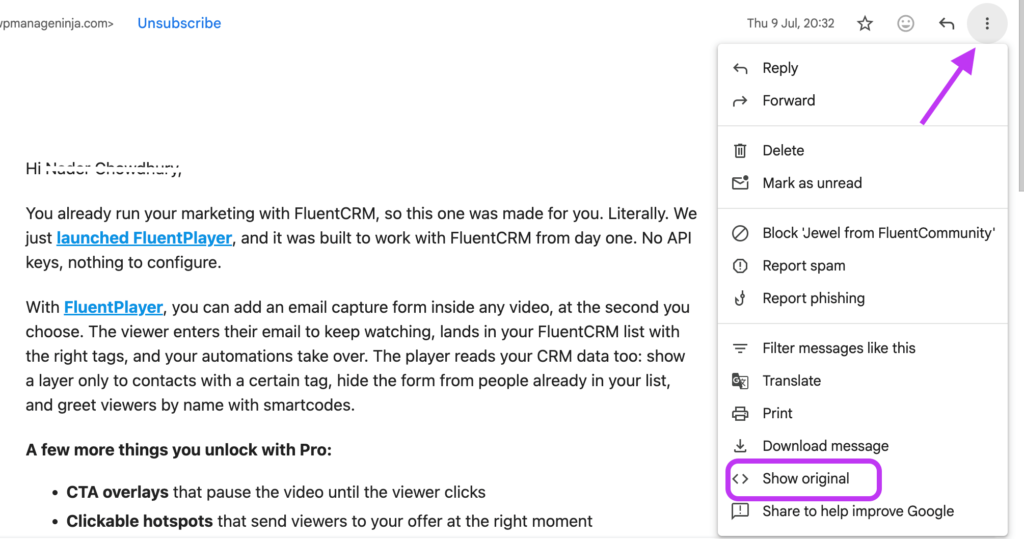
Gmail: Open the email, click the three-dot menu in the top-right corner, and select Show original.
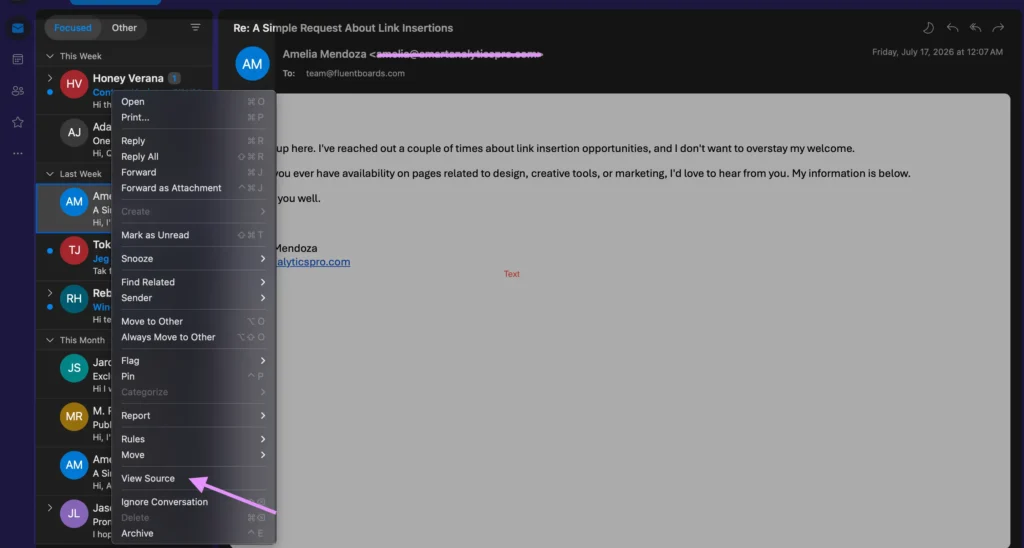
Outlook for Mac: Right-click, or Control+click, the email directly in your message list, not the toolbar. Select “View Source.” It opens in a TextEdit document with the full header above the message body.
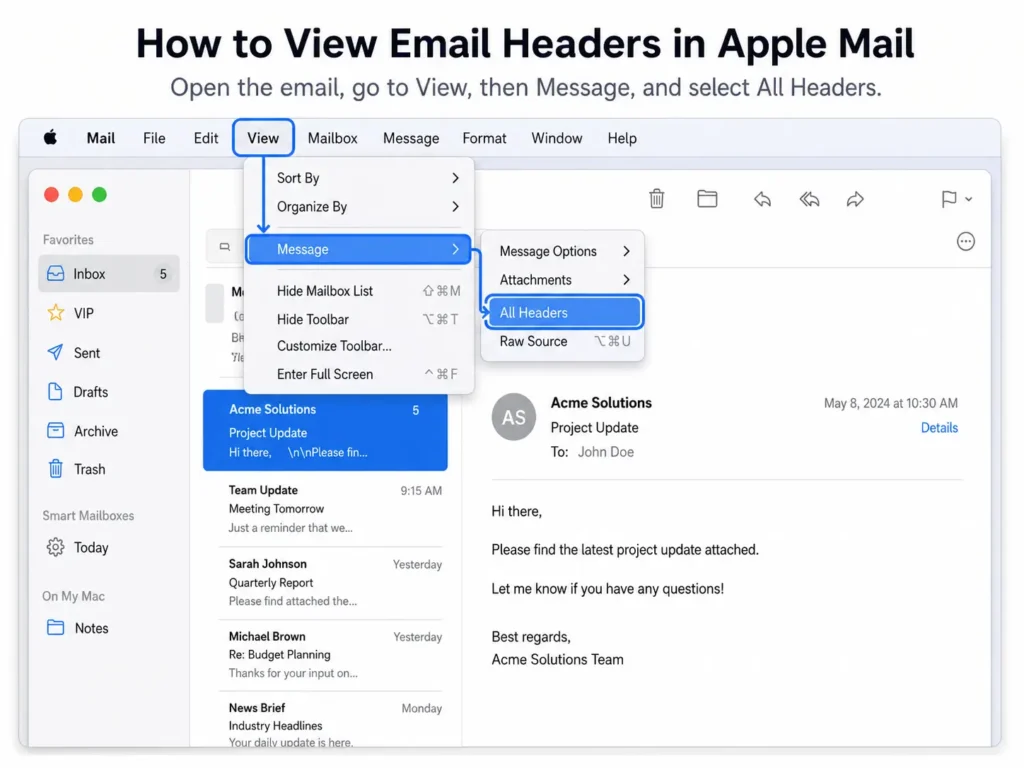
Apple Mail: Open the email, go to View, then Message, and select All Headers.
Once you open the header, it may look like a dense wall of text. That is completely normal. You do not need to read all of it. You only need to focus on the handful of lines that actually matter.
Anatomy of an Email Header, Line by Line
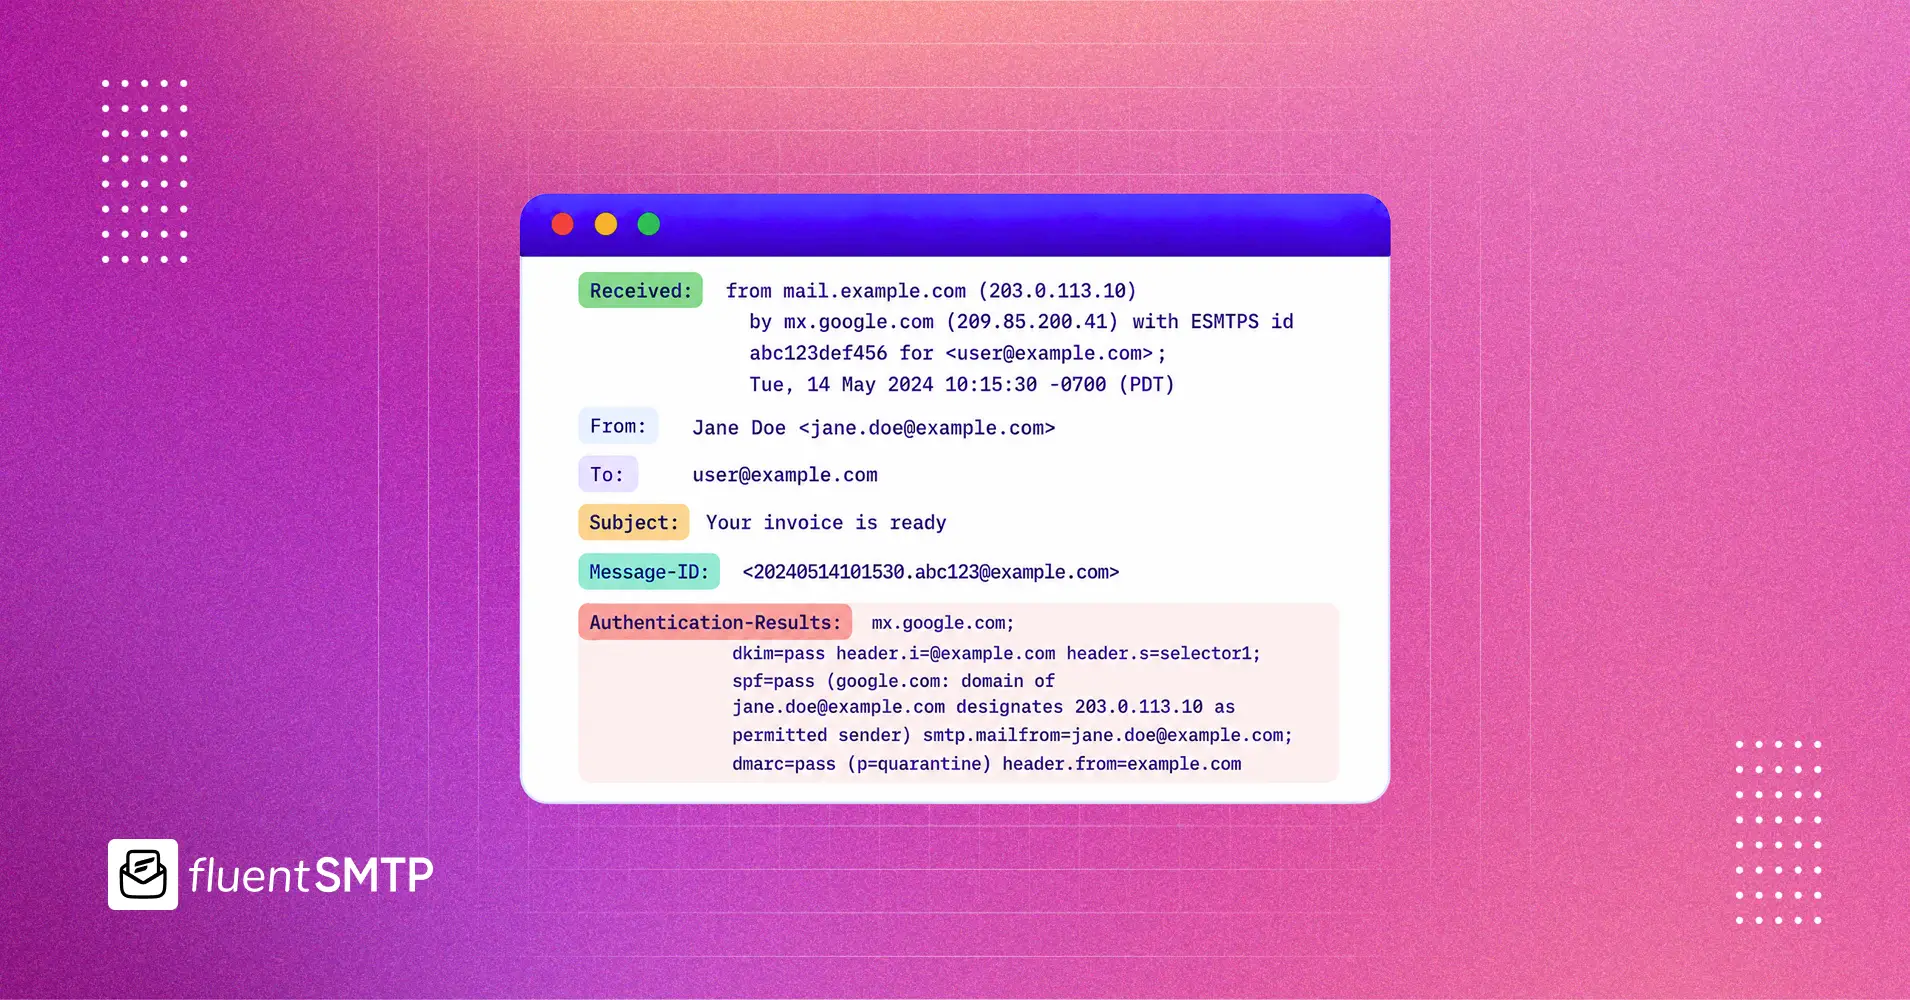
Here’s a simplified example of what you’ll find, and what each part is actually telling you.
Received: from mail.provider.com by mx.recipient.com; Tue, 14 Jul 2026 09:14:22
Received: from smtp.senderdomain.com by mail.provider.com; Tue, 14 Jul 2026 09:14:18
From: [email protected]
Subject: Your order confirmation
Date: Tue, 14 Jul 2026 09:14:15
Message-ID: <[email protected]>
Return-Path: <[email protected]>
Authentication-Results: mx.recipient.com; spf=pass; dkim=pass; dmarc=pass
Received lines are the trail itself, and there’s one for every server the message passed through. Read them from the bottom up. The bottom “Received” line is the earliest hop, closest to the sender. The top one is the last server before it reached the inbox.
If you’re chasing down a delay, the timestamps in these lines will show you exactly where the message sat waiting. This is the same trail we referenced in our SMTP relay guide, just visible in raw form here instead of described in the abstract.
From, To, Subject, and Date are the fields you already recognize from your inbox. Worth noting: “From” can be forged more easily than people expect, which is part of why the next line matters more than this one for verifying legitimacy.
Message-ID is a unique identifier generated for that specific email. Support teams often ask for this when troubleshooting, since it lets them find the exact message in server logs.
Return-Path is where bounce notifications get sent if the message fails to deliver. It doesn’t always match the visible “From” address.
Authentication-Results is the line worth checking first when something’s gone wrong. It shows whether the message passed SPF, DKIM, and DMARC, the domain-level checks we cover in what SPF, DKIM, and DMARC actually do. A “pass” on all three means the domain checks out. A “fail” here is one of the most common reasons a message lands in spam even though it was delivered successfully.
What to Look For When Diagnosing a Delivery Problem
Different symptoms point you to different lines in the header.
If the email landed in spam instead of the inbox, start with the Authentication-Results header. A failure on SPF, DKIM, or DMARC is one of the most common causes. It usually points to a domain configuration issue rather than a problem with the message itself. Once you have confirmed that authentication is the issue, our breakdown on fixing WordPress emails going to spam walks through what to do next.
If the email arrived much later than expected, check the timestamps across the Received lines. A large gap between two consecutive hops shows you exactly which server held onto the message. That is usually enough to tell whether the delay happened on your side or somewhere further down the delivery chain.
If the email never arrived at all, the header itself will not help much. A header only exists for a message that was accepted somewhere along the way. If there is no header to inspect, the message was likely rejected at send time. That is where SMTP error codes become useful.
If you suspect your domain has been flagged, look for a consistent pattern across multiple emails. Repeated authentication failures are a strong signal that something is wrong with your domain reputation or email authentication setup. Our email blacklist explainer covers how to check that and what to do next.
You Don’t Always Have to Dig for This Yourself
Everything above works for any email, from any source. If the email was sent from your WordPress site through FluentSMTP, there is a partial shortcut worth knowing about. But it is not a full replacement for checking the actual email header.
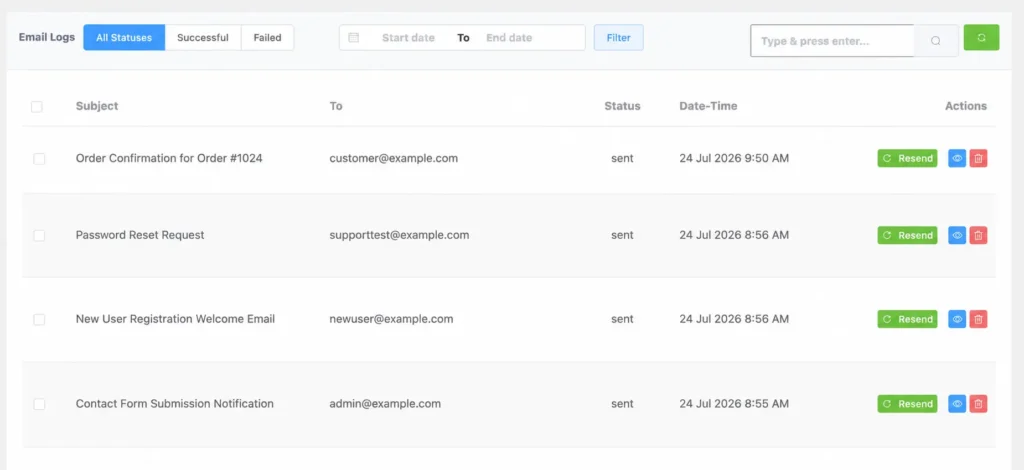
FluentSMTP’s Email Log keeps a record of every email your site sends. When you click into an individual log entry, you will see a few sections that are useful to understand.
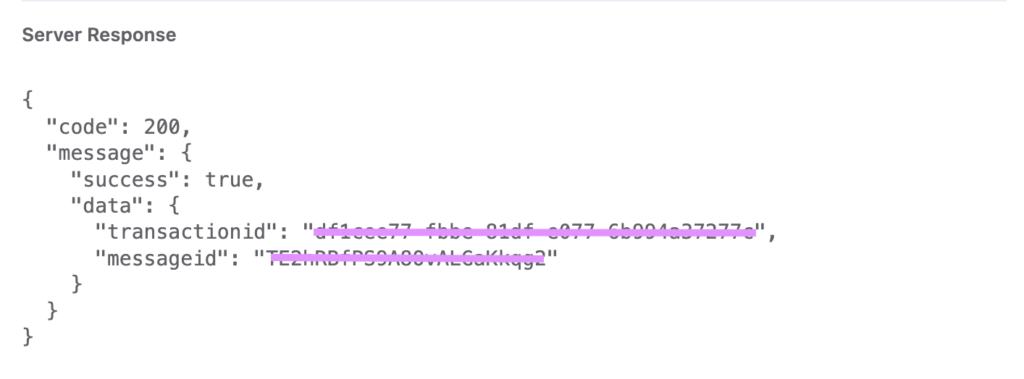
Server Response shows your provider’s confirmation that it accepted the message from your site. This usually includes a code, often 200, a success flag, and a few tracking IDs.
One important detail: that 200 is an HTTP status from your provider’s API. It is not an SMTP response code. It tells you that your WordPress site successfully handed the message off to the email provider. It does not confirm whether the recipient’s mail server accepted it afterward. Those are two different steps, and this log only covers the first one.
The transactionid and messageid fields are the details you would share with your provider’s support team, or use to track that specific email inside the provider’s own dashboard.
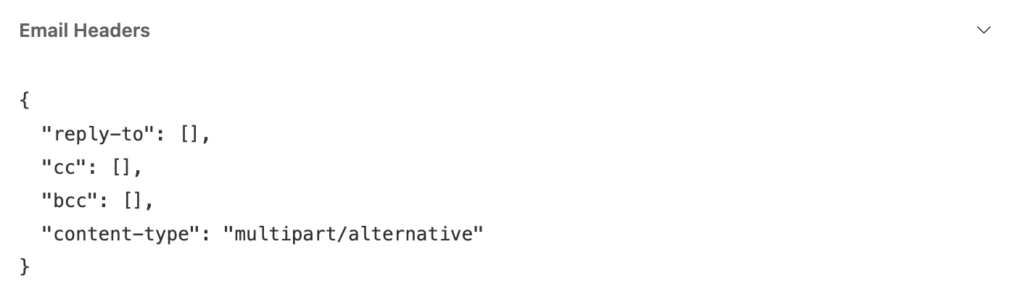
Email Headers in FluentSMTP show the fields the message was composed with, such as reply-to, cc, bcc, and content type. If you see empty brackets there, it simply means the email did not have those fields set. It does not mean anything failed.
What this section does not include is the full raw header this article is focused on. You will not see the complete Received chain, Authentication-Results, or SPF, DKIM, and DMARC pass/fail results inside the FluentSMTP log. That data is stored in the recipient’s copy of the message, generated by the servers that handle email after it leaves FluentSMTP.
So, for confirming that an email left your site successfully, FluentSMTP’s Email Log is the fastest place to look. But for deeper diagnosis, such as tracing server hops or checking whether authentication passed, you still need to pull the real header from the recipient’s side using the steps above.
Frequently Asked Questions
Why can’t I see the email header in my inbox by default?
Email clients hide it because it’s dense, technical, and irrelevant to reading a normal message. It’s still attached to every email, just tucked behind a menu option rather than deleted.
Can email headers be faked?
Some fields, like “From,” can be forged relatively easily, which is exactly why Authentication-Results matters more. SPF, DKIM, and DMARC are cryptographic and DNS-based checks that are far harder to spoof than a display name.
What’s the fastest way to check if my email passed authentication?
Look for the Authentication-Results line and check whether spf, dkim, and dmarc each show “pass.” If any show “fail” or “none,” that’s your starting point for troubleshooting.
Stop Digging Through Headers to Find Delivery Problems
Reading a header is useful when something’s already gone wrong. It’s better not to need to. Most of the failures a header reveals- missing authentication, an untrusted sending path, a misconfigured domain- trace back to the same root cause: WordPress sending through an unverified connection instead of a trusted one.
FluentSMTP fixes that at the source, so there’s less to dig through in the first place.
Nader Chowdhury
Table of Content
Subscribe To Get
WordPress Guides, Tips, and Tutorials





Add your first comment to this post