
How to Add Two-Factor Authentication on Your WordPress Website


Security is a big concern for all of us because it ensures the safety of information and resources. When it comes to the security of your social media profiles, you’ll appoint the strongest passwords and protection to save them from third parties.
Similarly, if you own a WordPress site, you would want to protect it from hackers and cyberattacks.
Unfortunately, a strong password can’t guarantee the protection of your site. It is wiser to add another layer of security to prevent hacking.
The good news, you can easily set up two-factor authentication!
What is two-factor authentication?
Two-factor authentication or 2FA is a strong authentication method to secure apps or websites during a new login attempt.
How it works: Normally, when you want to log into your WordPress website you enter the username or email address and password. If you enter the right credentials, you can log into your WordPress dashboard.
In the case of two-factor authentication, when an unauthorized person attempts to log into a WordPress website using login credentials, he/she will need to enter a security code to proceed. The code is generally sent as an email, text message, or to an authentication app.
If the person trying to log into the website fails to enter the OTP, they won’t be able to proceed further and access the website.
Importance of two-factor authentication in WordPress
WordPress is widely used as a reliable website-building solution for many different purposes. As a result, a significant amount of the web population relies on WordPress to build their website.
Unfortunately, this also increases the chance of getting attacked by hackers and you’ll want to protect your website at any cost by maintaining the WordPress security checklist.
Two-factor authentication will ensure that:
- If your website is attacked by hackers or brute force, they can’t access your WordPress admin privilege.
- 2FA prevents malware attacks, information stealing, installing malicious software, or damaging your site.
- Enabling two-factor authentication will prevent hackers from accessing your website by asking users to enter the security/verification code every time they attempt to log in
Ready to set up 2FA on your website?
How to enable two-factor authentication to protect your WordPress website
Hopefully, now you can understand why you need to enable two-factor protection on your website. And you might be wondering how to enable two-factor protection to secure your website. The most effective and easiest way to do this is to use a two-factor authentication plugin.
We have shared step-by-step guidelines on enabling two-factor protection on your WordPress website. So follow this guideline carefully and configure your website to ensure resistance against any kind of threats.
Install and activate FluentAuth on your website
The first thing you need to do is install the FluentAuth plugin on your website. It’s an all-in-one WordPress authorization & security plugin that serves the purpose of multiple plugins in a single bundle.

It comes with many exciting and effective features that’ll ensure your site has the strongest security against brute force or any kind of cyber attack. With FluentAuth you’ll enjoy the service of multiple security and login & logout redirection plugins, meaning it’ll save both your money and website space.
And the most fascinating part —It’s free!
Now to install FluentAuth log into your WordPress dashboard & go to Plugins>Add New and search for FluentAuth.
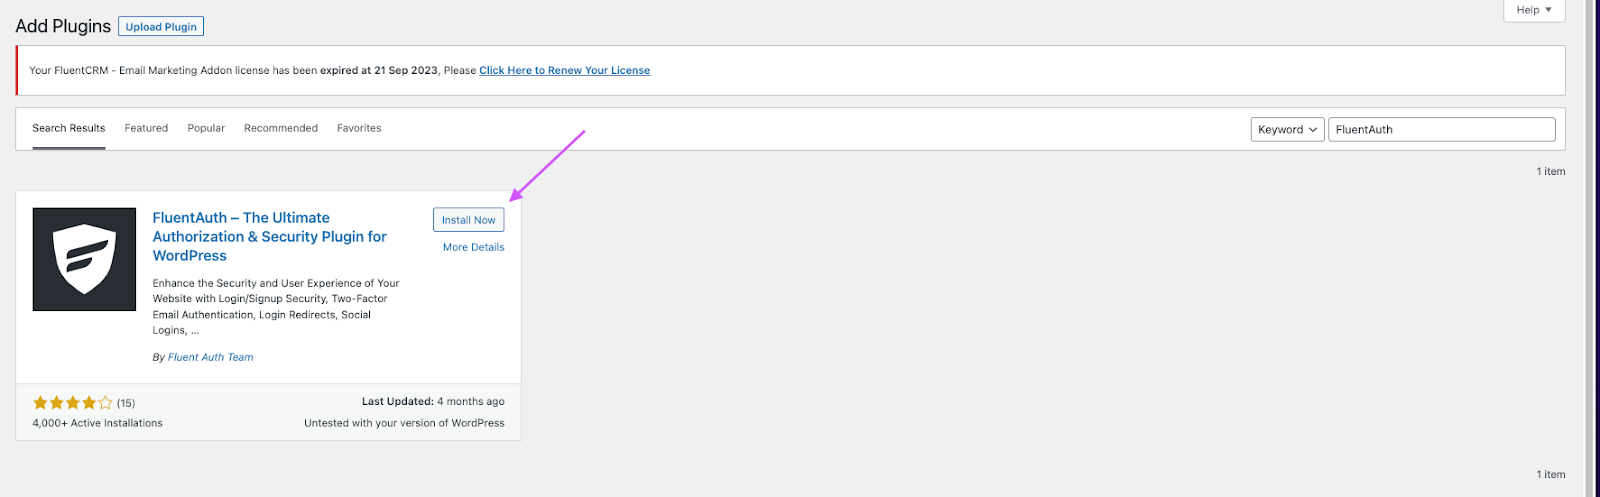
After discovering FluentAuth click on Install Now to install it. After installing the plugin don’t forget to activate it.
Configure FluentAuth
The next thing you need to do is configure FluentAuth properly to ensure your website has the strongest shield. So go to Plugins>Installed Plugins>Settings and you’ll discover the following options:
- Core security settings: Under this section disable XML-RPC because 99% of websites don’t need this. Then if you don’t use the site via REST API disable the App Login. Also, disable the REST Endpoint for wop users.
- Login security settings: FluentAuth allows you to set a login limit for any IP for a specific period. If the user fails to log in then the system will block the user for a specific period.
- Extended login options: Under this setting, you can add two-factor authentication via email and enable magic login by URL sent to email.
- Other settings: In the final section you can enable email notifications for specific user roles and user block
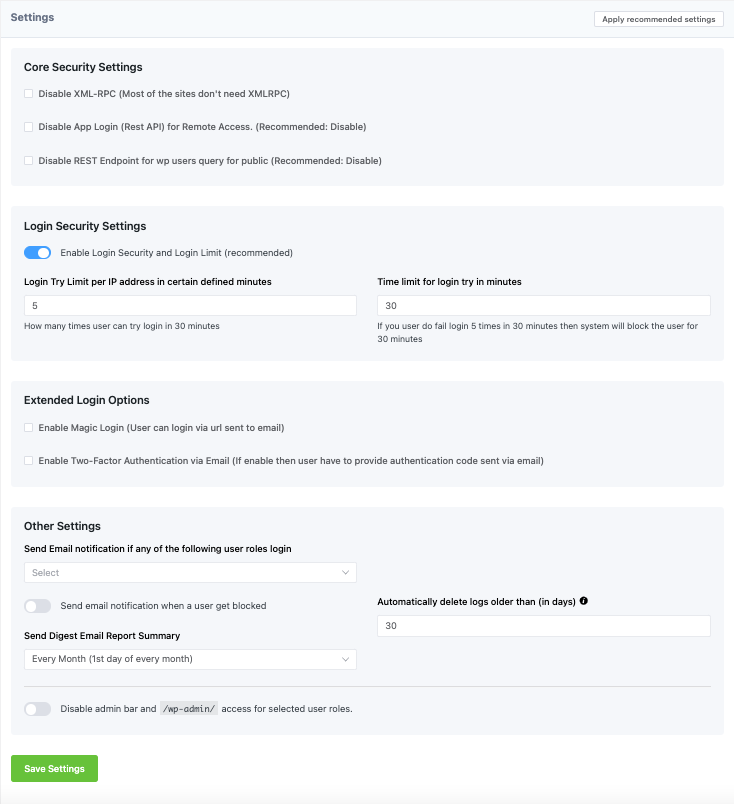
FluentAuth provides a handy and user-friendly option to configure it automatically for users who have limited technical knowledge. Just click on Apply recommended settings and it’ll configure the recommended settings for your website.

However, if you want to customize the settings then you can do that too. After configuring all the settings, click on Save Settings to activate your preferences.
If you follow the instructions carefully and implement them accordingly then two-factor authentication will be enabled on your WordPress website.
That means the next time any unauthenticated user tries to log into your WordPress site, they’ll be asked to enter the security code to proceed, meaning your website is safe from any kind of ominous activity.
Strengthen your website’s security with 2FA!
Ensuring the protection of your website is crucial because it’ll assure data security & secure operation of your online presence. And now you know how to protect your website with FluentAuth from any kind of ominous accessibility.
We hope this article will help you to configure your website for two-factor authentication. Now go ahead and strengthen your website’s security with 2FA. We wish you all the best!

Aminul Islam
Hi! Nice to meet you. I’m a guy who loves to explore, learn, and share knowledge. I spend most of my time catching up with marketing tips & tricks. When I’m not busy with any of these, you’ll find me with a book, exploring the city, or playing my favorite games.
Table of Content
Subscribe To Get
WordPress Guides, Tips, and Tutorials


Leave a Reply