
How to Set Up Appointments in WordPress: A Step-by-Step Guide


Booking appointments manually is tiring. Endless phone calls, messages, and emails just to fill up your calendar. But here’s the reality: 46% of appointments are already booked online, freeing up staff time and reducing scheduling errors.
Your clients want the freedom to book whenever it suits them. As a business owner or service provider, offering them this flexibility not only saves you hours but also positions you as a modern and professional entity.
The good news? If you have a WordPress website, setting up online appointments is easier than ever with a simple but effective appointment booking plugin.
This step-by-step guide will show you how to create an automated booking system that works while you focus on serving your clients.
Why Use an Appointment Booking System on WordPress?
Do you know, WordPress powers over 43% of all websites on the internet?
And most of the small businesses are already empowering their business on WordPress. And for the service-based business, an appointment booking system allows customers to schedule meetings, consultations, or services directly on their website. Benefits include:
- Automate scheduling and reduce back-and-forth emails
- Offer a seamless booking experience that builds trust
- Manage one-on-one, group, or recurring appointments
- Sync with tools like Google Calendar, Zoom, or Stripe for payments
That’s why you need an appointment scheduling plugin that is intuitive, integrates with popular tools, and keeps your data within your WordPress site, with no need for third-party platforms.
Step-by-Step Guide to Set Up Appointments with FluentBooking
Now, we will show you the easiest way to set up an appointment on your WordPress site with FluentBooking, a simple yet effective appointment booking plugin that enhances your appointment booking experience better than ever.
Let’s see how to set it up.
Step 1: Create a Booking Calendar
A calendar defines the appointment types and availability for a host.
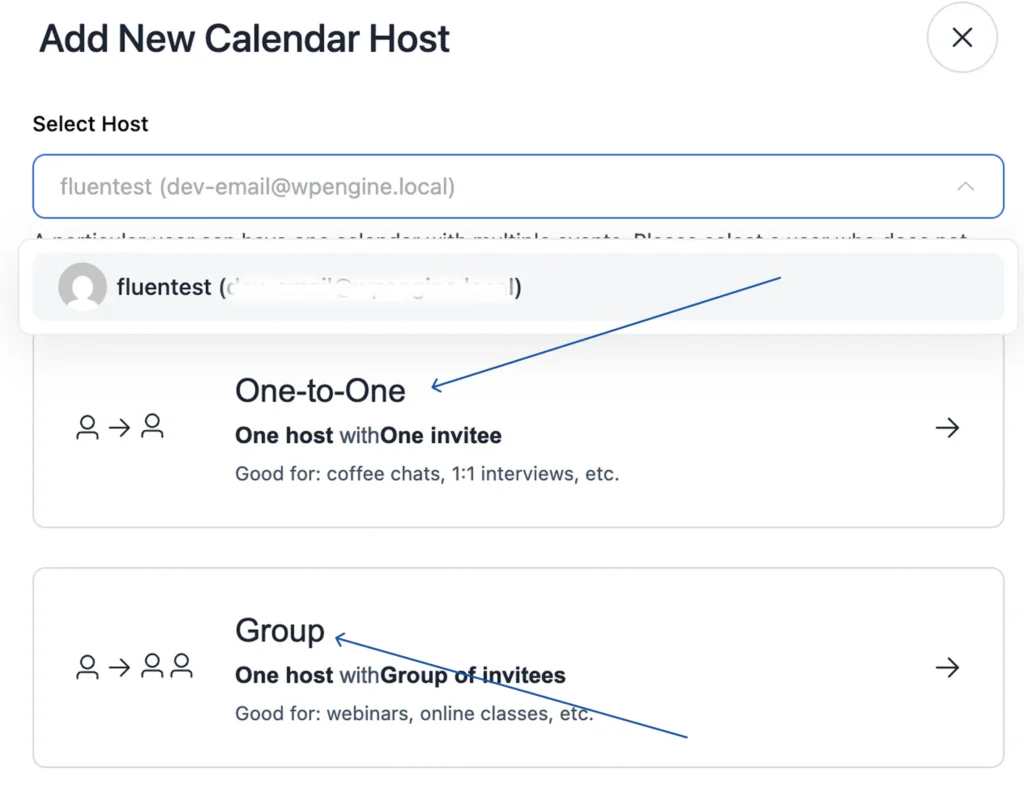
- From the FluentBooking dashboard, navigate to the Calendar tab, and from the top right corner, click “+ New” > Add host.
- Choose the host (the person taking appointments) and select the appointment type, either One-to-One or Group.
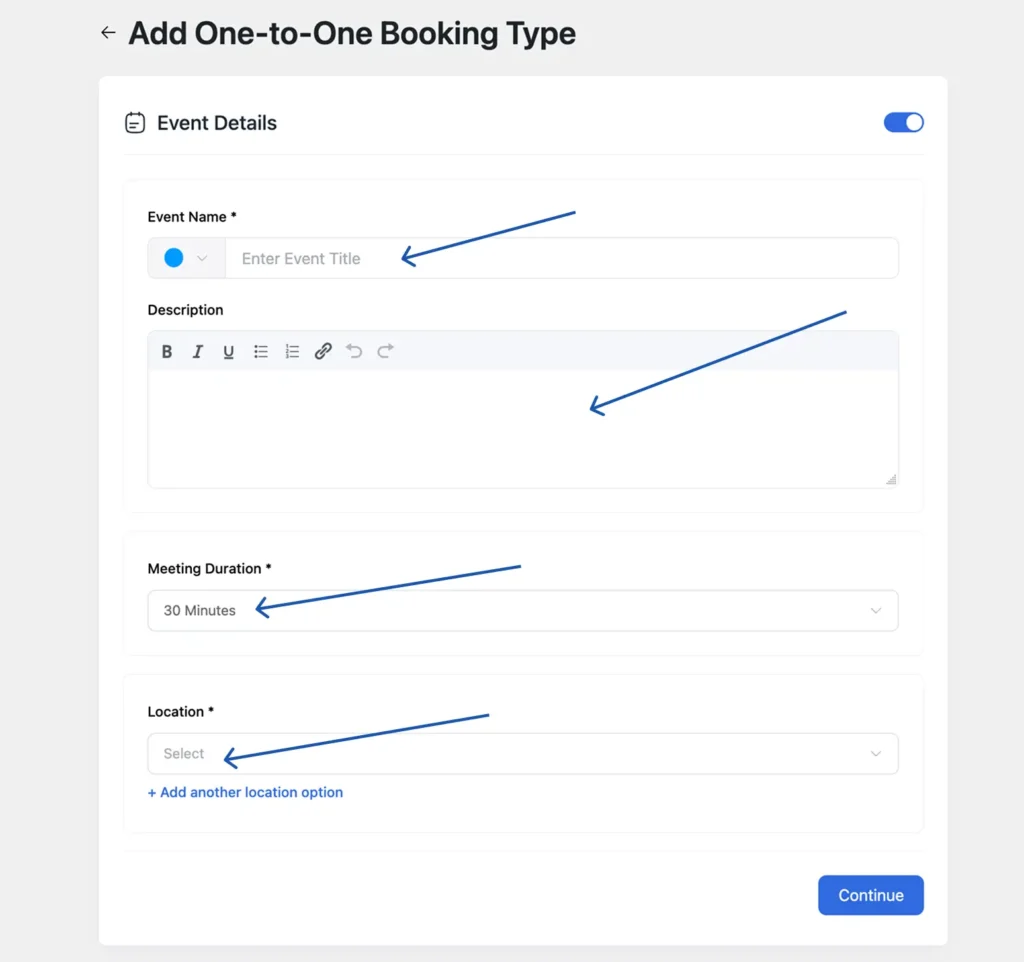
- Add Event Details like event name, description, meeting duration, location(online meeting link / in-person address), and select time zone, then select Continue.
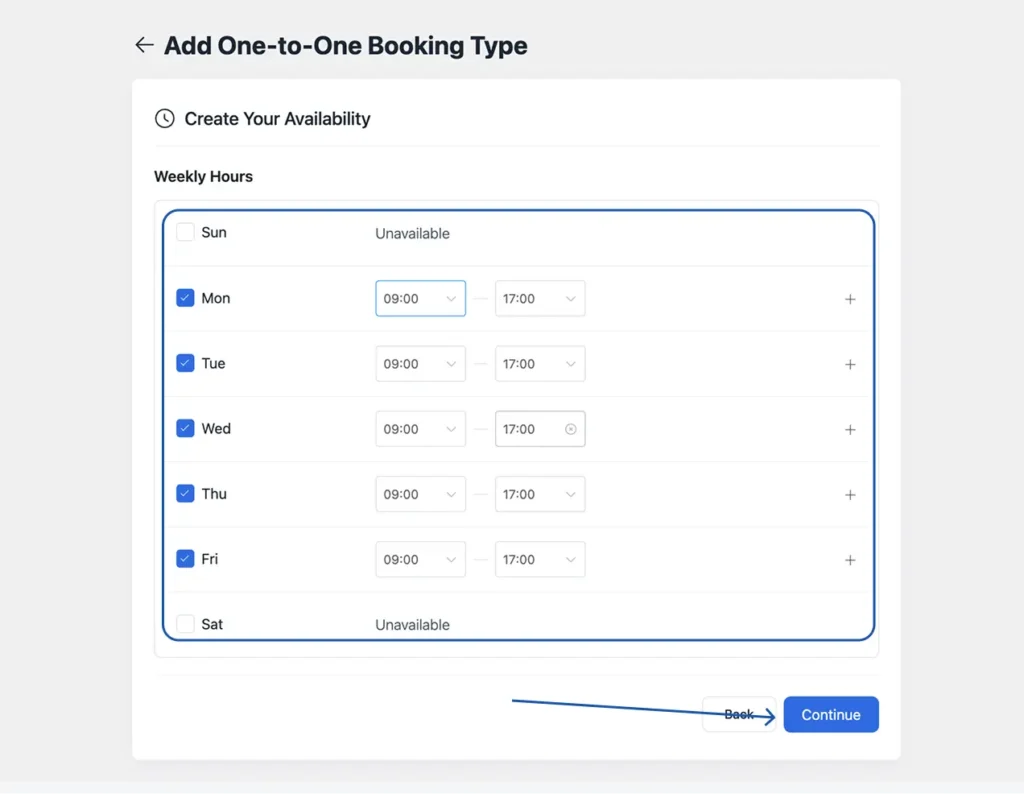
- Now, set your availability like how many days of the week and set your available time for each day, and tap on Continue.
That’s it! Your booking calendar is now created. Now, you can fine-tune your calendar settings to match your business needs and make the most of your time.
Step 2: Configure Appointment Availability
- Go to the Calendar tab, find your calendar, and click ‘Edit’.
- On the top left side, click on the ‘Availability’ tab.
- Set your working days and times, or add custom dates and times if needed.
Step 3: Set Limits for Your Appointment
- Click on Limits under availability. Here you can set buffer time before and after completing one appointment
- You can set a limit, how many times or the total amount of time your event can be booked
- Also, you can lock the timezone on your booking page
Step 4: Set Up Your Booking Form
The booking form is very important for every service provider. You must need the attendees’ information for the appointment booking.
- To set up a booking question on the booking form, click on the Question Settings tab, where you will find some pre-built questions like Name, Email, etc.
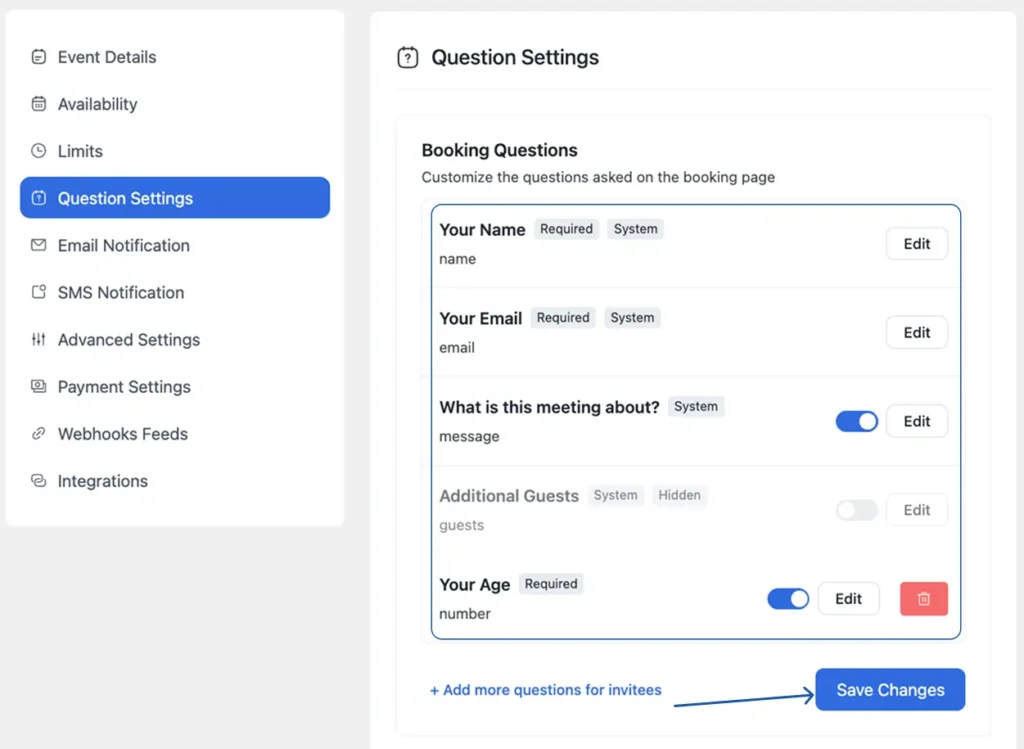
- To add a custom booking question, click Add more questions for invitees. Then, choose the type of question you want to add, such as Text, Number, Phone, Radio, or Checkbox, and click ‘Save’ to add it to your booking form.
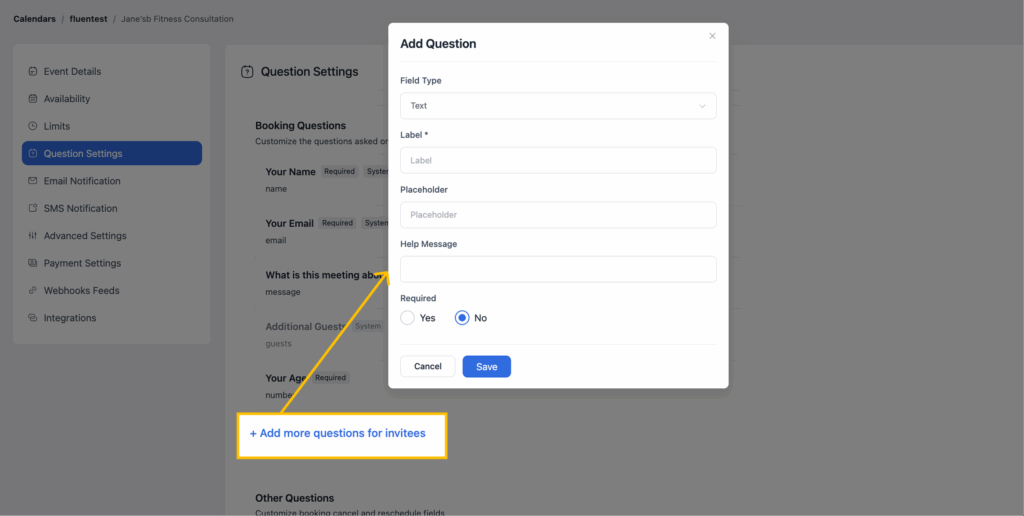
- Your custom question will be added to your booking form.
Step 5: Configure Notifications
The most useful feature FluentBooking offers is to send automated email notifications to both the host and the attendee.
- Turn on the notifications from the Email Notification tab
- Booking confirmations (sent to the customer and host).
- Reminders (e.g., 30 minutes before the appointment).
- Cancellations (if allowed).
- Optionally enable SMS notifications (requires a third-party service like Twilio).
- Customize the email content according to your service tone with any information.
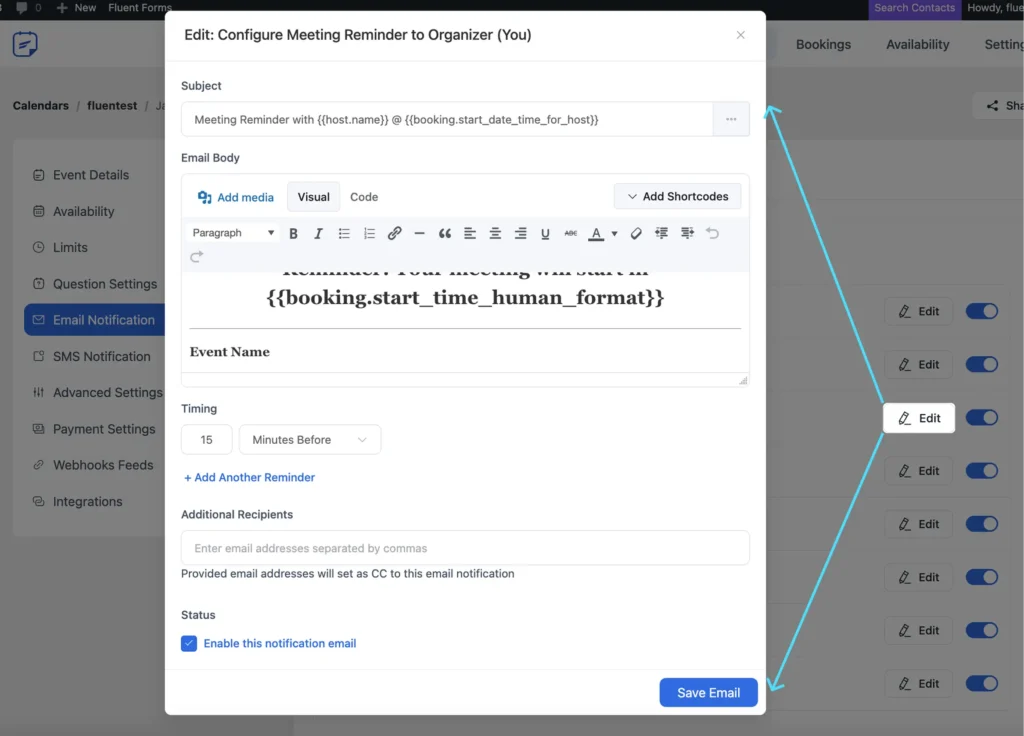
- Click “Save Email” to apply notification settings.
Step 6: Set Payment Method
FluentBooking offers multiple payment options to receive payment from your clients.
- From the Payment Settings tab, click on Go to payment settings.
- Now you can set up multiple payment methods like Stripe, PayPal, or you can set up offline payment.

Step 7: Set Up Integrations (Optional)
You can make your appointments more functional by doing some easy integrations from the “Settings” tab.
- Calendar Sync: You can connect to Google Calendar, Apple Calendar, or Outlook for two-way syncing to prevent double bookings.

- Video Conferencing: Link Zoom, Google Meet, or Microsoft Teams for virtual appointments. FluentBooking automatically generates meeting links upon booking.
Also, during video conferences, you can enhance your professional image by using virtual meeting backgrounds solutions that come from Exclaimer.

- CRM/Automation: You can integrate with FluentCRM, WP Fusion, Zapier, or Pabbly to manage leads or automate follow-up emails.

Step 8: Test the Booking System
Now, you have to test whether your booking calendar is working perfectly or not.
- From the Calendar tab, find your created calendar and click on the share icon.
- A pop-up will appear, go to the Landing Page tab, and click on View.
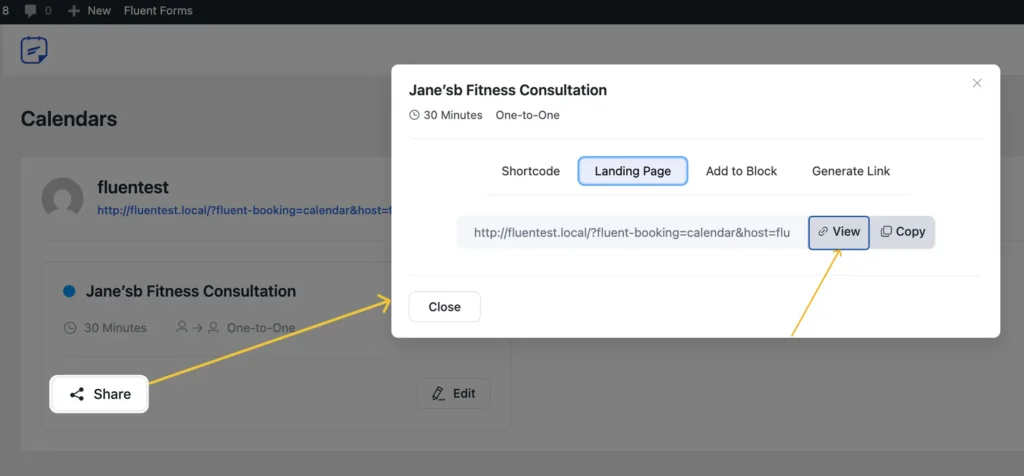
- Your booking page will look like that, where you can see the available dates and times that you set earlier.

- Choose a time slot and click Next. Your booking form will appear. Fill up the form and click “Schedule Meeting.”
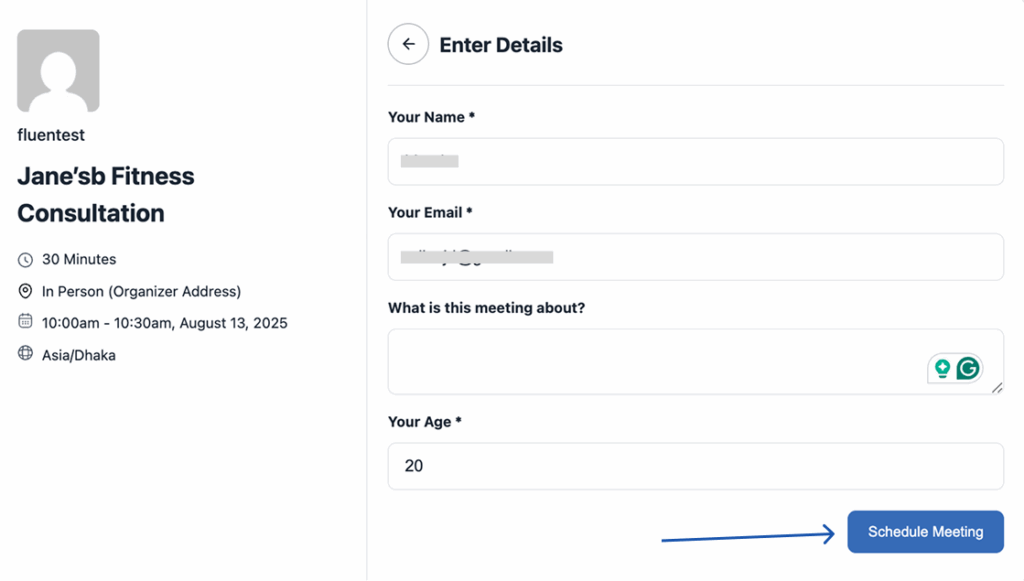
- If all the procedures are done correctly, then you will see a confirmation that “Your meeting has been scheduled.”

That means your appointment booking calendar has been successfully created and is working.
Step 9: Publish Your Booking Calendar on Website
The last stage is to publish your calendar on your website for your audience. It’s very easy to publish it to your WordPress website.
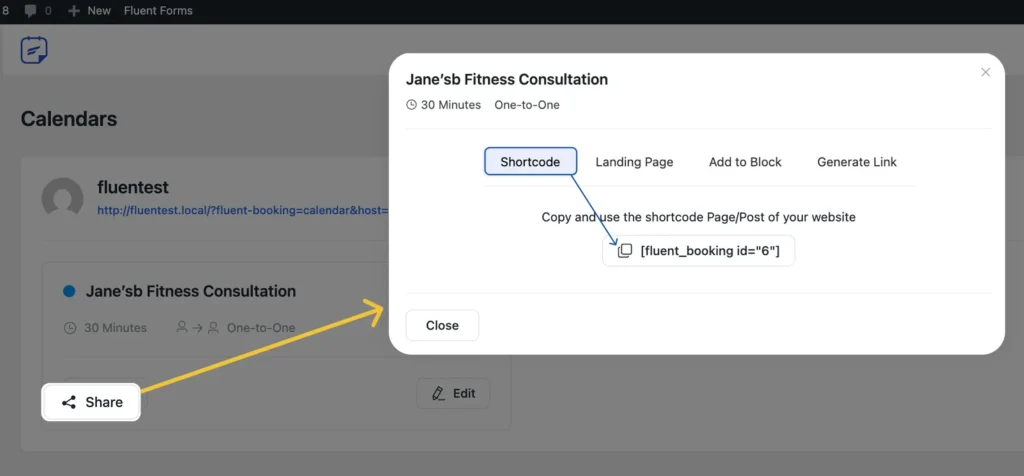
- Go to calendar tab > select your calendar > Share
- From the pop-up, go to the Shortcode tab and copy the shortcode.
- Go to your WordPress dashboard>Pages>choose the page where you want to embed the booking calendar.
- Find your preferred position, add a Shortcode block, and paste the shortcode of your calendar, and save the page.

- See the preview of the page, your booking page will look like below in your WordPress website.

Now, everyone can book their appointment from your WordPress website. And both you and your client will get automated confirmation and a reminder if someone books an appointment.
Your Next Step to Hassle-Free Appointments
By creating a smooth booking experience, you’re not just saving hours of admin work; you’re also giving your clients the freedom to book at their convenience, reducing no-shows with automated reminders, and presenting your business as professional and organised.
Take the step today. Set up FluentBooking on your WordPress site and turn your appointment scheduling into a smooth, effortless process for you and your clients.
We wish you all the best!

Ratul Ripon
I enjoy turning complex ideas into simple ones and engage with people through my writing. With a background in Oceanography, I create technical content that’s both easy to understand and interesting.
Table of Content
Subscribe To Get
WordPress Guides, Tips, and Tutorials


Leave a Reply