
How to Add CAPTCHA on Your WordPress Contact Forms


If you use the internet regularly, you might have come across CAPTCHA. They may look hilarious to an everyday internet user, but they help website owners fight against hackers and spammers who use bots to exploit a website’s weaknesses in different ways.
CAPTCHA is a very simple yet powerful tool to protect your website. And how does it work? Well, it helps your website understand whether an actual human or robot is trying to get access.
In this blog, we’ll talk about how you can increase website security by adding a captcha on your WordPress contact forms.
Let’s begin!
What is CAPTCHA?
You’ve probably seen CAPTCHAs, those annoying tasks that differentiate humans from robots. Common types include distorted text puzzles and picture selection challenges.
Not to mention the weird ones that you fail to authenticate even if you are a human!
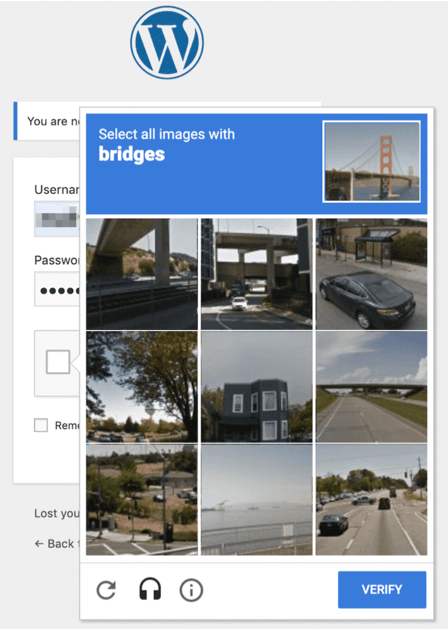
These seemingly simple tasks are complex for machines but understandable for humans. Even modern bots cannot complete these problems using corrupted text or picture pieces. But how does it help your website?
- Brute force assaults, a standard hacking method, use bots to enter login credentials until they break through repeatedly. Bots are key to cyber risks that might compromise your website’s security and reputation.
- XSS, where hackers insert harmful code into your site through insecure forms like your login page or comments area, is another sneaky threat. Your site may have malware, compromised data, and other issues due to this invasion.
- Beyond this, bots can pollute your comments with low-quality links, hurting SEO and repelling real visitors. Spam is annoying because it shows your site is unprotected and unmonitored.
Bot attacks can target any form on your site that collects user data. Using a CAPTCHA before form submissions will prevent non-human entities from accessing or introducing malicious code onto your website. It’s the tech-savvy defense your website needs against emerging cyber threats.
What is Google reCAPTCHA?
Even though CAPTCHAs are the unsung heroes protecting your site, like any technological solution, they have disadvantages. Their UX impact is a disadvantage. While helpful against bots, these seemingly harmless checks might slow visitors down and restrict their ability to fulfill their goals on your site.
Additionally, CAPTCHAs might be difficult for persons with visual impairments or dyslexia, which can deter legitimate visitors. The dilemma is that repelling bots risks locking off real users, which is terrible for both sides.
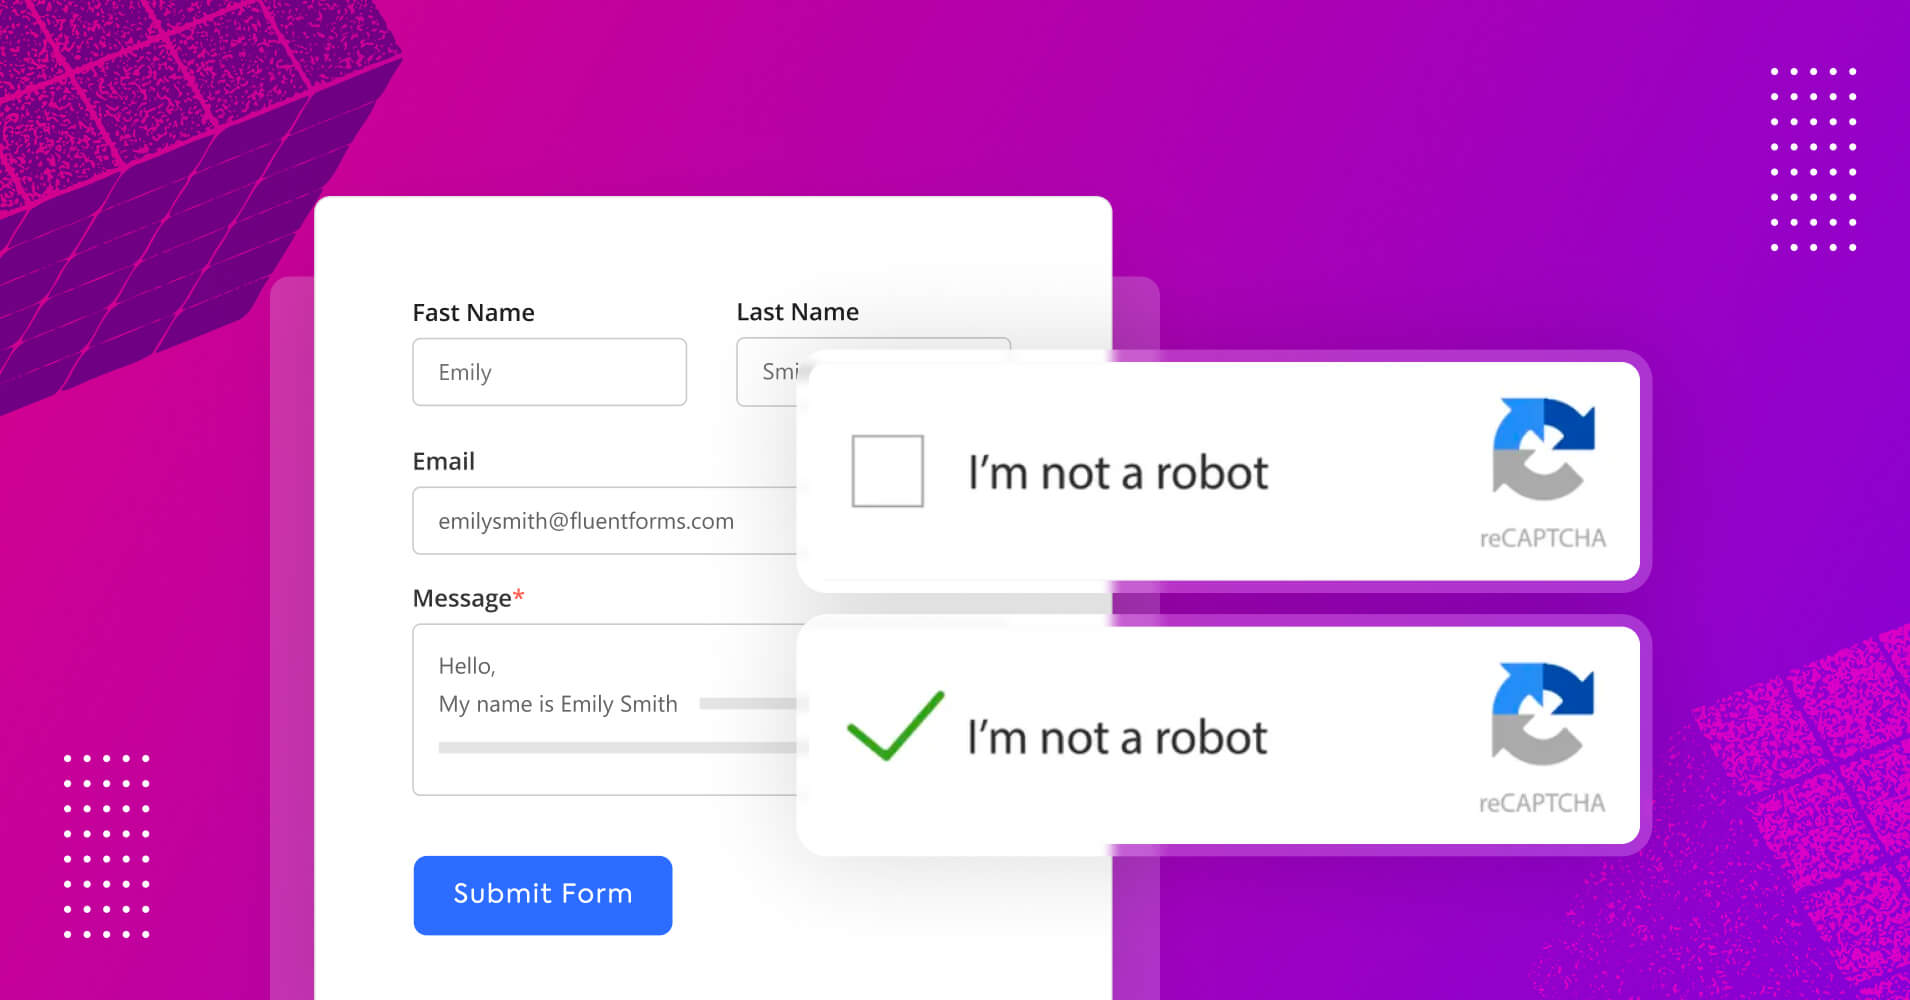
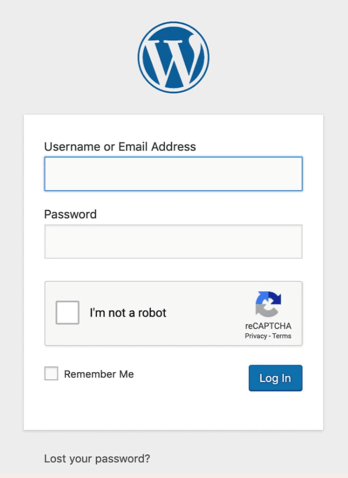
That’s where Google came up with No CAPTCHA reCAPTCHA in 2014 to address these issues, replacing the 2007 distorted word and picture tests. Users just tick a box next to “I’m not a robot” to verify their identity in the new method. And this is what you probably see on most websites nowadays.
Looks familiar?
This strategy is easier and more accessible. Google launched the “invisible CAPTCHA,” a technical marvel that identifies bots without human intervention, in 2018. You must choose a CAPTCHA type when adding one to your WordPress site.
Strategically using Google reCAPTCHA v2 or v3 improves site usability and accessibility. This tech-savvy innovation provides security without compromising user enjoyment. However, if you think CAPTCHA hurts your user experience, you might want to implement a CAPTCHA alternative.
4 steps to implementing CAPTCHA on your WordPress contact forms
By now, you already know how simple a captcha is. To protect your contact form with a captcha, you first must ensure that the form builder you are using has accessible captcha integration features.
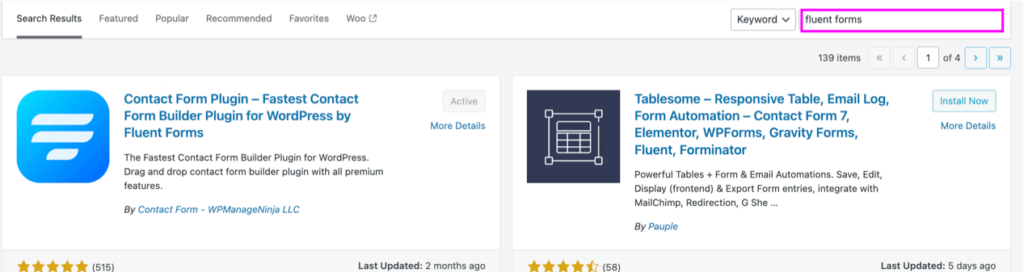
Fluent Forms is a contact form plugin with excellent CAPTCHA integration. For this tutorial, we’ll take this plugin and show you how easy it is to protect your forms using a CAPTCHA.
Note: Though different CAPTCHA plugins are available, we are not getting into that. When you can have the best of the best Google Recaptcha for free, why waste money on other fancy plugins?
Ready? Let’s begin!
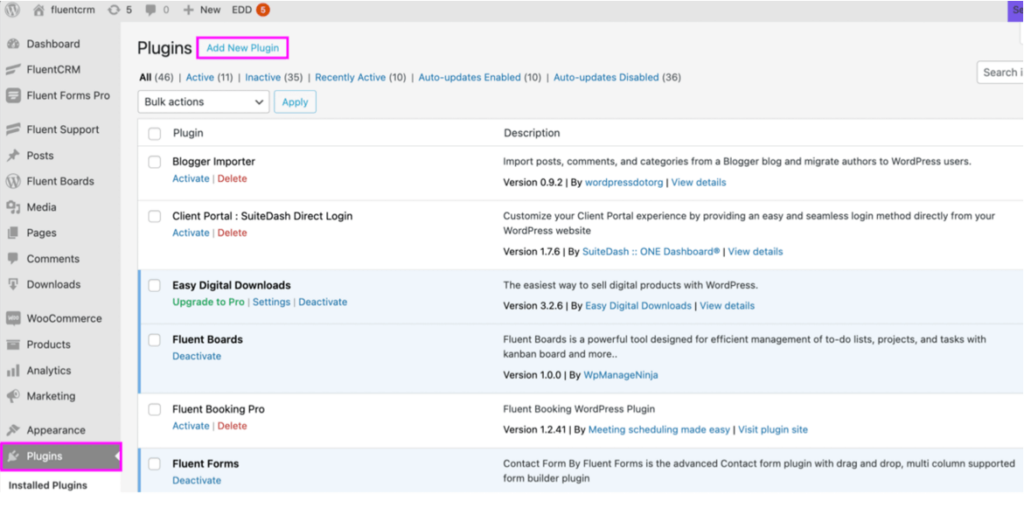
1. Downloading and installing Fluent Forms
Go to your WordPress dashboard and click on Plugins. On the next page, select Add New Plugins and search for Fluent Forms. Download the plugin, and don’t forget to activate it.
Once the plugin is installed, you are ready for the next step.
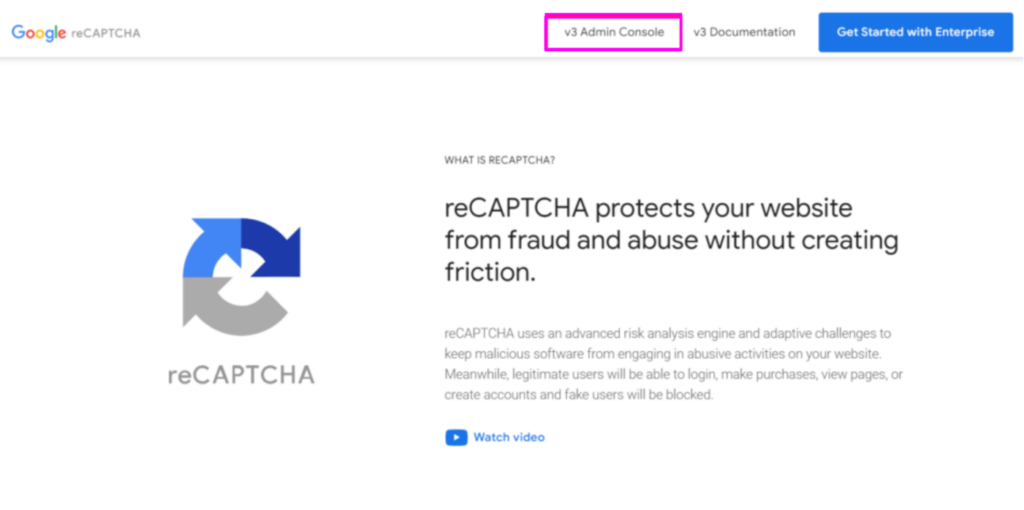
2. Create Your Google reCAPTCHA API
Click on Google reCAPTCHA to get started with creating API keys. Once you are on the page, click on V3 Admin Console.
On the next page, you have to fill out a few necessary fields including
- Providing a label
- Selecting reCAPTCHA v3 as the reCAPTCHA type
- Entering the domain
- Accepting the reCAPTCHA Terms of Service
- And finally, click on the Submit Button
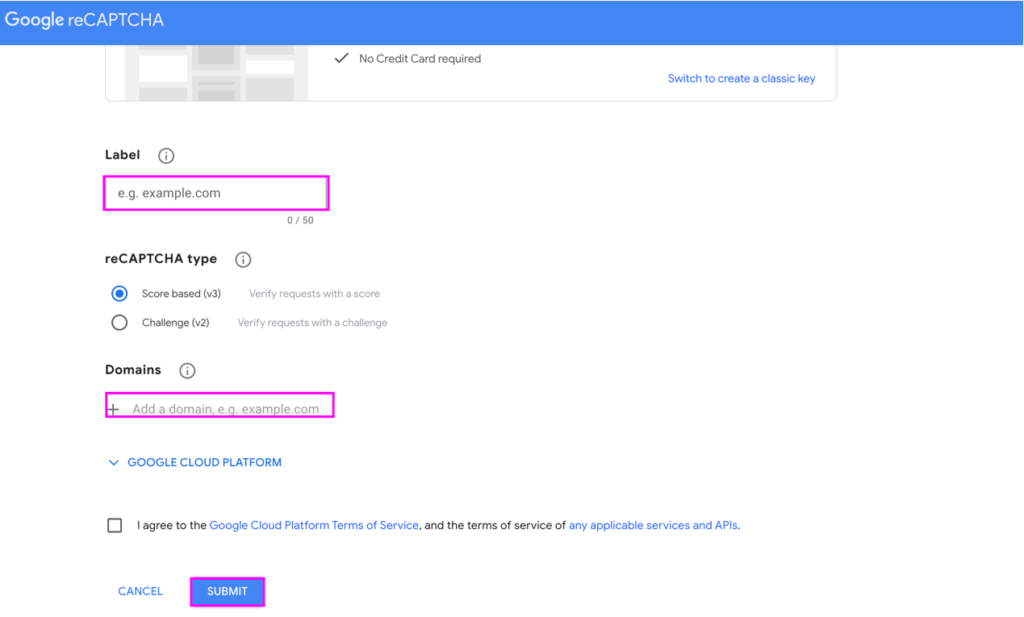
Once you have done these correctly, you’ll be given a Site Key and Secret Key on the next page. Don’t forget to copy these API key pairs as you’ll be needing them soon enough.
You will be provided with the Site Key and Secret Key on the next page. Copy these API key pairs as needed in the next step.

Good to remember: reCAPTCHA v2 and v3 API keys differ. The v2 API doesn’t support v3 keys. Reregistering your websites gets you v3 keys.
3. Setting up reCAPTCHA with Fluent Forms
You have completed the hard part. Now it’s time to head back to the Fluentforms dashboard. Look for the Global Setting option and click on it.

Click the left panel reCAPTCHA from this window. Select reCAPTCHA version 3 (Invisible), paste the Site and Secret Keys from the previous step, and click Save Settings.
It will state, “Your reCAPTCHA is valid.” You may now utilize Google reCAPTCHA v3 in your form.
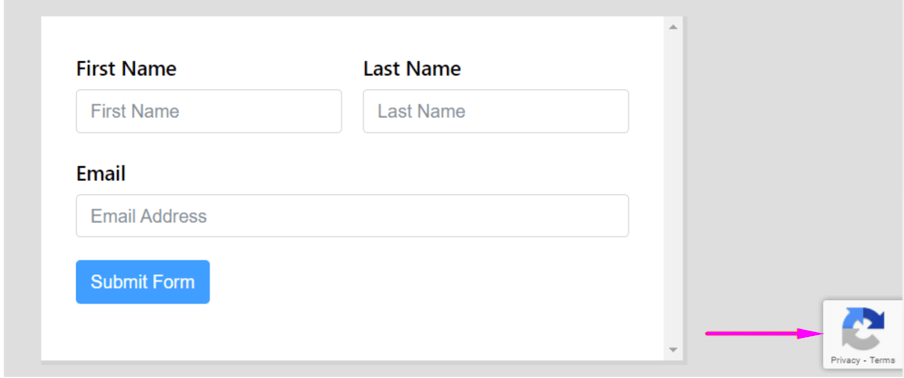
4. Add reCAPTCHA to your form
Create or update an old form to start the process of including reCAPTCHA. After adding the required information, search for reCAPTCHA in the advanced input field.

Don’t forget to hit Submit Form.
There you go. Your form now uses reCAPTCHA v3 to prevent spam!
Final Words
Online forms are great for gathering data, but spammers can exploit them to sell their products or steal your data. We hope we were helpful in enlightening you about the best way of protecting your WordPress contact form.
But that may not be enough to fight against lethal hackers and malware. So, have a proper WordPress security checklist, and don’t forget to take advantage of different WordPress security plugins.
Sakhawat Showrabh
Table of Content
Subscribe To Get
WordPress Guides, Tips, and Tutorials


Leave a Reply