
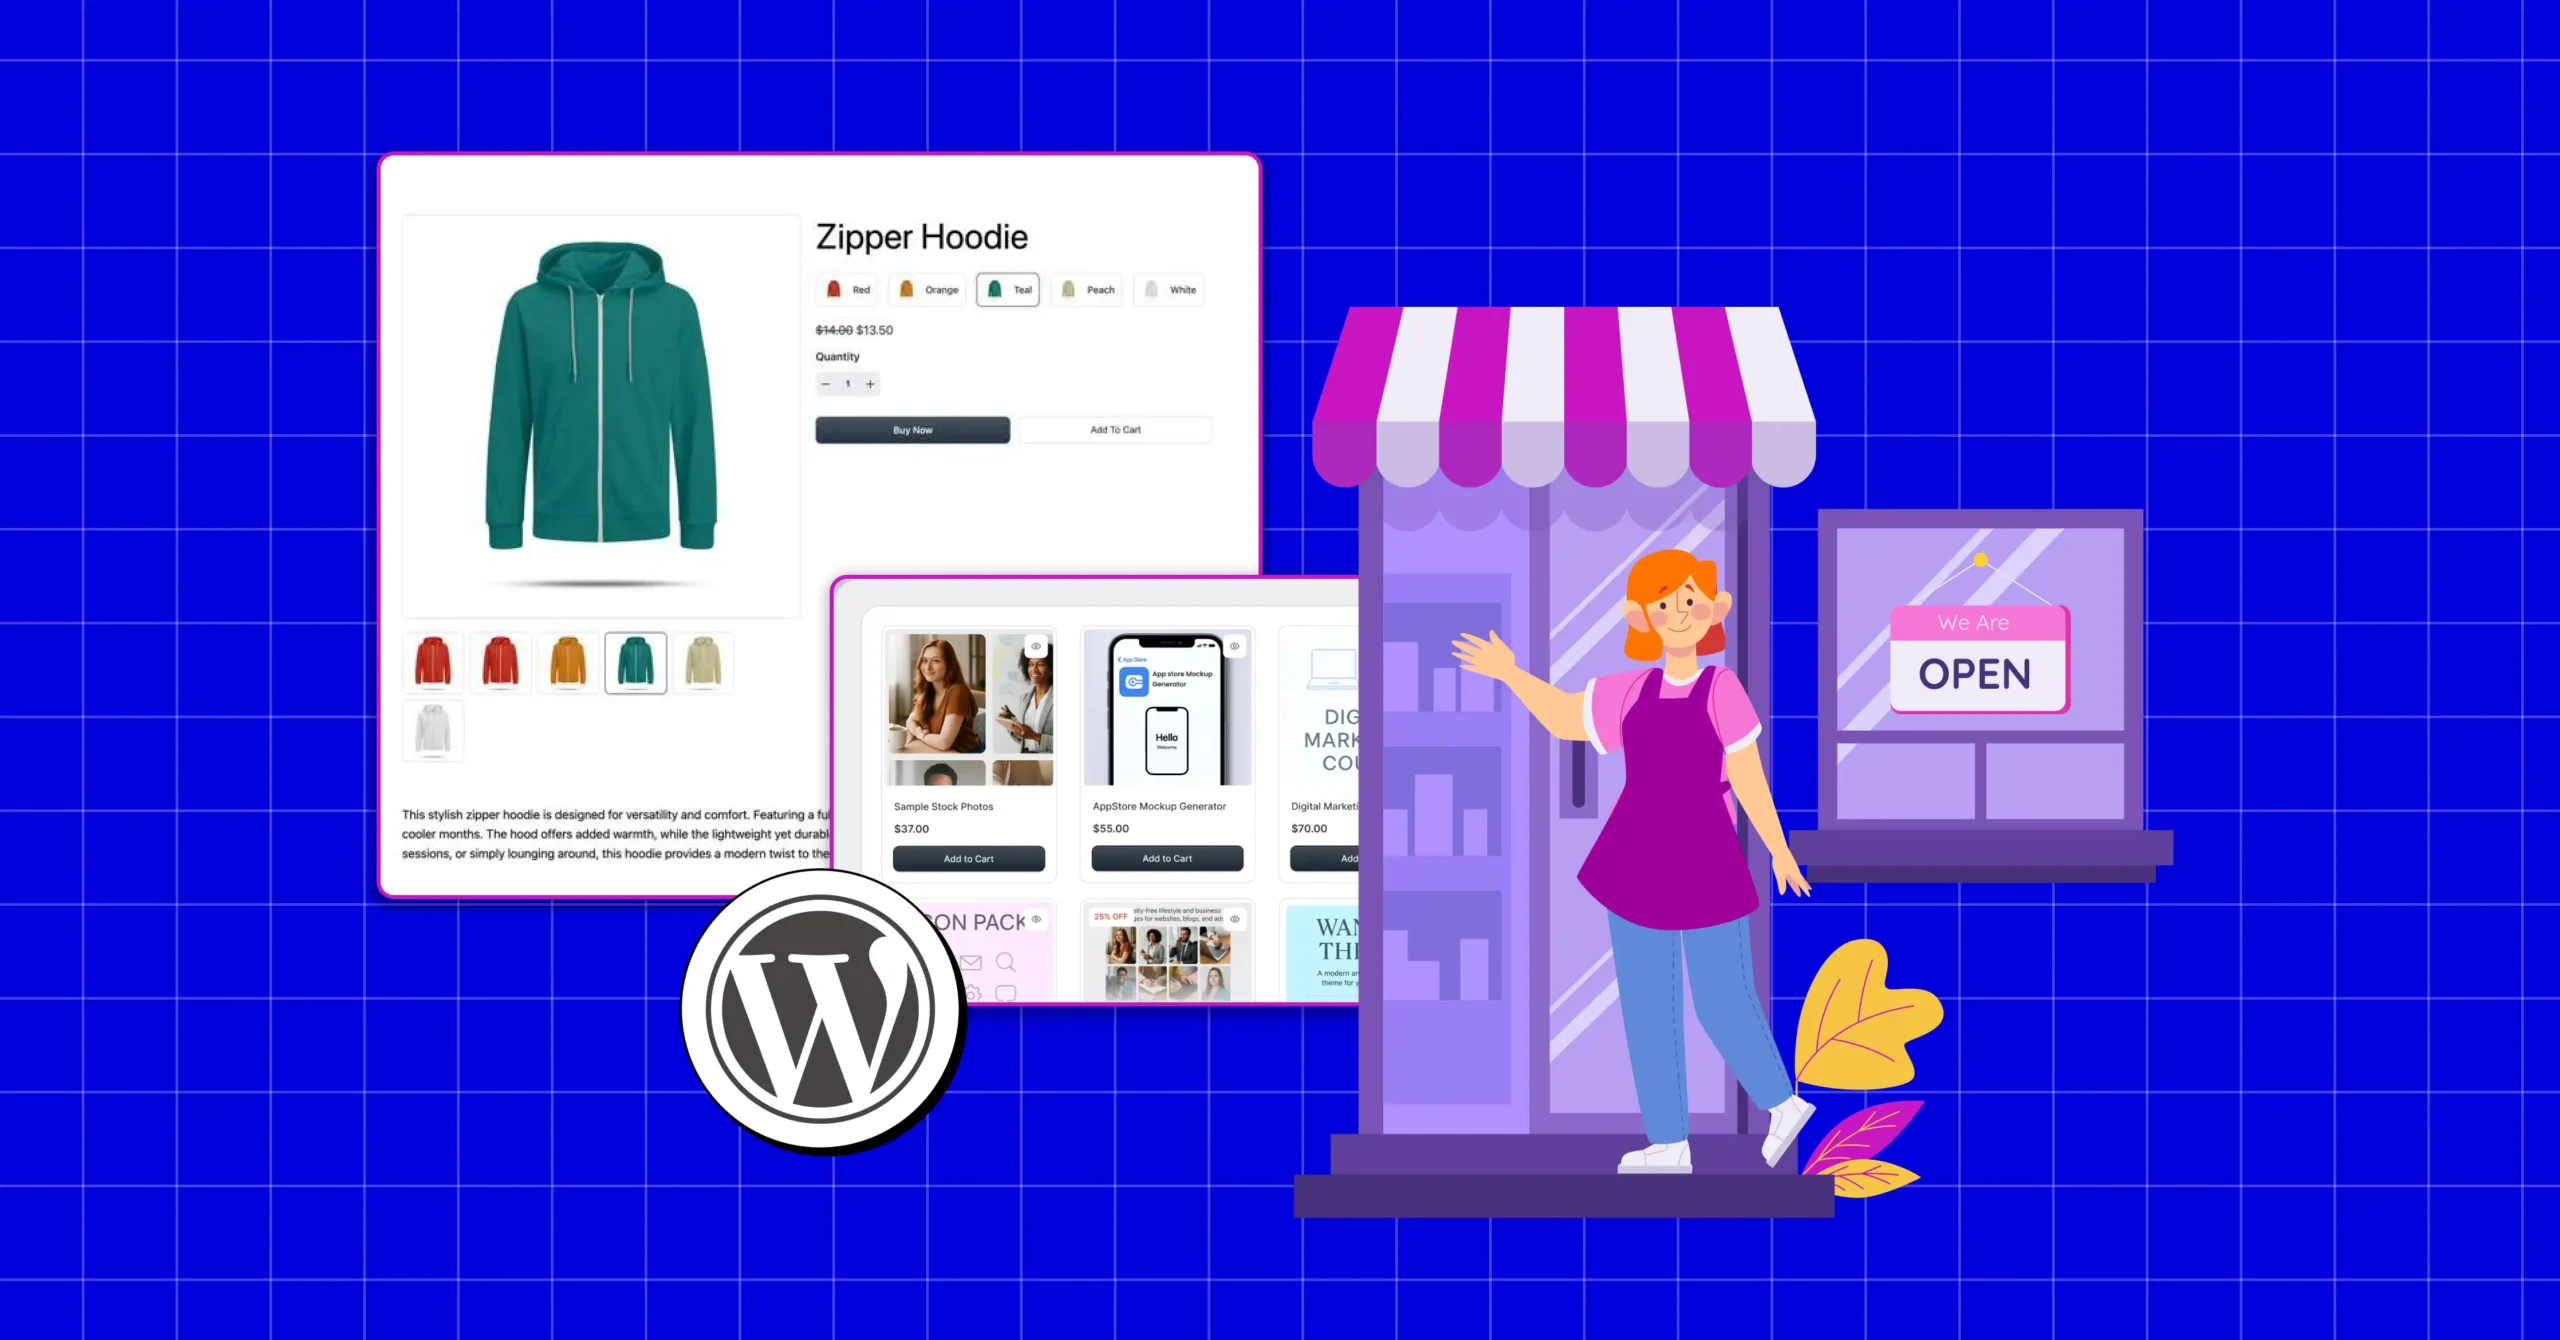
How to Start Your Online Store with WordPress for Free : A Beginner’s Guide to Selling Digital or Physical Products


You’ve crossed the hardest line from idea to actual product.
Time to sell it.
So you sit down to figure out the store part. And that’s when the doubts creep in.
The fees stack up before you’ve made a sale. The technical side sounds like a foreign language. You start wondering if you need a bigger budget first.
Well, here’s the thing: you don’t.
You can launch a real store today without spending a dollar upfront, whether you’re selling digital products or shipping physical goods. Just a clear path from setup to your first sale.
This guide walks you through it.
Let’s launch your online store.
What You Need to Start Your Online Store
Before diving in, let’s talk about what you actually need to launch your online store. The good news? It’s simpler than you think.
| What You Need | Cost | What It Does |
| WordPress | $0 | Website platform |
| eCommerce plugin | $0 | Turns your site into a store |
| Domain & Hosting | Small annual + monthly cost | Your store’s address online |
That’s everything you need. Three things stand between you and a live store.
Why choose WordPress?
WordPress is an open-source platform that lets you build and manage websites without coding, and it’s completely free.
In fact, WordPress powers about 43.4% of all websites worldwide, from small startups to major operations making real revenue.
So what’s in it for you?
- Complete ownership over your store, your data, and your rules
- Zero platform fees are eating into revenue month after month
- Free core features that let you sell without hitting paywalls
- Search engine visibility, where customers find you organically
And the best part!
WordPress scales as you grow.
Start with what you need now, and as you expand, the platform grows with you without forcing you onto expensive monthly tiers.
The one real cost: domain and hosting
Let’s be honest. A domain runs about the price of lunch once a year. Hosting costs roughly what you’d spend on coffee each month.
That’s not zero, but it’s close. And it’s the only unavoidable expense if you want a professional store.
Can you skip it?
Technically, you can test with a free subdomain while figuring things out. But if you’re serious about selling, this small investment pays itself back fast.
Before you start building, make sure your foundation is solid.
You need more than just a store. You need a validated business idea, a clear target market, and a launch strategy.
For the complete roadmap, read: How to Start an Online Business
Alright, let’s get your store live.
How to Start Your Free Online Store (Step-by-Step)
Your store needs a home. More specifically, it needs a platform that can handle products, process payments, and actually get customers through checkout.
One hour from now, you’ll be live. Let’s go.
Step 1: Get your platform ready
To move ahead with store functionality, you need WordPress installed and configured with the essentials. This step covers the foundation: installation, basic settings, security, and your store’s appearance.
Install WordPress
First, you need WordPress installed. Most hosting providers offer one-click installation. Log into your hosting control panel, find the WordPress installer, select your domain, and follow the setup wizard.
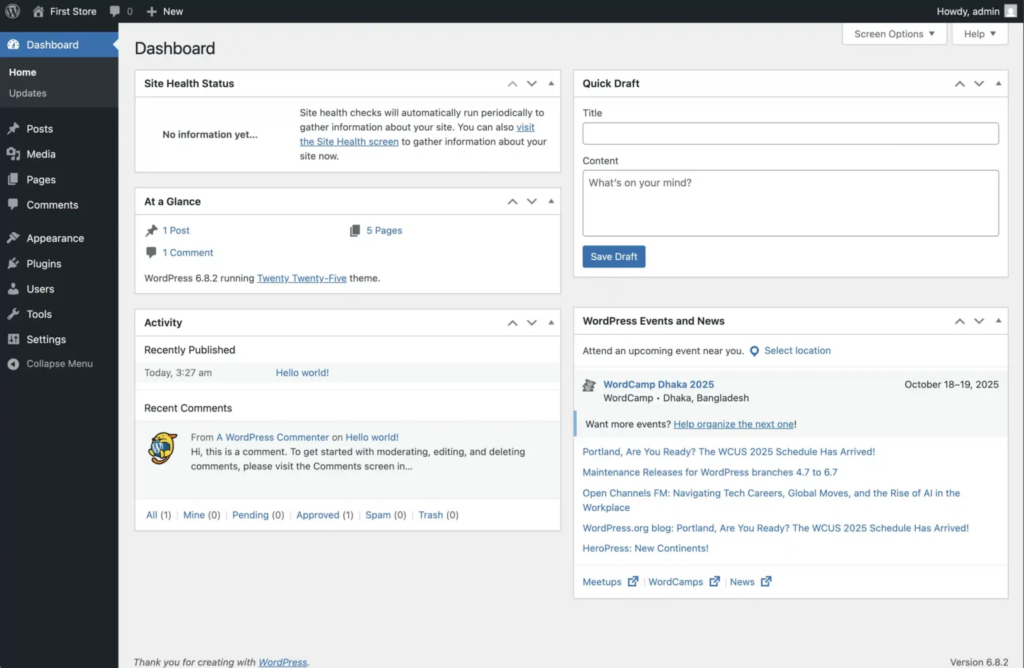
Once installed, log in to your WordPress dashboard at yoursite.com/wp-admin. And with that, you now have a working WordPress installation ready for configuration.
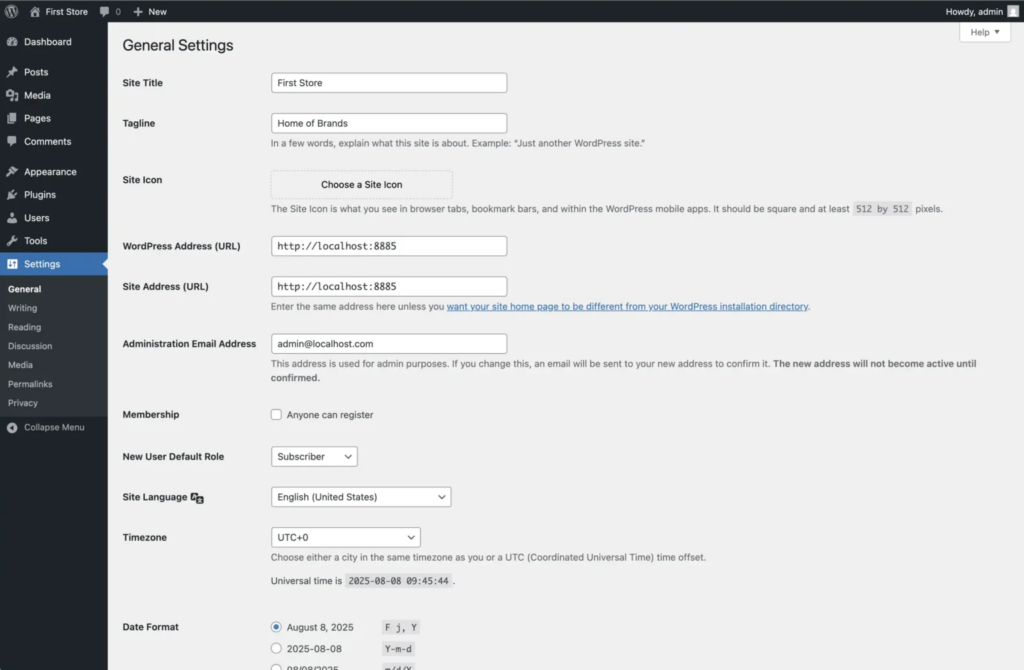
Configure basic settings
Now let’s set the foundation. Head to Settings > General and fill in your site title (your store name) and tagline (what you sell). While you’re here, choose your timezone so order timestamps and scheduling features work correctly.
Next, go to Settings > Permalinks and select “Post name” for clean, SEO-friendly URLs. This makes your product pages more readable for both customers and search engines.
Install essential plugins:
Every eCommerce store needs security, backups, and search visibility. Navigate to Plugins > Add New and install these:
- FluentSMTP – Ensures order confirmation and notification emails actually reach inboxes instead of spam
Get the most powerful SMTP plugin for free and hit the recipient’s inbox with your WordPress emails

- Wordfence Security – Protects your store from malware, hacking attempts, and security threats
- UpdraftPlus – Automated backups of your store data (set it to run daily or weekly)
- Yoast SEO – Optimizes your product pages for search engines and helps you rank higher
- Complianz – Cookie consent plugin for GDPR compliance (mandatory for handling customer data)
Important: Make sure SSL is enabled on your site. SSL keeps customer data secure during checkout. Most hosting providers include free SSL certificates. Check your hosting control panel for an SSL option and enable it. Your site should now load with https:// instead of http://. This is required for payment gateways to work.
Set up your theme
When customers land on your store, they judge it in about three seconds. That’s how long it takes them to decide if you’re legit or sketchy.
Your theme controls that first impression. It’s the visual design, the layout, the colors they see when they land on your site.
WordPress already installed a default theme for you, and honestly? It works fine for launching. Clean, functional, gets the job done.
But if you want your store to match your brand, you can install something more tailored. Go to Appearance > Themes > Add New. You’ll find thousands of options, both free and paid.
We recommend starting with Twenty Twenty-Five.
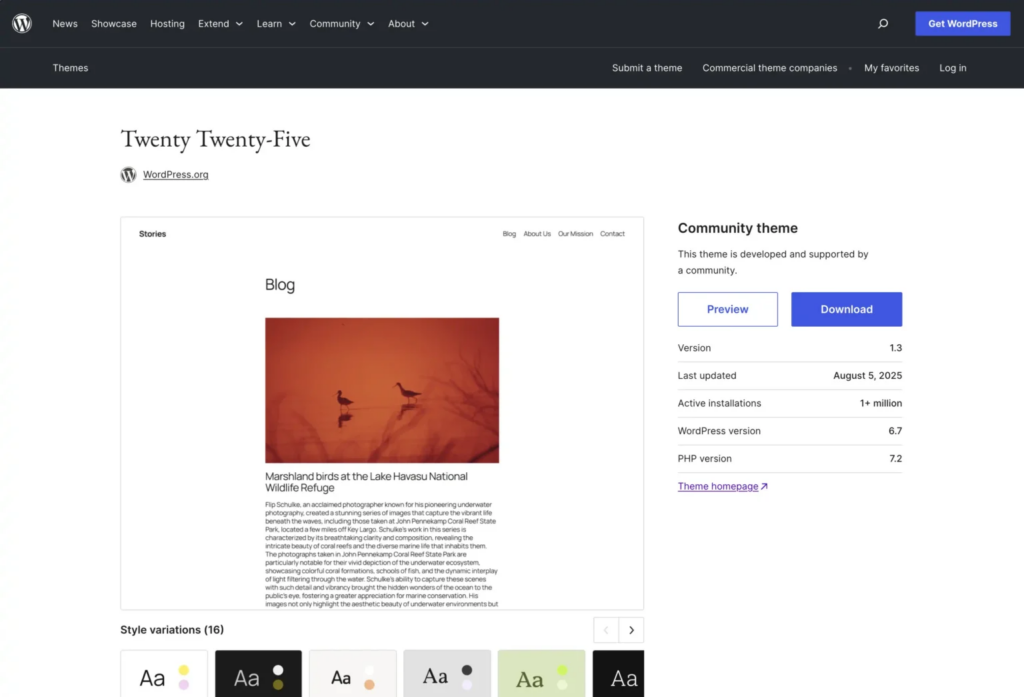
It’s WordPress’s latest theme, completely free, block-based (which means easy customization), and modern-looking. Plus, it works perfectly with FluentCart.
Want other options? Popular alternatives include:
- Astra – Lightweight and highly customizable
- Hello Elementor – Minimal design, built for flexibility
Pick one that feels right, install it, and activate it.
Now, customize your theme:
Once activated, navigate to Appearance > Editor (for block themes) or Appearance > Customize (for classic themes).
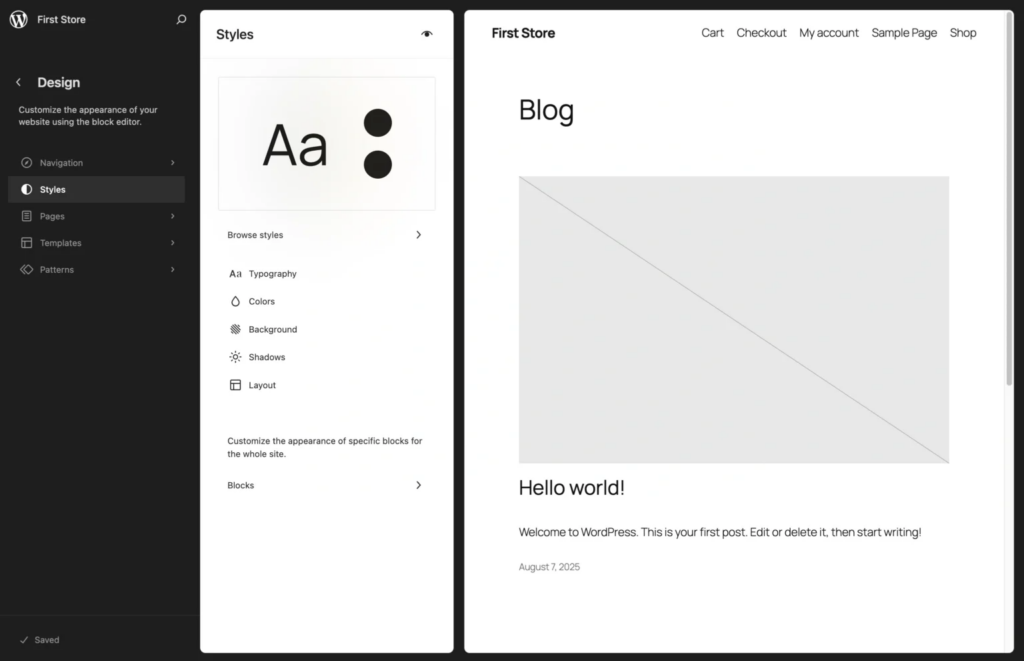
Here’s what you can adjust:
- Site logo and branding – Upload your logo and set your site icon (favicon)
- Colors – Match your brand colors for consistency across the store
- Typography – Choose fonts that reflect your brand personality (modern, classic, playful)
- Layout – Adjust header, footer, and page structure to fit your content
Your platform is ready. Time to add the store engine.
Step 2: Create your online store
Note: In this guide, we’re using FluentCart, a free WordPress plugin built for selling digital products, physical goods, and subscriptions without transaction fees. It’s fast, lightweight, and scales as you grow.
WordPress is running. Theme is set. But you don’t have a store yet.
What you need now is the engine that turns your site into something that can actually sell, handle products, process checkout, take payments, manage orders.
Let’s add FluentCart and run through the setup.
So, go to Plugins > Add New, search for “FluentCart,” install it, and hit Activate.
The moment you activate it, a setup wizard launches. This walks you through building your store in three stages.
Enter your store details
Let’s lay the foundation. Start with your store basics:
Store Name: What customers see across your entire store. Keep it clear and memorable.
Business Address: Your location details. This shows up on invoices and legal pages.
Store Currency: Choose the currency you’re selling in. This applies to all your products and pricing.
Business Logo: This appears on your store, invoices, and customer emails. It’s how people instantly recognize your brand, so make it count.
Fill this in, and you’re so close to opening your store doors.
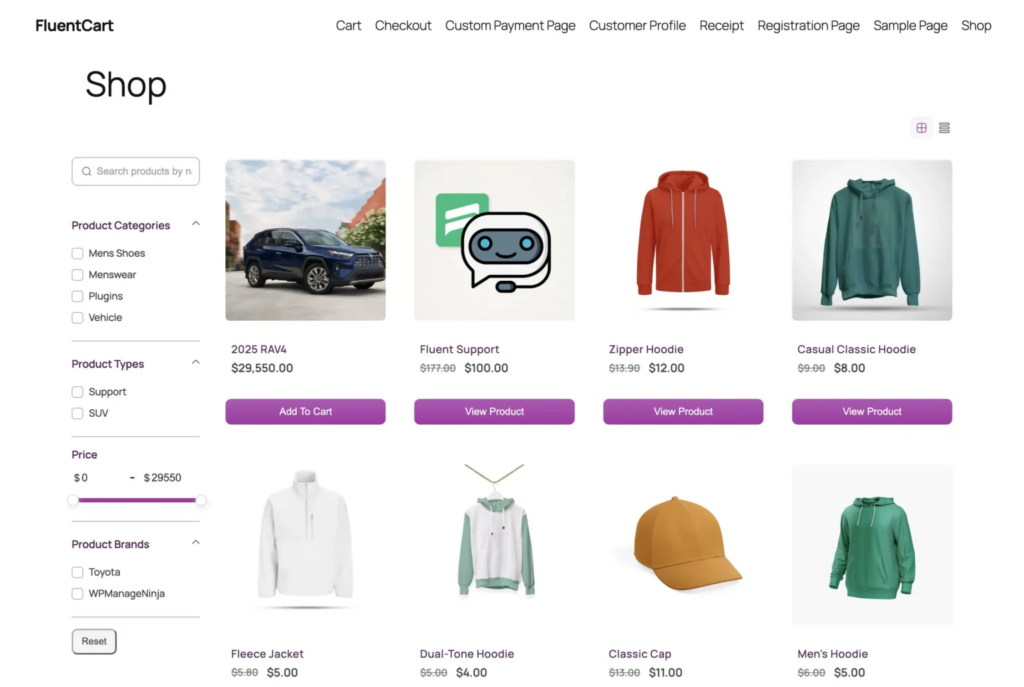
Set up your store pages
Your store needs specific pages to function: Checkout, Cart, Shop, Receipt, and Customer Profile.
Look for “Generate All Pages” at the top right. That’s your magic wand. One click, and in seconds, all your essential pages appear, built, linked, and ready to work.
Already have pages?
Select them manually. Otherwise, let FluentCart handle it and save yourself the setup headache.
The final step is coming up.

Set up your products
Well, this is the heart of your store starting to beat.
Go with “Start From Scratch” and you’re building your shop exactly how you envision it.
Note: Add some dummy products first to see how the gears turn, then swap in your real inventory when you’re ready.
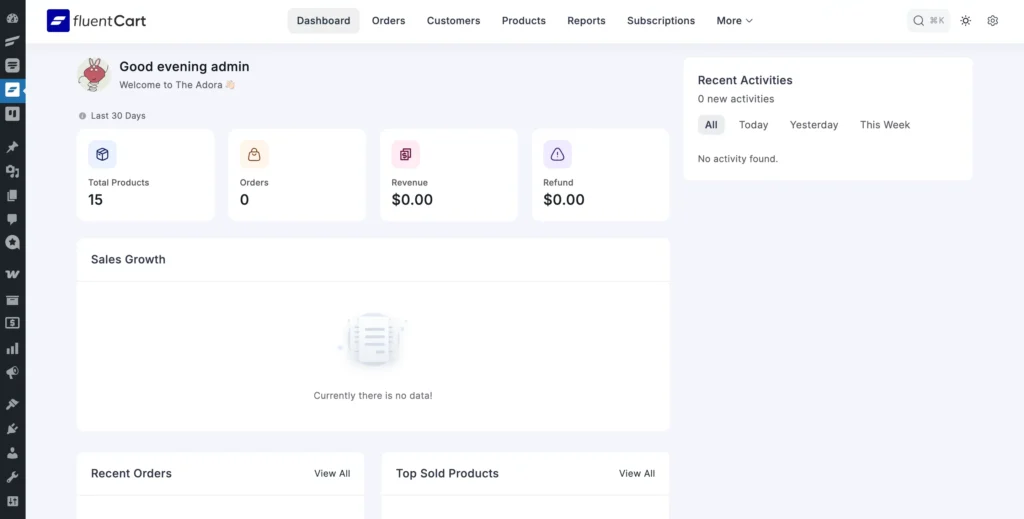
Congratulations. Your store’s onboarding is complete.
You went from zero to a working online store without spending a dime. The pages work, the checkout runs, and the system’s ready. Now head to your dashboard and fill your shelves with what you’re actually selling.
Step 3: Add what you’re selling
Your dashboard is ready. Now comes the part where you actually fill those shelves.
Your products could be:
- Physical products, such as items you pack and ship
- Digital products, like files customers can access right after purchase
And, FluentCart keeps everything under one roof, even in the same listing. No separate setups. No extra plugins.
So, let’s get your products live.
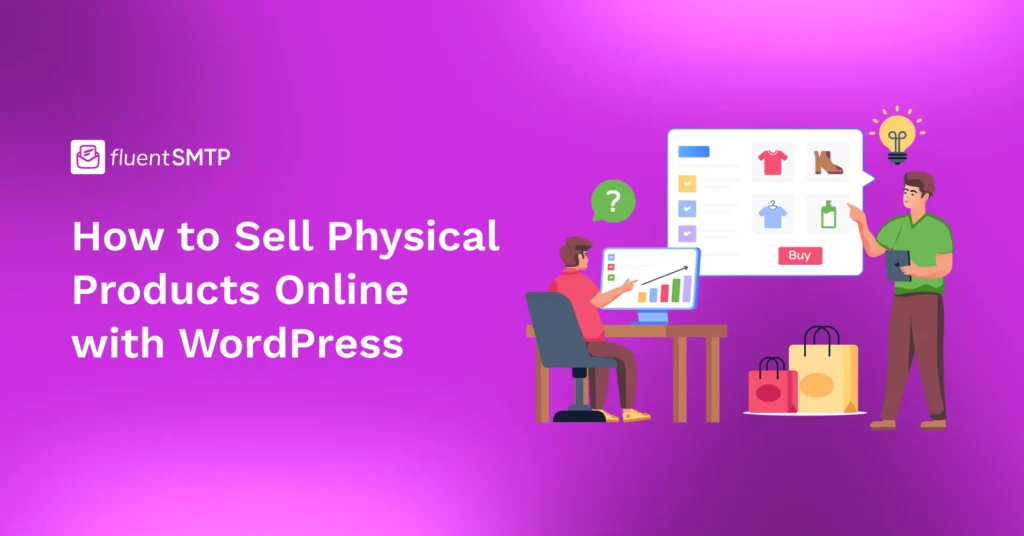
Selling physical products
When you walk into a physical store, you don’t buy instantly. You look around. A salesperson might explain a few things. You check the product yourself before deciding.
In an online store, that experience has to happen on the product page. And that’s the real challenge with physical items. Showing what customers can’t touch.
Well, your product setup needs to handle that. Let’s add one.
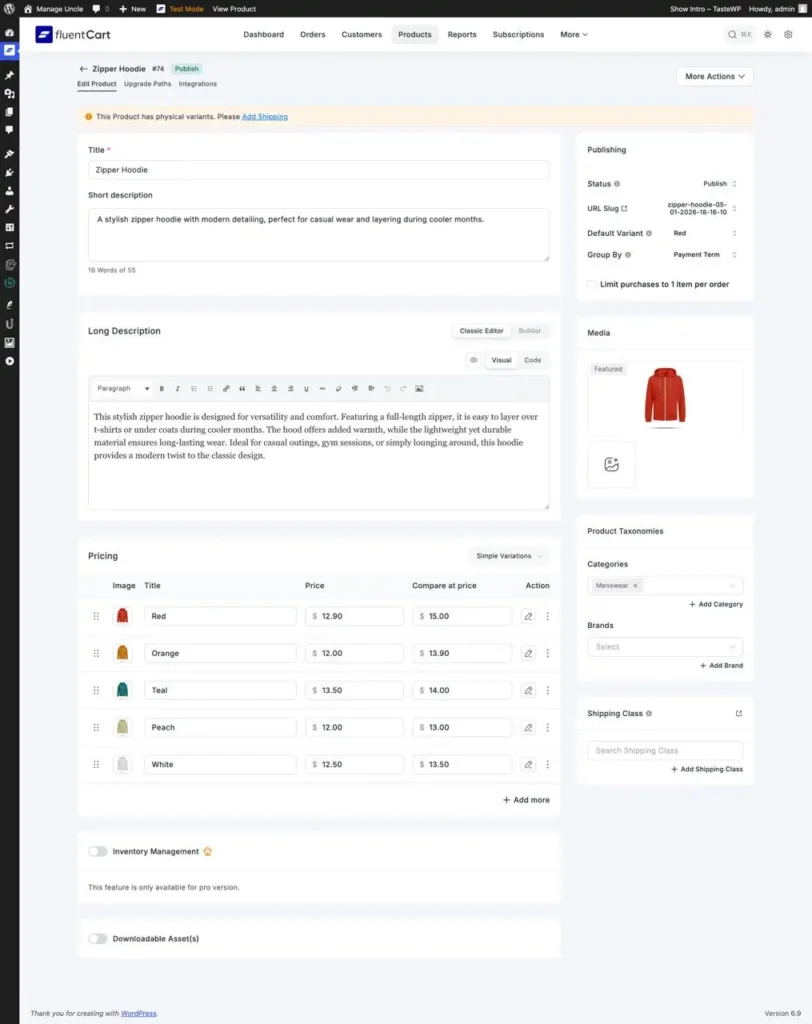
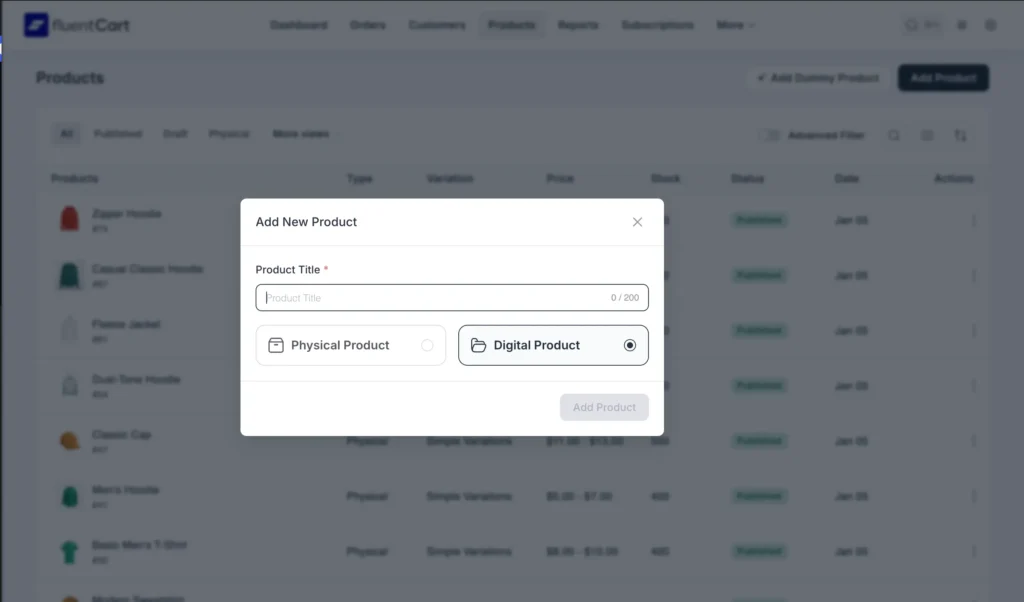
Head to FluentCart > Products and click “Add New Product.” Select physical. From here, your product page takes over the entire in-store experience.
Write your description like you’re explaining the product to someone standing in front of you. So, make sure it answers the basics clearly:
- What the product is
- Who it’s meant for
- What problem it solves
- Why it’s worth buying now
Next, show the product properly. This is where physical products actually sell. Customers can’t hold your product, so images do the heavy lifting. Show multiple angles. Close-ups of important details. Lifestyle shots showing it in use.
Heads up: Use high-resolution images (at least 1200×1200 pixels) but keep file sizes under 100KB. WEBP format gives you the best quality without slowing down your store.
Selling in different colors, sizes, or styles? Add them in the same listing. This keeps choices clear and prevents confusion.
Then set your pricing, stock count, and shipping details. FluentCart tracks stock automatically and stops sales when you run out. One less problem to deal with later.
Also, take a moment to clean up the product URL and add a clear meta description. This helps search engines understand your product and sets the right expectation before someone even clicks.
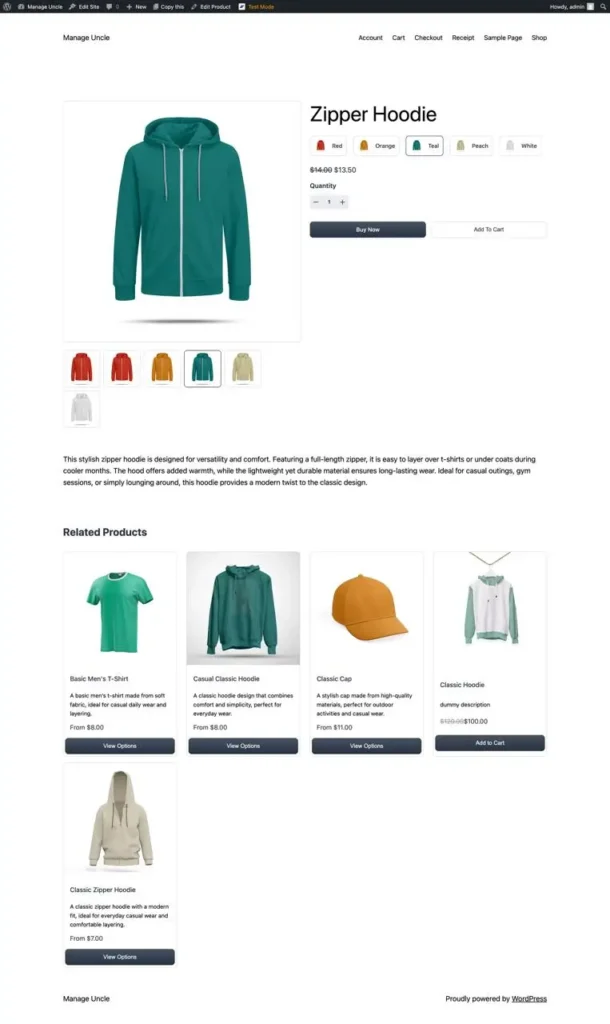
Once everything is in place, preview the product page. If it feels clear and complete, buying will feel safe for your customer.
That’s it. Your physical product is ready to sell.
Selling digital products
Digital products remove one big barrier right away. There’s nothing to ship, nothing to wait for, and no follow-up emails after checkout.
But that also raises expectations.
When someone buys a digital product, they want to know exactly what they’ll get and what happens the moment they pay. So the product page needs to make the outcome obvious before they click “Buy.”
Head to FluentCart > Products, click Add New Product, and choose Digital.
Your title and description come first. Digital products sell on value, not what customers can touch. Explain what’s inside. Who it’s for. What changes after they buy. This clears hesitation early.
Now, upload your file. PDF, video, software, templates. FluentCart stores it securely for automatic delivery once your payment system is connected.
After that, set your pricing and access details. Even though digital products don’t run out, expectations still matter. Buyers should clearly understand what they’re paying for and what kind of access they’re getting.
Besides, clean up your product URL and add a clear meta description. This helps search engines understand what you’re selling and sets expectations upfront.
Take one final look at the product page.
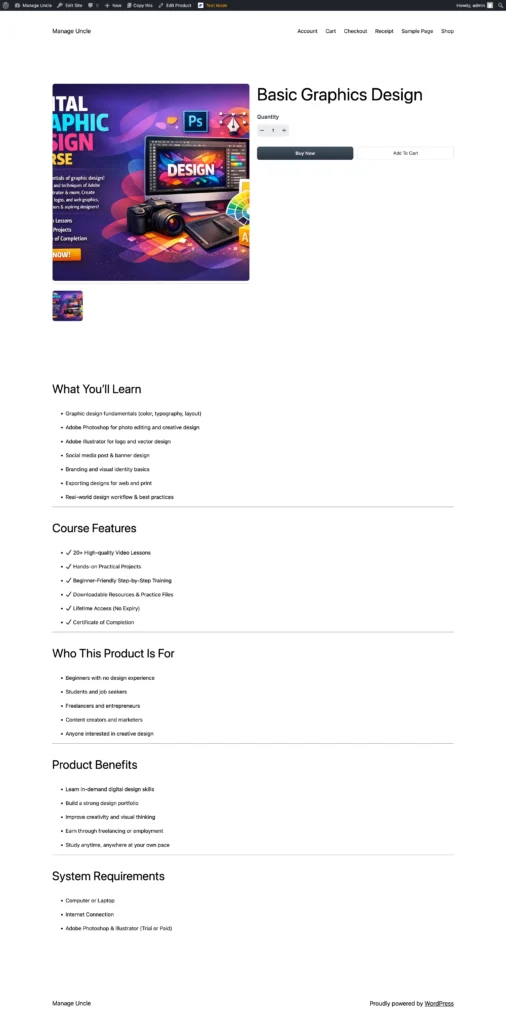
Does it feel smooth from landing page to payment to instant download?
If yes, you’re ready. Your digital product is now live and delivering on its own.
Step 4: Set up payments and delivery
Your products are live. Your store looks good. But before anyone can complete a purchase,
- How money is collected
- How orders are delivered
Everything else depends on this. You can’t open the doors until payments and delivery work, so let’s fix both now.
Connect your payment methods
When someone clicks “Buy,” they need a way to pay. Simple as that.
Head to FluentCart > Settings > Payment Settings.
Here, you decide how customers can pay you.
FluentCart supports multiple options out of the box, even in the free version-
- Paypal
- Stripe
- Paystack
You can enable online payments for instant checkout or allow offline options based on how your business operates.

For example, if you’re selling digital products, online payment methods like cards make the most sense. Customers pay once and get access immediately.
If you’re selling physical products, you may also want to enable Cash on Delivery. This is common in many regions and helps customers who aren’t comfortable paying upfront.
In real life, this mirrors how local stores work: customers see the product first, then pay.
Activate your payment methods and save. At this point, your store knows how money will be collected.
Configure shipping (only if you sell physical products)
Now comes delivery.
If you’re selling digital products only, you can skip this part entirely. There’s nothing to ship.
But if physical products are involved, shipping needs to be defined before checkout can work correctly.
Go to FluentCart > Settings > Shipping and create your shipping zones and methods. Decide where you ship, how much it costs, and whether you offer free or flat-rate shipping.

This step matters because checkout pulls shipping rules automatically. If shipping isn’t configured, customers won’t see the right options later, even if everything else looks fine.
Once shipping is set, your store now understands how orders move after payment.
Check the checkout experience
Only after payments and shipping are ready does checkout make sense.
Checkout isn’t something you manually build in FluentCart. It’s the result of everything you’ve already set up.
This is where you verify, not configure.
Open your checkout page and place a test order.
Walk through it like a customer:
- Do the right payment methods appear?
- Do shipping options show correctly for physical products?
- Does the order summary make sense?
- Does the order confirmation email arrive?
If the journey feels smooth from product page to payment to confirmation, checkout is doing its job.
Step 5: Optimize your store before launch
Your store works. Products are added. Payments and shipping are configured. But before you go live, a few final touches make the difference between looking amateur and looking professional.
Let’s polish it.
Customize your store
Before launch, give your store a final visual pass. This isn’t about design perfection. It’s about clarity and trust.
Open your Shop, Product, and Checkout pages and look at them like a customer. Make sure buttons are easy to find, prices are clear, and nothing feels cluttered.
Adjust what matters most:
- Product layout and spacing
- Shop filters and categories
- Button labels like Add to Cart or Buy Now
- Header and footer consistency
You don’t need heavy styling here. A clean, predictable layout helps customers move faster without thinking.
If the store feels easy to browse and simple to buy from, you’re in the right place.
Test, add legal pages & optimize for search
Now verify everything works before customers arrive.
Open your store on your phone. Add a product. Complete checkout.
Does it flow?
Try desktop. Try different browsers. Check if order emails arrive.
Then handle legal protection. Create Privacy Policy and Terms of Service using free generators like TermsFeed or GetTerms. Customize for your store. Add links in your footer.
Finally, basic SEO. Add meta descriptions to your products. One sentence explaining what each is. This shows in Google search results.
Set up Google Search Console. Submit your sitemap. Google finds and indexes your products faster.
Why this matters: Broken checkout loses sales. Legal pages protect you. SEO brings customers.
Well done. Your store is built, tested, and ready. Time to welcome your customers.
Time to Open for business
You started with an idea. Now you have a working store that can take real orders without platform fees or monthly subscriptions.
The setup is done. The systems work. What happens next is up to you.
As Reid Hoffman said, “If you’re not embarrassed by the first version of your product, you’ve launched too late.”
Your store doesn’t need to be perfect. It needs to be live. Customers will tell you what works. Sales will show you what matters. Feedback will guide improvements.
So launch it. Test it. Adjust as you grow.
The hardest part (going from idea to actual store) is behind you. Everything else is just refinement.
Welcome your first customer. Make your first sale. Build from there.
Good luck with your new venture!

Mahjabin Sheikh
Hey, good people! I’m Mahjabin, a Digital Marketer at WPManageNinja. Just like the quote from Before Night Falls – ‘I write, and I survive’ – that’s me in a nutshell! With coffee in hand, I dive headfirst into WordPress and Project Management. When I’m off the clock? You’ll find me writing about movies, breaking down series moments, and, of course, scrolling through memes for a good laugh!
Table of Content
Subscribe To Get
WordPress Guides, Tips, and Tutorials


Leave a Reply