
How to Set Up and Customize WooCommerce Email Notifications


When someone buys from your store, they expect more than just the product. They expect a reassurance email.
A confirmation that their payment went through. An update when their order is shipped. A note if there is a refund. These small messages build trust and keep your customer calm.
But here is the problem. The default WooCommerce emails are plain, generic, and often unreliable. Some of them never even reach the inbox.
That can turn a positive shopping experience into an anxious one.
The good news is that you can fix this. With the right setup, your WooCommerce emails can be reliable, branded, and personal.
Let’s walk through how to do it.
Why WooCommerce Email Deliverability Matters?
Picture this. A customer makes a purchase. They are excited. They wait for a confirmation email. But it never comes.
Now they start worrying. Did the payment go through? Did the order fail? Will they actually get the product?
By default, WooCommerce uses your web host’s PHP mail function. It is unreliable. Emails can bounce, disappear into spam, or simply fail. That single gap can damage trust.
The solution is to route emails through a proper mail server. This is where SMTP, which stands for Simple Mail Transfer Protocol, comes in.
Instead of relying on PHP mail, your emails are sent through trusted providers like Gmail, Outlook, or SendGrid. This makes them authenticated and far more reliable.
A free plugin like FluentSMTP makes this setup easy. It lets you:
- Reduce failed or bounced emails
- Avoid spam folders
- Connect WooCommerce to trusted email services
- Track logs to see which emails were delivered
Better deliverability means your customer always receives what they need to feel secure.
The Problems With Default WooCommerce Emails
WooCommerce does send essential emails out of the box. Order confirmations. Refund notices. Invoices. But they come with problems that most store owners run into quickly.
- First, they look generic. The templates are plain and do not reflect your brand.
- Second, customization is limited. You can only change basic text and colors unless you edit the code.
- Third, deliverability is weak. Many of these default emails never reach inboxes.
- Finally, there is very little personalization. Beyond order details, you cannot make the messages feel human.
That’s why most serious stores take the time to customize and strengthen how emails are sent.
How WooCommerce Sends Emails by Default
WooCommerce includes several built-in notifications. These include built-in notifications such as:
- New order (sent to admin)
- Cancelled order
- Failed order
- Order on-hold
- Order processing
- Order completed
- Order refunded
- Customer invoice
- Customer note
These messages do their job at a basic level. But the limitations show quickly.
Quick Tip: If you want to set up email failure alerts from WordPress, you can check out this blog!
The Limitations WooCommerce Emails Have:
All emails from WooCommerce look the same. Other issues WooCommerce email has:
- Branding: They all look alike and don’t reflect your business personality.
- Technical reliability: Sent using PHP mail, which is notorious for spam issues.
- Scalability: If you grow, you’ll quickly need more robust options.
And because they rely on PHP mail, they are technically fragile. If your store grows, the default system will not scale with you.
To save yourself from the waste of time, you can customize the built-in email templates of FluentCRM.
Setting Up WooCommerce Email Notifications Step by Step
Here is how you can set up your WooCommerce Email notification step by step:
Step 1: Accessing WooCommerce Email Settings
Before you start customizing, you need to make sure WooCommerce emails are turned on and reaching the right people. Here’s how to set them up properly.
- Go to your WordPress Dashboard.
- On the left menu, click WooCommerce → Settings.
- At the top, open the Emails tab.
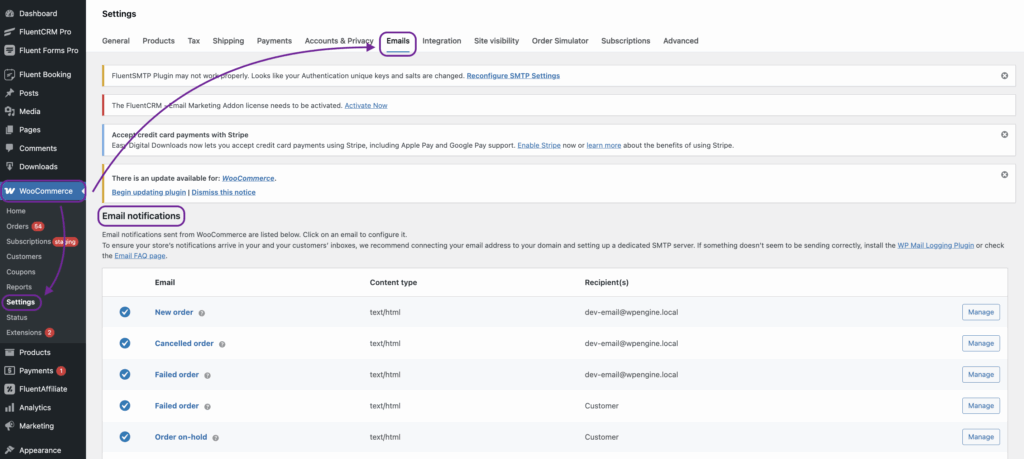
You’ll now see a list of all the default WooCommerce emails, like New Order, Processing Order, Completed Order, Refund, and so on.
Step 2. Enabling/disabling Email Notifications
- Click on one of the email types (for example, “New Order”).
- On the next screen, tick or untick the box that says Enable this email notification.
- Tick it if you want WooCommerce to send this email.
- Untick if you don’t need it.
- Tick it if you want WooCommerce to send this email.
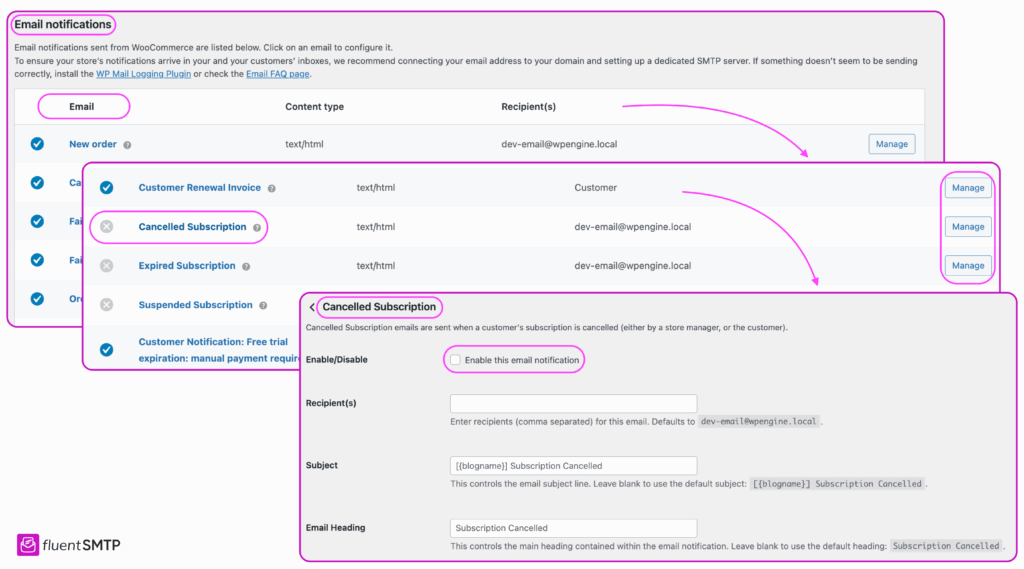
- Scroll down and click Save changes.
Step 3. Set Recipients for Admin Emails
Some emails, like New Order, are meant for the store admin. By default, they go to your site admin email. But you can add more addresses here.
- In the “Recipient(s)” field, enter the email addresses.
- Example: send new order alerts to your sales team and warehouse team.
- Use a comma to separate multiple addresses.
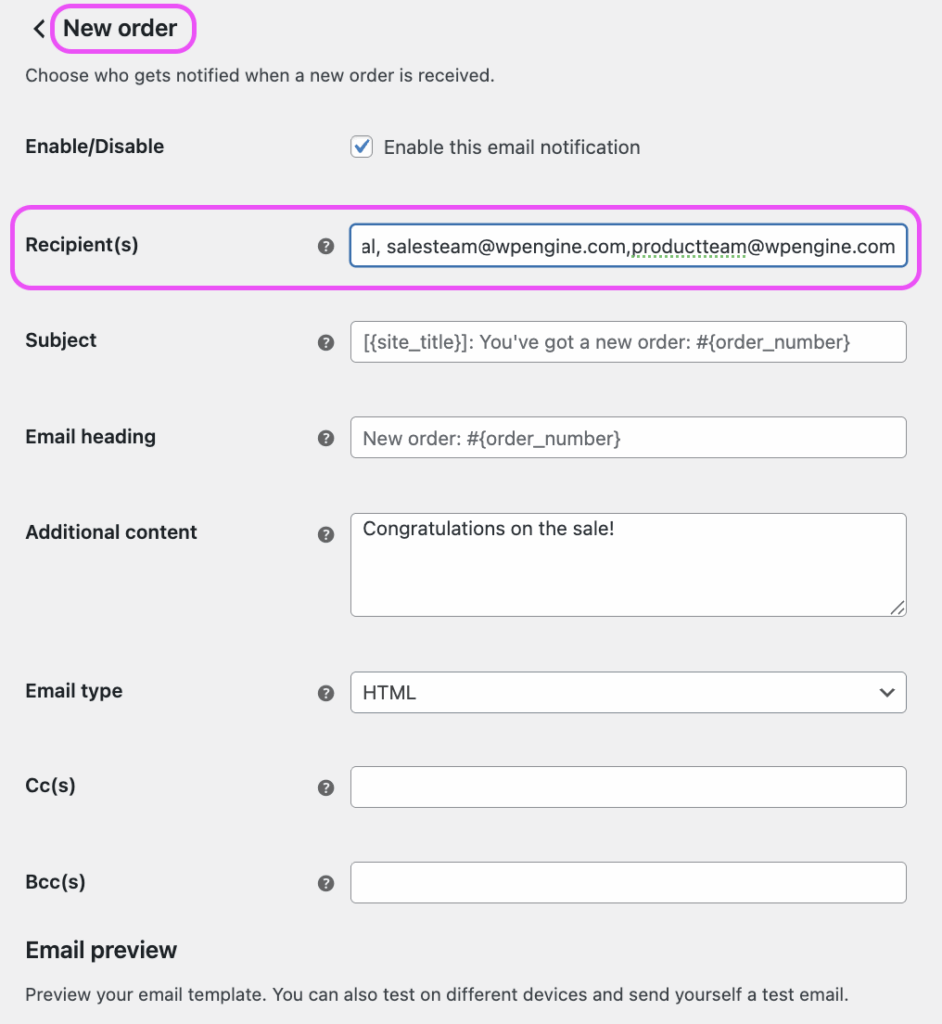
- Save changes.
Step 4. Preview Your Emails
After enabling and setting recipients, it’s smart to preview what customers will see.
- Go back to the Emails tab in WooCommerce settings.
- At the bottom of the page, scroll to the Email template section.
- Click here to preview your email templates
This will open a sample email in a new tab so you can see the design.
Quick Tip: Sending all these emails manually can be tough. To ease your task, you can take inspiration from proven WooCommerce automation and multiply your conversion.
How to Customize WooCommerce Emails
WooCommerce lets you tailor transactional emails at three levels:
- built-in settings for colors, logo, and per-email toggles
- safe hooks for inserting content
- full template overrides in a child theme for changing layout/markup
For reliable delivery, pair WooCommerce with FluentSMTP; for post-purchase marketing and automation, add FluentCRM.
1. Quick Styling & Per-Email Controls
- Go to WooCommerce → Settings → Emails.
- Toggle individual emails on/off, set Subject, Heading, and recipients (for admin emails).
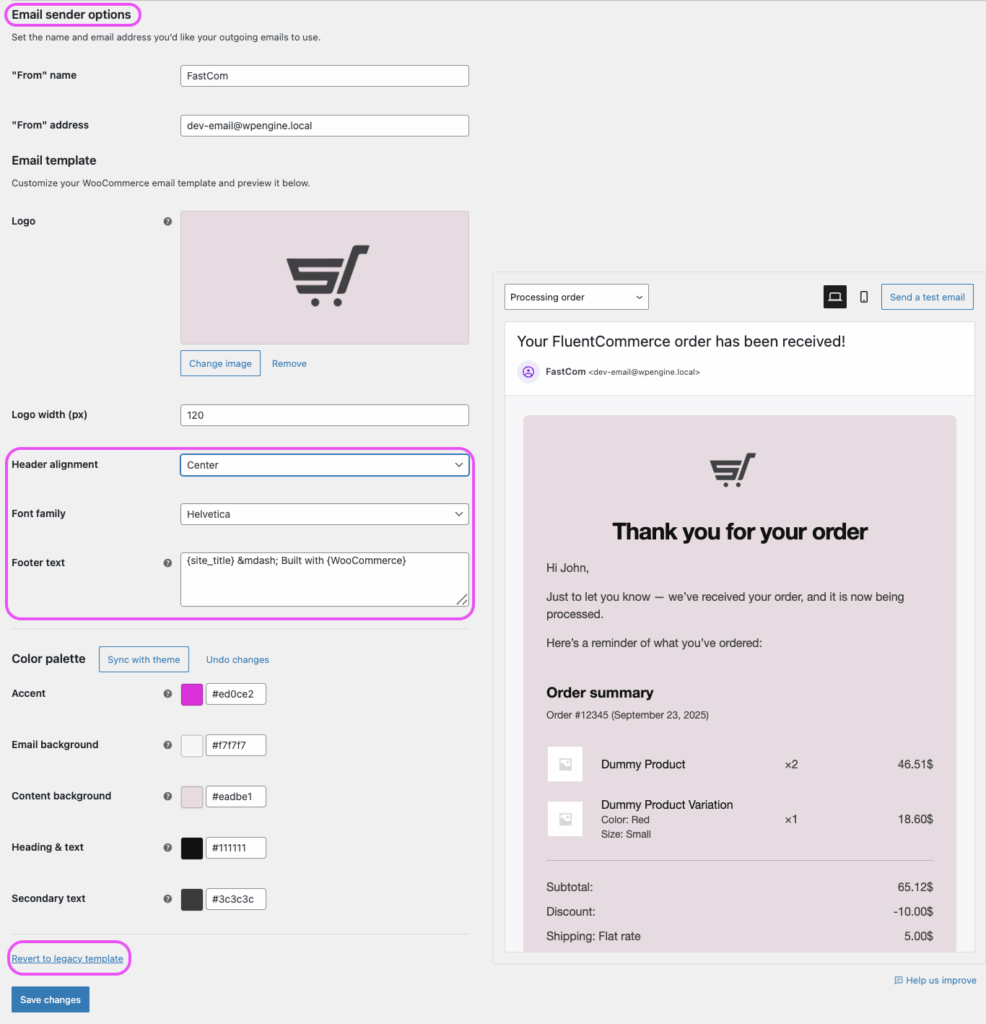
- Use the global Email sender options and Email template colors/logo to match your brand.
- Toggle individual emails on/off, set Subject, Heading, and recipients (for admin emails).
- Save changes.
It is the fastest way to brand emails without touching PHP.
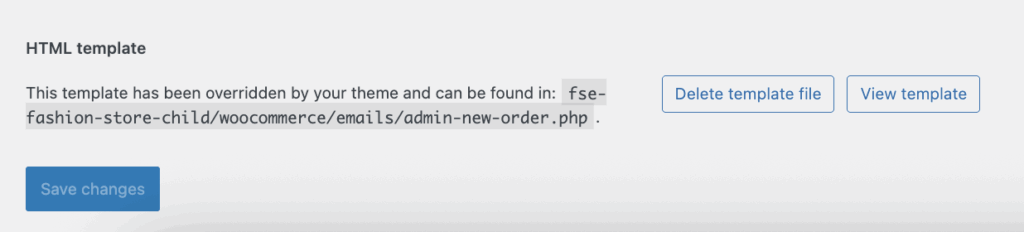
2. Prepare a Child Theme
- If you edit templates in wp-content/plugins/woocommerce/…. They’ll be overwritten on plugin updates.
- Use a child theme, and mirror WooCommerce’s folder structure when overriding files:
wp-content/themes/your-child-theme/woocommerce/emails/…- From each email’s Manage screen, you may see a Copy file to theme button, which you can use to place the correct file under your child theme automatically.
- inside your child theme folder (or a small “site plugin” if you prefer keeping PHP out of themes).
For a personalized subject with the customer’s first name, add this to your child theme functions.php or a small plugin:
add_filter('woocommerce_email_subject_customer_processing_order', function($subject, $order, $email){
    $first = $order ? $order->get_billing_first_name() : '';
    $num   = $order ? $order->get_order_number() : '';
    return "Thank you {$first} for your order #{$num}";
}, 10, 3);
3. Customizing Email Templates with Your Brand
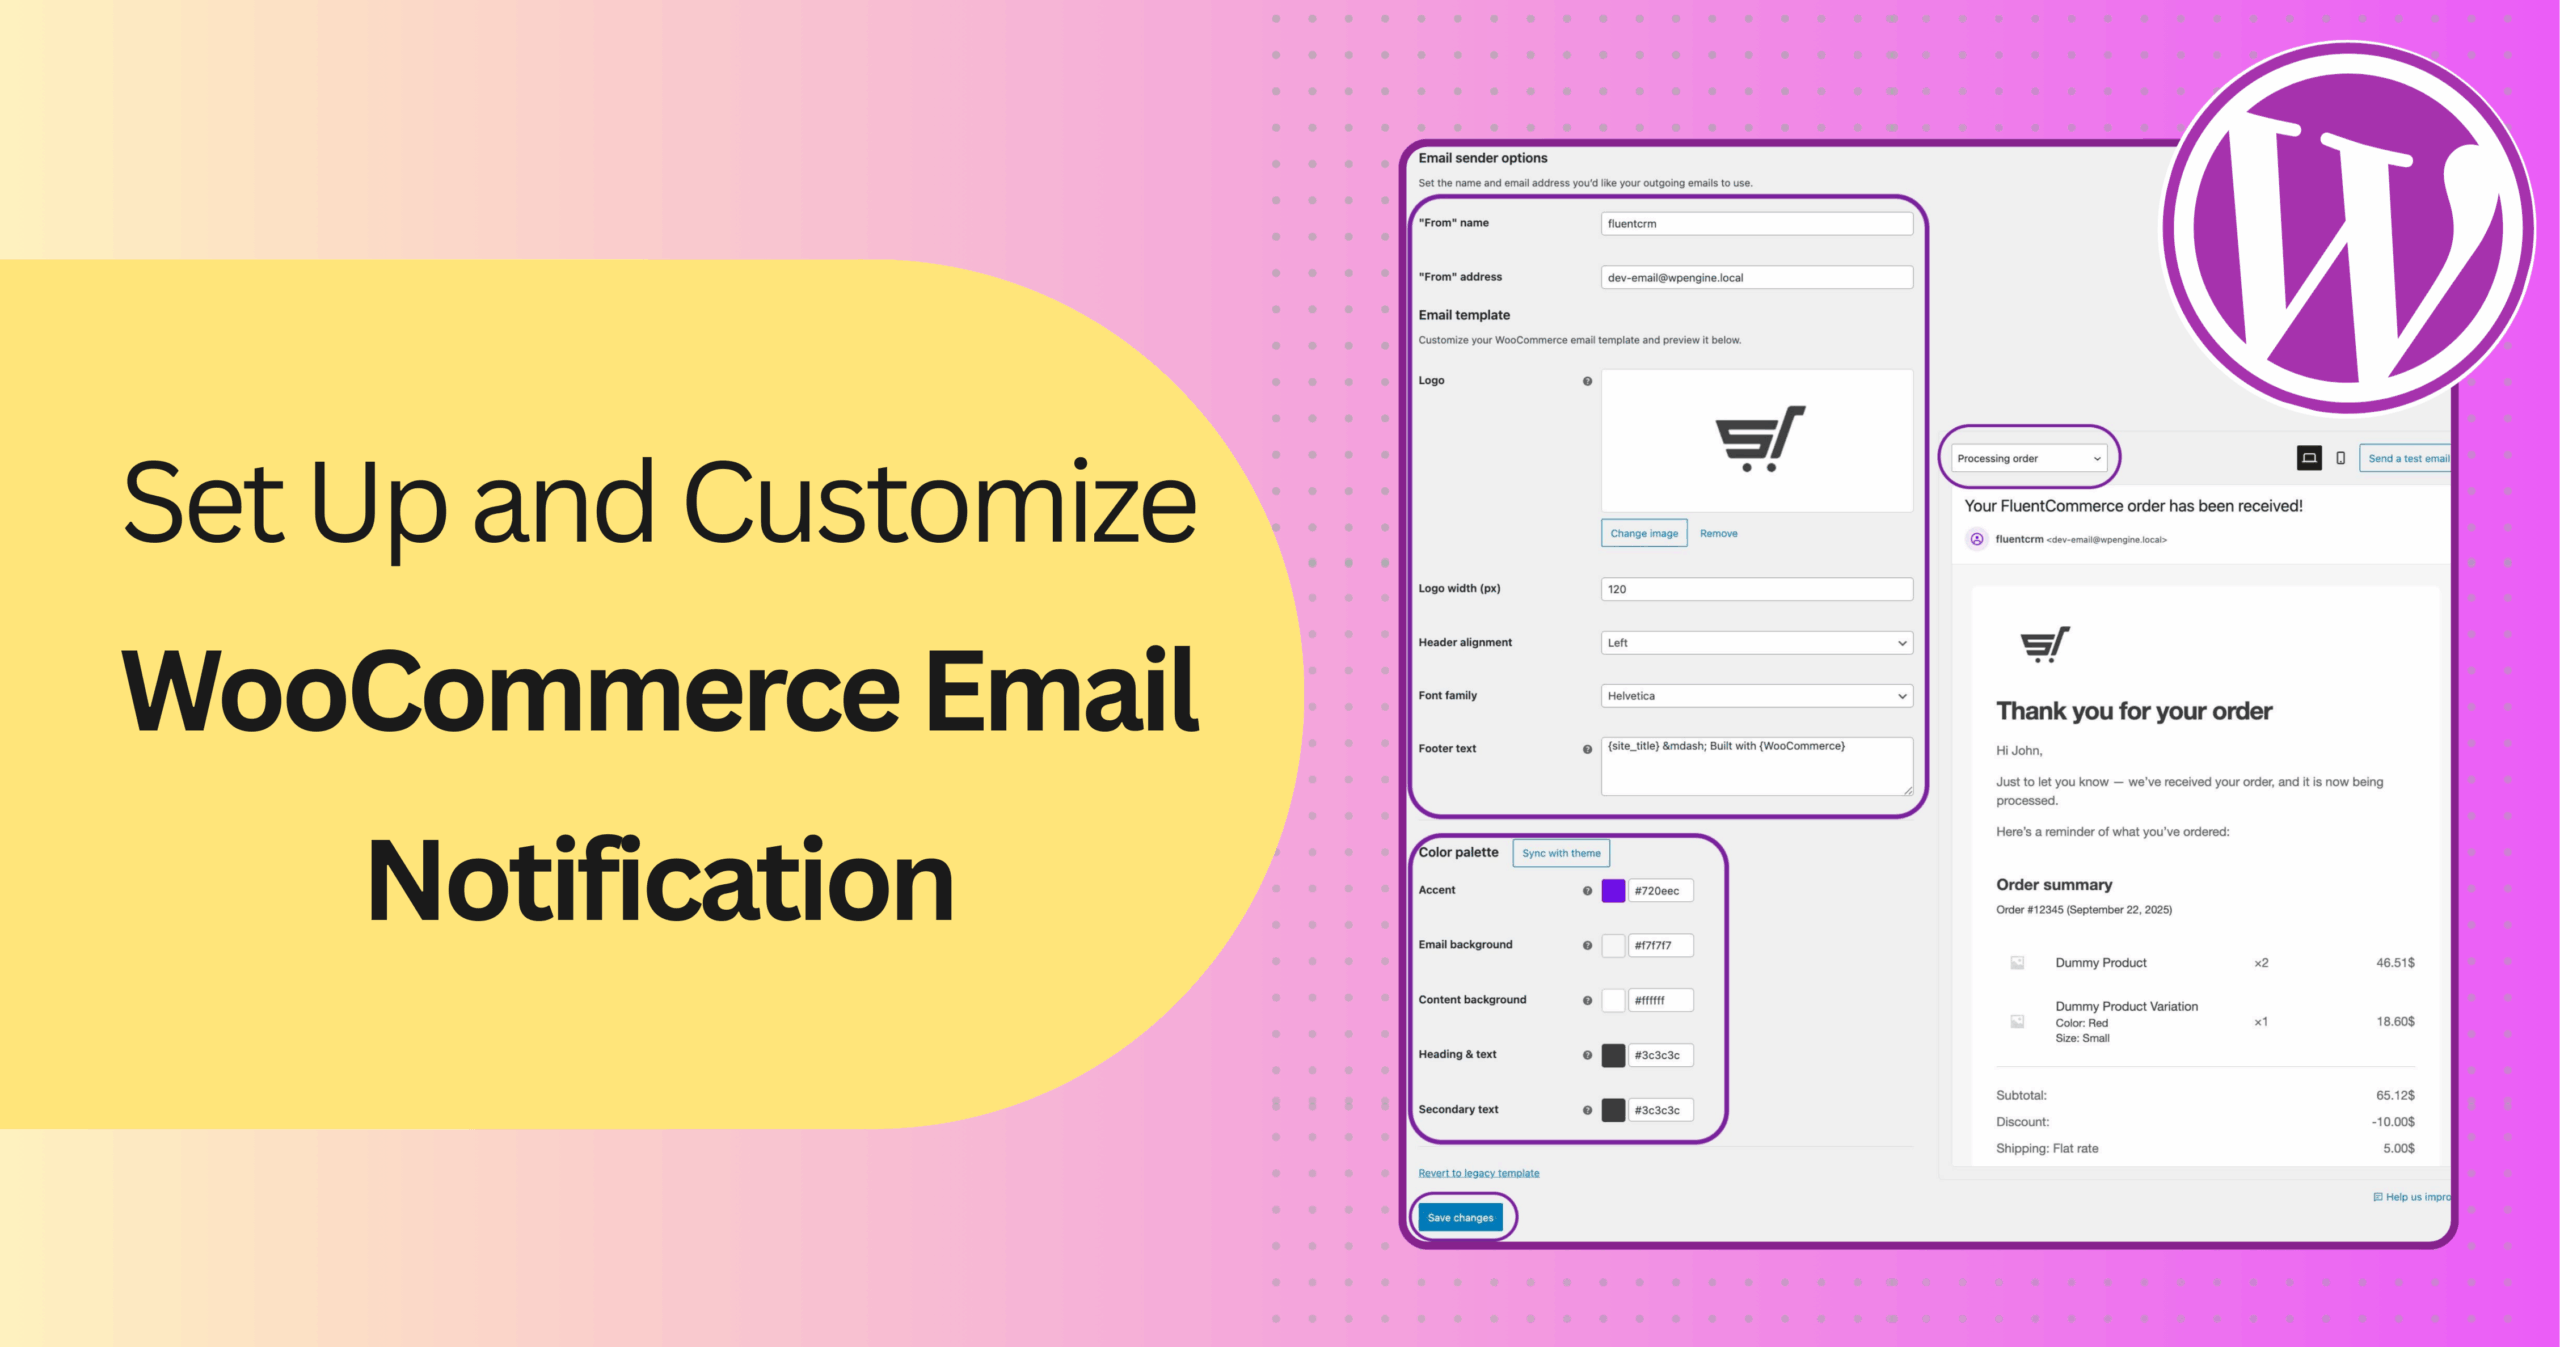
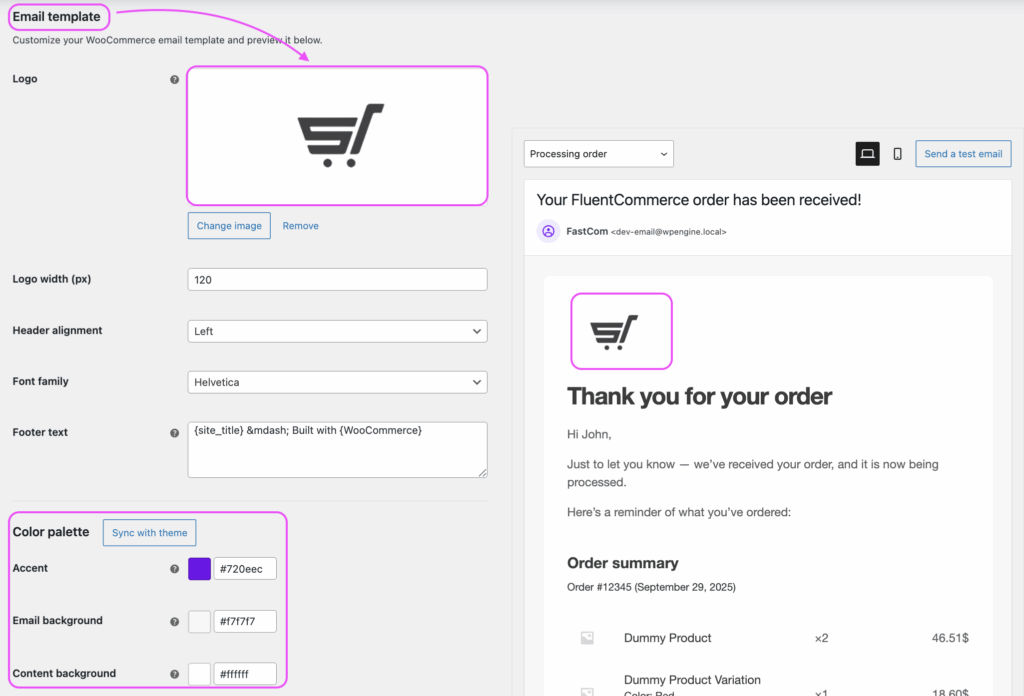
Make your emails match your store’s style.
- Go to WooCommerce → Settings → Emails.
- Scroll to Email template.
- Upload your logo, set the Header image, adjust colors, and update Footer text.
- Click Save changes, then Preview.
4. Using HTML and CSS for Advanced Styling
Want to add banners or custom content? Override WooCommerce templates.
- Copy the template from
wp-content/plugins/woocommerce/templates/emails/
to your child theme atwp-content/themes/your-child-theme/woocommerce/emails/ - Edit the template.
1. Add a Banner
After the email header, add this:
echo '<table width="100%" cellpadding="0" cellspacing="0" style="margin:0 0 20px 0;">
  <tr><td><a href="'. esc_url( home_url('/sale') ) .'">
    <img src="'. esc_url( get_stylesheet_directory_uri() . '/images/email-banner.jpg' ) .'" alt="Sale now on">
  </a></td></tr>
</table>';
2. Adding Dynamic Content
Personalization builds trust. Here’s how you can add dynamic details like customer name or delivery info.
Placeholders you can use in Subject and Heading:
{order_number}{order_date}{site_title}
3. Add the Customer’s First Name:
add_action('woocommerce_email_before_order_table', function($order, $sent_to_admin, $plain_text, $email){
    $name = $order ? $order->get_billing_first_name() : '';
    echo '<p>Hi ' . esc_html($name) . ', thanks for your order!</p>';
}, 10, 4);
4. Add a Delivery Time Based on Shipping Method or City:
add_action('woocommerce_email_order_meta', function($order, $sent_to_admin, $plain_text, $email){
    $eta = '3 to 5 business days';
    $methods = $order ? $order->get_shipping_methods() : [];
    $method  = reset($methods) ? reset($methods)->get_name() : '';

    if (stripos($method, 'express') !== false) $eta = '1 to 2 business days';
    echo '<p><strong>Estimated delivery:</strong> ' . esc_html($eta) . '</p>';
}, 10, 4);
Best Practices You Should Follow for WooCommerce Emails
Following these best practices will not only make sure your email lands in the inbox, but also contribute to better email KPIs:
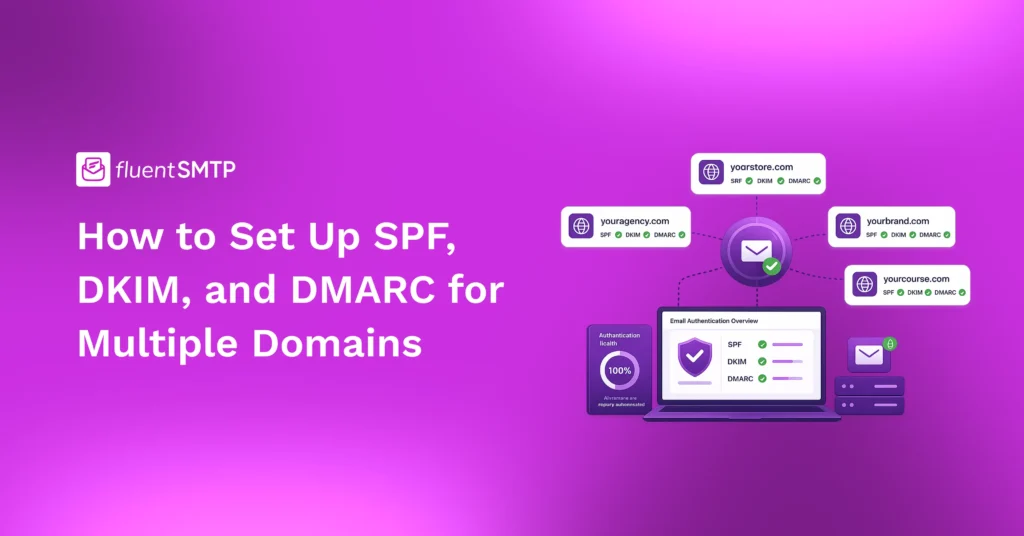
- Implement Email Authentication (SPF, DKIM, DMARC): These protocols verify your domain’s legitimacy, reducing the risk of emails being marked as spam.
- Maintain a Clean Email List: Regularly remove inactive or invalid email addresses to improve engagement rates and deliverability.
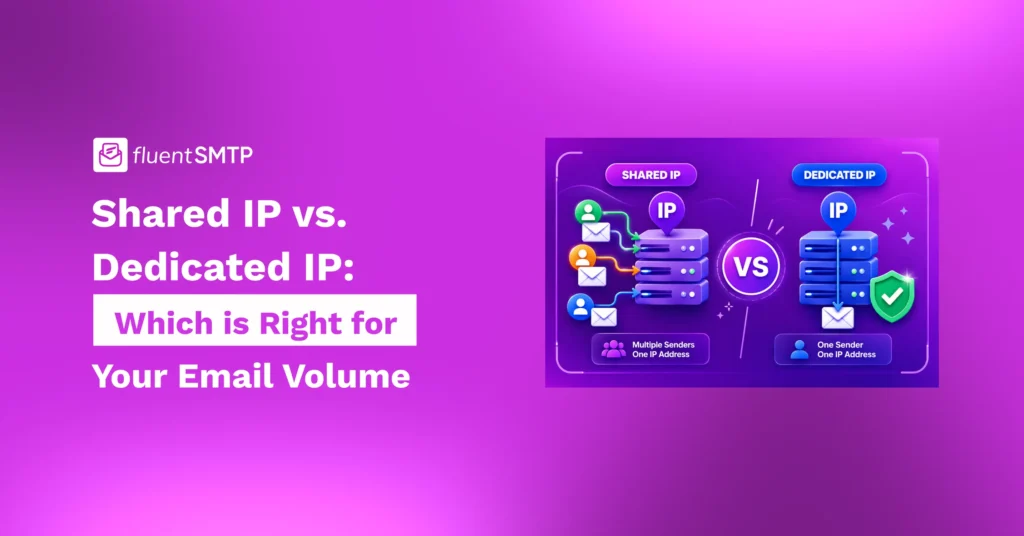
- Use a Dedicated IP Address: For high-volume senders, a dedicated IP can enhance reputation and deliverability.
- Monitor Email Domain Reputation: Regularly check your domain’s reputation to ensure high inbox placement rates.
- Configure SMTP Ports Correctly: Use recommended ports (587 or 2525) to ensure email delivery.
- Enable Two-Factor Authentication (2FA): Enhance security by requiring a second form of verification for email-related accounts.
- Educate Your Team About Phishing: Train staff to recognize and avoid phishing attempts, safeguarding your email systems.
- Regularly Update Software and Plugins: Keep your WordPress and FluentSMTP installations up to date to protect against vulnerabilities.
Turn Emails into Your Brand Voice
If your WooCommerce emails are bland, unbranded, or unreliable, you’re missing an opportunity to build trust and keep customers engaged.
But here’s the good news: customizing your email notifications is an easy fix.
By personalizing your emails, adding your brand’s voice, and ensuring they always land in the inbox, you can turn every message into a powerful connection with your audience.
Take control of your WooCommerce emails and make them work for you today!
Samira Farzana
I’m a marketer and blog writer who loves data science. With a strong focus on analytics and strategy, I create content that helps brands understand their audience, improve performance, and grow with confidence.
Table of Content
Subscribe To Get
WordPress Guides, Tips, and Tutorials


Leave a Reply